My cousin Mark had claimed to hate Halloween for a solid fifteen years. The costumes, the candy corn, the doorbell ringing at all hours—he had a complaint for every single part of it. I honestly believed him. Then I brought these spiderweb cupcakes to our family’s fall gathering last October and found him standing alone in the kitchen, carefully peeling the paper liner off a third one, studying the chocolate web like it was a tiny work of art. “Don’t say a word,” he muttered without looking up. I didn’t. But I smiled.
That moment stuck with me more than the recipe itself at first. There’s something about a dessert that can quiet even the most vocal skeptic, you know? These cupcakes have that power. They look like they took hours of painstaking piping work—the kind of thing you’d see on a bakery display and immediately talk yourself out of attempting. But here’s the secret, and I’m not ashamed to admit it: the spiderweb design is almost impossible to mess up. I mean that genuinely. I’ve made them with a piping bag, a zip-top bag with the corner snipped off, and once, in a pinch, a spoon. They worked every single time.
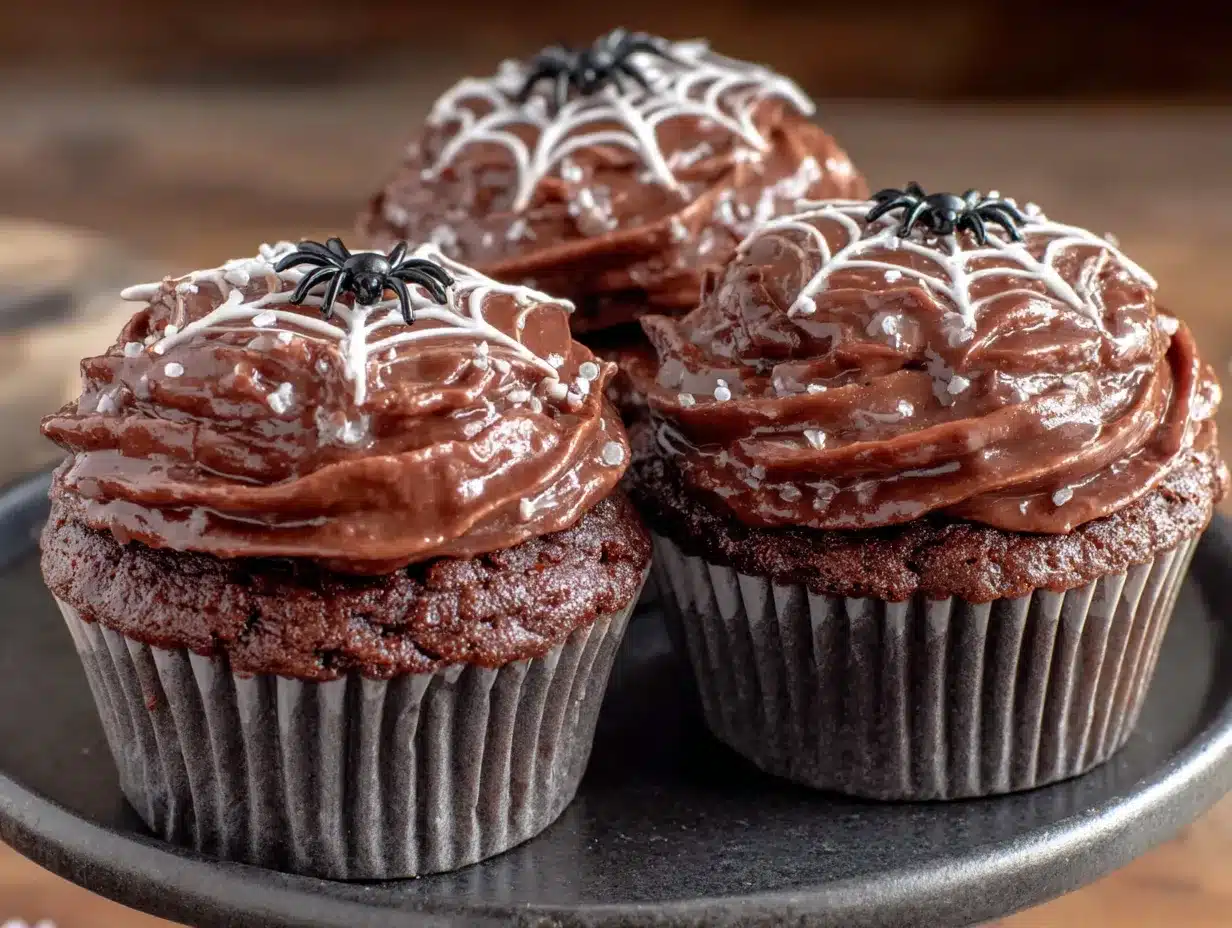
The chocolate cake base is the real workhorse here. It’s the kind of recipe that makes you close your eyes after the first bite—deep, rich, the texture so tender it practically melts. I developed this version after a string of disappointing dry cupcakes that tasted more like cocoa powder than actual chocolate. Let me tell you, nothing kills a party mood like a crumbly, flavorless cupcake. This one stays moist for days, which matters when you’re baking ahead for a crowd. The frosting is a simple buttercream, thick enough to hold those delicate web strings without drooping. And the spider? Just a little chocolate candy, placed right in the center, looking almost too cute to eat.
The first time I tested these, I forgot to chill the frosted cupcakes before piping the web. The lines bled into the white frosting, creating this muddy gray mess that looked nothing like a web and more like a regrettable art project. But you know what? They still tasted incredible. That’s the kind of recipe this is—forgiving enough to save you even when you’re rushing, but beautiful enough to steal the table when you take the extra minute. I keep coming back to these cupcakes because they let me look like a hero without the stress. And honestly, that’s exactly what you want when you’re hosting.
Why You’ll Love This Recipe
I’ve tested this recipe more times than I care to count, and each batch taught me something new about getting that perfect balance of flavor, texture, and show-stopping looks. Here’s why this version stands apart from every other Halloween cupcake you’ll find online.
- Incredibly Moist Cake : The combination of hot coffee and buttermilk creates a tender crumb that stays soft for days. No dry, crumbly disasters here.
- Foolproof Spiderweb Design : You don’t need steady hands or artistic talent. The technique relies on a simple toothpick drag pattern that looks professional every time.
- Perfect for a Crowd : This recipe scales beautifully. I’ve made 48 cupcakes for a neighborhood party without breaking a sweat. Prep the frosting while the cakes cool, and you’re golden.
- Make-Ahead Friendly : Bake the cupcakes up to two days in advance. Frost and decorate the morning of your party. Your future self will thank you.
- Kid-Approved and Adult-Adored : The chocolate is deep enough for grown-up palates, but the playful design keeps little ones excited. Everyone wins.
- No Fancy Equipment Required : A zip-top bag works just as well as a piping bag for the spiderweb. I’ve done both, and honestly, the bag method is less cleanup.
What makes this recipe different from the dozens of other Halloween cupcakes out there is the texture. I spent months tweaking the flour-to-liquid ratio, testing different fat contents, and yes, eating a lot of mediocre cupcakes along the way. The result is a cake that’s sturdy enough to hold a generous swirl of frosting but light enough to feel indulgent, not heavy. It’s the kind of dessert that makes people ask for the recipe before they’ve even finished the first one.
There’s also something deeply satisfying about watching someone’s face light up when they see that spiderweb. It’s a small moment of magic, honestly. And when you’re hosting a party, those moments are exactly what you’re after. This recipe delivers them every single time.
What Ingredients You Will Need
This recipe relies on simple, pantry-friendly ingredients, but a few key choices make all the difference in the final result. I’ve tested substitutions for almost every component, so you’ll find notes below for dietary needs or last-minute swaps.
For the Chocolate Cupcakes
- All-purpose flour, 1 ¾ cups (220g) — Spoon and level for accuracy. Scooping directly from the bag packs in too much flour and makes the cake dense.
- Unsweetened cocoa powder, ¾ cup (75g) — I prefer Dutch-processed for a smoother, darker chocolate flavor. Natural cocoa works too, but the color will be lighter.
- Granulated sugar, 2 cups (400g) — Don’t reduce the sugar here. It’s not just for sweetness; it contributes to the tender texture and helps with browning.
- Baking soda, 1 ½ teaspoons — This reacts with the buttermilk and coffee to create lift. Make sure it’s fresh.
- Baking powder, 1 teaspoon — Double-check the expiration date. Flat cupcakes are sad cupcakes.
- Salt, 1 teaspoon — Balances the sweetness and deepens the chocolate flavor. I use fine sea salt.
- Buttermilk, 1 cup (240ml), room temperature — This is non-negotiable for moisture. If you don’t have buttermilk, add 1 tablespoon of lemon juice to regular milk and let it sit for 5 minutes.
- Strong hot coffee, 1 cup (240ml) — Don’t worry, the cupcakes won’t taste like coffee. It enhances the chocolate flavor dramatically. Instant espresso powder dissolved in hot water works perfectly.
- Vegetable oil, ½ cup (120ml) — Keeps the cake moist longer than butter. Canola or avocado oil both work.
- Large eggs, 2, room temperature — Cold eggs seize the batter. Let them sit on the counter for 30 minutes or place them in warm water for 5 minutes.
- Vanilla extract, 2 teaspoons — Pure vanilla is best, but imitation works in a pinch.
For the Vanilla Buttercream Frosting
- Unsalted butter, 1 cup (226g), softened — Let it sit out for at least an hour. It should be soft enough to leave a fingerprint but not greasy.
- Powdered sugar, 4 cups (480g), sifted — Sifting prevents lumps. I know it’s an extra step, but it makes a noticeable difference in the smoothness.
- Heavy cream, 3-4 tablespoons (45-60ml) — Whole milk works too, but heavy cream gives a richer mouthfeel.
- Vanilla extract, 1 ½ teaspoons — Again, pure is preferred.
- Pinch of salt — Cuts the sweetness and balances the butter.
For the Spiderweb Decoration
- Dark chocolate melting wafers, ½ cup (about 85g) — I recommend Ghirardelli or Guittard for smooth melting. Regular chocolate chips work but may need a teaspoon of coconut oil to thin them out.
- Small chocolate spiders (optional) — You can buy these at craft stores or online. Alternatively, use chocolate-covered raisins or pretzel M&M’s for a DIY version.
Ingredient Selection Tip: For the cocoa powder, look for one with at least 20% fat content. It makes the cake richer. I’ve tested this with Hershey’s Special Dark and Valrhona, and both produced excellent results, though Valrhona is noticeably more intense.
Substitution Guidance: For a dairy-free version, replace buttermilk with almond milk mixed with 1 tablespoon of apple cider vinegar, use vegan butter sticks (not spreadable tub margarine), and substitute full-fat coconut cream for heavy cream in the frosting. The texture will be slightly different but still delicious.
Equipment Needed
You don’t need a professional bakery setup to pull off these spiderweb cupcakes. I’ve made them in a tiny apartment kitchen with mismatched bowls, and they turned out just fine. Here’s what you’ll actually use.
- Standard 12-cup muffin pan — Light-colored metal pans produce the most even browning. Dark pans can over-brown the bottoms, so reduce the oven temperature by 25°F if that’s what you have.
- Paper cupcake liners — I like black or orange liners for Halloween, but white works fine too. Avoid the thin, cheap ones—they peel away from the cake and leave a mess.
- Large mixing bowls (at least 2) — One for dry ingredients, one for wet. Glass or stainless steel is ideal.
- Whisk and rubber spatula — A whisk for the dry ingredients, a spatula for folding everything together without overmixing.
- Electric hand mixer or stand mixer — For the frosting. You can beat it by hand, but your arm will get a workout. I speak from experience.
- Piping bag or large zip-top bag — For the frosting. A zip-top bag with the corner snipped off works beautifully and costs nothing.
- Small piping tip (round, size 4 or 5) — Optional but helpful for precise spiderweb lines. I’ve used a Wilton 4 with great results.
- Toothpick or wooden skewer — This is the secret weapon for creating the web pattern. Don’t lose it.
- Small microwave-safe bowl — For melting the chocolate wafers. Glass works better than plastic for even heating.
Budget-Friendly Tip: If you don’t own a piping bag, seriously, just use a sturdy zip-top bag. I’ve been baking for over a decade and still reach for the bag method half the time. It’s less cleanup and genuinely easier to control. Also, dollar stores often carry cupcake liners and disposable piping bags for a fraction of the price at baking supply stores.
Preparation Method
Let’s get to the good part. I’ve broken this down into clear stages so you can work through it without feeling rushed. Set aside about two hours total, including cooling time. The actual hands-on work is closer to 45 minutes.
Step 1: Prepare the Oven and Pan
Preheat your oven to 350°F (175°C). Line your muffin pan with 18-20 paper liners. Yes, 18-20—this recipe makes more than a standard dozen. If you only have one pan, bake in batches. Let the pan cool completely before filling it again for the second batch.
Step 2: Mix the Dry Ingredients
In a large bowl, whisk together the flour, cocoa powder, sugar, baking soda, baking powder, and salt. Whisk for about 20 seconds to aerate everything evenly. This step matters more than you’d think—it distributes the leavening agents so your cupcakes rise uniformly.
Step 3: Combine the Wet Ingredients
In a separate bowl or large liquid measuring cup, whisk together the buttermilk, hot coffee, vegetable oil, eggs, and vanilla extract. The coffee should still be warm but not boiling. Pour the wet ingredients into the dry ingredients all at once.
Step 4: Mix the Batter
Whisk gently until just combined. Stop the moment you no longer see streaks of flour. The batter will be thin—thinner than typical cake batter. That’s correct. Do not be tempted to add more flour. Overmixing at this stage develops gluten and makes the cupcakes tough. A few small lumps are fine.
Step 5: Fill the Liners
Fill each liner about two-thirds full. I use a ¼-cup measuring cup for consistency. The batter should reach just below the top of the liner. If you fill them too high, they’ll dome over and make frosting difficult.
Step 6: Bake
Bake for 18-22 minutes, rotating the pan halfway through. The cupcakes are done when a toothpick inserted into the center comes out with a few moist crumbs, not wet batter. The tops should spring back when lightly touched. Let them cool in the pan for 5 minutes, then transfer to a wire rack to cool completely. Do not frost warm cupcakes—the frosting will melt and slide right off.
Step 7: Make the Frosting
While the cupcakes cool, beat the softened butter in a large bowl with an electric mixer on medium speed until smooth and creamy, about 2 minutes. Add the sifted powdered sugar one cup at a time, beating on low speed after each addition. Add the heavy cream, vanilla extract, and salt, then increase speed to medium-high and beat for 3-4 minutes until light and fluffy. Scrape down the bowl as needed. The frosting should hold a firm peak when you lift the beater.
Step 8: Frost the Cupcakes
Fit a piping bag with a large round tip or snip the corner off a zip-top bag. Fill the bag with frosting and pipe a generous swirl onto each cooled cupcake. You want a smooth, even surface for the spiderweb design. Use an offset spatula to smooth the tops if needed. Place the frosted cupcakes in the refrigerator for 15 minutes to firm up the frosting. This step makes the web pattern much cleaner.
Step 9: Create the Spiderweb
Melt the dark chocolate wafers in a microwave-safe bowl in 20-second intervals, stirring between each, until completely smooth. Let it cool for 2-3 minutes—it should be warm but not hot. Transfer the melted chocolate to a small piping bag or a zip-top bag with a tiny corner snipped off.
Pipe three concentric circles on each frosted cupcake, starting from the center and working outward. Immediately use a toothpick to drag lines from the center through the circles toward the edge, creating the web pattern. Wipe the toothpick clean after each drag. Space the lines evenly around the cupcake—I usually do 6-8 drags per cupcake.
Step 10: Add the Spider
Place a small chocolate spider in the center of each web, or create your own using a chocolate-covered raisin for the body and pretzel sticks broken into pieces for the legs. Press gently so it sticks to the frosting. Let the chocolate set for about 10 minutes before serving.
Cooking Tips & Techniques
I’ve made these cupcakes more times than I can count, and I’ve learned a few things the hard way. Here’s what I wish someone had told me before my first attempt.
The Coffee Trick Is Real
I know adding a full cup of coffee to chocolate cake sounds strange. The first time I tried it, I was convinced the cupcakes would taste like a breakfast blend. They don’t. The coffee doesn’t add a coffee flavor—it deepens and intensifies the chocolate, making it taste richer and more complex. Use decaf if you’re worried about caffeine. Or don’t. I won’t judge.
Temperature Matters More Than You Think
Room-temperature ingredients aren’t a suggestion. Cold eggs and cold buttermilk will seize the batter, creating a lumpy texture that bakes unevenly. Set everything out on the counter 30 minutes before you start. I’ve forgotten this step and tried to speed things up with a warm water bath for the eggs—it works, but it’s annoying. Just plan ahead.
The Toothpick Drag Technique
Here’s where most people get nervous. The spiderweb looks complicated, but it’s genuinely foolproof. Pipe your three concentric circles—they don’t need to be perfect. Then drag the toothpick from the center outward, through all three circles. The key is to wipe the toothpick clean after each drag. If you don’t, the chocolate smears and you lose the clean web lines. I learned this after ruining an entire batch. Wipe, drag, wipe, drag. It takes 10 seconds per cupcake.
Chill the Frosting First
I cannot stress this enough. If you pipe the chocolate web onto soft, room-temperature frosting, the lines will sink in and disappear. You’ll end up with a muddy mess. Pop the frosted cupcakes in the fridge for at least 15 minutes. The cold buttercream creates a firm surface that holds the chocolate perfectly.
Work in Batches
Don’t try to pipe the chocolate on all 20 cupcakes at once. The melted chocolate will start to thicken and become difficult to work with. Pipe the circles on 4-5 cupcakes, drag the webs, add the spiders, then move to the next batch. Rewarm the chocolate in the microwave for 10 seconds if it gets too thick.
Variations & Adaptations
One of the best things about this recipe is how adaptable it is. Here are a few versions I’ve tried and loved.
Gluten-Free Version
Substitute the all-purpose flour with a 1:1 gluten-free baking blend that contains xanthan gum. I’ve tested this with King Arthur Measure for Measure and Cup4Cup, both with excellent results. Do not use almond flour or coconut flour alone—they lack the structure needed for a light cupcake. The gluten-free version is slightly more tender, so handle the batter gently and avoid overmixing.
Peanut Butter Spiderweb
For a flavor twist that pairs beautifully with chocolate, replace ¼ cup of the powdered sugar in the frosting with creamy peanut butter. Beat it in with the butter at the beginning. The peanut butter adds richness and a savory note that balances the sweet chocolate. Top with a mini peanut butter cup instead of a chocolate spider for a Reese’s-inspired treat.
Vegan Adaptation
I’ve made a vegan version for a friend’s Halloween party, and honestly, it was almost indistinguishable from the original. Use flax eggs (1 tablespoon ground flaxseed mixed with 3 tablespoons water per egg), replace buttermilk with almond milk and apple cider vinegar, and substitute coconut oil for the butter in the frosting. The cake is slightly denser but still incredibly moist. Use vegan chocolate wafers for the web.
White Chocolate Web
For a striking visual contrast against dark chocolate cake, use white chocolate melting wafers for the spiderweb pattern. The white web on dark frosting is dramatic and elegant. Add a drop of black gel food coloring to the white chocolate for a gray web effect that looks even more realistic.
Serving & Storage Suggestions
These cupcakes are designed to be the centerpiece of your dessert table, and a few small touches can make them feel even more special.
Serving Temperature
Serve the cupcakes at room temperature for the best texture and flavor. If you’ve stored them in the refrigerator, let them sit out for about 30 minutes before serving. The cake softens and the frosting becomes creamy again. Cold cupcakes taste muted—the chocolate flavor really opens up at room temperature.
Presentation Ideas
Arrange the cupcakes on a black or dark purple cake stand for maximum visual impact. Scatter a few fake spiders or candy eyeballs around the base for a playful touch. I’ve also placed them on a mirror tile with battery-operated tea lights around the edges—the reflection doubles the visual drama. If you’re serving them at a party, consider labeling them with a small sign that says “Spiderweb Cupcakes” in a spooky font. It adds to the fun.
Complementary Dishes and Beverages
These cupcakes pair beautifully with a warm mug of spiced apple cider or a creamy pumpkin latte. For a dessert spread, serve them alongside a pumpkin roll, caramel apples, or a bowl of popcorn drizzled with white chocolate and orange sprinkles. If you’re hosting a dinner party, a glass of cold milk or a dark stout beer complements the rich chocolate perfectly.
Storage Instructions
Store unfrosted cupcakes in an airtight container at room temperature for up to 3 days. Frosted cupcakes should be stored in the refrigerator in a single layer in an airtight container for up to 5 days. The spiderweb design will stay intact if you keep them chilled. Do not stack frosted cupcakes—the webs will smudge and the spiders will fall off.
Freezing Tips
You can freeze the unfrosted cupcakes for up to 3 months. Wrap each one tightly in plastic wrap, then place them in a freezer-safe bag. Thaw at room temperature for about an hour before frosting and decorating. I’ve also frozen frosted cupcakes (without the spiderweb) for up to a month. Thaw them in the refrigerator overnight, then add the web design fresh. The chocolate web is best done the day you plan to serve them.
How Flavors Develop
Like many chocolate cakes, these cupcakes actually taste better the day after baking. The flavors meld and deepen overnight, and the texture becomes even more moist. If you’re planning ahead, bake the cupcakes on Friday, frost and decorate on Saturday morning, and serve them Saturday evening. That extra rest makes a noticeable difference.
Nutritional Information & Benefits
Let’s be honest—these are celebration cupcakes, not health food. But that doesn’t mean they can’t offer a few redeeming qualities. Here’s a rough breakdown per cupcake (based on 20 servings).
- Calories: Approximately 320-350
- Fat: 18g
- Carbohydrates: 42g
- Protein: 4g
- Fiber: 2g
- Sugar: 30g
Health Benefits of Key Ingredients
Dark cocoa powder is surprisingly rich in antioxidants called flavonoids, which can help reduce inflammation and support heart health. The coffee in the batter also provides antioxidants and a small amount of caffeine for a gentle energy boost. Real butter contains fat-soluble vitamins A, D, and E, though obviously in moderation. And the eggs contribute high-quality protein and choline, which supports brain health.
Dietary Considerations
This recipe contains gluten, dairy, and eggs. For a gluten-free version, see the variations section above. For a dairy-free version, use the substitutions I mentioned in the ingredients section. The recipe is not suitable for vegans as written, but the vegan adaptation works beautifully. Please note that the nutritional values are estimates and will vary based on specific brands and substitutions.
Conclusion
These spiderweb cupcakes have become my go-to Halloween recipe for one simple reason: they deliver every single time. The cake is impossibly moist, the frosting is rich and creamy, and the spiderweb design makes people think you spent hours in the kitchen when you really didn’t. I’ve brought them to costume parties, family dinners, and neighborhood gatherings, and they always disappear first.
What I love most about this recipe is how it brings people together. There’s something about the combination of deep chocolate and a playful design that makes everyone smile, even the Halloween skeptics in the room. My cousin Mark still won’t admit he likes Halloween, but I’ve caught him eyeing the leftover cupcakes every year since that first batch. Some conversions happen quietly, I guess.
I’d love to hear how yours turn out. Did you try a different variation? Did the spiderweb pattern work on your first try? Drop a comment below and let me know—I read every single one. And if you share your cupcakes on social media, tag me so I can see your beautiful creations. Happy Halloween, and happy baking!
Frequently Asked Questions
Can I use a boxed cake mix instead of making the cake from scratch?
Absolutely. If you’re short on time, use your favorite chocolate cake mix and follow the package instructions. The spiderweb design works on any frosted cupcake. Just make sure the cupcakes are completely cool before frosting, and chill the frosting before piping the web. The homemade cake is definitely more moist and flavorful, but a boxed mix will still produce a beautiful result.
Why did my spiderweb lines bleed into the frosting?
This usually happens when the frosting is too soft or the chocolate is too hot. Make sure your frosted cupcakes have been chilled for at least 15 minutes before piping the web. The melted chocolate should be warm but not hot—if it’s too hot, it will melt the buttercream on contact. Let the chocolate cool for 2-3 minutes after melting before transferring it to the piping bag.
How far in advance can I make these cupcakes?
You have several options. Bake the cupcakes up to 2 days in advance and store them unfrosted in an airtight container at room temperature. Make the frosting up to 5 days in advance and refrigerate it in an airtight container—let it come to room temperature and re-whip before using. The spiderweb design should be done the day you plan to serve them for the cleanest look. The chocolate web can be piped up to 8 hours ahead if the cupcakes stay refrigerated.
Can I use milk chocolate instead of dark chocolate for the web?
Yes, but with a caveat. Milk chocolate has a lower cocoa butter content and a higher sugar content, which makes it softer and more prone to melting at room temperature. If you use milk chocolate, the web lines may not hold their shape as well, especially in a warm room. Add a teaspoon of coconut oil to help thin it out, and keep the cupcakes refrigerated until just before serving.
What if I don’t have a piping bag for the frosting?
No problem at all. A sturdy zip-top bag with the corner snipped off works perfectly for both the frosting and the melted chocolate. You can also use a butter knife to spread the frosting in a smooth, even layer—it won’t look as polished, but the spiderweb design will still be striking. For the chocolate, a small spoon works in a pinch. Just drizzle the circles carefully and drag the toothpick through them.
Pin This Recipe!
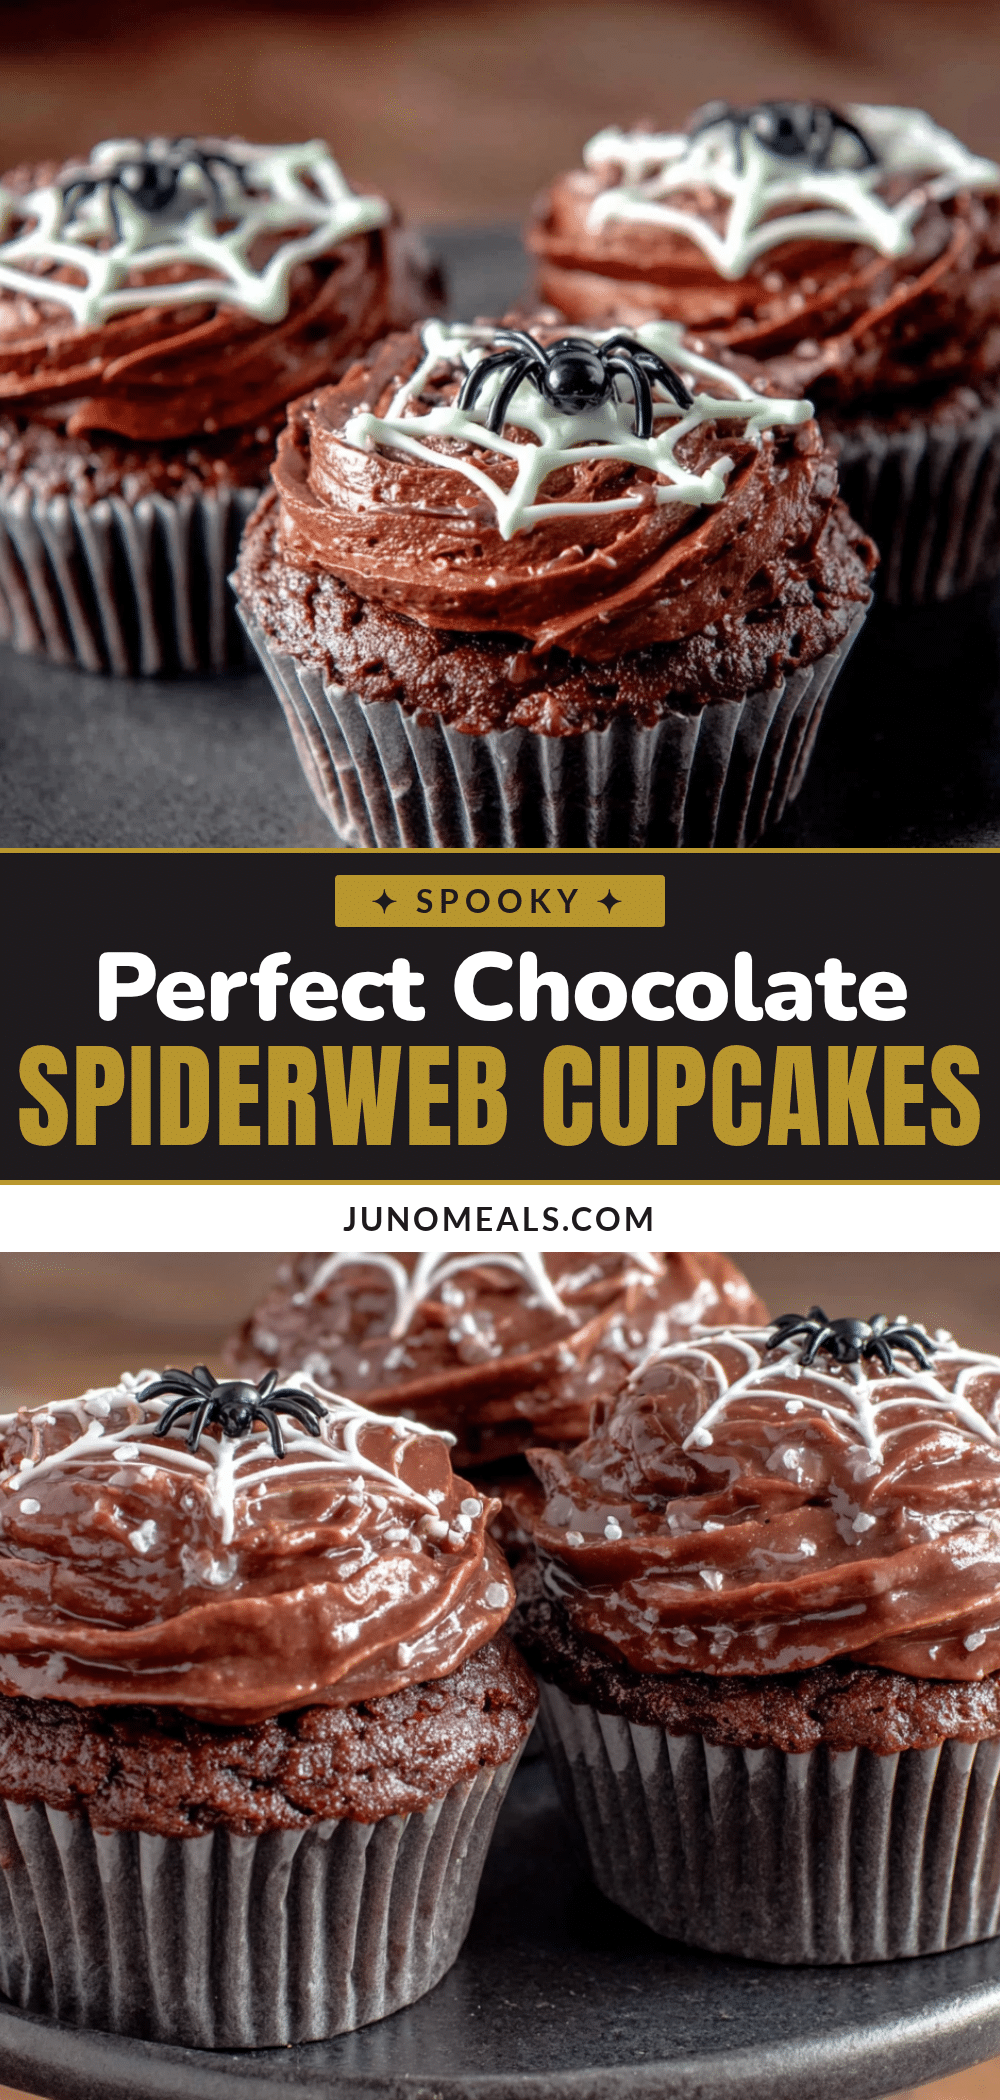
Perfect Chocolate Spiderweb Cupcakes Easy Halloween Recipe
These moist chocolate cupcakes feature a foolproof spiderweb design that looks professional but is almost impossible to mess up. The deep, rich chocolate cake paired with creamy vanilla buttercream and a delicate chocolate web makes for a show-stopping Halloween dessert that even skeptics will love.
- Prep Time: 45 minutes
- Cook Time: 20 minutes
- Total Time: 2 hours (including cooling)
- Yield: 18-20 cupcakes 1x
- Category: Dessert
- Cuisine: American
Ingredients
- 1 ¾ cups (220g) all-purpose flour
- ¾ cup (75g) unsweetened cocoa powder (Dutch-processed preferred)
- 2 cups (400g) granulated sugar
- 1 ½ teaspoons baking soda
- 1 teaspoon baking powder
- 1 teaspoon fine sea salt
- 1 cup (240ml) buttermilk, room temperature
- 1 cup (240ml) strong hot coffee
- ½ cup (120ml) vegetable oil
- 2 large eggs, room temperature
- 2 teaspoons vanilla extract
- 1 cup (226g) unsalted butter, softened
- 4 cups (480g) powdered sugar, sifted
- 3–4 tablespoons (45-60ml) heavy cream
- 1 ½ teaspoons vanilla extract
- Pinch of salt
- ½ cup (about 85g) dark chocolate melting wafers
- Small chocolate spiders (optional)
Instructions
- Preheat oven to 350°F (175°C). Line muffin pan with 18-20 paper liners.
- In a large bowl, whisk together flour, cocoa powder, sugar, baking soda, baking powder, and salt for about 20 seconds.
- In a separate bowl, whisk together buttermilk, hot coffee, vegetable oil, eggs, and vanilla extract.
- Pour wet ingredients into dry ingredients and whisk gently until just combined. Batter will be thin.
- Fill each liner about two-thirds full with batter.
- Bake for 18-22 minutes, rotating pan halfway through. Cupcakes are done when a toothpick inserted into the center comes out with a few moist crumbs.
- Cool in pan for 5 minutes, then transfer to a wire rack to cool completely.
- For frosting: Beat softened butter with an electric mixer on medium speed until smooth and creamy, about 2 minutes.
- Add sifted powdered sugar one cup at a time, beating on low after each addition.
- Add heavy cream, vanilla extract, and salt. Beat on medium-high for 3-4 minutes until light and fluffy.
- Pipe frosting onto cooled cupcakes using a piping bag or zip-top bag with corner snipped. Smooth tops if needed.
- Refrigerate frosted cupcakes for 15 minutes to firm up frosting.
- Melt dark chocolate wafers in a microwave-safe bowl in 20-second intervals, stirring between each, until smooth. Let cool 2-3 minutes.
- Transfer melted chocolate to a small piping bag or zip-top bag with tiny corner snipped.
- Pipe three concentric circles on each frosted cupcake, starting from center outward.
- Immediately use a toothpick to drag lines from center through circles toward edge, creating web pattern. Wipe toothpick clean after each drag.
- Place a chocolate spider in the center of each web. Let chocolate set for about 10 minutes before serving.
Notes
For best results, chill frosted cupcakes before piping the web to prevent bleeding. The coffee enhances chocolate flavor without adding coffee taste. Use a zip-top bag if you don’t have a piping bag. Work in batches when piping chocolate to prevent it from thickening.
Nutrition
- Serving Size: 1 cupcake
- Calories: 335
- Sugar: 30
- Sodium: 280
- Fat: 18
- Saturated Fat: 9
- Carbohydrates: 42
- Fiber: 2
- Protein: 4
Keywords: Halloween cupcakes, spiderweb cupcakes, chocolate cupcakes, easy Halloween dessert, chocolate spiderweb, buttercream frosting, fall baking, party dessert


