I wasn’t expecting cooking advice from the quietest person in my neighborhood, but there I was, last Tuesday morning at the weekly rummage sale, holding a slightly dented casserole dish while Mrs. Patterson—the woman who barely nods when I wave—described exactly how to make the best homemade four-cheese mac and cheese with panko crust. She was sorting through a box of old kitchen towels, and without looking up, she said, “You know, the secret to mac and cheese isn’t the cheese. It’s the crust.” I almost laughed. I mean, who expects culinary wisdom from someone who spends most of her time tending petunias? But she had me curious, so I listened. She told me about her mother’s recipe, scribbled on a notepad she’d found buried in a drawer, and how that panko crust turned a simple weeknight dinner into something the grandkids actually fought over. Honestly, I was skeptical. I’d made mac and cheese a hundred times—boxed stuff, fancy baked versions, even some with truffle oil that nobody ate. But this? This was different. Maybe you’ve been there, standing in someone else’s garage sale, holding a dish you didn’t plan to buy, and suddenly realizing the real treasure was a recipe you never knew you needed. That morning, I walked away with a scratched casserole dish for two dollars and a promise to try her method. Let me tell you, it was the best two dollars I ever spent. This kid-approved baked four-cheese mac and cheese with panko crust has become our family’s go-to for regular meals that feel special without breaking the budget. It’s the kind of recipe that makes you close your eyes after the first bite, wondering why you ever bothered with anything else.
Why You’ll Love This Recipe
This isn’t just another mac and cheese recipe. It’s the one that finally gets your kids to clean their plates without a single complaint, and it’s the one you’ll feel good about serving because it uses real ingredients you can actually pronounce. I’ve tested this version at least a dozen times, tweaking the cheese blend and the crust ratio until it hit that sweet spot between creamy comfort and crispy crunch. Here’s why this one stands out from the rest:
- Quick & Easy: Comes together in about 45 minutes, most of which is hands-off baking time. Perfect for those evenings when you need dinner on the table without a major production.
- Simple Ingredients: No fancy grocery trips needed. You likely already have most of these items in your fridge and pantry, which means less stress and fewer dollars spent.
- Perfect for Family Meals: Great for busy weeknights, weekend dinners, or even potlucks where you want to bring something that disappears fast.
- Crowd-Pleaser: Always gets rave reviews from kids and adults alike. I’ve yet to meet a picky eater who turns down this cheesy, golden-topped dish.
- Unbelievably Delicious: The texture and flavor combo is next-level comfort food. The creamy four-cheese sauce paired with that buttery, crunchy panko crust is honestly addictive.
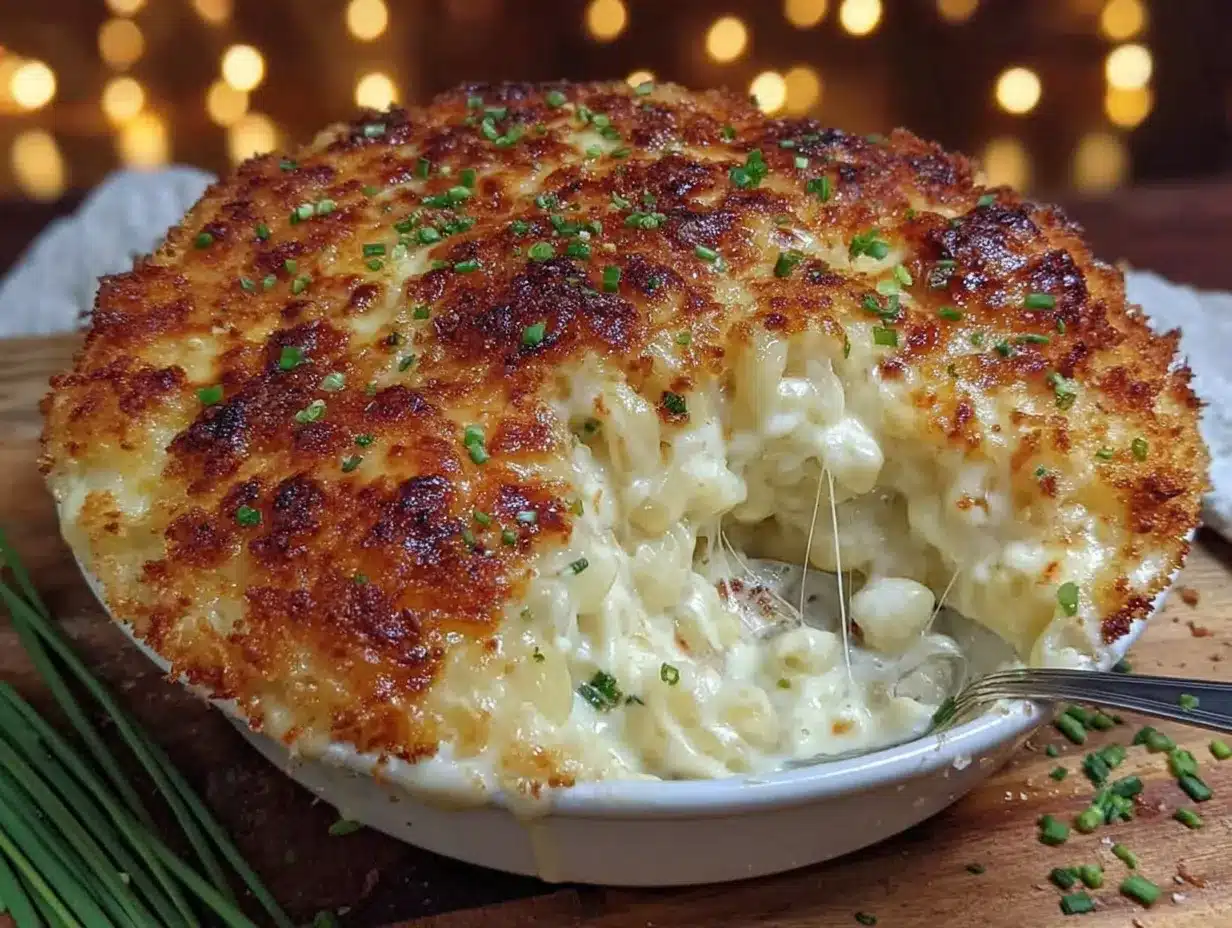
What makes this recipe different from all the others? It’s the careful balance of cheeses—sharp cheddar for punch, mozzarella for stretch, Gruyère for nuttiness, and cream cheese for that ultra-smooth, velvety texture that doesn’t separate when baked. Plus, that panko crust isn’t just for show. It adds a satisfying crunch that contrasts beautifully with the creamy pasta underneath. This recipe is comfort food reimagined—simpler, more affordable, but with the same soul-soothing satisfaction. Perfect for impressing guests without stress, or turning a simple Tuesday dinner into something memorable.
What Ingredients You Will Need
This recipe uses simple, wholesome ingredients to deliver bold flavor and satisfying texture without the fuss. Most of these are pantry staples, but I’ve included notes on where you might want to splurge a little for the best results.
For the Pasta
- 1 pound (450g) elbow macaroni (or any small pasta like cavatappi or shells—they hold the sauce well)
- Salt for the pasta water (don’t skip this; it seasons the noodles from the inside out)
For the Four-Cheese Sauce
- 4 tablespoons (56g) unsalted butter (I prefer Land O’Lakes for consistent results)
- 1/4 cup (30g) all-purpose flour (creates the roux base for a smooth sauce)
- 3 cups (720ml) whole milk (warm it slightly before adding for fewer lumps)
- 1 cup (240ml) heavy cream (adds richness—you can substitute with half-and-half if needed)
- 1 1/2 cups (170g) sharp cheddar cheese, shredded (buy a block and shred it yourself; pre-shredded cheese has anti-caking agents that affect melt)
- 1 cup (115g) mozzarella cheese, shredded (gives that beautiful stretch)
- 3/4 cup (75g) Gruyère cheese, shredded (adds a nutty, slightly sweet depth—worth the extra cost)
- 4 ounces (113g) cream cheese, softened (the secret to a silky, non-grainy sauce)
- 1/2 teaspoon garlic powder
- 1/2 teaspoon onion powder
- 1/4 teaspoon smoked paprika (optional, but adds a lovely warmth)
- 1/2 teaspoon Dijon mustard (don’t skip this—it brightens the cheese flavor without tasting like mustard)
- Salt and black pepper to taste
For the Panko Crust
- 1 cup (60g) panko breadcrumbs (regular breadcrumbs won’t give you the same crunch)
- 3 tablespoons (42g) unsalted butter, melted
- 1/4 cup (25g) Parmesan cheese, grated (the kind in the green can works fine, but fresh grated is even better)
- 1/4 teaspoon garlic powder
- Pinch of salt
Equipment Needed
You don’t need a fancy kitchen to pull this off. Here’s what you’ll need:
- Large pot for boiling pasta (at least 5 quarts)
- 9×13-inch baking dish (or a similar 3-quart casserole dish)
- Medium saucepan for the cheese sauce
- Whisk (a silicone-coated one won’t scratch your pans)
- Wooden spoon or spatula for stirring
- Box grater or food processor for shredding cheese (skip the pre-shredded stuff, seriously)
- Small bowl for mixing the panko topping
- Measuring cups and spoons
- Colander for draining pasta
If you don’t have a 9×13 dish, you can use two smaller baking dishes or even a cast-iron skillet. Just adjust the baking time slightly—smaller dishes will cook faster. I’ve used my grandmother’s old Pyrex dish for years, and it works perfectly. Also, if you’re on a budget, skip the food processor and just use a box grater. It takes an extra five minutes, but your arms will forgive you.
Preparation Method
Let’s get cooking. I’ve broken this down into clear steps so you don’t miss anything. Trust me, the first time I made this, I forgot to warm the milk and ended up with lumpy sauce. Learn from my mistakes.
Step 1: Preheat and Prepare
Preheat your oven to 375°F (190°C). Grease your 9×13-inch baking dish with butter or non-stick spray. Set it aside while you work on the pasta and sauce.
Step 2: Cook the Pasta
Fill your large pot with water and bring it to a rolling boil. Add a generous tablespoon of salt—the water should taste like the sea. Add the elbow macaroni and cook according to package directions until al dente, usually about 7-8 minutes. Don’t overcook it because the pasta will continue cooking in the oven. Drain the pasta in a colander, but don’t rinse it. You want that starch to help the sauce cling to the noodles. Set it aside.
Step 3: Make the Roux
In your medium saucepan, melt the 4 tablespoons of butter over medium heat. Once it’s bubbling, whisk in the flour. Keep whisking for about 1-2 minutes until the mixture turns a light golden color and smells slightly nutty. This is your roux, and it’s the foundation of a smooth, lump-free sauce. Don’t walk away—burnt roux will ruin the whole dish.
Step 4: Build the Cheese Sauce
Slowly pour in the warm milk and heavy cream while whisking constantly. I can’t stress this enough—keep whisking. If you dump it all in at once, you’ll get lumps. Continue whisking until the mixture thickens, about 3-4 minutes. It should coat the back of a spoon when it’s ready. Reduce the heat to low.
Now add the shredded cheddar, mozzarella, Gruyère, and the softened cream cheese. Stir gently but continuously until all the cheese is melted and the sauce is smooth. This takes about 2-3 minutes. Add the garlic powder, onion powder, smoked paprika, Dijon mustard, and a pinch of salt and pepper. Taste it. Adjust the seasoning if needed. The sauce should be rich and creamy with a slight tang from the mustard.
Step 5: Combine Pasta and Sauce
Pour the drained pasta into the pot with the cheese sauce. Stir gently until every piece of macaroni is coated in that glorious, cheesy goodness. Don’t be rough—you want the pasta intact, not broken up. Transfer the mixture to your greased baking dish and spread it evenly.
Step 6: Make the Panko Crust
In a small bowl, combine the panko breadcrumbs, melted butter, grated Parmesan, garlic powder, and a pinch of salt. Mix with a fork until the crumbs are evenly coated and look like wet sand. Sprinkle this mixture evenly over the top of the mac and cheese. Don’t press it down—you want those crumbs to stay loose and crunchy.
Step 7: Bake to Golden Perfection
Place the baking dish in the preheated oven and bake for 20-25 minutes, until the sauce is bubbly around the edges and the panko crust is golden brown. If you want an extra-crispy top, switch the oven to broil for the last 1-2 minutes. Watch it closely—broilers can burn things in seconds. Let the dish rest for 5-10 minutes before serving. This allows the sauce to set slightly so it doesn’t turn into a soupy mess on the plate.
Cooking Tips & Techniques
I’ve made this recipe enough times to know where things can go wrong. Here are some hard-earned lessons from my own kitchen disasters:
Shred your own cheese. I know, it’s tempting to buy the bagged shredded cheese, especially when you’re tired. But those anti-caking agents (usually potato starch or cellulose) prevent the cheese from melting smoothly. Your sauce will turn out grainy instead of silky. Take the extra five minutes to shred a block—your taste buds will thank you.
Warm your milk and cream. Cold liquid added to a hot roux can cause lumps that are nearly impossible to whisk out. I microwave my milk for about 45 seconds before adding it. If you forget, just add it slowly and whisk like your life depends on it.
Don’t skip the mustard. I know it sounds weird in mac and cheese, but Dijon mustard does something magical. It cuts through the richness of the cheese and brightens the whole dish without tasting like mustard. Think of it as a flavor enhancer, not a flavor itself.
Watch your bake time. The first time I made this, I got distracted by a phone call and left it in the oven too long. The crust was almost black, and the sauce had turned into a gluey mess. Set a timer, and check it at 20 minutes. You want golden, not burnt.
Let it rest. I know you’re hungry, and the kids are circling the kitchen like sharks. But if you serve it straight out of the oven, the sauce will be too loose. Five minutes of resting time makes a huge difference in texture.
Variations & Adaptations
This recipe is flexible, and I’ve tried several versions depending on what I have in the fridge. Here are some ways to make it your own:
Dietary Adaptations
Gluten-Free: Use gluten-free pasta and substitute the all-purpose flour with a gluten-free all-purpose blend or cornstarch (use 2 tablespoons cornstarch mixed with 2 tablespoons cold water as a slurry). For the panko crust, use gluten-free panko or crushed gluten-free crackers.
Lower-Fat Version: Swap the heavy cream for evaporated milk, use reduced-fat cheddar and mozzarella, and skip the cream cheese. The sauce won’t be as velvety, but it’ll still be delicious and significantly lighter.
Flavor Twists
Spicy Kick: Add 1/2 teaspoon of cayenne pepper or a diced jalapeño to the cheese sauce. Top with crushed red pepper flakes before baking.
Bacon Lover’s: Cook 6 strips of bacon until crispy, crumble them, and mix half into the cheese sauce. Sprinkle the rest on top of the panko crust before baking. This version disappears fastest in my house.
Seasonal Variations
Spring: Stir in 1 cup of blanched peas and 1/2 cup of chopped fresh chives right before baking. The sweetness of the peas pairs beautifully with the cheese.
Fall: Add 1 cup of roasted butternut squash cubes and a pinch of nutmeg to the cheese sauce. It adds a subtle sweetness and extra creaminess.
Serving & Storage Suggestions
This mac and cheese is best served warm, straight from the oven, with that panko crust still crunchy. I like to scoop it onto plates with a wide spatula to keep the topping intact. It pairs beautifully with a simple green salad dressed with lemon vinaigrette—the acidity cuts through the richness. For a heartier meal, serve it alongside roasted chicken or grilled sausages. My kids love it with steamed broccoli on the side, though honestly, they usually just eat the mac and cheese first and save the broccoli for last.
Storing Leftovers: Let the dish cool completely, then cover it tightly with foil or plastic wrap. It will keep in the refrigerator for up to 4 days. The panko crust will soften over time, but the flavor actually gets better as the cheese sauce melds with the pasta.
Reheating: For best results, reheat in a 350°F (175°C) oven for about 15-20 minutes, covered with foil. Remove the foil for the last 5 minutes to crisp up the top again. You can also microwave individual portions, but the texture won’t be as good. If using a microwave, add a splash of milk before reheating to restore some creaminess.
Freezing: This mac and cheese freezes beautifully. Assemble the dish completely but don’t bake it. Cover tightly with foil and freeze for up to 3 months. When ready to bake, thaw in the refrigerator overnight, then bake as directed, adding about 10 extra minutes to the cooking time. I often make a double batch and freeze one for those nights when I just can’t face cooking.
Nutritional Information & Benefits
Let’s be honest—this is comfort food, not health food. But it’s made with real ingredients, and that counts for something. Here’s the approximate nutritional breakdown per serving (based on 8 servings):
- Calories: 580
- Fat: 34g
- Saturated Fat: 20g
- Carbohydrates: 45g
- Protein: 22g
- Calcium: 35% of the Daily Value
- Vitamin A: 15% of the Daily Value
The cheese provides a good amount of calcium and protein, which is great for growing kids. The whole milk and cream add vitamin D and healthy fats that help with nutrient absorption. If you’re watching your sodium, use low-sodium cheese and skip the added salt in the sauce. This recipe is not gluten-free or dairy-free, but the variations section above offers alternatives for both. Personally, I feel good serving this to my family because it’s made from scratch with ingredients I trust, and it fills their bellies without any weird additives or preservatives.
Conclusion
This kid-approved baked four-cheese mac and cheese with panko crust has earned a permanent spot in our dinner rotation. It’s the recipe I turn to when I need a guaranteed win—when the kids are grumpy, the budget is tight, and I’m too tired to argue about dinner. It’s comfort food that actually delivers on its promise, and it came from the most unexpected source. Who knew Mrs. Patterson’s garage sale wisdom would change my cooking life?
I hope you give this a try, and I’d love to hear how it turns out. Did your kids go back for seconds? Did you add your own twist? Drop a comment below and let me know—I read every single one, and I’m always looking for new ideas to try. And if you loved it, share this recipe with a friend who needs a little comfort food in their life. Happy cooking, friends. You’ve got this.
Frequently Asked Questions
Can I use pre-shredded cheese for this recipe?
You can, but I really don’t recommend it. Pre-shredded cheese is coated with anti-caking agents that prevent it from melting smoothly, which can make your sauce grainy. Shredding your own cheese from a block takes an extra five minutes but makes a huge difference in texture.
How do I prevent my cheese sauce from becoming lumpy?
Lumpy sauce usually happens when you add cold milk to a hot roux or when you add cheese too quickly. Make sure your milk and cream are warm before adding them, and add the cheese gradually while stirring constantly. Also, keep the heat low once you start adding cheese—high heat can cause the sauce to separate.
Can I make this mac and cheese ahead of time?
Absolutely. You can assemble the entire dish (without the panko crust) up to 24 hours in advance. Cover and refrigerate it, then add the panko topping just before baking. You may need to add 5-10 minutes to the baking time since you’re starting from cold.
What’s the best pasta shape for baked mac and cheese?
Elbow macaroni is classic, but any small pasta with nooks and crannies works well. Cavatappi, shells, rotini, or even orecchiette are great choices. The key is to use a shape that holds onto the cheese sauce so every bite is creamy.
Why did my panko crust turn out soggy?
A soggy crust usually means the topping was pressed down too firmly or the dish was covered while baking. Sprinkle the panko mixture loosely over the top and don’t pat it down. Also, make sure your oven is fully preheated and that you’re baking uncovered. If your dish is particularly deep, you might need an extra 5 minutes of baking time to crisp up the top.
Pin This Recipe!
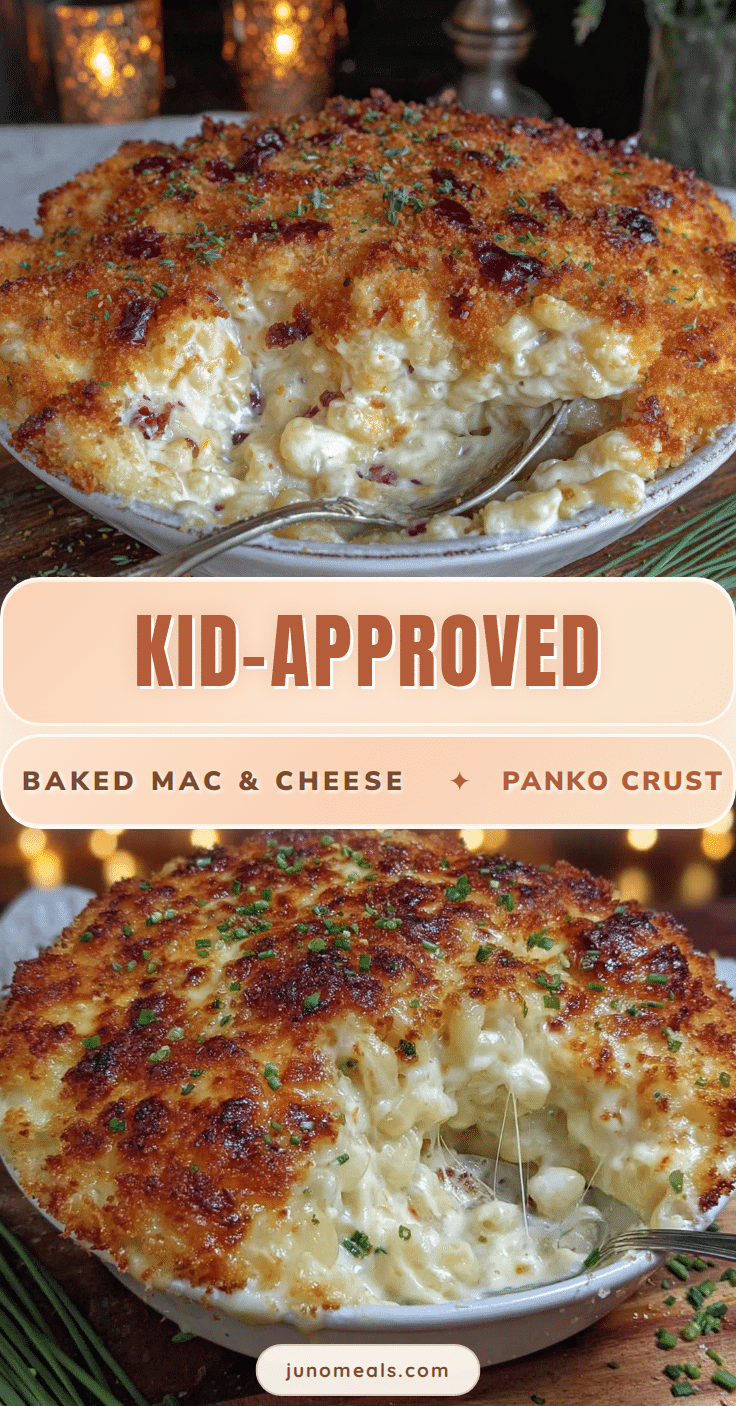
Best Homemade Four-Cheese Mac and Cheese with Panko
This kid-approved baked four-cheese mac and cheese with panko crust is creamy, cheesy, and topped with a buttery, crunchy crust. It’s the perfect comfort food for busy weeknights or special dinners.
- Prep Time: 15 minutes
- Cook Time: 30 minutes
- Total Time: 45 minutes
- Yield: 8 servings 1x
- Category: Main Course
- Cuisine: American
Ingredients
- 1 pound (450g) elbow macaroni
- Salt for pasta water
- 4 tablespoons (56g) unsalted butter
- 1/4 cup (30g) all-purpose flour
- 3 cups (720ml) whole milk, warmed
- 1 cup (240ml) heavy cream, warmed
- 1 1/2 cups (170g) sharp cheddar cheese, shredded
- 1 cup (115g) mozzarella cheese, shredded
- 3/4 cup (75g) Gruyère cheese, shredded
- 4 ounces (113g) cream cheese, softened
- 1/2 teaspoon garlic powder
- 1/2 teaspoon onion powder
- 1/4 teaspoon smoked paprika (optional)
- 1/2 teaspoon Dijon mustard
- Salt and black pepper to taste
- 1 cup (60g) panko breadcrumbs
- 3 tablespoons (42g) unsalted butter, melted
- 1/4 cup (25g) Parmesan cheese, grated
- 1/4 teaspoon garlic powder
- Pinch of salt
Instructions
- Preheat oven to 375°F (190°C). Grease a 9×13-inch baking dish with butter or non-stick spray.
- Bring a large pot of salted water to a boil. Cook elbow macaroni according to package directions until al dente (about 7-8 minutes). Drain, do not rinse.
- In a medium saucepan, melt 4 tablespoons butter over medium heat. Whisk in flour and cook for 1-2 minutes until light golden and nutty.
- Slowly whisk in warm milk and heavy cream. Continue whisking until thickened, about 3-4 minutes. Reduce heat to low.
- Add shredded cheddar, mozzarella, Gruyère, and cream cheese. Stir until melted and smooth, about 2-3 minutes. Stir in garlic powder, onion powder, smoked paprika, Dijon mustard, salt, and pepper.
- Pour drained pasta into the cheese sauce and stir gently to coat. Transfer to the prepared baking dish and spread evenly.
- In a small bowl, combine panko breadcrumbs, melted butter, Parmesan, garlic powder, and a pinch of salt. Mix until crumbs are evenly coated. Sprinkle over the mac and cheese.
- Bake for 20-25 minutes until bubbly and golden. For extra crispiness, broil for 1-2 minutes at the end. Let rest for 5-10 minutes before serving.
Notes
Shred your own cheese for a smoother sauce. Warm the milk and cream before adding to the roux to prevent lumps. Do not skip the Dijon mustard—it enhances the cheese flavor. Let the dish rest for 5-10 minutes after baking to allow the sauce to set.
Nutrition
- Serving Size: 1 serving
- Calories: 580
- Sugar: 6
- Sodium: 680
- Fat: 34
- Saturated Fat: 20
- Carbohydrates: 45
- Fiber: 2
- Protein: 22
Keywords: mac and cheese, baked mac and cheese, four-cheese, panko crust, comfort food, kid-friendly, easy dinner


