I was standing in my kitchen at 4:17 PM, staring into the open fridge, when my six-year-old appeared beside me like a tiny, snack-obsessed ghost. “Mom, what’s for dinner?” he asked, and I felt that familiar pre-dinner panic settle in. It was Halloween week, which meant the kids were already buzzing with sugar-fueled energy, and I had exactly zero inspiration. Then my eyes landed on the can of crescent rolls I’d shoved behind the pickles, and next to it, a pack of hot dogs. Honestly, it felt like a minor kitchen miracle. I grabbed them both, and in that moment, the Easy Mummy Hot Dogs with Crescent Dough Wraps were born. Not from a family recipe or a Pinterest board, but from pure, last-minute desperation. And you know what? They turned out ridiculously cute. The kids actually stopped arguing long enough to watch them bake through the oven door, and my husband—who claims he doesn’t “do” themed food—ate four of them before I could get a photo. That’s the thing about this recipe. It doesn’t need a fancy origin story. It just needs a hungry kid, a busy parent, and about twenty minutes. These little guys have become our go-to for Halloween parties, school lunch surprises, and any night I need dinner to feel like fun without feeling like work. They’re the kind of recipe that makes you look like you planned something special, when really, you just didn’t want to order pizza again. And honestly? That’s my favorite kind of cooking.
Why You’ll Love This Recipe
Look, I’ve tested a lot of crescent roll recipes in my time. Some were flops (soggy bottoms, anyone?), and some were pure gold. These mummy hot dogs? They’re solid gold. Here’s why this version works better than any other I’ve tried:
- Ready in 20 Minutes Flat: From fridge to table in under half an hour. That’s faster than delivery, and way more fun.
- Only 3 Main Ingredients: Hot dogs, crescent dough, and mustard eyes. That’s it. No special trip to the store required.
- Kid-Approved and Adult-Friendly: My kids devour them, and I’ve caught grown-ups sneaking seconds at parties. They’re just… good.
- Perfect for Halloween Parties: They look spooky and cute at the same time, which is surprisingly hard to pull off.
- Totally Customizable: Swap the hot dogs for cheese sticks, use turkey dogs, or add spice. The base recipe is a blank canvas.
What makes Easy Mummy Hot Dogs with Crescent Dough Wraps different from every other version out there? It’s the wrapping technique. I learned the hard way that if you wrap the dough too tight, the hot dog puffs out in weird places. Too loose, and the mummy looks like it’s falling apart (which, okay, is kind of on-theme, but not what we’re going for). The trick is a relaxed, slightly uneven wrap—just enough to look wrapped but not squeezed. It gives you that perfect mummy texture: flaky, golden, and a little bit messy. This isn’t just another Halloween snack. It’s the one that makes your kid say, “Can we make these again tomorrow?”
What Ingredients You Will Need
This recipe uses simple, everyday ingredients to deliver something that feels way more special than it actually is. You probably have everything in your kitchen right now, or at least the things that matter.
- Hot Dogs (8 standard-size): Use your favorite brand. I personally like beef hot dogs for flavor, but turkey or chicken work great too. If you’re feeling fancy, try smoked sausages for a heartier bite. (Just make sure they’re not too thick, or the dough won’t wrap evenly.)
- Crescent Roll Dough (1 can, 8-count): This is the real star. I use Pillsbury Original Crescent Rolls because they’re widely available and bake up perfectly flaky. The refrigerated dough is key—don’t try to make your own pastry dough for this, unless you have way more time than I do. (If you want a homemade version, check out our recipes page for a quick dough alternative.)
- Mustard (for eyes): Yellow mustard gives the best color contrast for mummy eyes. Squeeze a tiny dot on each “face” after baking. You can use ketchup or sriracha if you prefer, but mustard really pops against the golden dough.
- Optional: Cooking Spray or Butter: Lightly spray your baking sheet or brush the tops with melted butter before baking. It gives the dough a gorgeous golden-brown finish. I use unsalted butter for a richer taste.
- Optional: Everything Bagel Seasoning or Sesame Seeds: Sprinkle a little on top before baking for extra texture and flavor. It’s not traditional, but it’s delicious.
- Optional: Cheese Slices or Cheese Sticks: For a gooey, cheesy center, wrap a half-slice of cheese around the hot dog before adding the dough. It’s a game-changer.
Ingredient Selection Tips: For the best results, use hot dogs that are uniform in size. Thin hot dogs will look more delicate when wrapped, while thicker ones give a chunkier mummy look. If you’re using turkey dogs, be aware they can be a bit drier—adding a little butter or cheese helps. And always check the expiration date on your crescent dough. Trust me, expired dough doesn’t rise properly, and you’ll end up with flat, sad mummies. Nobody wants that.
Equipment Needed
You don’t need a fancy kitchen to pull off these mummy hot dogs. In fact, you probably have everything already. Here’s what you’ll need:
- Baking Sheet: A standard half-sheet pan works perfectly. Line it with parchment paper or a silicone baking mat for easy cleanup. (I’ve used foil in a pinch, but parchment gives the best browning.)
- Sharp Knife or Pizza Cutter: You’ll need to slice the crescent dough into thin strips. A pizza cutter makes this way faster and cleaner than a knife. If you’re using a knife, make sure it’s sharp so you don’t squish the dough.
- Cutting Board: For slicing the dough strips. A clean, flat surface is essential.
- Small Bowl (optional): For melted butter if you’re brushing the tops.
- Pastry Brush (optional): For applying butter or egg wash. A silicone brush is my favorite—it doesn’t shed bristles.
- Toothpicks (optional): If your dough strips are being stubborn, a toothpick can help hold them in place while baking. Just remove before serving.
Budget-Friendly Alternatives: No pastry brush? Use a paper towel dipped in melted butter. No pizza cutter? A clean pair of kitchen scissors works surprisingly well for cutting dough strips. And if you don’t have parchment paper, lightly greased foil will do the job—just keep an eye on the bottoms so they don’t burn.
Preparation Method
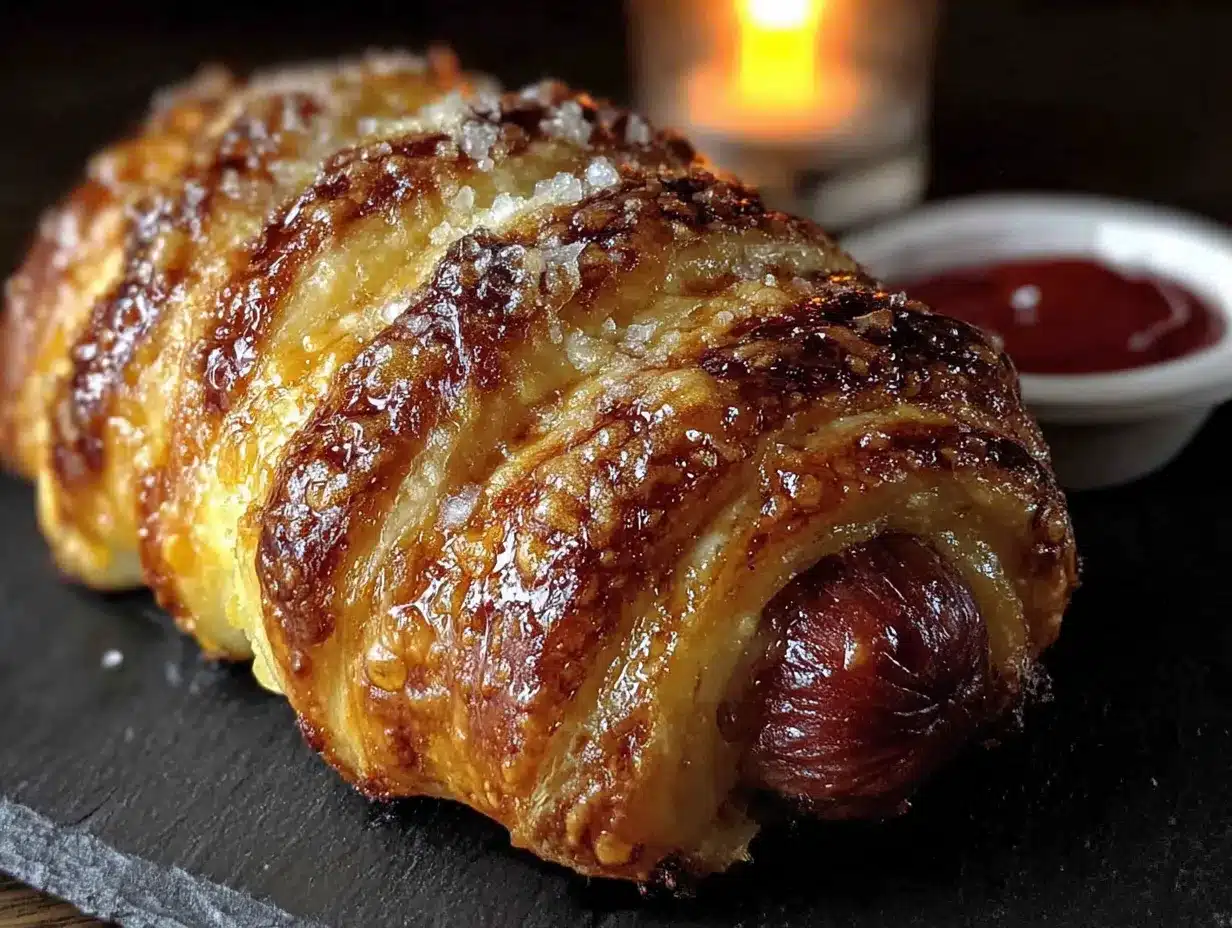
Let’s get cooking. This is the fun part. Follow these steps, and you’ll have a tray of adorable mummy hot dogs in no time.
- Preheat your oven to 375°F (190°C). Line a baking sheet with parchment paper or a silicone mat. This is non-negotiable if you want easy cleanup.
- Unroll the crescent dough. Carefully open the can (pop it away from your face—it always startles me) and unroll the dough onto a clean cutting board. Separate it along the perforated lines so you have 8 triangles.
- Cut each triangle into thin strips. Using a sharp knife or pizza cutter, slice each triangle lengthwise into 3-4 thin strips. They don’t have to be perfect—mummies are supposed to look a little ragged. Aim for strips about ½-inch wide.
- Wrap the hot dogs. Take one hot dog and start wrapping a dough strip around it, leaving a small gap near the top for the “face.” Don’t wrap too tightly—the dough needs room to puff up. Overlap the strips slightly as you go, so no hot dog is exposed. Leave about an inch at the top unwrapped for the eyes.
- Place on the baking sheet. Arrange the wrapped hot dogs on the prepared sheet, leaving about an inch of space between each one. They won’t spread much, but a little breathing room helps them brown evenly.
- Brush with melted butter (optional). If you want that gorgeous golden crust, lightly brush the tops with melted butter or an egg wash (1 egg beaten with 1 tablespoon water). This step is optional but highly recommended.
- Bake for 10-12 minutes. Bake until the dough is golden brown and puffed. The hot dogs will be heated through. Keep an eye on them after 10 minutes—ovens vary, and you don’t want burnt mummies.
- Add the eyes. Remove from the oven and let cool for 2-3 minutes. Using a toothpick or the tip of a knife, dab a tiny amount of mustard onto the unwrapped section to create eyes. Two dots per mummy. Don’t skip this step—it’s what makes them look like mummies instead of sad, wrapped sausages.
- Serve immediately. These are best eaten warm, when the dough is flaky and the hot dog is juicy. They cool quickly, so serve right away.
Pro Tip: If the dough strips feel too sticky, lightly dust your hands with flour. And if a strip breaks while wrapping, just press it back together—the dough is forgiving.
Cooking Tips & Techniques
I’ve made these mummy hot dogs at least a dozen times now, and I’ve learned a few things the hard way. Here are my best tips to save you from my mistakes:
- Don’t overwork the dough. Crescent dough is delicate. If you handle it too much, it becomes tough and loses its flaky texture. Work quickly and gently.
- Leave room for the eyes. I once wrapped a hot dog all the way to the top, and when it came out of the oven, I had no space for eyes. It looked like a sad, beige sausage. Always leave that 1-inch gap.
- Use a timer, not your eyes. The dough can go from golden to burnt in under a minute. Set a timer for 10 minutes, then check. If they need more time, add 1-minute increments.
- Let them cool slightly before adding eyes. If you add mustard while the dough is piping hot, it will melt into a yellow puddle. Wait 2-3 minutes, and the mustard will stay put.
- Make extra dough strips. If you’re making a double batch, cut all the dough strips first before wrapping. It speeds things up and keeps the process flowing.
My Biggest Failure: The first time I made these, I used hot dogs straight from the fridge. The cold meat made the dough take longer to cook, and the bottoms burned before the tops were golden. Now I always let the hot dogs sit at room temperature for 5 minutes before wrapping. It makes a real difference.
Variations & Adaptations
One of the best things about Easy Mummy Hot Dogs with Crescent Dough Wraps is how easy they are to adapt. Here are some of my favorite variations:
- Cheesy Mummies: Before wrapping, place a half-slice of cheddar or mozzarella on the hot dog. The cheese melts into the dough and creates a gooey, stretchy center. It’s incredible.
- Spicy Mummies: Use spicy Italian sausages or chorizo instead of hot dogs. Brush the dough with a little sriracha butter before baking for extra heat.
- Veggie Mummies: Swap the hot dog for a cheese stick or a cooked veggie sausage. You can also use a thick carrot stick (blanched first) for a lighter option.
- Breakfast Mummies: Use breakfast sausages instead of hot dogs, and serve with maple syrup for dipping. It’s a fun twist for Halloween morning.
- Gluten-Free Mummies: Use gluten-free crescent dough (many brands now make it) or puff pastry sheets cut into strips. The texture will be a bit different, but the flavor is still great.
Personal Variation: My favorite version is the “Everything Mummy.” I brush the dough with butter, then sprinkle everything bagel seasoning on top before baking. The sesame seeds and garlic flakes give it a savory crunch that pairs perfectly with the hot dog. My husband calls them “fancy mummies,” and I take that as a compliment.
Serving & Storage Suggestions
These mummy hot dogs are best served warm and fresh, but they’re still pretty good at room temperature (if they last that long). Here’s how to serve and store them:
- Serving Temperature: Serve immediately after baking, while the dough is still flaky and the hot dog is hot. They cool quickly, so if you’re serving a crowd, bake them in batches.
- Presentation Ideas: Arrange them on a platter with a small bowl of ketchup or mustard for dipping. For Halloween, I like to serve them on a black platter with “spider web” decorations made from sour cream and a toothpick.
- Complementary Dishes: Pair them with a simple side salad, roasted vegetables, or a bowl of tomato soup. For a party, serve alongside mini lemon blueberry cheesecakes for a sweet finish.
- Storage: Store leftovers in an airtight container in the refrigerator for up to 3 days. The dough will soften, but the flavor is still good.
- Reheating: Reheat in a 350°F oven for 5-7 minutes, or in an air fryer at 350°F for 3-4 minutes. The microwave will make the dough soggy, so avoid it if you can.
Flavor Development: These are definitely best fresh, but I’ve eaten them cold straight from the fridge the next day, and they’re still tasty. The mustard eyes might bleed a little, but that’s part of the mummy charm, right?
Nutritional Information & Benefits
Let’s be real—this isn’t a health food. But it’s a fun treat, and sometimes that’s exactly what you need. Here’s the estimated nutritional breakdown per mummy hot dog (based on standard ingredients):
| Nutrient | Amount Per Serving (1 mummy) |
|---|---|
| Calories | 220 |
| Total Fat | 14g |
| Saturated Fat | 5g |
| Cholesterol | 25mg |
| Sodium | 620mg |
| Total Carbohydrates | 18g |
| Dietary Fiber | 0g |
| Sugars | 4g |
| Protein | 7g |
Health Benefits: Hot dogs are a source of protein, and crescent dough provides quick energy from carbohydrates. If you use turkey or chicken hot dogs, you’ll reduce the fat and calories. Adding a side of vegetables or a salad helps balance the meal. For a lower-sodium option, look for reduced-sodium hot dogs or use chicken sausages.
Dietary Considerations: This recipe contains gluten, dairy (if using butter), and processed meats. For a gluten-free version, use gluten-free crescent dough. For a dairy-free version, skip the butter or use a plant-based alternative. As always, check ingredient labels for allergens.
Personal Wellness Perspective: I believe in balance. These mummy hot dogs aren’t an everyday meal, but they’re perfect for a special occasion. And honestly, the joy on my kids’ faces when they see these on their plates? That’s a nutrient you can’t measure.
Conclusion
So there you have it. Easy Mummy Hot Dogs with Crescent Dough Wraps—the recipe that turned a chaotic weeknight into a mini celebration. They’re quick, they’re cute, and they’re so simple that even my six-year-old can help wrap them (with a little supervision). Whether you’re making them for Halloween, a birthday party, or just a Tuesday night that needs a little fun, these mummies deliver. I love this recipe because it reminds me that cooking doesn’t have to be complicated to be memorable. Sometimes the best dishes come from a can of dough and a pack of hot dogs, made with love and a little bit of desperation. I’d love to hear how yours turn out. Did you add cheese? Use spicy sausage? Forget the eyes and end up with faceless mummies? (Been there.) Drop a comment below and let me know your favorite variation. And if you’re looking for more easy, fun recipes, check out our full recipe collection for more weeknight wins. Happy cooking, and happy Halloween!
Frequently Asked Questions
Can I make these mummy hot dogs ahead of time?
You can assemble them up to 24 hours in advance. Wrap the hot dogs, place them on the baking sheet, cover with plastic wrap, and refrigerate. Bake just before serving for the best texture.
Can I use puff pastry instead of crescent dough?
Yes, puff pastry works well. Cut it into thin strips and wrap the same way. The texture will be flakier and more buttery. Bake at 400°F for 12-15 minutes, or until golden brown.
How do I keep the dough from unraveling during baking?
Make sure the ends of the dough strips are tucked under the hot dog. If they’re still stubborn, use a toothpick to hold them in place. Remove the toothpick before serving.
Can I freeze these mummy hot dogs?
Yes, but it’s best to freeze them after baking. Let them cool completely, then place in a freezer-safe bag. Reheat in a 350°F oven for 10 minutes. The texture won’t be as flaky, but they’ll still taste great.
What can I use instead of mustard for the eyes?
Ketchup, sriracha, or even small dots of cream cheese work well. For a non-spicy option, use a tiny dab of ranch dressing or mayonnaise. Just make sure it’s thick enough to hold its shape.
Pin This Recipe!
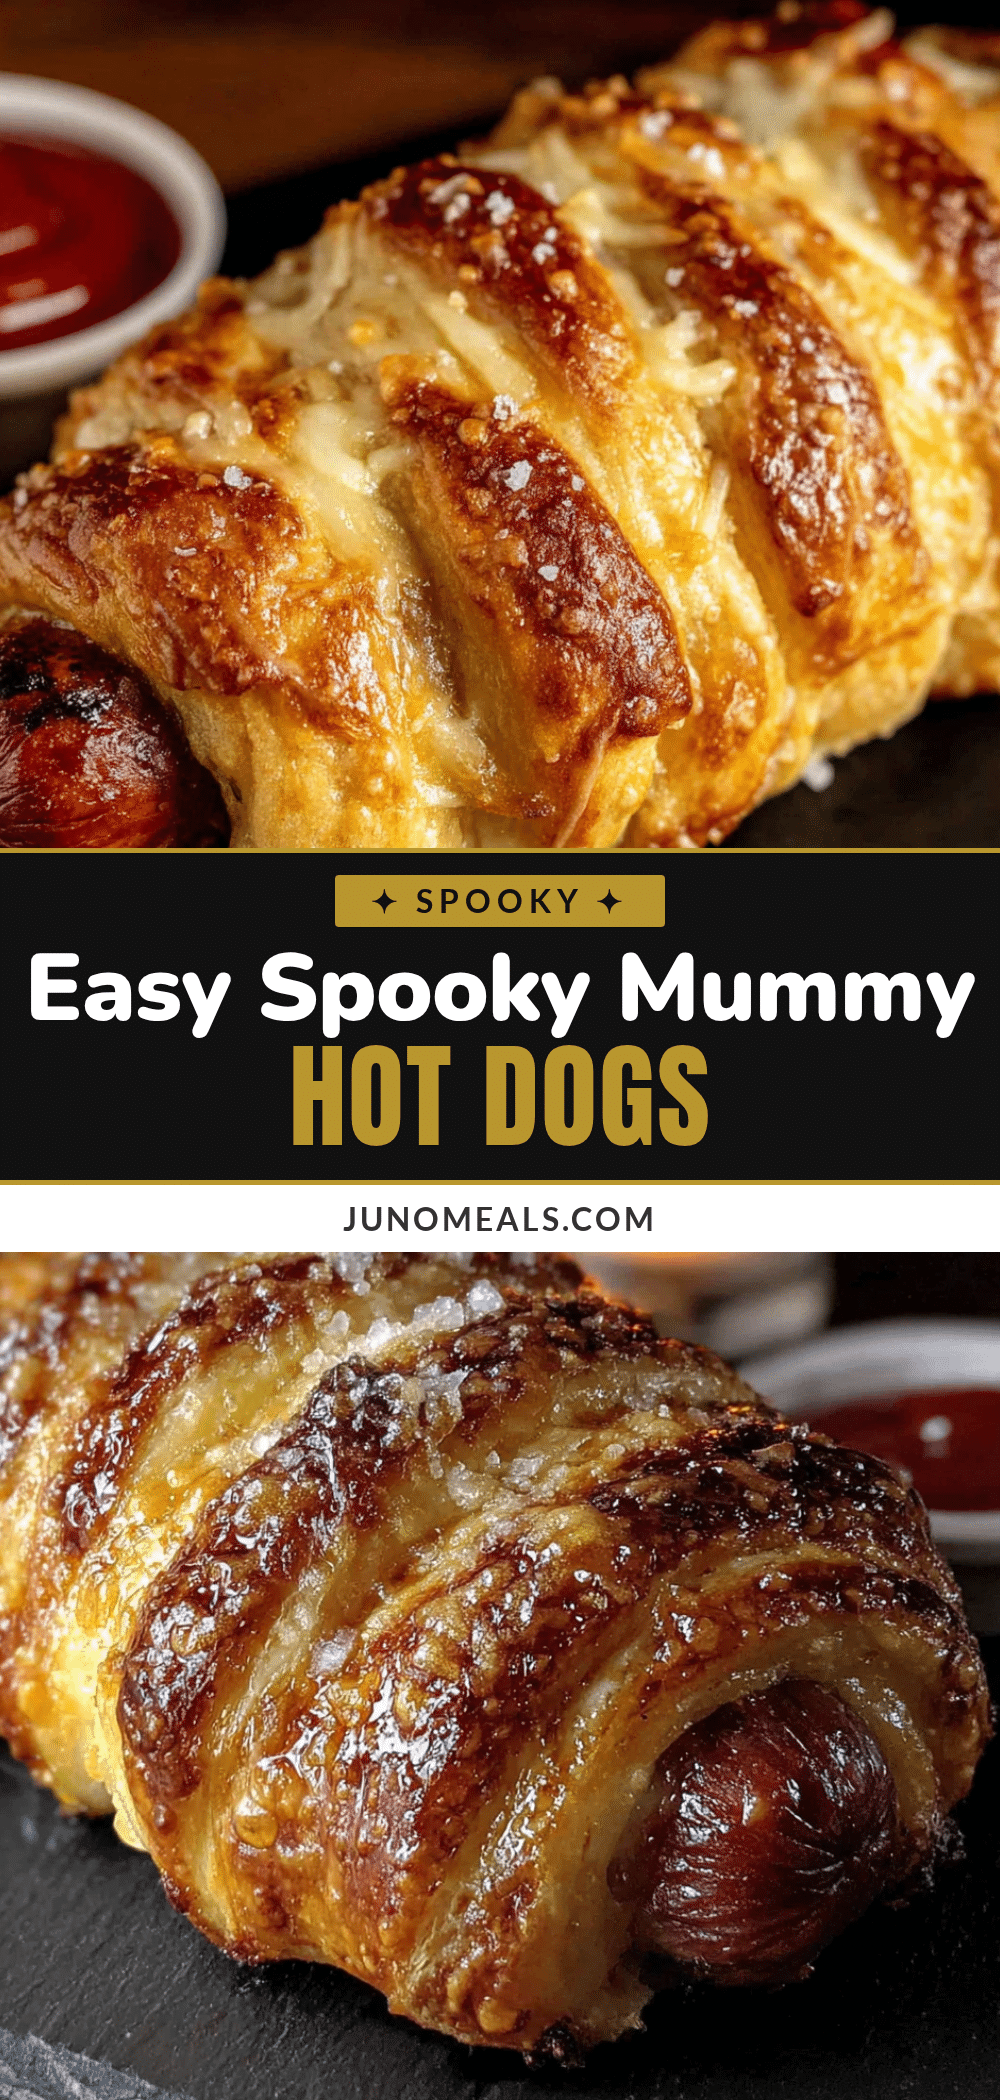
Easy Mummy Hot Dogs: Best Crescent Dough Recipe in 20 Min
These easy mummy hot dogs are wrapped in crescent dough and baked until golden, making a fun and quick Halloween snack or weeknight dinner that kids and adults love.
- Prep Time: 10 minutes
- Cook Time: 12 minutes
- Total Time: 22 minutes
- Yield: 8 servings 1x
- Category: Appetizer
- Cuisine: American
Ingredients
- 8 standard-size hot dogs
- 1 can (8-count) crescent roll dough
- Yellow mustard (for eyes)
- Optional: cooking spray or melted butter for brushing
- Optional: everything bagel seasoning or sesame seeds
- Optional: cheese slices or cheese sticks
Instructions
- Preheat oven to 375°F (190°C). Line a baking sheet with parchment paper or a silicone mat.
- Unroll the crescent dough and separate into 8 triangles along the perforated lines.
- Using a sharp knife or pizza cutter, slice each triangle lengthwise into 3-4 thin strips (about ½-inch wide).
- Take one hot dog and wrap a dough strip around it, leaving a 1-inch gap near the top for the face. Overlap strips slightly and don’t wrap too tightly.
- Place wrapped hot dogs on the prepared baking sheet, leaving about 1 inch of space between each.
- Optional: Brush tops with melted butter or egg wash for a golden crust.
- Bake for 10-12 minutes until dough is golden brown and puffed.
- Remove from oven and let cool for 2-3 minutes. Use a toothpick or knife tip to dab small dots of mustard on the unwrapped section for eyes.
- Serve immediately.
Notes
For best results, let hot dogs sit at room temperature for 5 minutes before wrapping. Don’t overwork the dough. If strips break, press them back together. Add mustard eyes after cooling slightly to prevent melting.
Nutrition
- Serving Size: 1 mummy hot dog
- Calories: 220
- Sugar: 4
- Sodium: 620
- Fat: 14
- Saturated Fat: 5
- Carbohydrates: 18
- Protein: 7
Keywords: mummy hot dogs, crescent dough, Halloween recipe, easy snack, kid-friendly


