The sound of a package of crescent rolls being popped open — that soft *thwump* and the cardboard tube cracking — is the official start of Halloween in my kitchen. It’s a sound that instantly takes me back to my first Halloween party as an adult, standing in my tiny apartment with a can of Pillsbury in one hand and a bag of Lil’ Smokies in the other, absolutely determined to make something that looked like it took effort. Spoiler alert: it didn’t. But that’s the whole point of these Easy Mummy Pigs in a Blanket. They look like you spent an hour wrapping little gauze strips around each sausage, but really? You’re just cutting dough into strips and having a ridiculously good time doing it. I remember pulling the first tray out of the oven, the little cheese eyes staring back at me, and thinking, “Okay, this is my kind of Halloween magic.” No fancy molds, no scary techniques, just a snack that makes people laugh and grab a second one before you’ve even set the plate down. Honestly, that first batch was gone in five minutes. And I knew right then I’d be making them every single year.
These mummy pigs aren’t just cute — they’re the kind of recipe that saves your Halloween sanity. You can whip them up in under 30 minutes, the ingredients are basically pantry staples, and they disappear faster than any candy bowl I’ve ever put out. Whether you’re hosting a spooky movie night or just need something fun for the kids to help with, these little guys deliver. And the best part? You don’t have to be a pastry chef to pull them off. If you can cut a strip of dough, you can make a mummy. It’s that simple.
So grab your hot dogs and let’s get rolling. Trust me, once you see those little cheese eyes staring up at you from the baking sheet, you’ll understand why this recipe has become my go-to for Halloween.
Why You’ll Love This Recipe
I’ve tested this recipe more times than I care to admit — through burnt edges, dough that wouldn’t stay put, and even a batch where the cheese eyes melted into oblivion. So when I say this version is foolproof, I mean it. Here’s why these Easy Mummy Pigs in a Blanket are about to become your Halloween MVP:
- Quick & Easy : From fridge to table in under 25 minutes. No complicated steps, no waiting around. Perfect for when the doorbell’s about to ring and you need snacks *now*.
- Simple Ingredients : Just five things — crescent rolls, mini hot dogs, cheese, and a couple pantry staples. You probably have everything already.
- Perfect for Halloween Parties : They’re cute, they’re themed, and they don’t require a costume. Kids love them, adults sneak them, and nobody judges you for eating four in a row.
- Crowd-Pleaser : I’ve brought these to potlucks, classroom parties, and game nights. They’re always the first thing to disappear. Always.
- Unbelievably Delicious : The flaky, buttery dough wrapped around a juicy little sausage with a hint of mustard — it’s comfort food in bite-sized form. The mummy wrapping keeps everything tender and perfectly baked.
What makes this recipe different from the dozens of others out there? It’s the little things. I’ve learned to cut the dough strips just wide enough so they don’t tear, to space the cheese eyes so they don’t slide off, and to bake them until the dough is golden but the bottoms don’t burn. It’s not just another version — it’s the version you’ll come back to year after year.
And honestly? There’s something about making food that looks like little monsters. It makes people smile. It makes the kitchen feel festive. It turns a simple snack into a memory. That’s why I keep making them, and that’s why you’ll love them too.
What Ingredients You Will Need
This recipe uses simple, everyday ingredients to turn a classic appetizer into something Halloween-worthy. No special trips to a fancy grocery store required — just the stuff you probably already have in your fridge and pantry.
Here’s your shopping list:
- 1 can (8 oz) refrigerated crescent roll dough — I use Pillsbury original, but any brand works. The key is getting the kind that’s already perforated into triangles — it makes cutting strips so much easier. (Pro tip: keep the dough cold until you’re ready to use it. Warm dough is sticky and harder to handle.)
- 12 mini hot dogs or cocktail sausages — Lil’ Smokies are my go-to. They’re the perfect size for one-bite mummies. You can also use regular hot dogs cut into thirds if that’s what you have.
- 12 small cheese dots for eyes — I use cheddar cheese slices and cut tiny circles with a straw. Cheese sticks cut into little rounds work too. (Adds a salty, melty bite that balances the dough perfectly.)
- 1 large egg, beaten — For the egg wash that gives the mummies that golden, glossy finish. (Use a pastry brush for even coverage.)
- 1 tablespoon yellow mustard (optional) — I like to add a tiny dab under the cheese eyes. It gives a little tang and helps the cheese stick. Totally optional, but I love it.
That’s it. Five ingredients. No obscure spices, no specialty items. Just the basics that come together to make something that looks way more complicated than it is.
Ingredient Selection Tips:
- Crescent roll dough — Look for cans that feel cold in the store. If the dough is room temperature, the layers won’t separate as cleanly. I prefer the original style, not the buttery or flaky versions — they hold up better during wrapping.
- Mini hot dogs — I like the smoky flavor of beef Lil’ Smokies, but turkey or chicken versions work great too. Just avoid the ones with cheese inside — they get too messy when baked.
- Cheese — Cheddar melts beautifully and gives a nice orange color that pops against the golden dough. Pepper jack works if you want a little heat. Avoid pre-shredded cheese — it doesn’t melt as smoothly.
Substitution Guidance:
- For a gluten-free version, use gluten-free crescent roll dough (available at most major grocery stores) or gluten-free puff pastry sheets cut into strips.
- For a dairy-free option, use dairy-free crescent roll dough and skip the cheese eyes (or use dairy-free cheese slices).
- For a vegetarian alternative, swap the hot dogs for vegetarian cocktail sausages or even carrot sticks cut to size and parboiled.
If you’re looking for another party-friendly recipe that’s just as simple, you might enjoy these mini lemon blueberry cheesecakes — they’re also perfect for gatherings and use everyday ingredients.
Equipment Needed
You don’t need a fully stocked kitchen to make these mummies. Here’s what I use every time:
- Baking sheet — A standard half-sheet pan works perfectly. Line it with parchment paper or a silicone baking mat for easy cleanup. (Trust me on the parchment — melted cheese is a pain to scrape off.)
- Sharp knife or pizza cutter — For cutting the crescent roll dough into strips. A pizza cutter gives you cleaner edges, but a regular knife works fine.
- Pastry brush — For applying the egg wash. A silicone brush is easiest to clean, but a regular bristle brush works too.
- Small round cutter or straw — For cutting the cheese into eyes. A regular drinking straw works surprisingly well — just press and twist.
- Cutting board — For working with the dough. A clean, dry surface is all you need.
- Small bowl — For beating the egg.
- Tongs — For placing the hot dogs on the baking sheet without burning your fingers. (I’ve used my hands in a pinch, but tongs are safer.)
Budget-Friendly Options: If you don’t have a pizza cutter, a butter knife works perfectly. No pastry brush? Use a clean finger or the back of a spoon to spread the egg wash. No straw for cheese eyes? Use the tip of a sharp knife to cut tiny squares — they look just as cute.
I’ve made these mummies in a friend’s tiny apartment kitchen with nothing but a butter knife and a cereal bowl. They turned out great. Don’t let missing equipment stop you.
Preparation Method
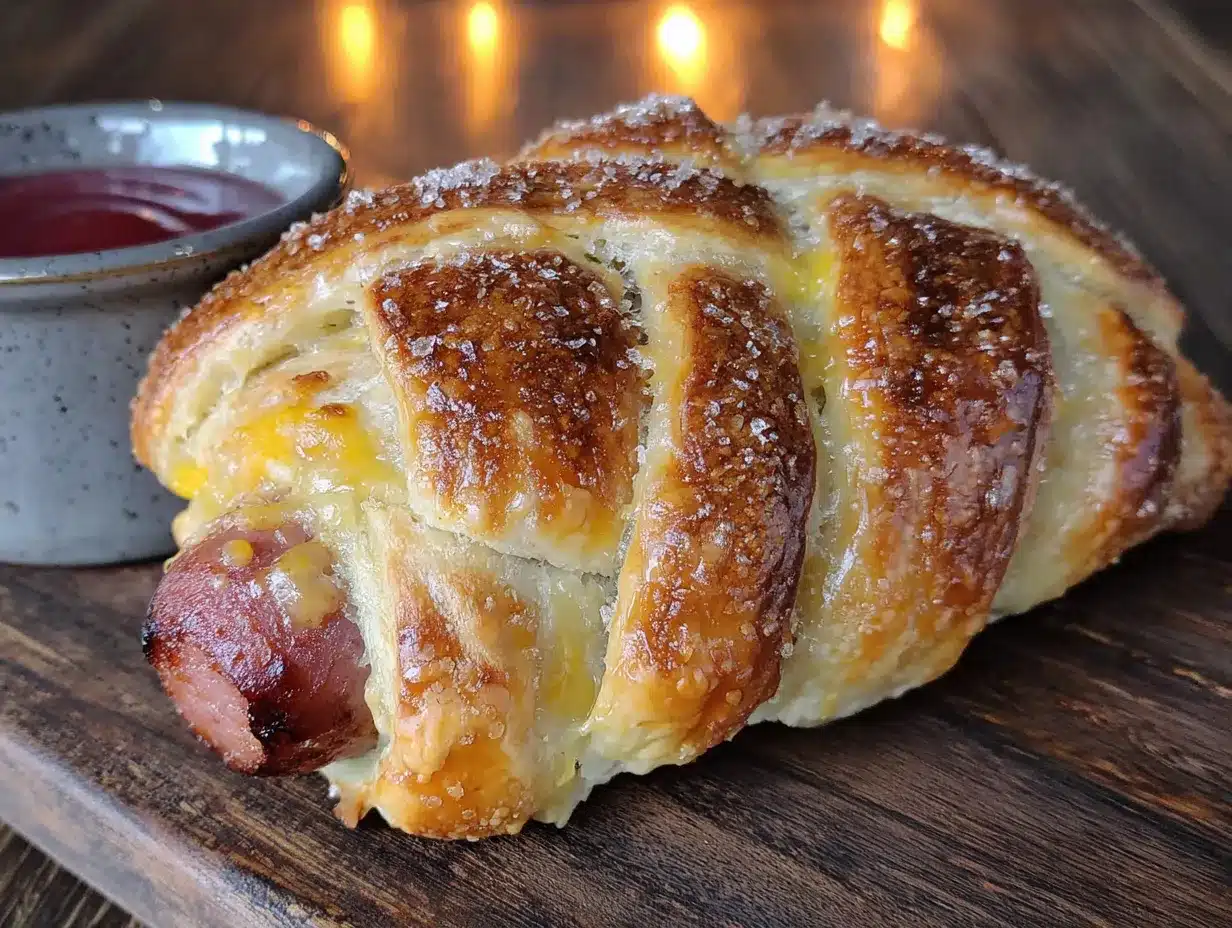
Let’s make some mummies. This whole process takes about 20 minutes from start to finish, and most of that is baking time.
- Preheat your oven to 375°F (190°C). Line a baking sheet with parchment paper. (Don’t skip the parchment — it makes cleanup so much easier.)
- Unroll the crescent roll dough onto a clean cutting board. You’ll see it’s already perforated into 8 triangles. Pinch the seams together gently to create one large rectangle of dough. Don’t press too hard — you just want to seal the seams, not compress the dough.
- Cut the dough into strips. Using a sharp knife or pizza cutter, slice the rectangle lengthwise into 12 strips, each about ½-inch wide. (If the dough feels sticky, dust your knife with a little flour.) The strips don’t need to be perfectly even — mummies aren’t supposed to look perfect.
- Prepare the hot dogs. If you’re using regular hot dogs, cut each one into 3 equal pieces. If you’re using Lil’ Smokies, they’re already the perfect size. Pat them dry with a paper towel — this helps the dough stick better.
- Wrap the mummies. Take one strip of dough and wrap it around a mini hot dog, starting at one end and spiraling toward the other. Leave a small gap near the top where the eyes will go. Don’t wrap too tightly — the dough needs room to expand as it bakes. (I learned this the hard way when my first batch burst open in the oven.)
- Place the wrapped mummies on the prepared baking sheet, spacing them about 1 inch apart. They don’t spread much, but a little breathing room helps them bake evenly.
- Add the egg wash. Beat the egg in a small bowl with 1 tablespoon of water. Using a pastry brush, lightly brush the top of each mummy with the egg wash. This gives them that beautiful golden-brown color. (Don’t drown them — a light coat is all you need.)
- Bake for 10-12 minutes, or until the dough is golden brown and the hot dogs are heated through. The bottoms should be lightly browned but not burnt. (Check at 10 minutes — ovens vary.)
- Add the eyes. Remove the baking sheet from the oven and let the mummies cool for 2-3 minutes. While they’re still warm, press a small cheese dot onto each mummy in the gap you left earlier. If you’re using mustard, add a tiny dab under the cheese to help it stick. The warmth of the dough will soften the cheese just enough to hold it in place.
- Serve immediately. These are best eaten warm, when the dough is flaky and the cheese is still slightly melted. (Though I’ve been known to eat them cold the next day — no judgment.)
Sensory Cues: When the mummies are done, the dough should be puffed and golden, with visible layers. You’ll smell that buttery, toasted aroma that makes crescent rolls so irresistible. The cheese eyes should be soft but not melted into puddles. If the cheese has completely disappeared, they baked a minute too long — still delicious, just less mummy-like.
Personal Tip: I like to work in batches of 4 mummies at a time. Wrapping all 12 at once can feel tedious, but breaking it into smaller groups keeps it fun. Plus, it gives you a chance to adjust your wrapping technique if the first few aren’t perfect.
Cooking Tips & Techniques
After more batches of these than I can count, I’ve collected a few tricks that make the process smoother and the results better. Here’s what I’ve learned:
Keep the dough cold. Crescent roll dough gets sticky and hard to work with once it warms up. If you’re a slow wrapper (like me), pop the dough back in the fridge for 5 minutes between batches. It makes a huge difference.
Don’t over-wrap. I know it’s tempting to use the whole strip of dough, but leaving a little gap for the eyes is essential. If you wrap too tightly, the dough can burst as it bakes, and you’ll end up with a naked hot dog. (Been there. It’s sad.)
Space the cheese eyes carefully. Place them about ½ inch apart on the gap you left. If they’re too close together, they’ll melt into one big cheese blob. If they’re too far apart, the mummy looks like it has a unibrow. Aim for two distinct dots.
Use a timer, not your eyes. The difference between perfectly golden mummies and burnt ones is about 90 seconds. Set a timer for 10 minutes, check, and add more time in 1-minute increments if needed. Your nose will also tell you — if you smell toast, they’re done.
Common Mistake to Avoid: Don’t skip the egg wash. I did once because I was in a hurry, and the mummies came out pale and sad-looking. The egg wash is what gives them that appetizing golden glow. It’s worth the extra 30 seconds.
Multitasking Strategy: While the first batch is baking, prep the second batch on a separate piece of parchment paper. That way, you can slide the second batch onto the baking sheet as soon as the first one comes out. This keeps the process moving and ensures everyone gets warm mummies.
If you’re looking for more easy appetizer ideas, check out the full recipe collection for more crowd-pleasing options.
Variations & Adaptations
One of the best things about this recipe is how easy it is to customize. Here are some variations I’ve tried and loved:
Spicy Mummies: Add a thin slice of jalapeño under the cheese eye for a little heat. Or mix a pinch of cayenne pepper into the egg wash before brushing. The spice pairs surprisingly well with the buttery dough.
Cheese-Stuffed Mummies: Cut a small slit in the side of each hot dog and stuff it with a thin strip of cheddar or pepper jack before wrapping. The cheese oozes out slightly as it bakes, giving the mummies a gooey, delicious surprise.
Puff Pastry Mummies: Swap the crescent roll dough for puff pastry sheets. Cut the pastry into strips and wrap the same way. The result is flakier and more buttery — perfect for a fancier Halloween party. (Baking time may increase by 2-3 minutes.)
Gluten-Free Version: Use gluten-free crescent roll dough or gluten-free puff pastry. The texture will be slightly different — a bit more crumbly — but the flavor is still great. Just handle the dough gently to avoid tearing.
Veggie Mummies: Replace the hot dogs with cooked carrot sticks or firm tofu strips marinated in soy sauce and smoked paprika. Bake the same way. They won’t taste exactly like the original, but they’re a fun, healthier alternative.
Sweet Mummies: For a dessert twist, use cocktail sausages? No — use banana slices wrapped in cinnamon-sugar dusted crescent strips. Bake as directed and drizzle with a little melted chocolate for eyes. It’s weirdly good, I promise.
My personal favorite variation? The spicy cheese-stuffed version. I made it for a Halloween party last year and they vanished before the regular ones. Something about that little kick of heat makes them addictive.
Serving & Storage Suggestions
These mummies are best served warm, straight from the oven. The dough is flaky, the hot dog is juicy, and the cheese eyes are perfectly soft. Here’s how to make them shine:
Serving Temperature: Serve immediately after adding the cheese eyes. If you’re making a big batch, keep the finished mummies on a warm plate in a 200°F (93°C) oven while you finish the rest. They’ll stay warm for up to 30 minutes without drying out.
Presentation Ideas: Arrange the mummies on a platter lined with black or orange napkins for a festive look. Add a small bowl of ketchup or mustard for dipping — the red and yellow colors look great against the golden mummies. For extra Halloween vibes, scatter a few candy corn or pretzel spiders around the platter.
Complementary Dishes: These pair perfectly with a bowl of pumpkin soup, a simple green salad, or a plate of mini lemon blueberry cheesecakes for dessert. The tangy cheesecake balances the savory mummies beautifully.
Storage Instructions: Leftover mummies can be stored in an airtight container in the refrigerator for up to 3 days. The dough will soften slightly, but they’ll still taste great. To reheat, place them on a baking sheet in a 350°F (175°C) oven for 5-7 minutes, or until warmed through. Avoid the microwave — it makes the dough soggy.
Freezer Instructions: You can freeze unbaked mummies. Arrange them on a baking sheet and freeze until solid, then transfer to a freezer bag. Bake from frozen at 375°F (190°C) for 12-15 minutes, adding the cheese eyes after baking. They’ll keep for up to 2 months.
Flavor Development: Honestly, these are best fresh. The dough loses its flakiness after a day in the fridge. But if you have leftovers, they make a great lunchbox snack — just don’t expect the same texture as fresh-baked.
Nutritional Information & Benefits
Let’s be real: these are a treat, not a health food. But here’s what you’re getting in each mummy (based on a serving size of 2 mummies):
- Calories: Approximately 220-250
- Protein: 8-10g
- Carbohydrates: 18-20g
- Fat: 14-16g
- Sodium: 500-600mg
Health Benefits of Key Ingredients:
- Hot dogs provide a decent amount of protein, which helps keep you full and satisfied. (Opt for lower-sodium versions if you’re watching your salt intake.)
- Crescent roll dough offers carbohydrates for quick energy — perfect for fueling a night of trick-or-treating or partying.
- Cheese adds calcium and a little extra protein. Even a small amount contributes to bone health.
Dietary Considerations:
- Not gluten-free (unless using gluten-free dough)
- Contains dairy (unless using dairy-free cheese)
- Contains eggs (in the egg wash)
- Can be made vegetarian with plant-based hot dogs
My Personal Perspective: I don’t make these every week — they’re a special occasion thing. But I believe in enjoying food without guilt. One batch of mummy pigs isn’t going to derail anyone’s health goals. They’re fun, they’re festive, and they bring people together. That counts for something.
Conclusion
These Easy Mummy Pigs in a Blanket are proof that Halloween snacks don’t have to be complicated to be memorable. With just five ingredients and 25 minutes, you can create something that looks like it came from a spooky bakery — but tastes like the comfort food you already love.
I love this recipe because it’s forgiving. If your strips are uneven, your mummies look rustic. If your cheese eyes slide a little, they look mischievous. There’s no wrong way to make a mummy, and that’s the beauty of it. It’s a recipe that invites creativity, not perfection.
So go ahead — try them your way. Add extra cheese. Spice them up. Make them sweet. Experiment and see what makes you smile. And when you do, I’d love to hear about it. Drop a comment below, share a photo, or tell me about your favorite Halloween snack tradition. Let’s keep the conversation going — because food is always better when we share it.
Now go make some mummies. Your Halloween table is waiting.
Frequently Asked Questions
Can I make these mummy pigs in a blanket ahead of time?
Yes! You can assemble them up to 24 hours in advance. Just wrap the hot dogs with dough, place them on the baking sheet, cover with plastic wrap, and refrigerate. Add the egg wash right before baking. If baking from cold, add 1-2 minutes to the baking time.
What can I use instead of crescent roll dough?
Puff pastry sheets work beautifully — just cut them into strips and wrap the same way. You can also use refrigerated pizza dough or even homemade pie crust. The texture will vary, but the concept stays the same.
How do I make the cheese eyes stay in place?
Press the cheese dots onto the warm mummies immediately after baking. The residual heat softens the cheese just enough to make it stick. For extra hold, add a tiny dab of mustard or ketchup under the cheese before pressing it on.
Can I freeze these mummy pigs in a blanket?
Absolutely. Freeze the unbaked mummies on a baking sheet until solid, then transfer to a freezer bag. Bake from frozen at 375°F (190°C) for 12-15 minutes. Add the cheese eyes after baking, while they’re still warm.
What dipping sauces go well with these?
Ketchup and mustard are classics. For a fun twist, try sriracha mayo, ranch dressing, or a spicy honey mustard. The sweet and spicy combo is surprisingly addictive.
Pin This Recipe!
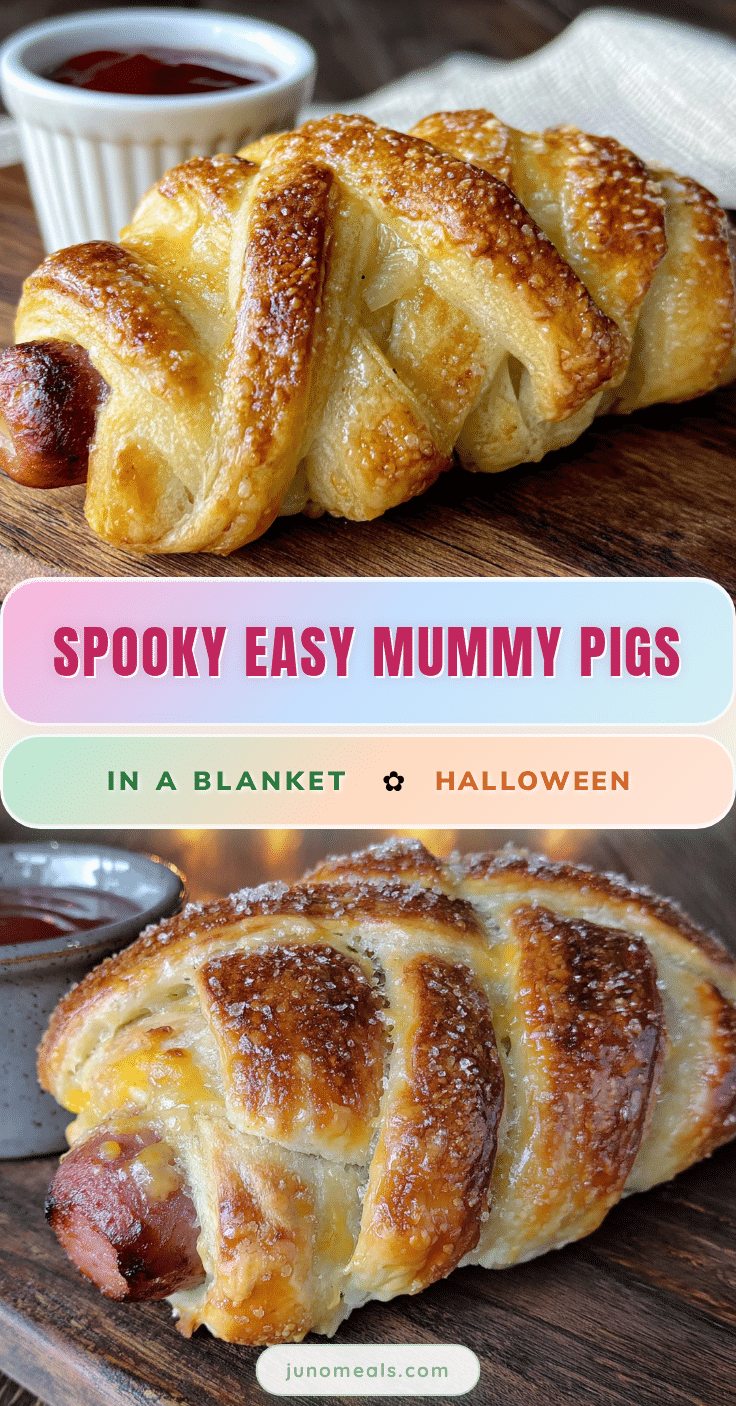
Easy Halloween Mummy Pigs in a Blanket Recipe
These Easy Mummy Pigs in a Blanket are a fun, festive Halloween snack made with just five ingredients in under 25 minutes. Crescent roll dough is wrapped around mini hot dogs like mummy bandages, then baked until golden and topped with cheese eyes.
- Prep Time: 10 minutes
- Cook Time: 12 minutes
- Total Time: 22 minutes
- Yield: 12 mummies (6 servings of 2 mummies each) 1x
- Category: Appetizer
- Cuisine: American
Ingredients
- 1 can (8 oz) refrigerated crescent roll dough
- 12 mini hot dogs or cocktail sausages (such as Lil’ Smokies)
- 12 small cheese dots for eyes (cheddar cheese slices cut with a straw)
- 1 large egg, beaten
- 1 tablespoon yellow mustard (optional)
Instructions
- Preheat your oven to 375°F (190°C). Line a baking sheet with parchment paper.
- Unroll the crescent roll dough onto a clean cutting board. Pinch the seams together gently to create one large rectangle of dough.
- Using a sharp knife or pizza cutter, slice the rectangle lengthwise into 12 strips, each about ½-inch wide.
- If using regular hot dogs, cut each one into 3 equal pieces. Pat the hot dogs dry with a paper towel.
- Take one strip of dough and wrap it around a mini hot dog, starting at one end and spiraling toward the other. Leave a small gap near the top where the eyes will go. Don’t wrap too tightly.
- Place the wrapped mummies on the prepared baking sheet, spacing them about 1 inch apart.
- Beat the egg with 1 tablespoon of water. Using a pastry brush, lightly brush the top of each mummy with the egg wash.
- Bake for 10-12 minutes, or until the dough is golden brown and the hot dogs are heated through.
- Remove the baking sheet from the oven and let the mummies cool for 2-3 minutes. While still warm, press a small cheese dot onto each mummy in the gap you left earlier. If using mustard, add a tiny dab under the cheese to help it stick.
- Serve immediately.
Notes
Keep the dough cold for easier handling. Don’t over-wrap the hot dogs—leave a gap for the eyes. For best results, serve warm. Unbaked mummies can be frozen for up to 2 months.
Nutrition
- Serving Size: 2 mummies
- Calories: 235
- Sugar: 4
- Sodium: 550
- Fat: 15
- Saturated Fat: 5
- Carbohydrates: 19
- Protein: 9
Keywords: Halloween appetizer, mummy pigs in a blanket, easy Halloween snack, crescent roll recipe, mini hot dogs, party food, kid-friendly Halloween recipe


