My neighbor Rosa watched me hauling a tray of sad, dry turkey sandwiches toward my car for a Friendsgiving potluck and didn’t say anything at first. Then she just shook her head, wiped her hands on her apron, and walked back into her kitchen. A few minutes later she came out with a warm, foil-wrapped dish and pressed it into my hands. “You bring this instead,” she said. “Trust me.”
Honestly, I almost felt offended for a second. I mean, I’d spent an hour on those sandwiches. But Rosa had been cooking for her family’s Sunday dinners since she was twelve, and you don’t argue with that kind of experience. So I left my sad tray on the counter and brought her mystery dish to the party instead.
That dish was the first version of these Cozy Friendsgiving Pull-Apart Turkey and Stuffing Sliders, and let me tell you—they nearly caused a scene. People were actually hovering around the serving dish, waiting for the next person to take one so they could grab another. The guy hosting the party asked me for the recipe three times before I even had a chance to eat one myself.
I called Rosa the next day, still buzzing from the compliments, and she walked me through it over the phone while her grandkids yelled in the background. “It’s nothing fancy,” she kept saying. But that’s exactly the point, isn’t it? These sliders take all the best parts of Thanksgiving—the tender turkey, the herby stuffing, the cranberry brightness—and tuck them into soft, buttery rolls that pull apart like they were made for sharing. Which they were.
Maybe you’ve been there too, staring down a mountain of Thanksgiving leftovers wondering what to do with them. Or maybe you’re planning a Friendsgiving and want something that feels special but doesn’t require carving a whole bird. Either way, these sliders are your answer. They’ve become my go-to for every Friendsgiving since that first night, and I honestly don’t think I’ll ever bring anything else.
Why You’ll Love This Recipe
Let me tell you why these sliders have earned a permanent spot in my Friendsgiving rotation. I’ve tested this recipe more times than I care to count—through one disastrous batch where the rolls turned into a soggy mess, through a version where the stuffing fell out everywhere, through a pan that I forgot to cover and ended up with burnt edges. Each failure taught me something, and this version is the result of all those lessons.
- Quick & Easy: These come together in about 30 minutes of active time. Perfect for when you’re juggling a million other dishes or showing up to a potluck with zero prep time.
- Simple Ingredients: You probably have most of these in your kitchen right now, especially if you’ve got leftover turkey and stuffing hanging around. No fancy grocery store runs required.
- Perfect for Friendsgiving: These sliders were basically invented for casual gatherings where everyone’s mingling and grazing. They’re handheld, shareable, and impossible to resist.
- Crowd-Pleaser: I’ve watched picky eaters, health-conscious friends, and people who “don’t really like Thanksgiving food” go back for thirds. Kids love them too, which is rare for a turkey dish.
- Unbelievably Delicious: The combination of soft rolls, savory stuffing, tender turkey, and that buttery herb topping creates something that tastes way more complicated than it actually is.
What makes this recipe different from all the other slider recipes out there? It’s the attention to texture. I learned the hard way that you can’t just pile everything onto rolls and hope for the best. The key is lightly toasting the rolls first so they don’t get soggy, using just enough gravy to add moisture without making everything mushy, and brushing the tops with a garlic-herb butter that creates this incredible golden crust. It’s not just another version—it’s the version I’d serve to anyone I wanted to impress.
This recipe isn’t just good—it’s the kind that makes people close their eyes after the first bite. You’ll see it happen. It’s comfort food reimagined as something you can hold in one hand while catching up with friends. Perfect for impressing guests without breaking a sweat.
What Ingredients You Will Need
This recipe uses simple, straightforward ingredients to deliver maximum flavor. Most of these are pantry staples, and you can easily swap things around based on what you have on hand. Here’s what you’ll need:
For the Sliders:
- 12-count package of soft slider rolls (I prefer King’s Hawaiian for their slight sweetness, but any soft roll works)
- 2 cups cooked turkey, shredded or chopped (leftover Thanksgiving turkey is perfect, but rotisserie chicken works great too)
- 1 ½ cups prepared stuffing (homemade or boxed—both work beautifully)
- ½ cup turkey gravy (store-bought is fine, just use a good quality brand)
- ½ cup whole berry cranberry sauce (adds those little bursts of tart sweetness)
- 6 slices of provolone or Swiss cheese (provolone melts more evenly, but Swiss adds nice nuttiness)
For the Garlic-Herb Butter Topping:
- ¼ cup unsalted butter, melted
- 2 cloves garlic, minced (or ½ teaspoon garlic powder in a pinch)
- 1 tablespoon fresh parsley, chopped (or 1 teaspoon dried)
- ½ teaspoon dried thyme
- ½ teaspoon dried rosemary
- ¼ teaspoon black pepper
- ¼ teaspoon salt
- 1 tablespoon grated Parmesan cheese (optional, but adds amazing flavor)
Ingredient Tips from My Kitchen:
For the rolls, I really recommend King’s Hawaiian if you can find them. Their slight sweetness balances the savory flavors perfectly. If you’re using leftover stuffing, make sure it’s not too wet—dry stuffing works better here because it absorbs some of the gravy without making everything soggy.
For the turkey, white meat gives you cleaner flavor, but dark meat adds more moisture. I actually like using a mix of both. If you don’t have leftover turkey, rotisserie chicken is a fantastic substitute—just shred it and you’re good to go.
The cranberry sauce is optional but highly recommended. Those little pockets of tart sweetness cut through the richness and make each bite more interesting. I prefer whole berry sauce, but jellied works too—just spread it thin.
Equipment Needed
You don’t need any fancy equipment for these sliders, which is part of why I love them. Here’s what you’ll need:
- 9×13 inch baking dish (a casserole dish works too, just make sure the rolls fit snugly)
- Sharp knife for cutting the rolls
- Small bowl for mixing the butter topping
- Pastry brush (or just use a spoon if you don’t have one—I’ve done it both ways)
- Aluminum foil for covering while baking
- Measuring cups and spoons
If you don’t have a 9×13 dish, you can use a large cast iron skillet or even a rimmed baking sheet. Just line it with foil for easy cleanup. And honestly, I’ve made these in a disposable aluminum pan when bringing them to potlucks—works perfectly and means one less dish to wash.
A pastry brush is nice to have for spreading the butter evenly, but I’ve used the back of a spoon in a pinch. It’s not as pretty, but it still tastes amazing. My favorite brush is a silicone one because it’s easy to clean and doesn’t shed bristles.
Preparation Method
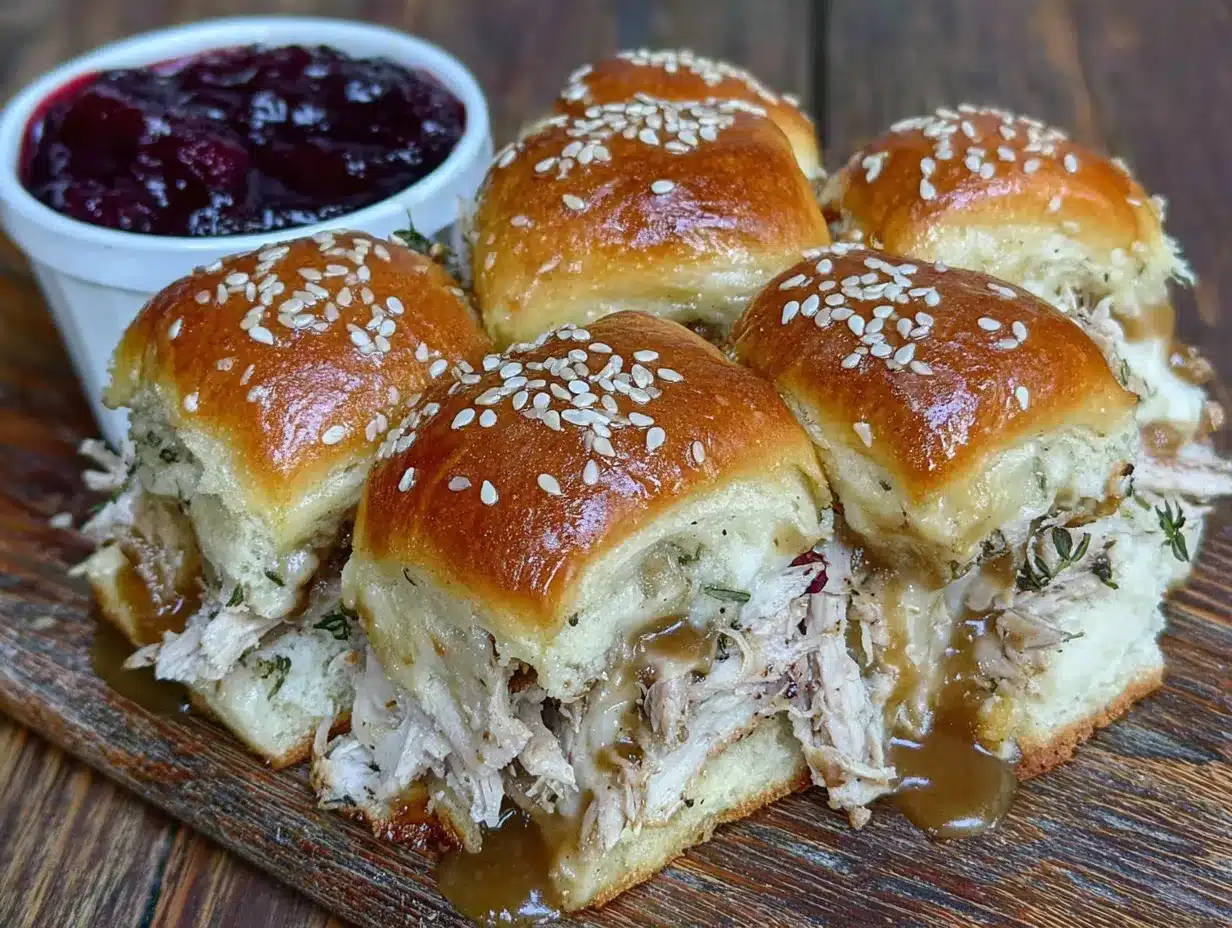
Alright, let’s make these sliders. I’ve broken this down step by step so you can follow along without any confusion. Trust me, after my first few attempts, I learned exactly what not to do.
- Preheat your oven to 350°F (175°C). While it’s heating up, take your rolls out of the package. Don’t separate them yet—you want to keep them connected as a whole slab. Using a sharp serrated knife, carefully cut the entire slab of rolls in half horizontally, like you’re splitting a giant hamburger bun. Set the top half aside.
- Place the bottom half of the rolls in your 9×13 baking dish. This is where I learned my first lesson: toast them first! Pop the dish in the oven for about 5 minutes while it’s preheating. This dries out the bottom slightly and prevents sogginess. You want them just barely golden, not brown.
- While the rolls are toasting, warm your gravy slightly. You don’t want it hot, just loose enough to spread. In a small bowl, mix your shredded turkey with about ¼ cup of the gravy. This keeps the meat moist without making the whole sandwich soggy.
- Remove the dish from the oven. Now start layering. First, spread your cranberry sauce evenly over the bottom rolls. I like to leave little pockets of it rather than spreading it completely smooth—those concentrated bursts of tartness are amazing.
- Layer on the cheese slices. Place them evenly across the cranberry sauce, overlapping slightly if needed. The cheese acts as a barrier that helps keep the rolls from getting too wet.
- Spread your turkey mixture evenly over the cheese. Use your fingers to distribute it if needed—just make sure it’s in an even layer.
- Top the turkey with your stuffing. Press it down gently so it stays in place. Don’t pack it too tight, but you want it to stay put when you add the top rolls.
- Place the top half of the rolls over the filling. Press down gently to help everything settle together.
- Make the garlic-herb butter. In your small bowl, combine the melted butter, minced garlic, parsley, thyme, rosemary, salt, pepper, and Parmesan cheese if using. Stir until everything’s combined. Brush this mixture generously over the top of the rolls. Don’t be shy—this is what creates that gorgeous golden crust.
- Cover the dish with foil and bake for 15 minutes. This steams everything together and melts the cheese perfectly. After 15 minutes, remove the foil and bake for another 5-8 minutes until the tops are golden brown and the edges are bubbly.
- Let them rest for 5 minutes before serving. This is the hardest part, I know. But if you try to pull them apart too soon, everything will fall apart. Those 5 minutes let the cheese set slightly and make the sliders much easier to handle.
You’ll know they’re done when the tops are golden brown, the cheese is visibly melted around the edges, and the whole kitchen smells like Thanksgiving. The rolls should feel slightly firm when you press on them, and you’ll see little bits of herb butter glistening on top.
Cooking Tips & Techniques
I’ve made these sliders at least two dozen times by now, and I’ve made pretty much every mistake you can imagine. Here’s what I’ve learned so you don’t have to repeat my failures.
The soggy bottom problem. My first attempt was a disaster—the rolls turned into a wet, mushy mess. The solution is twofold: toast the bottom rolls first, and don’t overdo the gravy. You want just enough to moisten the turkey, not drown it. Think of it as a light coating, not a sauce.
Cutting the rolls cleanly. Use a serrated knife and a gentle sawing motion. If you try to press straight down, you’ll squish the rolls. I ruined an entire package my second time because I was rushing. Take your time with this step.
Don’t skip the rest time. I know it’s tempting to dive right in, but those 5 minutes of resting make a huge difference. The cheese sets up just enough that each slider holds its shape when you pull it apart. I learned this when I got impatient and ended up with a pile of ingredients instead of neat little sandwiches.
Make ahead tip. You can assemble these completely the night before, cover them tightly, and refrigerate. Just add 5-10 minutes to the covered baking time since they’re starting cold. The butter topping should be added right before baking though—if you add it ahead of time, the rolls absorb it and lose that beautiful golden crust.
Multitasking strategy. While the rolls are toasting, prep your turkey mixture and cheese slices. While the assembled sliders are baking, make a quick salad or set out your other dishes. These sliders only need about 20 minutes of oven time total, so plan your timing accordingly.
Variations & Adaptations
One of the best things about this recipe is how flexible it is. Here are some variations I’ve tried and loved:
Vegetarian Version: Swap the turkey for sautéed mushrooms and roasted vegetables. I use a mix of cremini mushrooms, diced sweet potatoes, and Brussels sprouts. The texture is different but equally satisfying. Use vegetable gravy instead of turkey gravy.
Spicy Kick: Add a layer of pepper jack cheese instead of provolone, and mix some diced jalapeños into the cranberry sauce. My friend Marco brought this version to a game day party and it was gone in ten minutes.
Breakfast Sliders: This is a fun twist I discovered when I had leftover stuffing but no turkey. Use scrambled eggs and breakfast sausage instead of turkey, and swap the gravy for a drizzle of maple syrup over the top before baking. Perfect for a post-Thanksgiving brunch.
Gluten-Free Option: Use gluten-free slider rolls and make sure your stuffing and gravy are gluten-free as well. I’ve tested this with Schar gluten-free rolls and they work surprisingly well—just watch the baking time closely since gluten-free bread dries out faster.
Low-Carb Adaptation: Skip the rolls entirely and use large portobello mushroom caps as the “buns.” Roast them first to remove some moisture, then assemble and bake as directed. It’s a completely different dish, but surprisingly delicious.
Serving & Storage Suggestions
These sliders are best served warm, right after that 5-minute rest period. The cheese is perfectly melted, the rolls are soft but not soggy, and everything holds together beautifully. I like to arrange them on a large platter with the pull-apart seams visible so people can see exactly how to grab one.
What to serve with them:
- A simple green salad with a bright vinaigrette cuts through the richness
- Roasted vegetables like Brussels sprouts or green beans
- Cranberry sauce on the side for dipping (trust me on this)
- Sweet potato fries for a casual gathering
Storage: Leftover sliders keep well in the refrigerator for up to 3 days. Store them in an airtight container. The rolls will soften slightly, but the flavor is still fantastic. I actually think they’re even better the next day after the flavors have had time to meld together.
Reheating: The best way to reheat these is in the oven at 350°F for about 10 minutes, covered with foil. This brings back the warmth without drying out the rolls. The microwave works in a pinch, but the rolls will be softer and the cheese might get rubbery. If you’re reheating just one or two, the microwave is fine—just do 30-second intervals.
Freezing: You can freeze these assembled but unbaked. Wrap the dish tightly in plastic wrap, then foil, and freeze for up to 2 months. To bake, thaw overnight in the refrigerator, then bake as directed, adding 5-10 minutes to the covered time. I’ve done this for last-minute gatherings and it works beautifully.
Nutritional Information & Benefits
Here’s the honest truth about these sliders: they’re comfort food, not health food. But they’re made with real ingredients, and that counts for something. Per slider (based on 12 servings), here’s the approximate breakdown:
- Calories: 320
- Protein: 18g
- Carbohydrates: 28g
- Fat: 15g
- Fiber: 2g
- Sodium: 580mg
The turkey provides lean protein that keeps you full and satisfied. The cranberry sauce adds a dose of antioxidants, and the herbs in the butter topping bring anti-inflammatory benefits. If you use whole wheat rolls, you’ll add more fiber and nutrients.
For those watching their sodium, use low-sodium gravy and skip the added salt in the butter topping. You can also reduce the cheese or use a lower-fat version. But honestly? These are meant to be a treat. One slider is plenty satisfying, and the protein helps keep portions reasonable.
This recipe contains dairy (cheese, butter), gluten (rolls, stuffing), and potential allergens depending on your specific ingredients. Always check labels if you’re serving someone with food sensitivities.
Conclusion
These Cozy Friendsgiving Pull-Apart Turkey and Stuffing Sliders have become more than just a recipe in my kitchen—they’re a tradition. Every time I make them, I think about Rosa handing me that foil-wrapped dish and how one small act of neighborly kindness turned into something I now share with everyone I love.
The beauty of this recipe is that it’s completely forgiving. You can use leftover turkey or rotisserie chicken, homemade stuffing or boxed, whatever cheese you have in the fridge. It adapts to what you have and still turns out amazing. That’s the kind of recipe I think we all need more of—one that doesn’t require perfection, just good ingredients and a little bit of care.
I’d love to hear how these turn out for you. Did you add your own twist? Did your friends fight over the last one? Drop a comment below and let me know—I read every single one, and your variations might just inspire my next batch. And if you’re looking for more Friendsgiving ideas, my cranberry brie bites and pumpkin spice dip are always crowd favorites too.
Now go make these sliders. Your Friendsgiving table will thank you.
Frequently Asked Questions
Can I make these sliders ahead of time for a party?
Absolutely! Assemble them completely the night before, cover tightly with foil, and refrigerate. Add the butter topping right before baking, and add 5-10 minutes to the covered baking time since they’re starting cold.
What if I don’t have leftover turkey?
No problem at all. Rotisserie chicken works perfectly—just shred it and use it exactly as you would turkey. You can also use deli-sliced turkey in a pinch, though the texture will be different.
Can I use different types of cheese?
Definitely. Provolone and Swiss are my favorites, but cheddar, mozzarella, or even gouda work great. Just avoid cheeses that don’t melt well, like feta or goat cheese.
How do I prevent the sliders from getting soggy?
Three key tips: toast the bottom rolls first, don’t oversaturate the turkey with gravy, and let the sliders rest for 5 minutes after baking. The cheese layer also helps create a barrier between the rolls and the wet ingredients.
Can I freeze these sliders?
Yes! Freeze them unbaked, tightly wrapped in plastic wrap and foil, for up to 2 months. Thaw overnight in the refrigerator before baking as directed. I’ve done this for multiple gatherings and they always turn out great.
Pin This Recipe!
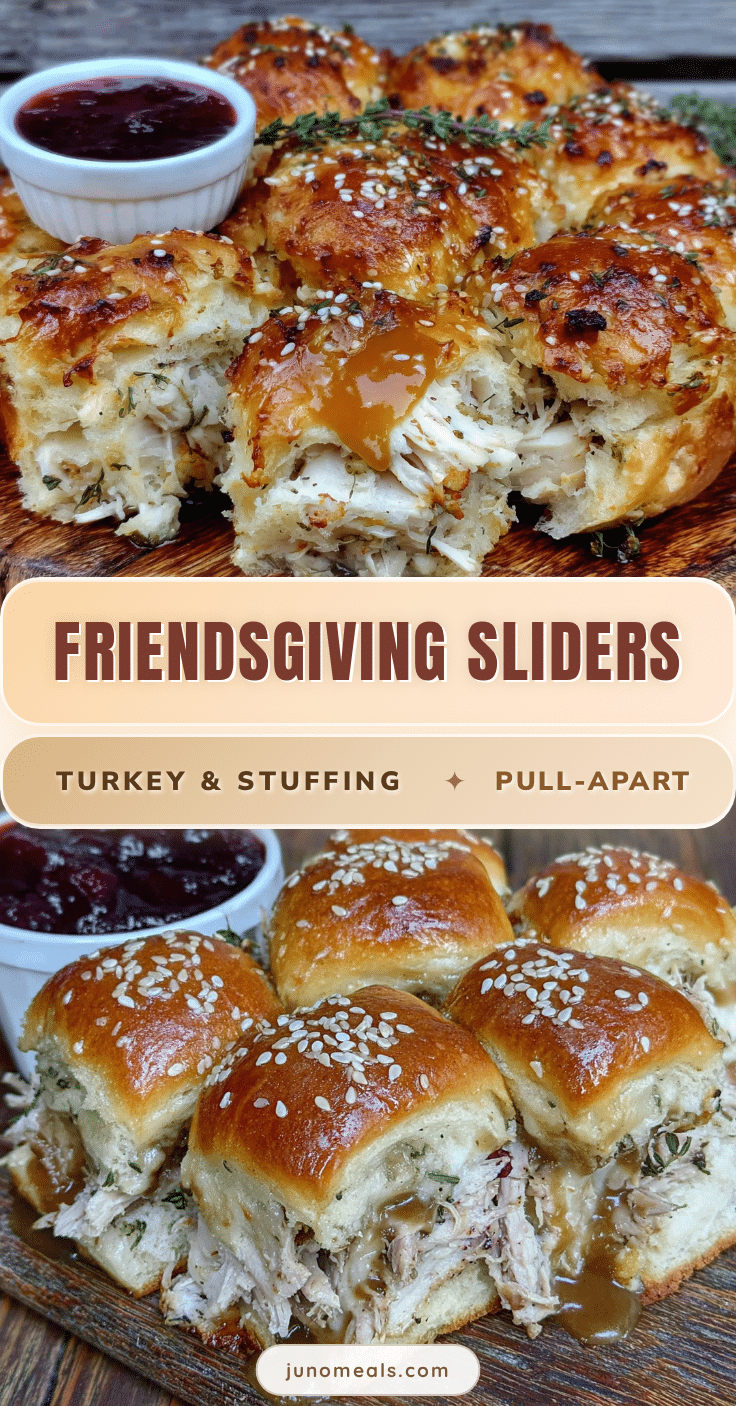
Cozy Friendsgiving Pull-Apart Turkey Stuffing Sliders
These sliders take all the best parts of Thanksgiving—tender turkey, herby stuffing, and cranberry brightness—and tuck them into soft, buttery rolls that pull apart like they were made for sharing. Perfect for Friendsgiving or using up leftovers.
- Prep Time: 30 minutes
- Cook Time: 20 minutes
- Total Time: 55 minutes
- Yield: 12 servings 1x
- Category: Main Course
- Cuisine: American
Ingredients
- 12-count package of soft slider rolls (preferably King’s Hawaiian)
- 2 cups cooked turkey, shredded or chopped
- 1 ½ cups prepared stuffing (homemade or boxed)
- ½ cup turkey gravy
- ½ cup whole berry cranberry sauce
- 6 slices provolone or Swiss cheese
- ¼ cup unsalted butter, melted
- 2 cloves garlic, minced (or ½ teaspoon garlic powder)
- 1 tablespoon fresh parsley, chopped (or 1 teaspoon dried)
- ½ teaspoon dried thyme
- ½ teaspoon dried rosemary
- ¼ teaspoon black pepper
- ¼ teaspoon salt
- 1 tablespoon grated Parmesan cheese (optional)
Instructions
- Preheat oven to 350°F (175°C). Keep rolls connected as a whole slab; using a serrated knife, cut slab in half horizontally. Set top half aside.
- Place bottom half of rolls in a 9×13 baking dish. Toast in the oven for about 5 minutes until just barely golden.
- While rolls toast, warm gravy slightly. In a small bowl, mix shredded turkey with about ¼ cup of the gravy.
- Remove dish from oven. Spread cranberry sauce evenly over bottom rolls, leaving small pockets.
- Layer cheese slices evenly over cranberry sauce, overlapping slightly if needed.
- Spread turkey mixture evenly over cheese.
- Top turkey with stuffing, pressing down gently to keep in place.
- Place top half of rolls over filling; press down gently.
- In a small bowl, combine melted butter, minced garlic, parsley, thyme, rosemary, salt, pepper, and Parmesan (if using). Brush mixture generously over top of rolls.
- Cover dish with foil and bake for 15 minutes. Remove foil and bake another 5-8 minutes until tops are golden brown and edges are bubbly.
- Let rest for 5 minutes before serving.
Notes
Toast bottom rolls first to prevent sogginess. Don’t oversaturate turkey with gravy. Let sliders rest 5 minutes after baking for easier handling. Can be assembled night before and refrigerated; add butter topping just before baking and add 5-10 minutes to covered baking time. Freeze unbaked for up to 2 months.
Nutrition
- Serving Size: 1 slider
- Calories: 320
- Sodium: 580
- Fat: 15
- Carbohydrates: 28
- Fiber: 2
- Protein: 18
Keywords: turkey sliders, stuffing sliders, Friendsgiving, Thanksgiving leftovers, pull-apart sliders, turkey stuffing sliders, holiday appetizer


