I want a slice of banana bread, but I also want pumpkin, and I refuse to pick one. That’s the kind of decision I make on a rainy Tuesday afternoon when the kitchen feels like the only place that makes sense. The bananas on the counter are practically begging to be used—brown spots everywhere, soft enough that they’re almost liquid inside. And there’s that half-can of pumpkin puree from last week’s baking session staring at me from the fridge. So I do what any reasonable person would do: I mash them together into one loaf pan and hope for the best.
Honestly, this is how most of my favorite recipes are born. Not from careful planning or Pinterest boards, but from staring at ingredients that need using and refusing to let them go to waste. The first time I made this Ultimate Moist Pumpkin Banana Walnut Bread, I wasn’t trying to create anything special. I was just trying to use up what I had. But then I took that first bite—warm, fragrant, with that perfect crumb that’s somehow both tender and sturdy—and I knew I’d stumbled onto something worth repeating.
The thing about combining pumpkin and banana is that they don’t fight each other. They complement. The banana brings sweetness and moisture, the pumpkin adds earthiness and that velvety texture, and together they create something that tastes like fall in a way that neither could achieve alone. It’s the kind of recipe that feels like a happy accident, but I’ve tested it enough times to know it’s no accident at all. Trust me on this one.
Why You’ll Love This Recipe
Let me tell you why this Ultimate Moist Pumpkin Banana Walnut Bread has become my go-to fall bake, and why it should be yours too.
- Quick & Easy : From start to finish, this comes together in about an hour and fifteen minutes. Most of that is baking time. The actual hands-on work takes maybe 15 minutes. Perfect for those days when you want something homemade but don’t have hours to spend.
- Simple Ingredients : You probably have most of these in your pantry right now. No weird specialty items, no trips to three different stores. Just good, basic baking staples that come together beautifully.
- Perfect for Fall Gatherings : This bread shows up at every Thanksgiving I host, every Friendsgiving I attend, and every cozy weekend brunch I plan. It’s the kind of thing people ask for by name.
- Crowd-Pleaser : I’ve served this to kids, adults, picky eaters, and people who claim they don’t like pumpkin. Every single person has asked for the recipe. Not exaggerating.
- Unbelievably Delicious : The texture is what gets me every time. It’s moist without being soggy, dense without being heavy. The walnuts add crunch, the pumpkin and banana create this incredible softness, and the whole thing tastes like comfort in loaf form.
What makes this recipe different from the dozens of other pumpkin banana bread recipes out there? It’s the balance. Most recipes lean too hard on one flavor or the other. This one lets both shine. The banana provides natural sweetness and moisture, while the pumpkin adds depth and that unmistakable fall flavor. I’ve tested the ratios more times than I can count, and this version hits the sweet spot every single time.
This isn’t just good bread. It’s the kind that makes you close your eyes after the first bite. The kind that fills your kitchen with a smell that makes everyone wander in asking, “What’s baking?” It’s comfort food at its finest—simple, honest, and absolutely delicious.
What Ingredients You Will Need
This recipe uses simple, wholesome ingredients that work together to create something truly special. Here’s what you’ll need and why each one matters.
For the Bread
- 1 ½ cups all-purpose flour (spooned and leveled for accuracy)
- 1 teaspoon baking soda (fresh is key—check your expiration date)
- ½ teaspoon baking powder
- ½ teaspoon salt (I prefer fine sea salt for baking)
- 1 teaspoon ground cinnamon
- ½ teaspoon ground nutmeg
- ½ teaspoon ground ginger
- ¼ teaspoon ground cloves
- 2 large eggs, room temperature
- ½ cup granulated sugar
- ½ cup packed brown sugar (light or dark both work; dark gives deeper flavor)
- ½ cup vegetable oil (or melted coconut oil for a subtle flavor twist)
- 1 cup mashed ripe banana (about 2 large or 3 medium very ripe bananas)
- ¾ cup pumpkin puree (not pumpkin pie filling—make sure it’s 100% pure pumpkin)
- 1 teaspoon vanilla extract
- ¾ cup chopped walnuts (plus extra for topping if you’re feeling fancy)
Ingredient Notes & Substitutions
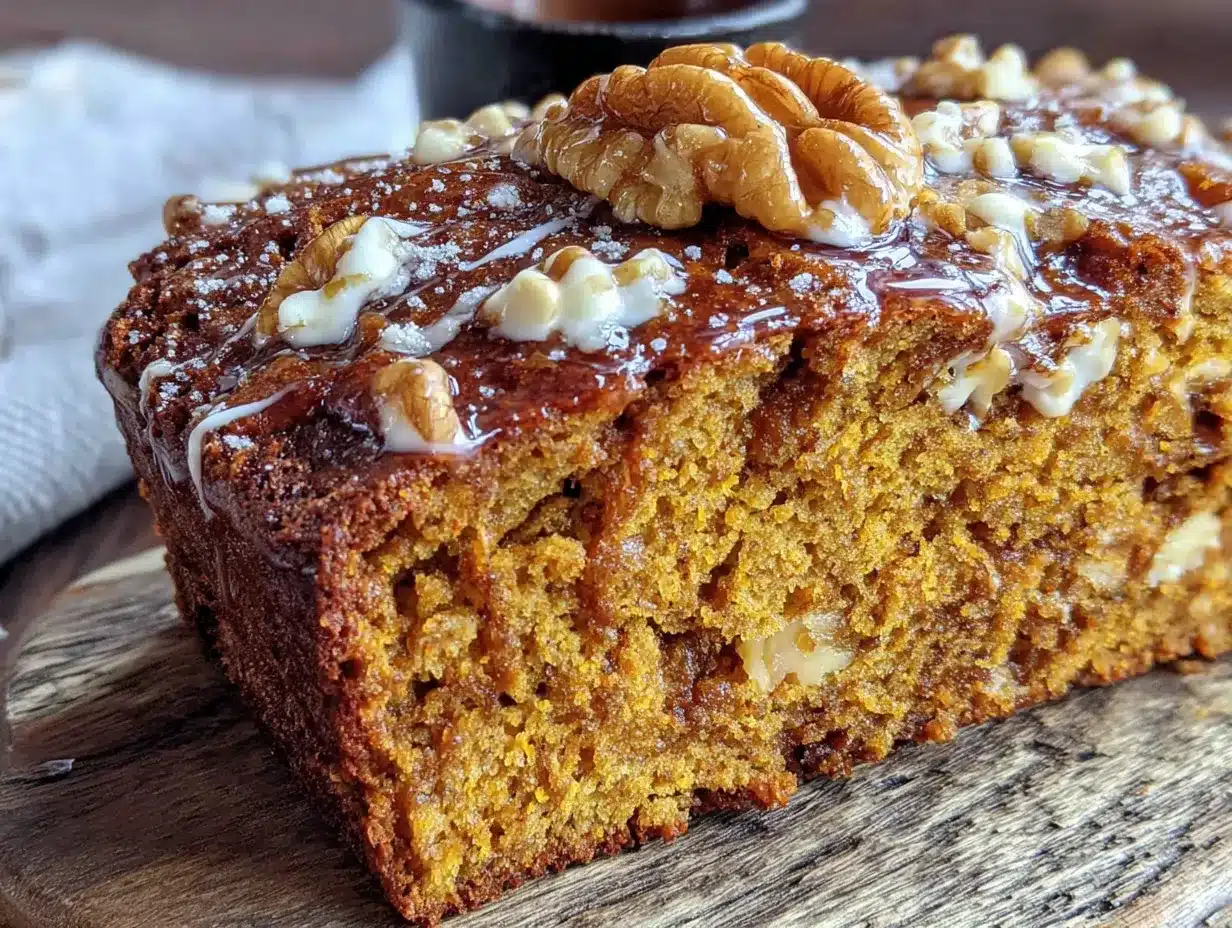
For the bananas, the riper the better. We’re talking brown spots, maybe even completely brown skin. That’s when they’re sweetest and easiest to mash. If your bananas aren’t ripe enough, you can speed things up by baking them at 300°F for 15-20 minutes until the skins turn black. Let them cool before using.
I recommend Libby’s pumpkin puree for consistent results—it’s thicker and less watery than some store brands. If you’re using a different brand, you might need to drain excess liquid by patting the puree with paper towels before measuring.
For the walnuts, toast them lightly before adding to the batter. Just 5 minutes in a dry pan over medium heat, stirring frequently. It brings out their natural oils and makes them infinitely more flavorful. I learned this the hard way after making a batch with raw walnuts that tasted, well, flat.
If you need a nut-free version, swap the walnuts for an equal amount of chocolate chips, dried cranberries, or simply leave them out. The bread will still be delicious, just with less crunch.
For a gluten-free option, use a 1:1 gluten-free baking flour blend. I’ve had good results with Bob’s Red Mill. Just don’t overmix the batter, as gluten-free flours can get gummy if overworked.
Equipment Needed
You don’t need a fancy kitchen to make this bread. Here’s what you’ll actually use:
- 9×5-inch loaf pan (standard size; if yours is smaller, fill only ¾ full and bake a few extra muffins with the remaining batter)
- Large mixing bowl (for dry ingredients)
- Medium mixing bowl (for wet ingredients)
- Whisk (for mixing dry ingredients evenly)
- Rubber spatula (for folding everything together without overmixing)
- Parchment paper (for lining the pan—trust me, this makes removal so much easier)
- Cooling rack (metal wire rack works best for even cooling)
- Fork or potato masher (for mashing bananas)
If you don’t have a loaf pan, you can use an 8×8-inch square pan and bake for about 30-35 minutes. Or make muffins—fill lined muffin tins about ¾ full and bake for 18-22 minutes. I’ve done all three, and each version works beautifully.
One tip I wish someone had told me earlier: invest in a good loaf pan. The cheap nonstick ones tend to warp over time, which leads to uneven baking. I use a heavy-duty aluminum pan and it’s never let me down.
Preparation Method
Let’s walk through this step by step. I’ll tell you exactly what to look for at each stage so you know you’re on the right track.
- Preheat your oven to 350°F (175°C). Position the rack in the center of the oven. Line your 9×5-inch loaf pan with parchment paper, leaving some overhang on the long sides. This creates little handles that make lifting the finished bread out effortless. Spray the parchment lightly with nonstick spray.
- Mash your bananas. In a medium bowl, mash those overripe bananas with a fork or potato masher until smooth. You want a few small lumps for texture, but mostly a uniform paste. Measure out 1 cup and set aside. If you have extra, save it for smoothies or freeze it for later.
- Whisk the dry ingredients together. In your large mixing bowl, combine the flour, baking soda, baking powder, salt, cinnamon, nutmeg, ginger, and cloves. Whisk thoroughly to distribute the spices evenly. This step matters more than you think—nobody wants a bite with a pocket of pure ginger.
- Mix the wet ingredients. In your medium bowl, whisk together the eggs, granulated sugar, and brown sugar until smooth and slightly thickened, about 1 minute. Add the oil, mashed banana, pumpkin puree, and vanilla extract. Whisk until everything is fully combined. The mixture should be smooth and a beautiful orange-brown color.
- Combine wet and dry ingredients. Pour the wet mixture into the dry ingredients. Use your rubber spatula to fold everything together gently. Here’s the most important part: stop mixing as soon as you no longer see streaks of flour. A few lumps are fine. Overmixing develops gluten and makes the bread tough. We want tender, not tough.
- Fold in the walnuts. Add the chopped walnuts to the batter and fold them in with just a few strokes. Don’t overmix here either. If you’re adding extra walnuts for the top, set aside a tablespoon or two.
- Pour the batter into the prepared pan. Use your spatula to spread it evenly. Tap the pan gently on the counter a few times to release any air bubbles. If you reserved walnuts, sprinkle them over the top now.
- Bake for 55-65 minutes. Start checking at 50 minutes. The bread is done when a toothpick inserted into the center comes out with just a few moist crumbs attached—not wet batter. The top should be golden brown and cracked beautifully. If the top is browning too quickly (around 45 minutes), tent loosely with aluminum foil.
- Cool in the pan for 15 minutes. This is crucial. If you try to remove it immediately, it might fall apart. After 15 minutes, use the parchment handles to lift the bread out and transfer it to a wire rack to cool completely.
- Wait before slicing. I know it’s tempting. The smell alone is torture. But letting the bread cool completely (at least 1 hour) allows the crumb to set properly. If you slice it while warm, it’ll be gummy and fall apart. Patience pays off here.
Cooking Tips & Techniques
After making this bread more times than I can count, I’ve learned a few things the hard way. Here are the tips that actually make a difference.
Don’t overmix the batter. I cannot stress this enough. Mix until just combined. Those last few streaks of flour? Fold them in gently. Overmixing creates tunnels in the bread and makes it dense and rubbery. We want it moist and tender, not tough.
Check your baking soda freshness. Baking soda loses potency over time. If yours has been sitting in the pantry for more than six months, it’s worth buying fresh. Here’s a quick test: drop a teaspoon of baking soda into a small bowl of vinegar. If it fizzes vigorously, it’s still good. If it barely bubbles, get a new box.
Room temperature eggs matter. Cold eggs can make the batter seize up and create an uneven texture. If you forgot to take them out of the fridge, place them in a bowl of warm water for 5 minutes. Problem solved.
Don’t skip the parchment paper. I once thought I could get away with just greasing the pan. The bread stuck so badly I had to eat it with a spoon right out of the pan. Not my proudest moment. Parchment paper with overhanging handles makes removal foolproof.
Toast your walnuts. This is one of those small steps that makes a huge difference. Raw walnuts can taste slightly bitter and a bit flat. Toasting them for 5 minutes in a dry skillet brings out their natural sweetness and adds a lovely crunch. Just watch them closely—they burn quickly.
Use a kitchen scale for accuracy. If you have one, weighing your flour is more accurate than scooping. One cup of all-purpose flour should weigh about 120 grams. Too much flour makes the bread dry, so if you’re scooping, spoon it into the measuring cup and level it off with a knife.
Let it cool completely. I know I said this already, but it bears repeating. The bread continues to cook from residual heat as it cools. Slicing too early releases steam and moisture, leaving you with a gummy texture. Trust the process.
Variations & Adaptations
This recipe is wonderfully flexible. Here are some variations I’ve tried and loved.
Chocolate Chip Version : Swap the walnuts for ¾ cup of semi-sweet or dark chocolate chips. The combination of pumpkin, banana, and chocolate is surprisingly amazing. I made this for a bake sale once and it sold out in 20 minutes.
Gluten-Free Adaptation : Use a 1:1 gluten-free baking flour blend. Add an extra tablespoon of oil to compensate for the lack of gluten structure. The texture will be slightly more delicate, but still delicious. I’ve served this to gluten-sensitive friends and they couldn’t tell the difference.
Vegan Version : Replace the eggs with flax eggs (2 tablespoons ground flaxseed mixed with 6 tablespoons water, let sit for 5 minutes). Use coconut oil instead of vegetable oil. The bread will be slightly denser but still incredibly moist and flavorful.
Spice It Up : Add ¼ teaspoon of cardamom or allspice for a warmer, more complex spice profile. I do this during the holidays and it gives the bread a chai-like quality that’s absolutely wonderful.
Streusel Topping : Mix ¼ cup flour, ¼ cup brown sugar, 2 tablespoons cold butter, and ¼ teaspoon cinnamon until crumbly. Sprinkle over the batter before baking. It adds a gorgeous crunchy top that makes the bread feel extra special.
Mini Loaves or Muffins : Divide the batter among 4 mini loaf pans (bake 30-35 minutes) or a 12-cup muffin tin (bake 18-22 minutes). Perfect for gifting or portion control. I often make mini loaves for neighbors during the holidays.
Serving & Storage Suggestions
This bread is incredibly versatile when it comes to serving. Here’s how I like to enjoy it.
Warm or Room Temperature : Both are excellent. Warm slices with a pat of butter melting into the crumb is pure comfort. Room temperature slices are perfect for packing in lunches or enjoying with a cup of coffee. If you want it warm, pop a slice in the microwave for 15 seconds or toast it lightly.
What to Serve With It : A smear of cream cheese or butter is classic and perfect. For a more decadent treat, try it with a drizzle of honey or maple syrup. It’s also wonderful alongside a hot cup of chai, coffee, or spiced apple cider. For brunch, serve it next to a mini lemon blueberry cheesecake for a beautiful dessert spread.
Storage : Wrap the cooled bread tightly in plastic wrap or aluminum foil and store at room temperature for up to 4 days. The flavors actually deepen after a day or two, so it might taste even better on day two. Just keep it away from direct sunlight and heat.
Freezer Instructions : This bread freezes beautifully. Wrap the cooled loaf (or individual slices) tightly in plastic wrap, then again in foil, and place in a freezer bag. It will keep for up to 3 months. To thaw, leave at room temperature for a few hours or microwave individual slices for 20-30 seconds.
Reheating : For the best texture, reheat slices in a toaster oven or regular oven at 300°F for 5-7 minutes. The microwave works in a pinch but can make the bread slightly rubbery. If you’re in a hurry, 15 seconds in the microwave is better than nothing.
Flavor Development : Here’s something interesting—the pumpkin and banana flavors meld together more after a day or two. The bread becomes even more moist and the spices settle into a beautiful harmony. So don’t be afraid to make it a day ahead if you’re planning for a gathering.
Nutritional Information & Benefits
Here’s the approximate nutritional breakdown for one slice (assuming 10 slices per loaf):
| Nutrient | Amount Per Slice |
|---|---|
| Calories | 285 |
| Total Fat | 14g |
| Saturated Fat | 2g |
| Cholesterol | 37mg |
| Sodium | 280mg |
| Total Carbohydrates | 37g |
| Dietary Fiber | 3g |
| Sugars | 20g |
| Protein | 5g |
| Vitamin A | 45% DV |
| Potassium | 8% DV |
This bread offers some genuine nutritional benefits beyond just being delicious. Pumpkin is packed with vitamin A, which supports eye health and immune function. Bananas provide potassium, which helps regulate blood pressure and muscle function. Walnuts are rich in omega-3 fatty acids, which are great for heart and brain health. And the cinnamon in this recipe has anti-inflammatory properties.
For those watching their sugar intake, you can reduce the granulated sugar to ⅓ cup without significantly affecting the texture. The bananas provide plenty of natural sweetness. This version is also easily made dairy-free if you skip the butter on top.
If you’re looking for more wholesome, delicious recipes, check out our full collection of recipes for more inspiration.
Conclusion
This Ultimate Moist Pumpkin Banana Walnut Bread is more than just a recipe—it’s the answer to what to bake when you want something that feels special but doesn’t require a trip to the store or hours of effort. It’s the bread that fills your home with the smell of fall, that makes your family wander into the kitchen asking what’s for dessert, that disappears faster than you expect every single time.
I love this recipe because it’s honest. It doesn’t pretend to be something it’s not. It’s simple, straightforward, and absolutely delicious. The kind of recipe that becomes a tradition, that you make year after year, that people start requesting before the leaves even change color.
Now I want to hear from you. Have you tried making this bread? Did you add your own twist? Drop a comment below and let me know how it turned out. Share your photos, your variations, your happy accidents. And if you loved it as much as I do, share this recipe with someone who needs a little fall comfort in their life. Happy baking, friends.
Frequently Asked Questions
Can I use frozen bananas for this recipe?
Absolutely. Thaw them completely, then drain off any excess liquid before mashing. Frozen bananas actually break down more easily and can make the bread even more moist. Just make sure to squeeze out some of the liquid so the batter doesn’t become too wet.
Why did my bread sink in the middle?
This usually happens for one of three reasons: the oven temperature was too low, the batter was overmixed, or the bread was underbaked. Make sure your oven is properly preheated to 350°F and use an oven thermometer to check accuracy. Also, resist the urge to open the oven door during the first 40 minutes of baking.
Can I make this recipe without walnuts?
Yes, absolutely. The bread works perfectly without them. You can replace the walnuts with chocolate chips, dried cranberries, raisins, or simply leave them out entirely. The texture will be slightly different but still delicious.
How do I know when the bread is fully baked?
Insert a toothpick or wooden skewer into the center of the loaf. It should come out with just a few moist crumbs attached—not wet batter. The top should be golden brown and cracked, and the edges should pull away slightly from the pan. If the toothpick comes out clean, it might be slightly overbaked, so aim for that moist crumb test.
Can I double this recipe?
Yes, and I often do. Double all ingredients and divide between two loaf pans. Bake time remains about the same, but start checking at 50 minutes. If you’re making multiple loaves, make sure they’re not touching in the oven for proper air circulation.
Pin This Recipe!
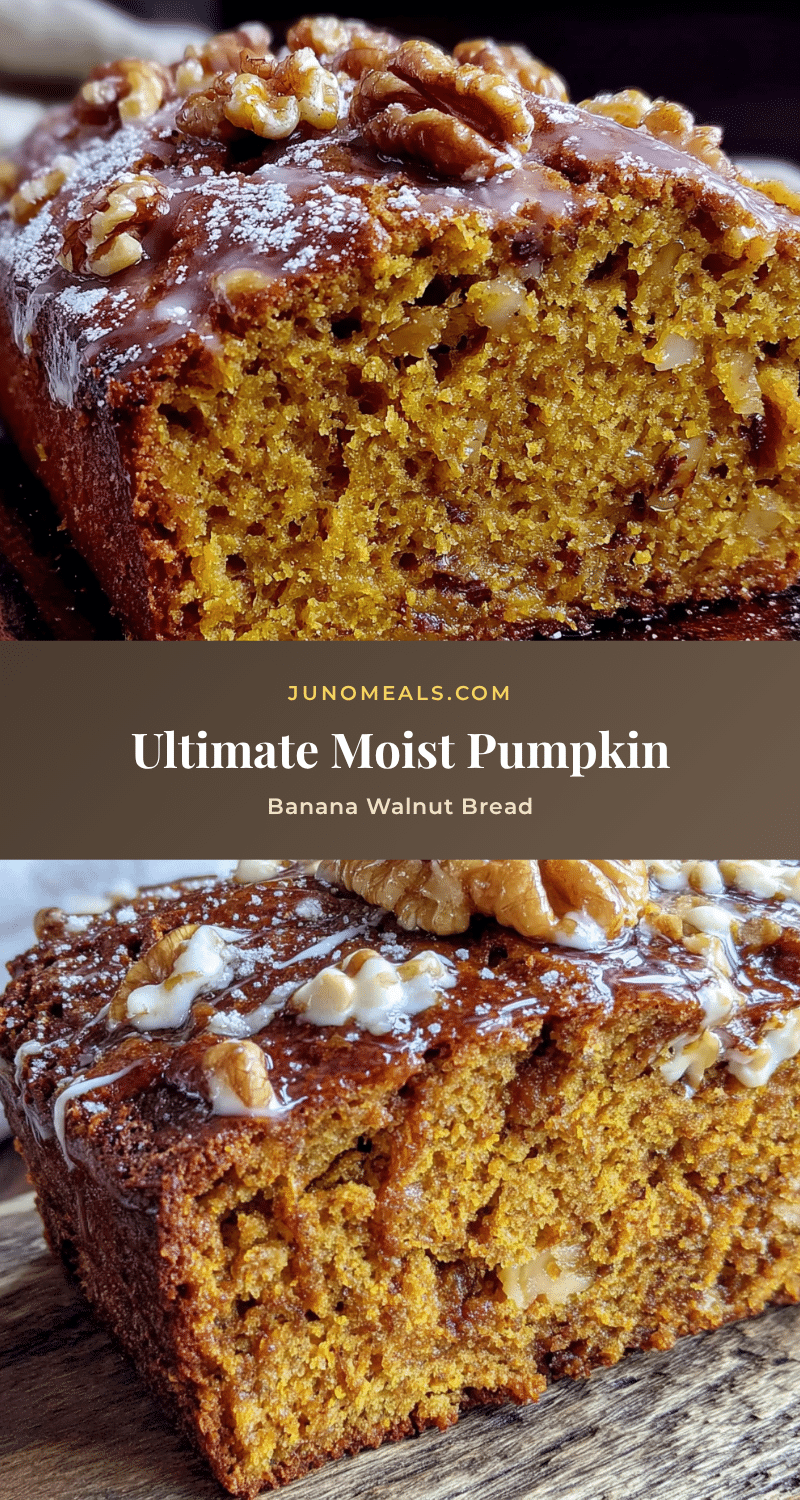
Ultimate Moist Pumpkin Banana Walnut Bread
This Ultimate Moist Pumpkin Banana Walnut Bread combines ripe bananas and pumpkin puree for a perfectly moist, tender loaf with warm fall spices and crunchy walnuts. It’s an easy, crowd-pleasing recipe that tastes like comfort in loaf form.
- Prep Time: 15 minutes
- Cook Time: 55-65 minutes
- Total Time: 1 hour 15 minutes
- Yield: 10 servings 1x
- Category: Bread
- Cuisine: American
Ingredients
- 1 ½ cups all-purpose flour (spooned and leveled)
- 1 teaspoon baking soda
- ½ teaspoon baking powder
- ½ teaspoon fine sea salt
- 1 teaspoon ground cinnamon
- ½ teaspoon ground nutmeg
- ½ teaspoon ground ginger
- ¼ teaspoon ground cloves
- 2 large eggs, room temperature
- ½ cup granulated sugar
- ½ cup packed brown sugar (light or dark)
- ½ cup vegetable oil (or melted coconut oil)
- 1 cup mashed ripe banana (about 2 large or 3 medium bananas)
- ¾ cup pumpkin puree (100% pure pumpkin, not pie filling)
- 1 teaspoon vanilla extract
- ¾ cup chopped walnuts (plus extra for topping)
Instructions
- Preheat oven to 350°F (175°C). Position rack in center. Line a 9×5-inch loaf pan with parchment paper, leaving overhang on long sides. Lightly spray parchment with nonstick spray.
- In a medium bowl, mash overripe bananas with a fork or potato masher until smooth with a few small lumps. Measure out 1 cup and set aside.
- In a large mixing bowl, whisk together flour, baking soda, baking powder, salt, cinnamon, nutmeg, ginger, and cloves until evenly distributed.
- In a medium bowl, whisk together eggs, granulated sugar, and brown sugar until smooth and slightly thickened, about 1 minute. Add oil, mashed banana, pumpkin puree, and vanilla extract. Whisk until fully combined and smooth.
- Pour wet mixture into dry ingredients. Use a rubber spatula to fold together gently until just combined—stop as soon as no streaks of flour remain. Do not overmix.
- Fold in chopped walnuts with a few strokes. Reserve a tablespoon or two for topping if desired.
- Pour batter into prepared pan and spread evenly. Tap pan gently on counter to release air bubbles. Sprinkle reserved walnuts on top if using.
- Bake for 55-65 minutes, starting to check at 50 minutes. Bread is done when a toothpick inserted in center comes out with a few moist crumbs (not wet batter). If top browns too quickly, tent loosely with foil at 45 minutes.
- Cool in pan for 15 minutes. Use parchment handles to lift bread out and transfer to a wire rack to cool completely.
- Let cool completely (at least 1 hour) before slicing to allow crumb to set properly.
Notes
For best results, use very ripe bananas (brown spots or fully brown). Toast walnuts lightly in a dry pan for 5 minutes before adding for enhanced flavor. Do not overmix batter to avoid tough bread. Let bread cool completely before slicing. Store wrapped at room temperature for up to 4 days or freeze for up to 3 months.
Nutrition
- Serving Size: 1 slice
- Calories: 285
- Sugar: 20
- Sodium: 280
- Fat: 14
- Saturated Fat: 2
- Carbohydrates: 37
- Fiber: 3
- Protein: 5
Keywords: pumpkin banana bread, fall recipe, moist banana bread, walnut bread, easy pumpkin bread, fall baking, quick bread


