The clock on the microwave blinked 4:47 PM, and I was staring down a kitchen counter covered in cupcake tins, a half-empty bag of flour, and the sinking realization that I had promised my niece I’d bring “something spooky” to her Halloween party in less than two hours. The cupcakes were a disaster—dry, lopsided, and frankly, not worth the frosting I’d have to waste covering them up. I needed a backup plan, and I needed it fast. That’s when I remembered the dirt cup puddings from my own childhood—those little cups of chocolate pudding with crushed Oreos that looked like potting soil. But this wasn’t just any Halloween party; it was her party, and she’d requested something “orange and spooky.” So I grabbed a box of instant vanilla pudding, a bottle of orange food coloring, and a bag of gummy worms, and I threw caution to the wind.
Honestly, I wasn’t sure it would work. I mean, orange dirt? It sounded like something you’d find in a Dr. Seuss book. But I stirred that neon orange pudding, crushed the cookies, and layered everything into clear plastic cups. By the time I stuck a gummy worm into each one, I had to admit—they looked ridiculous. And kind of perfect. They were the kind of silly, low-stress dessert that kids go absolutely crazy for, and honestly? The adults at that party couldn’t stop sneaking them either. That night, my niece asked me to make them every year. And I have. Every single Halloween since, I’ve made these Spooky Orange Dirt Cup Puddings with Gummy Worms, and they’ve never failed to steal the show.
These little puddings aren’t fancy. They’re not complicated. But they’re the kind of recipe that saves you when you’re out of time, out of patience, and just need something that works. And honestly? Sometimes that’s the best kind of recipe there is.
Why You’ll Love This Recipe
Let me tell you why these little cups of orange goodness have become my go-to Halloween dessert. I’ve made them for classroom parties, family gatherings, and even a few adult costume parties (where they disappeared almost as fast as the punch).
- Ready in Under 20 Minutes : No baking, no waiting, no stress. You can whip these up while the kids are still deciding what costume to wear.
- Simple Pantry Ingredients : You probably already have most of what you need. The only “special” item is orange food coloring, and honestly, you can find that at any grocery store.
- Perfect for Halloween Parties : They look spooky, they’re fun to eat, and they’re completely portable. Just snap a lid on and go.
- Crowd-Pleaser for All Ages : I’ve seen toddlers and grandparents alike go back for seconds. There’s something about gummy worms and pudding that just works.
- Completely Customizable : You can swap flavors, change the colors, or even make them dairy-free. I’ll show you how.
What makes these different from every other dirt cup recipe out there? It’s the color, honestly. The bright orange is unexpected and fun, and it ties into the Halloween theme without being too “on the nose.” Plus, the combination of creamy vanilla pudding and crunchy chocolate cookie crumbs is just unbeatable. It’s comfort food disguised as a spooky treat.
These puddings are the kind of dessert that makes you feel like a hero without actually working that hard. And honestly, isn’t that what we all want from a Halloween recipe?
What Ingredients You Will Need
This recipe uses simple, everyday ingredients to create something that looks like it came from a themed bakery. The magic is all in the layering and the color.
- Instant Vanilla Pudding Mix (2 boxes, 3.4 oz each) : I prefer Jell-O brand for consistent results, but any instant pudding will work. Do not use cook-and-serve pudding—it won’t set properly in the same timeframe.
- Cold Whole Milk (3 cups / 720 ml) : Whole milk gives the pudding a richer, creamier texture. You can use 2% in a pinch, but avoid skim milk—the pudding will be thinner.
- Orange Gel Food Coloring : Liquid food coloring works, but gel coloring gives you a vibrant orange without thinning the pudding. I use Wilton brand, and I start with just a few drops.
- Chocolate Sandwich Cookies (1 standard package, about 36 cookies) : Oreos are the classic choice. You’ll need the whole cookie—filling and all—for the “dirt” texture.
- Gummy Worms (1 bag, about 8 oz / 225 g) : Get the sour or the regular kind—both work great. I like the ones that are half green, half red for maximum spook factor.
- Clear Plastic Cups (8 oz / 240 ml size) : You need clear cups so the layers are visible. I use the ones from the party supply aisle—they’re cheap and disposable.
- Whipped Topping (optional, 1 cup / 240 ml) : For an extra creamy layer on top. I use Cool Whip, but homemade whipped cream works too.
- Halloween Sprinkles (optional) : For that extra festive touch. I like the ones with little pumpkins and ghosts.
Ingredient Selection Tips: When buying gummy worms, look for the ones that are individually shaped, not the long twisted kind. The individual worms are easier to stick into the pudding and look more like they’re crawling out of the dirt. For the cookies, I recommend the Double Stuf Oreos for extra chocolatey crumbs—they make the “dirt” richer.
Substitution Guidance: If you need a dairy-free version, use unsweetened almond milk or oat milk with a dairy-free instant pudding mix. Just note that the texture will be slightly less firm. For a gluten-free option, use gluten-free chocolate sandwich cookies—they’re available at most grocery stores now.
Equipment Needed
You don’t need much for this recipe, which is part of the beauty of it. Here’s what you’ll need:
- Large Mixing Bowl : For whisking the pudding. A glass or stainless steel bowl works best.
- Whisk : A balloon whisk works great for incorporating the pudding mix into the milk.
- Food Processor or Rolling Pin : For crushing the cookies. A food processor gives you even crumbs, but a rolling pin and a zip-top bag work just as well (and honestly, it’s more fun to smash them).
- Measuring Cups and Spoons : For accurate measurements.
- Small Spatula : For scraping the bowl clean.
- Clear Plastic Cups (8 oz / 240 ml) : I’ve used small mason jars and even wine glasses in a pinch. Just make sure they’re clear so the layers show.
- Refrigerator : For chilling the pudding. You’ll need at least 30 minutes for it to set.
Budget-Friendly Tip: Don’t have a food processor? No problem. Put the cookies in a sturdy zip-top bag and go to town with a rolling pin. It’s a great way to let the kids help, and honestly, it’s pretty satisfying after a long day.
Preparation Method
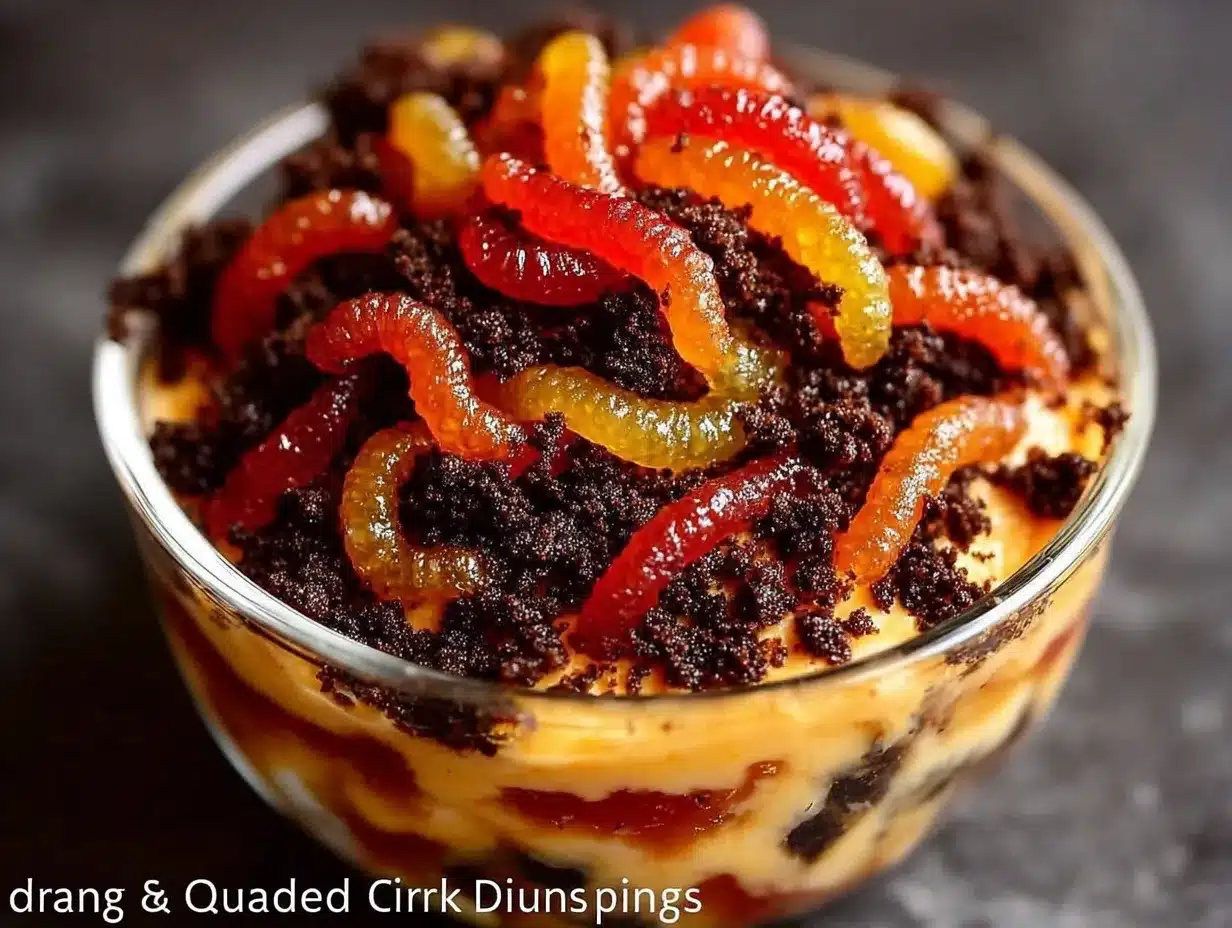
Follow these steps, and you’ll have spooky orange dirt cups in no time. I’ve tested this method dozens of times, and it works every single time.
- Crush the cookies (5 minutes): Place all 36 chocolate sandwich cookies in a food processor and pulse until you have fine crumbs. If using the bag-and-rolling-pin method, put the cookies in a large zip-top bag, seal it, and crush them with a rolling pin until you have a mix of fine crumbs and small chunks. You want some texture—not just dust. Set the crumbs aside in a bowl.
- Make the pudding (5 minutes): In a large mixing bowl, combine 3 cups (720 ml) of cold whole milk with both boxes of instant vanilla pudding mix. Whisk vigorously for about 2 minutes until the pudding begins to thicken. It should look smooth and slightly glossy.
- Add the orange color (1 minute): Add orange gel food coloring one drop at a time, stirring after each addition. Start with 3-4 drops and see where you’re at. I usually end up using about 6-8 drops for a vibrant Halloween orange. Remember, the color will look slightly lighter once it’s fully set, so go a shade darker than you think you want.
- Chill the pudding (10 minutes): Place the bowl of orange pudding in the refrigerator for about 10 minutes. This partial set is crucial—it makes the pudding thick enough to layer without running into the crumbs. You want it to be the consistency of thick yogurt.
- Layer the cups (10 minutes): Grab your clear cups. Start with a layer of crushed cookies at the bottom—about 2 tablespoons per cup. Then add a layer of orange pudding—about 3-4 tablespoons, depending on your cup size. Repeat with another layer of cookies and another layer of pudding. You want to end with a thin layer of cookie crumbs on top to look like dirt.
- Add the gummy worms (2 minutes): This is the fun part. Gently press 2-3 gummy worms into the top cookie layer of each cup, letting some of the worm “escape” over the edge of the cup. You want them to look like they’re crawling out of the dirt. Don’t push them all the way in—leave at least half of each worm visible.
- Chill completely (30-60 minutes): Place the finished cups in the refrigerator for at least 30 minutes, but an hour is better. This allows the pudding to set fully and the flavors to meld. The cookies will soften slightly, which creates a more cake-like texture.
- Add optional toppings (2 minutes): Right before serving, you can add a dollop of whipped topping and a sprinkle of Halloween sprinkles. This is purely decorative, but it does make them look extra festive.
Sensory Cue: When you whisk the pudding, you should feel it start to resist the whisk after about 90 seconds. That’s the thickening happening. The final texture should be smooth and creamy, with no lumps. If you see lumps, you under-whisked—give it another minute.
Personal Tip: I always make an extra cup for myself to test before the party. You know, quality control. It’s a tough job, but someone has to do it.
Cooking Tips & Techniques
After making these puddings for more Halloween parties than I can count, I’ve learned a few things the hard way. Here are my best tips:
- Don’t skip the partial chill. I made this mistake once when I was in a hurry. I layered the pudding while it was still thin, and the cookie crumbs turned into a soggy mess. That 10-minute chill in the fridge makes all the difference.
- Crush the cookies unevenly. You want a mix of fine crumbs and small chunks. The fine crumbs create the “dirt” texture, while the chunks add a satisfying crunch. If you pulverize everything into dust, it loses that contrast.
- Use gel food coloring, not liquid. Liquid food coloring will thin out your pudding and make it watery. Gel coloring gives you vibrant color without changing the texture. It’s worth the extra dollar.
- Wipe the cups clean. Before you add the top layer of cookie crumbs, use a damp paper towel to wipe any pudding smudges off the inside of the cup. This makes the layers look clean and professional.
- Make them the night before. These puddings actually taste better after sitting overnight in the fridge. The cookies soften into a cake-like texture, and the flavors meld together beautifully. Just don’t add the gummy worms until right before serving, or they’ll get soggy.
Common Mistake to Avoid: I once used fat-free milk because that’s all I had, and the pudding never set properly. The fat content in the milk is crucial for the pudding to thicken. Stick with whole milk or 2% at the very least.
Variations & Adaptations
One of the best things about this recipe is how easy it is to change up. Here are some variations I’ve tried and loved:
- Chocolate Pudding Version: Swap the vanilla pudding for chocolate instant pudding. The orange color won’t be as vibrant, but it will look more like actual dirt. My nephew actually prefers this version—he says it “tastes more like Halloween.”
- Dairy-Free Version: Use unsweetened oat milk or almond milk with a dairy-free instant pudding mix. I’ve tested this with oat milk, and it works great—just note that the pudding will be slightly less firm. Use dairy-free chocolate cookies like the ones from Enjoy Life.
- Gluten-Free Version: Use gluten-free chocolate sandwich cookies. I’ve used the ones from Kinnikinnick, and they crush up just like regular Oreos. The rest of the ingredients are naturally gluten-free.
- Spooky Purple Version: For a different color theme, use purple gel food coloring instead of orange. It gives a “witchy” vibe that’s perfect for a different kind of Halloween party.
- Adult Version: Add a tablespoon of orange liqueur (like Grand Marnier) to the pudding mixture before chilling. The orange flavor pairs beautifully with the chocolate cookie crumbs. Just make sure to label these clearly so the kids don’t grab them by mistake.
Personal Variation I Love: I once made these with a layer of crushed pretzels mixed into the cookie crumbs. The salty-sweet combination was incredible. It’s not for everyone, but if you like that flavor profile, give it a try.
Serving & Storage Suggestions
These puddings are best served cold, straight from the fridge. The contrast between the cool, creamy pudding and the crunchy cookie crumbs is what makes them so satisfying.
Serving Tips: Arrange the cups on a platter or tray with a few extra gummy worms scattered around for decoration. If you’re serving them at a party, consider adding a small sign that says “Worm Farm” or “Spooky Dirt Cups” for a fun touch. I’ve also served them in small mason jars tied with orange ribbon for a more polished look.
Complementary Dishes: These puddings pair beautifully with other Halloween treats. I often serve them alongside my mini lemon blueberry cheesecakes for a dessert table that has both spooky and elegant options. The bright citrus flavor of the cheesecakes balances the rich chocolate of the dirt cups perfectly.
Storage Instructions: Store the assembled puddings in the refrigerator for up to 3 days. Cover each cup with plastic wrap or a lid to prevent the pudding from absorbing other flavors from the fridge. The cookie crumbs will soften over time, which actually creates a more cake-like texture that many people prefer.
Reheating Notes: These are meant to be served cold, so no reheating needed. If you’ve stored them in the fridge for more than a day, let them sit at room temperature for about 5 minutes before serving to take the chill off.
Flavor Development: I’ve noticed that the pudding actually gets creamier and more flavorful after 24 hours in the fridge. The cookies soften, the pudding sets perfectly, and everything melds together. If you can, make these a day ahead—your future self will thank you.
Nutritional Information & Benefits
Let’s be real: these are a treat, not a health food. But here’s the nutritional breakdown for one serving (one cup, without whipped topping):
| Nutrient | Amount per Serving |
|---|---|
| Calories | 285 |
| Total Fat | 12g |
| Saturated Fat | 5g |
| Carbohydrates | 42g |
| Sugar | 30g |
| Protein | 5g |
| Calcium | 150mg |
Health Benefits: The milk in the pudding provides a good source of calcium and vitamin D, which are important for bone health. The cocoa in the chocolate cookies contains antioxidants called flavonoids, which have been linked to heart health. And hey, the gummy worms are fat-free, so there’s that.
Dietary Considerations: This recipe can be made gluten-free and dairy-free with the substitutions mentioned above. It’s not suitable for a low-sugar diet, but you can use sugar-free pudding mix and sugar-free cookies for a lower-sugar version.
Potential Allergens: This recipe contains milk, wheat (in the cookies), and soy (in some pudding mixes). Check your labels if you have allergies.
My Wellness Perspective: I believe in balance. These puddings are a fun, occasional treat that brings joy to Halloween celebrations. They’re not meant to be an everyday snack, and that’s okay. Sometimes the best thing you can do for your mental health is enjoy a spooky pudding with gummy worms and not feel guilty about it.
Conclusion
These Spooky Orange Dirt Cup Puddings with Gummy Worms have saved me more times than I can count. They’re the recipe I turn to when I need something quick, fun, and guaranteed to impress. Whether you’re hosting a Halloween party, sending a treat to a classroom, or just want to make your kids smile, these little cups deliver every single time.
Don’t be afraid to make them your own. Change the colors, swap the flavors, or add your own creative touches. That’s the beauty of a simple recipe like this—it’s a blank canvas for your Halloween creativity. And honestly, the messier and more ridiculous they look, the better they taste.
I’d love to hear how yours turn out. Did you try a different color? Add a special ingredient? Let me know in the comments below, and don’t forget to share your photos. And if you’re looking for more easy, crowd-pleasing recipes, check out the full recipe collection on my blog—there’s plenty more where these came from.
Now go make some spooky dirt cups. Your Halloween party is waiting.
Frequently Asked Questions
Can I make these puddings ahead of time?
Absolutely. You can assemble the puddings up to 3 days in advance and store them in the refrigerator. Just wait to add the gummy worms until right before serving, or they’ll absorb moisture from the pudding and become soggy.
Can I use a different flavor of pudding?
Yes! Chocolate pudding works great and gives a more traditional “dirt” look. You can also try butterscotch, banana, or even lemon pudding for a different flavor profile. Just adjust the food coloring to match your theme.
How do I make these dairy-free?
Use unsweetened oat milk or almond milk with a dairy-free instant pudding mix. I’ve tested this with oat milk, and it works well. Use dairy-free chocolate cookies like the ones from Enjoy Life. The texture will be slightly less firm, but the flavor is still great.
Can I use sugar-free pudding mix?
Yes, you can use sugar-free instant pudding mix. Just follow the same instructions. The texture might be slightly different, but it works. Pair it with sugar-free cookies for a lower-sugar version.
How many cups does this recipe make?
This recipe makes about 8-10 cups, depending on the size of your cups and how generous you are with the layers. I usually get 9 cups when I use standard 8 oz clear plastic cups.
Pin This Recipe!
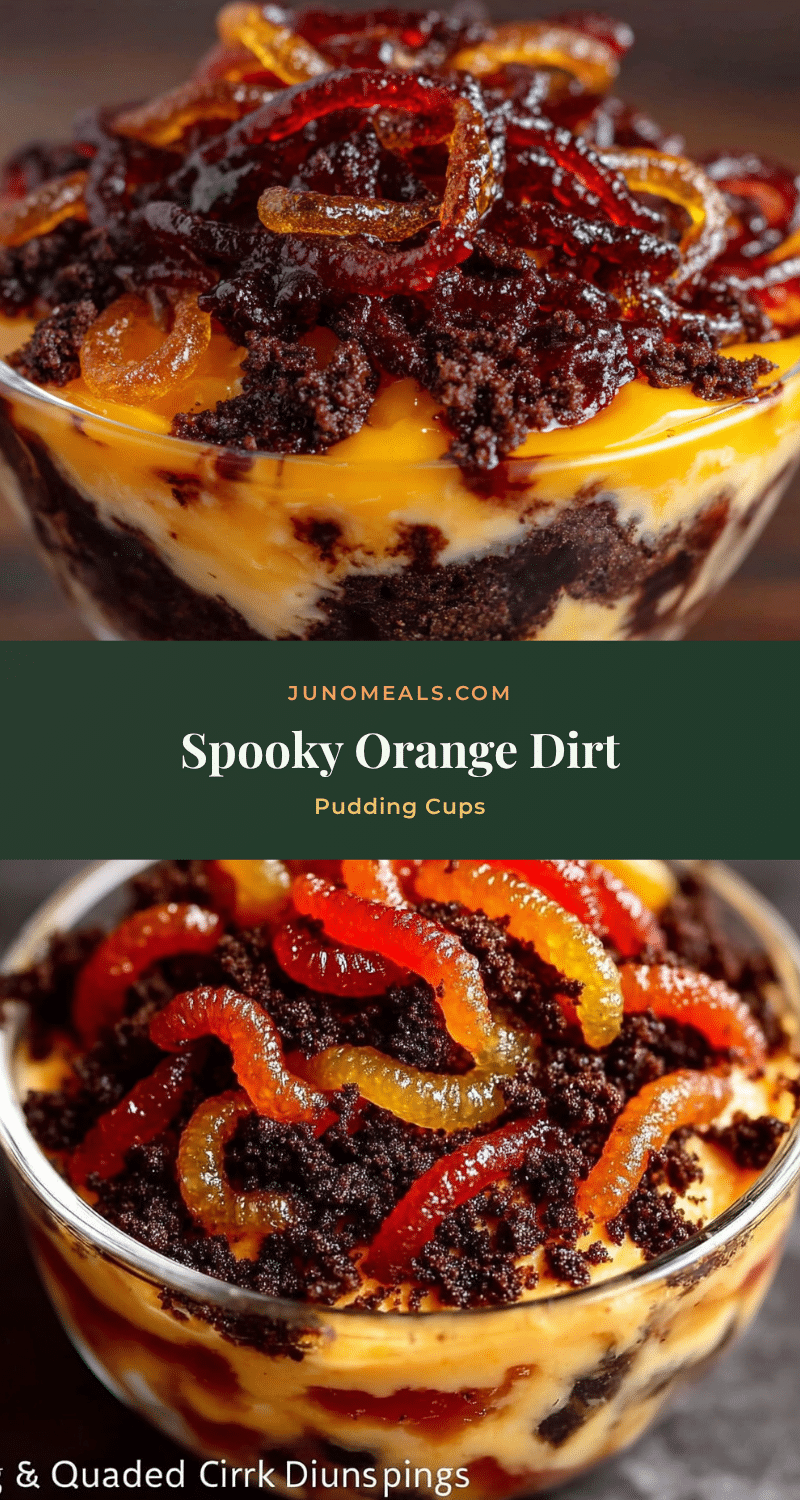
Spooky Orange Dirt Cup Puddings with Gummy Worms
These no-bake Halloween desserts are ready in under 20 minutes and feature creamy orange vanilla pudding layered with crushed chocolate cookies and gummy worms. A fun, spooky treat that kids and adults love.
- Prep Time: 15 minutes
- Cook Time: 0 minutes
- Total Time: 45 minutes (including chilling)
- Yield: 8-10 servings 1x
- Category: Dessert
- Cuisine: American
Ingredients
- 2 boxes (3.4 oz each) instant vanilla pudding mix
- 3 cups (720 ml) cold whole milk
- Orange gel food coloring
- 1 standard package (about 36 cookies) chocolate sandwich cookies (e.g., Oreos)
- 1 bag (about 8 oz / 225 g) gummy worms
- Clear plastic cups (8 oz / 240 ml size)
- 1 cup (240 ml) whipped topping (optional)
- Halloween sprinkles (optional)
Instructions
- Crush the cookies: Place all 36 chocolate sandwich cookies in a food processor and pulse until you have fine crumbs. Alternatively, put cookies in a large zip-top bag and crush with a rolling pin until you have a mix of fine crumbs and small chunks. Set aside.
- Make the pudding: In a large mixing bowl, combine 3 cups (720 ml) of cold whole milk with both boxes of instant vanilla pudding mix. Whisk vigorously for about 2 minutes until the pudding begins to thicken and looks smooth and slightly glossy.
- Add the orange color: Add orange gel food coloring one drop at a time, stirring after each addition. Start with 3-4 drops and add up to 6-8 drops for a vibrant Halloween orange. The color will look slightly lighter once set, so go a shade darker.
- Chill the pudding: Place the bowl of orange pudding in the refrigerator for about 10 minutes until it reaches the consistency of thick yogurt.
- Layer the cups: In each clear cup, start with a layer of crushed cookies (about 2 tablespoons). Add a layer of orange pudding (about 3-4 tablespoons). Repeat with another layer of cookies and another layer of pudding, ending with a thin layer of cookie crumbs on top.
- Add the gummy worms: Gently press 2-3 gummy worms into the top cookie layer of each cup, letting some of the worm ‘escape’ over the edge. Leave at least half of each worm visible.
- Chill completely: Place the finished cups in the refrigerator for at least 30 minutes, but preferably 1 hour, to allow the pudding to set fully and the flavors to meld.
- Add optional toppings: Right before serving, add a dollop of whipped topping and a sprinkle of Halloween sprinkles if desired.
Notes
Don’t skip the partial chill of the pudding before layering to prevent soggy crumbs. Use gel food coloring instead of liquid to avoid thinning the pudding. Make the puddings a day ahead for best flavor, but add gummy worms just before serving to keep them from getting soggy. For a dairy-free version, use unsweetened oat milk or almond milk with a dairy-free pudding mix. For gluten-free, use gluten-free chocolate sandwich cookies.
Nutrition
- Serving Size: 1 cup (without whipp
- Calories: 285
- Sugar: 30
- Sodium: 380
- Fat: 12
- Saturated Fat: 5
- Carbohydrates: 42
- Fiber: 1
- Protein: 5
Keywords: Halloween dessert, dirt cups, orange pudding, gummy worms, no-bake dessert, spooky treat, easy Halloween recipe


