The PTA Halloween party was in six hours and I’d completely forgotten. Like, the kind of forgotten where you’re scrolling through your phone at 10 AM and a calendar notification pops up and your stomach actually drops. Everyone else would be bringing those elaborate themed treats you see on Pinterest — the ones that take two days and a piping degree. I had a box of instant pudding, some Oreos, and a bag of gummy worms from the gas station. Let me tell you, I stood in my kitchen for a solid minute just staring at those ingredients like they might magically transform into something impressive on their own.
My neighbor Karen texted asking what I was bringing, and I lied and said “something spooky” while frantically Googling. That’s when I found it — or rather, the idea found me. Dirt pudding cups. I mean, the name alone is perfect for Halloween, right? I threw it together in about twenty minutes, shoving things in the fridge while simultaneously trying to get my kid’s costume zipped. I honestly didn’t think much of it. It was just pudding and crushed cookies and some plastic decorations from the dollar store. Nothing fancy. Nothing that screamed “I spent hours on this.”
But here’s the thing — those little graveyard cups were gone in ten minutes. Kids were coming back for seconds. Parents were asking for the recipe. One dad actually said it was the best thing at the party, and he’d brought those fancy caramel apples from a bakery. I just smiled and nodded, not mentioning that my “recipe” was essentially a box mix and some crushed Oreos. You know that feeling when you accidentally win at something you barely tried at? That was me, standing there with chocolate on my fingers and a plastic skeleton grinning up at me from an empty cup. And honestly? I’ve been making them every Halloween since.
Why You’ll Love This Recipe
Let’s be real — Halloween treats can be a nightmare. Between the complicated sugar cookies that require royal icing and the fondant-covered cupcakes that look adorable but taste like cardboard, most of us are just looking for something that actually delivers. These Spooky Graveyard Dirt Pudding Cups are the answer to your Halloween prayers. They look incredible, taste even better, and take almost no effort.
- Quick & Easy : Comes together in under 20 minutes of active prep time. The hardest part is crushing the cookies, and honestly, that’s kind of fun.
- Simple Ingredients : You probably already have most of this in your pantry. No specialty baking supplies, no obscure extracts, no trips to three different stores.
- Perfect for Halloween : These are made for spooky season. The graveyard theme is instantly recognizable and always gets a reaction.
- Crowd-Pleaser : Kids go absolutely wild for these. Adults pretend they’re too sophisticated, then secretly eat two. I’ve seen it happen.
- Unbelievably Delicious : The combination of creamy chocolate pudding, crunchy cookie “dirt,” and chewy gummy worms is textural perfection. It’s comfort food disguised as a decoration.
What makes this version different from the other dirt pudding recipes out there? It’s the layering technique. Most recipes just dump everything in a cup and call it a day. I’ve tested the perfect ratio of pudding to crumbs, the ideal chilling time for that set-but-still-creamy texture, and the best way to arrange your graveyard decorations so they actually look like a miniature cemetery instead of a mess. This isn’t just another dirt cup — it’s the one that makes people stop and say “wait, you made these?”
There’s something special about a recipe that brings people together, especially during the chaos of Halloween. These cups are the kind of thing that makes you feel like you’ve got it all together, even when you’re running on three hours of sleep and coffee. They’re fun without being fussy, impressive without being intimidating. And honestly? That first bite — when the cold, creamy pudding meets the crunch of the Oreo dirt — it’s pure magic.
What Ingredients You Will Need
This recipe uses simple, everyday ingredients to create something that looks far more complicated than it actually is. Most of these are pantry staples or easy to find at any grocery store, which is exactly what you want when you’re already stressed about Halloween planning.
For the Pudding Base
- 2 boxes (3.9 oz each) instant chocolate pudding mix — I prefer Jell-O brand for the smoothest texture, but store brands work fine too. Make sure it’s the instant kind, not cook-and-serve, or your timing will be off.
- 4 cups cold milk — Whole milk gives the richest, creamiest result, but 2% works well too. For a dairy-free version, use oat milk or unsweetened almond milk. Just know that the set time might be slightly different.
- 1 teaspoon vanilla extract — This is optional but adds a lovely depth of flavor that takes the pudding from “box mix” to “homemade-tasting.” Pure vanilla extract is worth the splurge here.
For the Dirt Layer
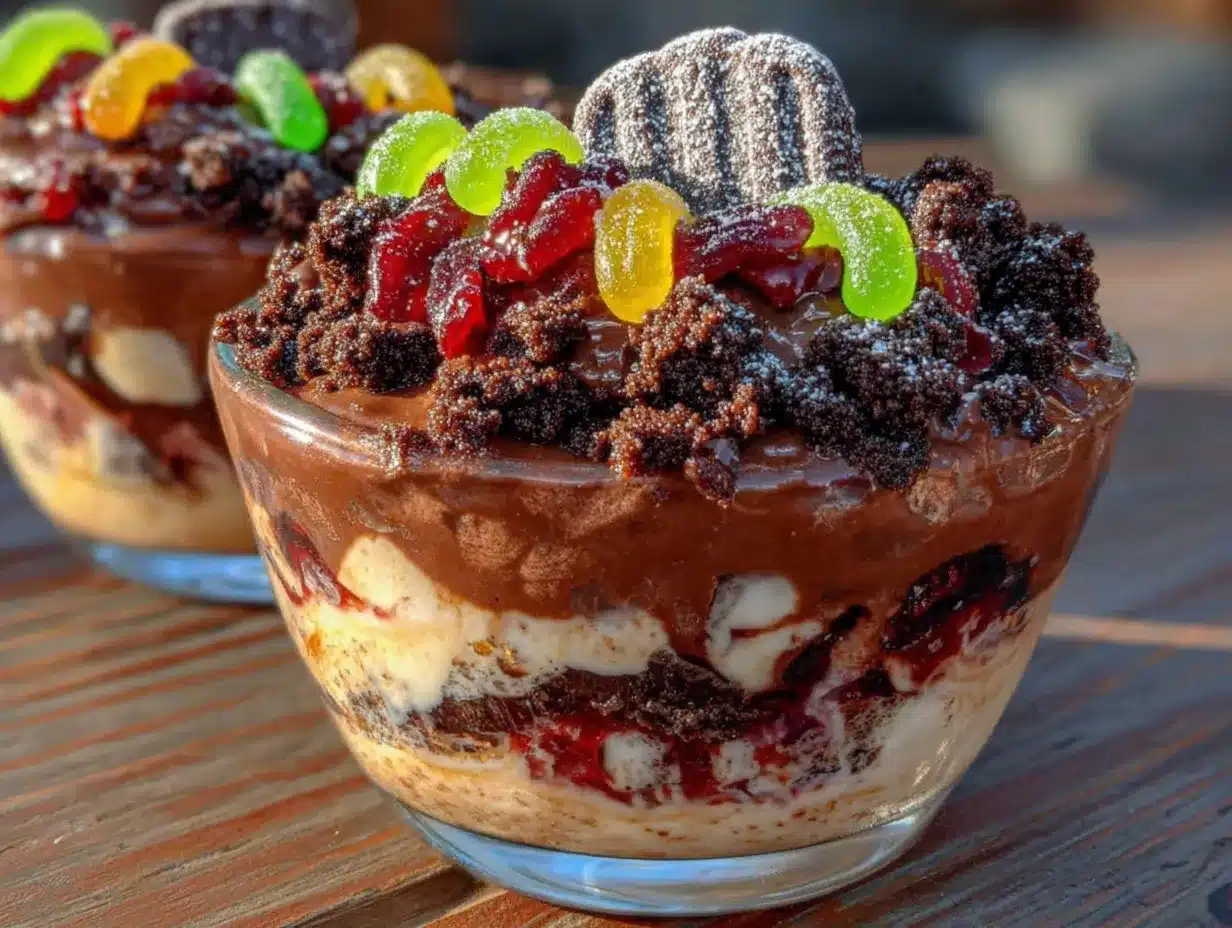
- 1 family-size package (about 20 oz) Oreo cookies — Regular Oreos work best because the cream filling helps the crumbs stick together slightly. Avoid the double-stuf variety as they’re too creamy and don’t crumble as well. You can also use chocolate sandwich cookies from a store brand to save money.
- Optional: 2 tablespoons melted butter — This helps the crumbs clump together more like real dirt. I skip it sometimes when I’m in a hurry, and it still works fine.
For the Graveyard Decorations
- 1 package gummy worms — The sour kind add a nice tangy contrast to the sweet pudding. I like the black and green ones for maximum spookiness, but any color works.
- 1 package chocolate sandwich cookie tombstones — You can find these at party supply stores or make your own by cutting Milano cookies into tombstone shapes. I’ve also used those chocolate wafer cookies that look like little rectangles.
- Optional decorations : Candy pumpkins, skeleton bone candies, plastic spiders, edible eyeballs, or any Halloween-themed sprinkles. The dollar store is your best friend here.
For Serving
- 8-10 clear plastic cups (7-9 oz each) — Clear cups are essential for showing off the layers. I use the disposable ones from the party supply section, but small glass jars or mason jars work beautifully too.
- Piping bag or zip-top bag — For cleanly layering the pudding. You can also just spoon it in, but a bag makes it look more professional.
A quick note on ingredient selection — when you’re buying your Oreos, look for packages that aren’t too crushed already. You want whole cookies that you can crush yourself to control the texture. And for the gummy worms, check the texture by squeezing the package. Fresher worms are softer and more pleasant to eat. Nobody wants a rock-hard gummy worm in their pudding cup.
If you’re making these for a classroom party or a nut-free event, double-check your chocolate pudding mix. Most brands are nut-free, but it’s always worth reading the label. The same goes for the Oreos — they’re typically made in a nut-free facility, but manufacturing processes can change.
Equipment Needed
You don’t need a professional bakery setup for these cups, which is honestly the beauty of this recipe. Here’s what you’ll need:
- Large mixing bowl — For whisking the pudding. A glass or stainless steel bowl works best because it doesn’t retain odors.
- Whisk — A balloon whisk is ideal for getting the pudding smooth without overmixing. I’ve used a fork in a pinch, and it works, but it takes longer.
- Food processor or zip-top bag and rolling pin — For crushing the Oreos. The food processor gives the most consistent texture, but honestly? I love the catharsis of smashing cookies with a rolling pin. It’s great stress relief.
- 8-10 clear plastic cups (7-9 oz each) — As mentioned, clear cups are key for showing off the layers. I buy mine in bulk at the beginning of October because I make these so often.
- Measuring cups and spoons — For accurate milk and vanilla measurements. Eyeballing works for some recipes, but pudding texture is finicky.
- Spatula — For scraping every last bit of pudding out of the bowl. Waste not, want not.
- Small offset spatula or butter knife — For smoothing the tops of the pudding layers.
- Refrigerator space — You’ll need room for the cups to chill for at least 30 minutes. Clear a shelf before you start mixing.
If you don’t have a food processor, don’t stress. Place the Oreos in a large zip-top bag, seal it (squeeze the air out first), and go to town with a rolling pin or even a heavy skillet. My kids love helping with this part — it’s messy and loud and perfect for Halloween energy.
One tip I learned the hard way — make sure your cups are completely dry before you start layering. Even a drop of water can make the pudding slide around and ruin your clean layers. I dry mine with a paper towel right before I start.
Preparation Method
Alright, let’s get into the actual making of these spooky treats. Trust me, this is easier than it looks. I’ve broken it down into clear steps with all the little details I’ve picked up from making these dozens of times.
- Make the pudding. In your large mixing bowl, combine both boxes of instant chocolate pudding mix with the 4 cups of cold milk. Whisk vigorously for about 2 minutes until the mixture thickens. It should look smooth and glossy with no lumps. Add the vanilla extract and whisk for another 30 seconds. The pudding will be quite thin at first — don’t panic, that’s normal. It thickens as it sets.
- Chill the pudding briefly. Pop the bowl in the fridge for about 5 minutes while you work on the cookies. This partial set helps the pudding hold its shape when you layer it. Don’t skip this step — I’ve done it straight away and the layers just bled together.
- Crush the Oreos. Place the entire package of Oreos (cream and all) into your food processor. Pulse about 10-12 times until you get a mixture that looks like dark, crumbly dirt. You want some slightly larger pieces for texture, but nothing bigger than a pea. If you’re using the bag-and-rolling-pin method, crush until you get the same consistency. Set aside about 1/4 cup of the finer crumbs for topping.
- Prepare your cups. Arrange your 8-10 clear cups on a baking sheet or tray. This makes them easier to move to the fridge without spilling. Trust me on this — I once tried to carry them individually and ended up with pudding on my floor.
- Layer the dirt. Spoon about 2 tablespoons of the crushed Oreo mixture into the bottom of each cup. Press it down gently with the back of a spoon or your fingers to create a compact base layer. This prevents the pudding from seeping through and keeps your layers distinct.
- Add the pudding. Transfer your partially set pudding to a piping bag or a zip-top bag with the corner snipped off. Pipe the pudding evenly into each cup, filling them about halfway. If you don’t have a bag, you can spoon it in carefully, but the bag method gives you much more control and less mess. Tap the tray gently on the counter to release any air bubbles.
- Add another dirt layer. Sprinkle another 1-2 tablespoons of crushed Oreos over the pudding layer. This creates the “underground” layer where the gummy worms will hide. Use the back of a spoon to create a slight well in the center of each cup — this is where your worms will go.
- Place the gummy worms. Take 2-3 gummy worms per cup and press them into the Oreo layer, letting some of them poke out like they’re crawling out of the dirt. Position them at different angles for a more natural look. Some can be fully buried, some halfway out, some just peeking. This is where the “spooky” really comes to life.
- Top with remaining pudding. Pipe the rest of the pudding over the gummy worms, filling the cups almost to the top. Leave about 1/2 inch of space for the final dirt layer. Smooth the tops with your offset spatula or the back of a spoon.
- Finish with the final dirt layer. Sprinkle the reserved fine Oreo crumbs over the top of each cup, covering the pudding completely. This is your “surface” dirt. Make it even and generous — you want it to look like a real patch of earth.
- Add the tombstones and decorations. Gently press your chocolate tombstone cookies into the center of each cup, leaving about half of the cookie visible above the “dirt.” Add any additional decorations like candy pumpkins, plastic spiders, or skeleton bones. Arrange them in a way that tells a little story — maybe a spider crawling over a tombstone or a pumpkin sitting next to a worm hole.
- Chill for at least 30 minutes. Place the tray in the refrigerator and let the cups set for at least 30 minutes, or up to 24 hours. The longer they sit, the more the flavors meld together and the cleaner your layers will be when you serve them. I usually make these the night before a party.
A few notes from my many trials — if your pudding seems too thin after the full chilling time, you might have used too much milk or not whisked enough. Next time, try whisking for a full 3 minutes. And if your Oreo crumbs are too fine, they can turn into a paste instead of staying crumbly. Pulse less next time, or use the bag method where you have more control.
Cooking Tips & Techniques
After making these Spooky Graveyard Dirt Pudding Cups more times than I care to count, I’ve picked up a few tricks that make the process smoother and the results more impressive. Let me share what I’ve learned — including the mistakes so you don’t have to make them yourself.
The temperature of your ingredients matters. Cold milk is non-negotiable for instant pudding. If your milk is even slightly warm, the pudding won’t set properly and you’ll end up with a soupy mess. I learned this the hard way when I was rushing and used milk straight from the counter after my kid left it out. The cups never set, and I had to start over. Keep your milk in the fridge until the moment you’re ready to use it.
Don’t overmix the pudding. Whisk just until it thickens — about 2 minutes. Overmixing can break down the starches and prevent the pudding from setting properly. You’ll notice it starts to look slightly grainy if you go too long. Stop as soon as it looks smooth and has a slight resistance when you lift the whisk.
Crush your Oreos strategically. For the best texture, aim for a mix of fine crumbs and small chunks. I pulse my food processor about 8 times, check the consistency, then pulse a few more times if needed. The fine crumbs create that realistic dirt texture, while the slightly larger pieces add crunch. Save the finest crumbs for the top layer — they look most like soil.
Layer with intention. When you’re adding the gummy worms, think about how they’d naturally emerge from the ground. Some should be fully visible, some barely peeking out, some completely hidden with just a hint of their shape under the dirt. This variety makes the cups look more dynamic and fun. I once made the mistake of placing all the worms the same way, and it looked like they were lined up for a parade instead of crawling out of a graveyard.
Chill time is crucial. I know you’re excited to serve these, but the 30-minute minimum chill time isn’t just for show. It allows the pudding to fully set, the flavors to meld, and the layers to stabilize. If you serve them too early, the pudding will be runny and the layers will bleed together. If you’re making these for a party, prepare them the night before — they actually taste better the next day.
One more thing — if you’re transporting these, make sure the tray is level and the cups are snug against each other so they don’t tip over. I learned this when I hit a pothole and three cups slid into each other, creating a muddy mess. Now I use a cupcake carrier or a box with dividers, and I’ve never had another accident.
Variations & Adaptations
One of the best things about this recipe is how easily it adapts to different tastes, dietary needs, and occasions. Here are some variations I’ve tried and loved:
Dairy-Free Version
Swap the whole milk for oat milk or full-fat coconut milk. Oat milk gives the creamiest texture that’s closest to dairy. You can also use dairy-free chocolate pudding mix — just check the label. For the Oreos, the original recipe is actually dairy-free, but double-check if you’re using a different brand of sandwich cookies. I’ve made this for my lactose-intolerant friends and they couldn’t tell the difference.
Gluten-Free Adaptation
Use gluten-free chocolate sandwich cookies for the dirt layer. There are several good brands available now, and they crush up just like regular Oreos. Make sure your pudding mix is also gluten-free — most instant pudding is, but always verify. This version works perfectly for classroom parties where you don’t know who has dietary restrictions.
Adult Halloween Party Version
Add a splash of Kahlua or Bailey’s Irish Cream to the pudding mixture before chilling. About 2 tablespoons per batch adds a lovely mocha flavor that adults appreciate. You can also use chocolate liqueur for an extra-rich taste. Just make sure to label these clearly if kids are around. I serve these at my annual Halloween movie night and they’re always the first thing to disappear.
Different Pudding Flavors
Don’t limit yourself to chocolate! Vanilla pudding with crushed golden Oreos creates a “sand” effect that’s perfect for a beach-themed Halloween party. Butterscotch pudding with chocolate cookie crumbs is another favorite. And for a truly spooky twist, try lime gelatin (green) with crushed chocolate cookies for a “slime” graveyard effect. The possibilities are endless.
Mini Cup Version
Use shot glasses or small paper cups for bite-sized versions. These are perfect for parties where people want to sample multiple treats. Just reduce the layering amounts proportionally — about 1 tablespoon of crumbs and 2 tablespoons of pudding per mini cup. I made these for a work party and people kept coming back for “just one more.”
Serving & Storage Suggestions
These Spooky Graveyard Dirt Pudding Cups are best served cold, straight from the refrigerator. The contrast between the chilled, creamy pudding and the crunchy Oreo dirt is part of what makes them so satisfying. I like to take them out about 5 minutes before serving — just enough to take the chill off without letting the pudding warm up too much.
Presentation tips: Arrange the cups on a black or dark purple platter for maximum spooky effect. Add some fake cobwebs, plastic spiders, or battery-operated tea lights around the base for ambiance. I once served these on a mirror tile with dry ice for a fog effect, and it was a showstopper. Just be careful with the dry ice — keep it away from kids and follow safety instructions.
What to serve alongside: These cups pair beautifully with other Halloween treats. I like to set up a dessert table with these as the centerpiece, alongside pumpkin-shaped sugar cookies, caramel apples, and a bowl of candy corn. For drinks, a warm apple cider or hot chocolate with marshmallows complements the chocolate pudding perfectly.
Storage instructions: These cups will keep in the refrigerator for up to 3 days, though they’re best within the first 24 hours. Cover the tray with plastic wrap or transfer the cups to an airtight container to prevent them from absorbing fridge odors. After about 48 hours, the Oreo crumbs start to soften from the moisture in the pudding, so the texture won’t be as crunchy.
Can you freeze them? I don’t recommend it. The pudding texture changes significantly when frozen and thawed — it becomes grainy and watery. If you need to make these ahead, prepare them the day before and keep them refrigerated. They’ll be perfect for your party.
Reheating? These are meant to be served cold, so no reheating needed. If the cups have been sitting out for more than 2 hours, discard any leftovers for food safety reasons.
Flavor development note: Something magical happens after these sit in the fridge overnight. The Oreo crumbs absorb a little moisture from the pudding and soften slightly, creating a texture that’s almost like a moist chocolate cake crumb. The gummy worms also soften slightly, becoming more chewy and integrated. Honestly, day-old cups are my favorite version.
Nutritional Information & Benefits
Let’s be honest — these are a treat, not a health food. But that doesn’t mean they can’t fit into a balanced lifestyle, especially when enjoyed in moderation as part of a Halloween celebration. Here’s the estimated nutritional breakdown per serving (based on 8 cups using whole milk and regular Oreos):
| Nutrient | Amount Per Serving |
|---|---|
| Calories | 380-420 |
| Total Fat | 16-18g |
| Saturated Fat | 7-9g |
| Cholesterol | 15-20mg |
| Sodium | 450-500mg |
| Total Carbohydrates | 55-60g |
| Dietary Fiber | 2-3g |
| Sugars | 38-42g |
| Protein | 6-8g |
From a health perspective, there are a few bright spots. The milk provides calcium and vitamin D, which are important for bone health. The cocoa in the chocolate pudding and Oreos contains antioxidants called flavonoids, which have been linked to heart health benefits. And the gummy worms? Well, they’re mostly sugar and gelatin, but they do make people smile, and that counts for something.
If you’re looking to lighten these up, you can use low-fat milk and sugar-free pudding mix to reduce the calories and sugar by about 30-40%. The texture won’t be quite as rich, but they’ll still be delicious. I’ve made this version for my own family when we’re having a treat night but don’t want to go overboard.
As always, be mindful of potential allergens. This recipe contains dairy and wheat (gluten). The Oreos may also be processed in facilities that handle nuts, so check labels if you have severe allergies. Always inform guests about ingredients if you’re serving these at a party.
Conclusion
These Spooky Graveyard Dirt Pudding Cups are proof that you don’t need hours in the kitchen or a culinary degree to create something truly memorable for Halloween. They’re fun, they’re delicious, and they look like you put way more effort into them than you actually did — which is my favorite kind of recipe. Whether you’re bringing them to a school party, serving them at a Halloween gathering, or just making them with your kids for a spooky night in, these cups deliver every time.
I love how this recipe has become a tradition in my own home. Every October, my kids start asking when we’re going to make “the graveyard cups.” We put on a spooky playlist, crush the cookies together (which inevitably ends with chocolate dust everywhere), and arrange the little tombstones just so. It’s messy and chaotic and absolutely perfect. That’s what Halloween should be, right?
Now I want to hear from you! Have you tried making these? What decorations did you use? Did your kids or party guests love them? Drop a comment below and share your graveyard creations — I love seeing how everyone puts their own spin on this recipe. And if you’re looking for more Halloween inspiration, check out my halloween dessert recipes for more spooky treats that won’t keep you in the kitchen all day. Happy Halloween, and happy eating!
Frequently Asked Questions
Can I make these Spooky Graveyard Dirt Pudding Cups ahead of time?
Absolutely! These are actually better when made a day ahead. Prepare them up to 24 hours in advance and keep them refrigerated. The flavors meld together beautifully overnight, and the texture improves as the Oreo crumbs soften slightly. Just add any fragile decorations like plastic spiders or candy tombstones right before serving to keep them looking fresh.
What if I don’t have clear cups?
While clear cups really show off the layers, you can use any small cups or bowls. Small mason jars work beautifully and give a rustic feel. Even paper cups will work in a pinch — just know that the graveyard effect won’t be as visible. If you’re using opaque cups, consider adding a “graveyard scene” on top with extra decorations to make up for the hidden layers.
Can I use homemade pudding instead of instant?
You can, but the texture will be different. Homemade pudding is usually thinner and won’t set as firmly as instant pudding. If you want to go the homemade route, use a recipe that includes cornstarch and cook it until it’s quite thick. Let it cool completely before layering. I’ve done this before and it works, but it takes more time and the layers aren’t as clean.
How do I keep the gummy worms from sinking to the bottom?
The key is to add them after you’ve already placed a layer of pudding and crumbs. The gummy worms need something to grip onto. I press them gently into the middle Oreo layer before adding the top pudding layer. The crumbs create a textured surface that holds the worms in place. If you just drop them into plain pudding, they’ll sink every time.
Can I use a different type of cookie for the dirt?
Definitely! Chocolate wafer cookies, chocolate graham crackers, or even chocolate cake crumbs all work well. The key is to get a dark, crumbly texture that resembles dirt. I’ve even used crushed chocolate cereal in a pinch — it creates a lighter, crunchier texture that’s still delicious. Just avoid anything with too much cream filling, as it can make the crumbs clump together too much.
Pin This Recipe!
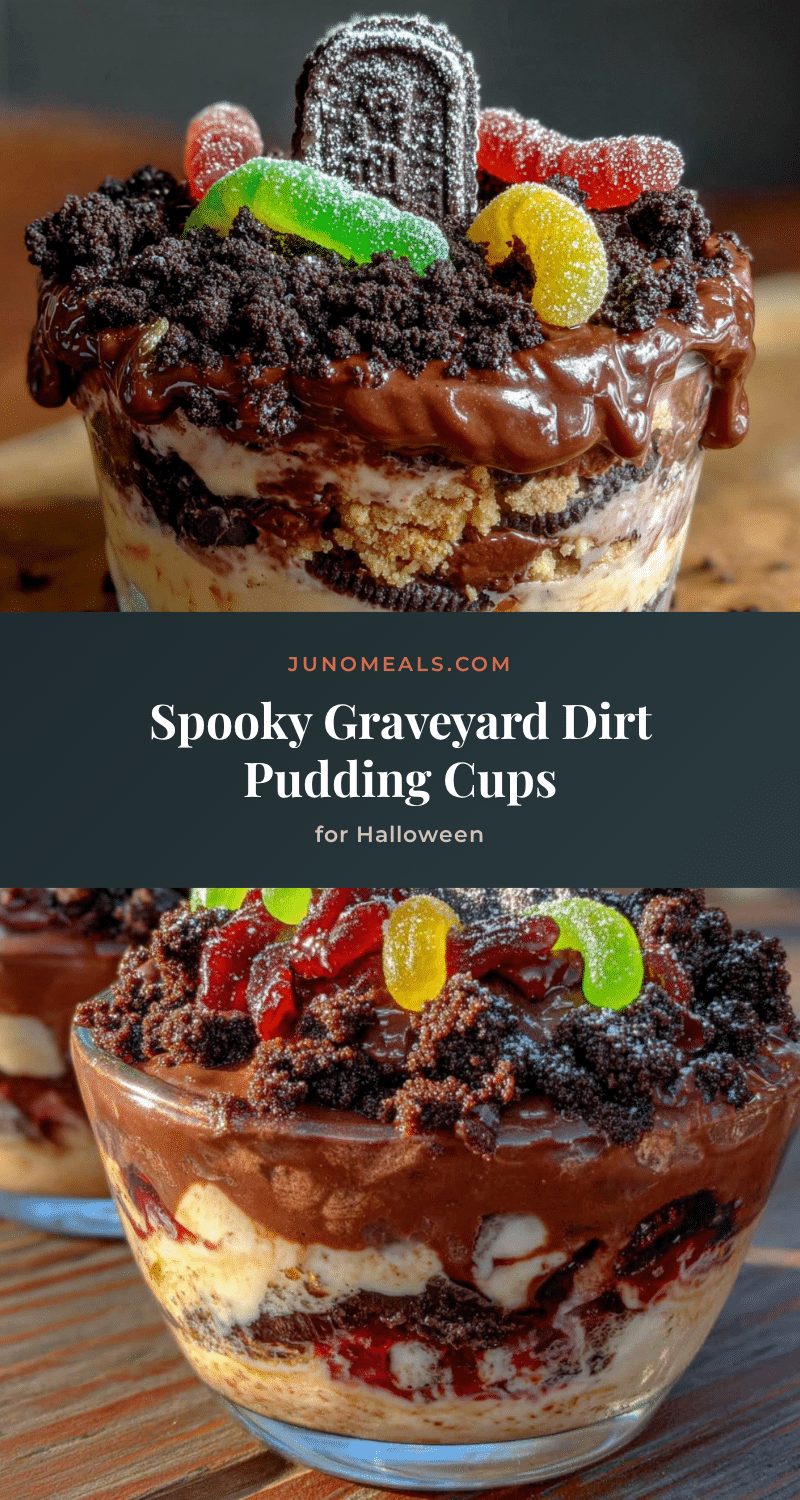
Spooky Graveyard Dirt Pudding Cups: Easy Halloween Treat
These spooky graveyard dirt pudding cups are quick, easy, and perfect for Halloween. With creamy chocolate pudding, crunchy Oreo ‘dirt,’ and gummy worms, they look impressive but come together in under 20 minutes.
- Prep Time: 20 minutes
- Cook Time: 0 minutes
- Total Time: 50 minutes (includes 30 minutes chilling)
- Yield: 8-10 servings 1x
- Category: Dessert
- Cuisine: American
Ingredients
- 2 boxes (3.9 oz each) instant chocolate pudding mix
- 4 cups cold milk
- 1 teaspoon vanilla extract
- 1 family-size package (about 20 oz) Oreo cookies
- 2 tablespoons melted butter (optional)
- 1 package gummy worms
- 1 package chocolate sandwich cookie tombstones
- Optional decorations: candy pumpkins, skeleton bone candies, plastic spiders, edible eyeballs, Halloween sprinkles
- 8–10 clear plastic cups (7–9 oz each)
- Piping bag or zip-top bag
Instructions
- In a large mixing bowl, combine both boxes of instant chocolate pudding mix with 4 cups cold milk. Whisk vigorously for about 2 minutes until thickened. Add vanilla extract and whisk for another 30 seconds.
- Chill the pudding in the fridge for about 5 minutes while you work on the cookies.
- Place the entire package of Oreos (cream and all) into a food processor. Pulse 10-12 times until you get a mixture that looks like dark, crumbly dirt. Set aside about 1/4 cup of finer crumbs for topping.
- Arrange 8-10 clear cups on a baking sheet or tray.
- Spoon about 2 tablespoons of crushed Oreo mixture into the bottom of each cup. Press down gently to create a compact base layer.
- Transfer the partially set pudding to a piping bag or zip-top bag with the corner snipped off. Pipe pudding evenly into each cup, filling them about halfway. Tap the tray gently to release air bubbles.
- Sprinkle another 1-2 tablespoons of crushed Oreos over the pudding layer. Use the back of a spoon to create a slight well in the center of each cup.
- Place 2-3 gummy worms per cup into the Oreo layer, letting some poke out at different angles.
- Pipe the remaining pudding over the gummy worms, filling cups almost to the top. Leave about 1/2 inch of space. Smooth the tops with a spatula or spoon.
- Sprinkle the reserved fine Oreo crumbs over the top of each cup, covering the pudding completely.
- Gently press chocolate tombstone cookies into the center of each cup, leaving about half visible. Add any additional decorations.
- Chill for at least 30 minutes, or up to 24 hours, before serving.
Notes
For best results, use cold milk and don’t overmix the pudding. Crush Oreos to a mix of fine crumbs and small chunks. Chill for at least 30 minutes; overnight is even better. For dairy-free, use oat milk and dairy-free pudding mix. For gluten-free, use gluten-free sandwich cookies. Add a splash of Kahlua for an adult version. Store in the refrigerator for up to 3 days; do not freeze.
Nutrition
- Serving Size: 1 cup
- Calories: 400
- Sugar: 40
- Sodium: 475
- Fat: 17
- Saturated Fat: 8
- Carbohydrates: 58
- Fiber: 2.5
- Protein: 7
Keywords: Halloween, dirt pudding, graveyard, chocolate pudding, Oreo, gummy worms, easy dessert, no-bake, spooky, kids treat


