Introduction
The summer I turned thirty-two, my neighbor across the hall, Mrs. Gable, watched me attempt to make cookies with my then-three-year-old daughter. I was using some fancy recipe I’d found online that promised “adult-level sophistication” and “complex flavor profiles.” It was a disaster. The dough was too sticky, the sugar was all over the floor, and my daughter was crying because she just wanted a “normal cookie.” Mrs. Gable didn’t say anything at first. She just shook her head slowly, disappeared into her apartment, and came back twenty minutes later with a plate of the most perfect peanut butter blossoms I had ever seen. The chocolate kiss was still slightly melted on top.
“This is what a cookie is supposed to be,” she said simply. “Not complicated. Just good.”
I mean, honestly, she was right. That day, I realized I had been overthinking everything. These soft thick peanut butter blossom cookies weren’t trying to be anything they weren’t. They were just perfectly soft, perfectly peanut buttery, and perfectly topped with that iconic Hershey’s kiss. I asked her for the recipe, and she wrote it on the back of a grocery receipt. The paper was stained with butter fingerprints, and I’ve kept it in my recipe box ever since. Maybe you’ve been there too—trying to make something complicated when what your family really wants is just a really good, classic cookie.
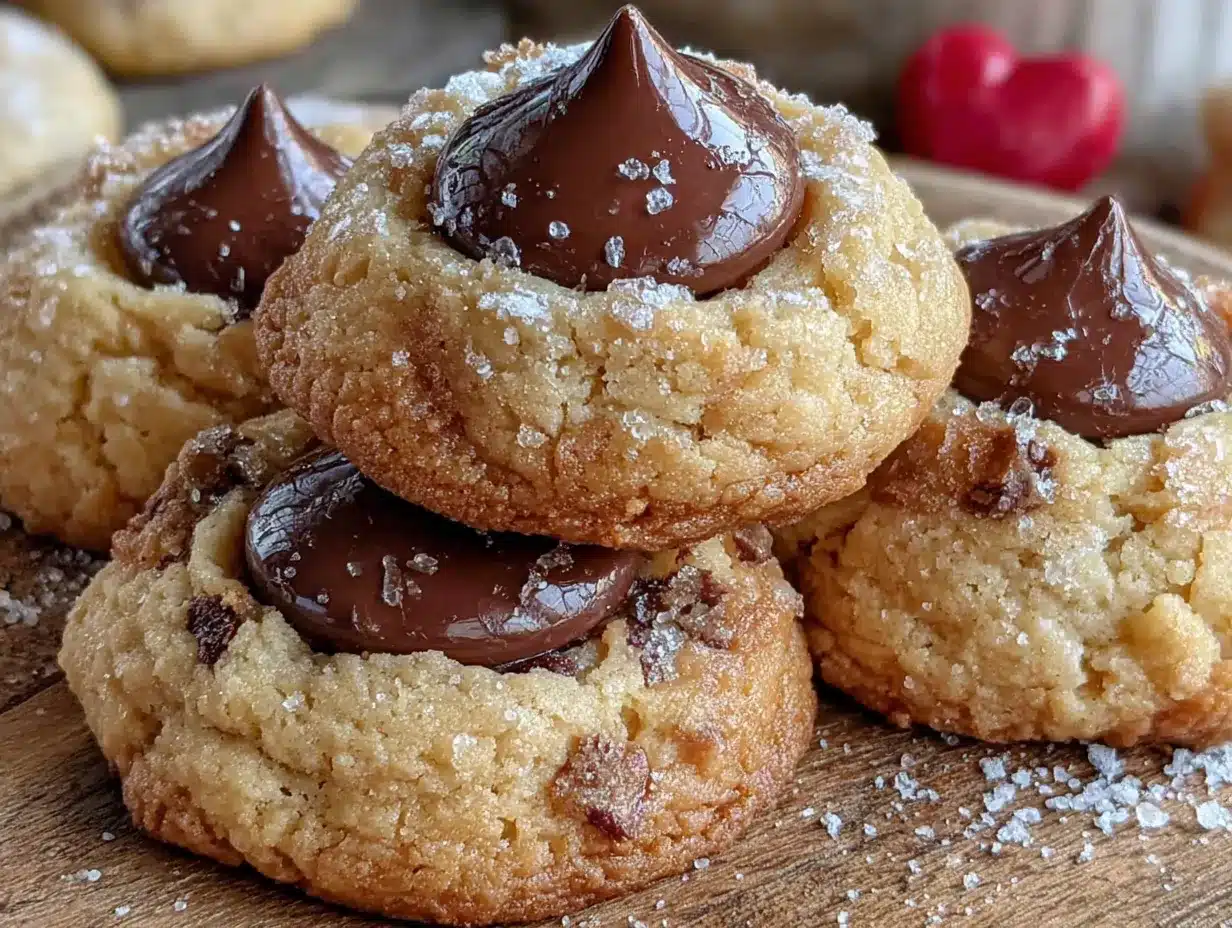
These soft thick peanut butter blossom cookies have become our family’s go-to for everything from rainy afternoon baking sessions to holiday cookie exchanges. They’re the kind of cookie that makes you close your eyes after the first bite, not because it’s fancy, but because it tastes exactly like it should. Every single time.
Why You’ll Love This Recipe
Let me tell you why these soft thick peanut butter blossom cookies are going to become your new favorite recipe. I have tested this recipe at least a dozen times—tweaking the flour ratio, playing with different peanut butters, and even accidentally using crunchy peanut butter once (which, honestly, was still pretty good). Here is what makes these cookies stand out:
- Kid-Approved & Parent-Friendly: These cookies are soft enough for little hands to hold without crumbling and thick enough that they don’t fall apart. My daughter calls them “the best cookies in the whole world,” and she has tested a lot of cookies.
- Simple Pantry Ingredients: You probably already have everything you need in your kitchen right now. No trips to specialty stores, no weird ingredients you’ll never use again.
- Perfect for Busy Families: These come together in under 30 minutes total. The dough doesn’t need to chill (I know, right?), which means you can have warm cookies in your hands almost immediately.
- Budget-Friendly: With just basic ingredients and a bag of Hershey’s kisses, these cookies cost pennies to make. Perfect for feeding a crowd without breaking the bank.
- Freezer-Friendly: The dough freezes beautifully, and the baked cookies freeze even better. I always keep a batch in the freezer for unexpected visitors or school bake sales.
What makes these different from every other peanut butter blossom recipe out there? It’s the texture. Most recipes produce thin, crumbly cookies that fall apart when you bite into them. These soft thick peanut butter blossom cookies stay perfectly thick and soft for days. The secret is in the ratio of butter to peanut butter and a little trick with the flour that keeps them tender without being cakey. This isn’t just another version—it’s the version that works every single time.
What Ingredients You Will Need
This recipe uses simple, wholesome ingredients to deliver that perfect soft, thick texture and bold peanut butter flavor without any fuss. Most of these are pantry staples you probably already have on hand.
- Unsalted butter, softened – 1/2 cup (1 stick, 113g). I use Land O’Lakes for consistent results. Make sure it’s truly softened to room temperature, not melted. This is crucial for the right texture.
- Creamy peanut butter – 1/2 cup (130g). I recommend Jif or Skippy for the best texture. Natural peanut butter that separates will make the cookies greasy and flat. Stick with the processed stuff here—it works better.
- Granulated sugar – 1/2 cup (100g) for the dough, plus extra for rolling (about 1/4 cup). The sugar helps create that slightly crackly exterior.
- Brown sugar, packed – 1/2 cup (100g). Light brown sugar adds moisture and a subtle molasses flavor that complements the peanut butter perfectly.
- Large egg – 1, at room temperature. If you forget to take it out of the fridge, place it in a bowl of warm water for 5 minutes.
- Vanilla extract – 1 teaspoon. Pure vanilla extract makes a difference, but imitation works fine too.
- All-purpose flour – 1 and 1/2 cups (190g). Spoon and level your flour—don’t scoop directly from the bag or you’ll end up with dry cookies.
- Baking soda – 1 teaspoon. This helps the cookies spread just enough without becoming flat.
- Baking powder – 1/2 teaspoon. The combination of baking soda and baking powder gives these cookies their perfect thick texture.
- Salt – 1/4 teaspoon. Even though peanut butter contains salt, you still need a little extra to balance the sweetness.
- Hershey’s Kisses – 36-40, unwrapped. Milk chocolate is classic, but dark chocolate or white chocolate kisses work beautifully too. You’ll need about one standard 12-ounce bag.
Ingredient Selection Tips: For the best soft thick peanut butter blossom cookies, use a peanut butter that has sugar and oil added. Natural peanut butter will work in a pinch, but the cookies will spread more and be less tender. If you only have natural peanut butter, add an extra tablespoon of flour to compensate.
Equipment Needed
You don’t need fancy equipment for these cookies, which is part of what makes them so great for family baking.
- Electric mixer – A hand mixer works perfectly, but a stand mixer with the paddle attachment is even easier. You can mix by hand with a wooden spoon, but your arm will get a workout.
- Large mixing bowl – Any large bowl will do. I use a glass mixing bowl because I can see when everything is fully incorporated.
- Measuring cups and spoons – For accuracy, especially with the flour. I recommend using dry measuring cups for dry ingredients and liquid measuring cups for wet.
- Baking sheets – Two standard half-sheet pans work well. If you only have one, let it cool completely between batches.
- Parchment paper or silicone baking mats – These prevent sticking and make cleanup a breeze. Silicone mats are worth the investment if you bake often.
- Cooling rack – Essential for letting the cookies cool properly so the chocolate kisses set.
- Small bowl for rolling sugar – Just a shallow bowl or plate works fine.
- Cookie scoop – A 1.5-tablespoon scoop ensures uniform cookies. If you don’t have one, use two spoons.
Budget-Friendly Tip: If you don’t have parchment paper, you can grease your baking sheets lightly with butter or cooking spray. The cookies might spread slightly more, but they’ll still be delicious.
Preparation Method
Let me walk you through making these soft thick peanut butter blossom cookies step by step. I’ve included all the little details I’ve learned through trial and error so you get perfect results every time.
- Preheat your oven to 375°F (190°C). Line two baking sheets with parchment paper or silicone mats. This temperature is important—too hot and the cookies will burn before the centers are done; too cool and they’ll spread too much.
- Cream the butter and sugars together. In a large mixing bowl, beat the softened butter, granulated sugar, and brown sugar together until light and fluffy, about 2-3 minutes. Scrape down the sides of the bowl halfway through. The mixture should look pale and slightly increased in volume. Don’t rush this step—proper creaming is what gives the cookies their tender texture.
- Add the peanut butter. Beat in the creamy peanut butter until fully combined. The mixture will look a bit like thick frosting at this point. Scrape the bowl again to make sure everything is incorporated.
- Add the egg and vanilla. Beat in the egg and vanilla extract until just combined. Don’t overmix once the egg is added, or the cookies can become tough. The mixture should look smooth and glossy.
- Whisk the dry ingredients together. In a separate bowl, whisk together the flour, baking soda, baking powder, and salt. This ensures the leavening agents are evenly distributed. I learned this lesson the hard way after biting into a cookie that tasted like baking soda.
- Combine wet and dry ingredients. Gradually add the dry ingredients to the wet mixture, mixing on low speed or folding with a spatula until just combined. Stop as soon as the flour disappears. Overmixing at this stage develops gluten, which makes cookies tough. The dough should be soft and slightly sticky but hold together when pressed.
- Prepare the sugar coating. Place about 1/4 cup of granulated sugar in a small bowl. Using a cookie scoop or two spoons, portion the dough into 1.5-tablespoon balls (about 25g each). Roll each ball between your palms until smooth, then roll in the sugar to coat completely. The sugar coating gives the cookies that beautiful sparkly exterior.
- Place on baking sheets. Arrange the sugar-coated dough balls on the prepared baking sheets, spacing them about 2 inches apart. These cookies don’t spread too much, but they need a little room. I usually fit 12 cookies per standard baking sheet.
- Bake the cookies. Bake for 8-10 minutes, or until the edges are lightly golden and the centers still look slightly soft and puffy. The cookies will continue to bake on the hot pan after you remove them from the oven. For softer cookies, bake for 8 minutes. For slightly firmer cookies, go to 10 minutes.
- Add the chocolate kisses immediately. As soon as the cookies come out of the oven, press a Hershey’s kiss firmly into the center of each cookie. The heat from the cookie will soften the chocolate slightly, creating that perfect seal. Don’t press too hard, or the cookie might crack. Let the cookies cool on the baking sheet for 5 minutes before transferring to a wire rack to cool completely.
- Let the chocolate set. Allow the cookies to cool completely on the wire rack before storing. The chocolate kisses need time to firm up again. If you try to stack them too soon, the kisses will smear. Trust me on this one.
Sensory Cues: When the cookies are done, they should look puffy and soft in the center with lightly golden edges. The kitchen will smell like warm peanut butter and vanilla. When you press the kiss into the warm cookie, you should feel a slight give—the cookie should be soft but not raw.
Cooking Tips & Techniques
After making these soft thick peanut butter blossom cookies more times than I can count, here are the tips that make the biggest difference:
The Butter Temperature Matters More Than You Think. I once made these cookies with butter that was too soft—almost melted—and the cookies spread into flat, greasy discs. Your butter should be soft enough to leave an indent when pressed with a finger, but still hold its shape. If you’re in a hurry, cut the butter into small cubes and let it sit for 15 minutes.
Don’t Skip the Sugar Rolling. I tried making these without rolling them in sugar once because I was trying to cut down on sweetness. Big mistake. The sugar coating isn’t just for looks—it creates a slight crust that contrasts beautifully with the soft interior. Plus, it gives the cookies that classic crackled appearance.
Work Quickly with the Kisses. Have all your Hershey’s kisses unwrapped and ready before the cookies come out of the oven. You only have about 30 seconds after removing the cookies from the oven before they start to set, and the kisses won’t stick properly if the cookies have cooled too much. I learned this when I tried to unwrap kisses while the cookies were baking and ended up with a pan of cookies with no kisses.
Use a Cookie Scoop for Uniform Size. Uniform cookies bake evenly. If some are bigger than others, the small ones will be overdone by the time the big ones are done. A 1.5-tablespoon scoop gives you the perfect size for these cookies.
Let Them Cool on the Pan. Don’t rush to move the cookies to a cooling rack. Let them rest on the baking sheet for 5 minutes. This allows the structure to set so they don’t fall apart when you move them. The chocolate also needs this time to start firming up.
Variations & Adaptations
One of the best things about these soft thick peanut butter blossom cookies is how adaptable they are. Here are some variations I’ve tried and loved:
Chocolate Peanut Butter Blossoms: For an extra chocolatey version, replace 1/4 cup of the flour with unsweetened cocoa powder. The chocolate and peanut butter combination is absolutely divine. My husband says these are his favorite version.
Gluten-Free Version: Substitute the all-purpose flour with a 1:1 gluten-free baking flour blend. I’ve used Bob’s Red Mill 1:1 Baking Flour with excellent results. The texture is slightly more tender, but they still hold together beautifully.
Holiday Variation: Use seasonal Hershey’s Kisses flavors. For Christmas, the candy cane kisses are amazing. For Valentine’s Day, the Hugs (white chocolate with white stripes) are perfect. For Halloween, use the orange and brown wrapped kisses.
Peanut Butter Blossom Bars: If you don’t want to roll individual cookies, press the dough into a greased 9×13 pan and bake for 15-18 minutes. Press the kisses into the warm bars in a grid pattern. Cut into squares once cooled. This version is great for bake sales or potlucks.
Nut-Free Option: For school-safe cookies, substitute the peanut butter with sunflower seed butter (like SunButter). The cookies will be slightly darker in color but still delicious. Note that sunflower seed butter can react with baking soda and turn green—this is completely normal and safe to eat.
Serving & Storage Suggestions
These soft thick peanut butter blossom cookies are best served at room temperature, when the chocolate kiss is firm but not hard and the cookie is perfectly soft. They’re wonderful with a cold glass of milk—honestly, it’s a classic combination for a reason.
For Serving: Arrange the cookies on a beautiful plate or platter. If you’re bringing them to a gathering, they look lovely on a three-tiered stand. For a fun presentation, serve them warm with a scoop of vanilla ice cream. The warm cookie and cold ice cream is absolutely heavenly.
Storage Instructions: Store the cookies in an airtight container at room temperature for up to 5 days. Place a piece of bread in the container to keep them soft—the cookies will absorb moisture from the bread. Replace the bread every other day. Do not refrigerate the cookies, as this will dry them out.
Freezing Instructions: These cookies freeze beautifully. To freeze baked cookies, arrange them in a single layer on a baking sheet and freeze until solid, then transfer to a freezer-safe bag or container. They’ll keep for up to 3 months. Thaw at room temperature for about 30 minutes before serving. You can also freeze the unbaked dough balls—just roll them in sugar before freezing, then bake directly from frozen, adding 2-3 minutes to the baking time.
Reheating Tip: For that just-baked experience, microwave a cookie for 8-10 seconds. The chocolate will soften slightly, and the cookie will taste fresh from the oven.
Nutritional Information & Benefits
While these soft thick peanut butter blossom cookies are definitely a treat, they do offer some nutritional benefits worth noting.
Estimated Nutritional Values (per cookie, based on 36 cookies):
- Calories: 145
- Total Fat: 8g
- Saturated Fat: 3.5g
- Cholesterol: 15mg
- Sodium: 95mg
- Total Carbohydrates: 17g
- Sugars: 11g
- Protein: 3g
Health Benefits: Peanut butter is a good source of protein and healthy fats. It also contains vitamin E, magnesium, and potassium. The cookies also provide a small amount of calcium from the milk chocolate. Of course, these are still cookies—they’re meant to be enjoyed in moderation as part of a balanced diet.
Dietary Considerations: These cookies contain gluten, dairy, eggs, peanuts, and soy (from the chocolate). They are not suitable for those with these allergies without modifications. For a dairy-free version, use vegan butter and dairy-free chocolate kisses.
Personal Wellness Perspective: I believe in enjoying treats without guilt. These cookies are made with real, recognizable ingredients—no preservatives, no artificial flavors. When my family eats these, I know exactly what went into them. That matters to me.
Conclusion
These soft thick peanut butter blossom cookies are more than just a recipe—they’re a little piece of comfort that I’m so happy to share with you. They’re the cookies I make when I need a guaranteed win, when I want to fill my kitchen with that warm, nostalgic smell, or when I just want to see my daughter’s face light up as she presses a chocolate kiss into each warm cookie.
I hope you’ll try this recipe and make it your own. Maybe you’ll add a sprinkle of sea salt on top, or swap in dark chocolate kisses, or double the batch because one dozen is never enough. However you make them, I promise they’ll become a favorite in your home too. They certainly have in mine.
If you make these soft thick peanut butter blossom cookies, I’d love to hear about it! Drop a comment below and let me know how they turned out, what variations you tried, or if the kids gave them the official stamp of approval. And if you have a favorite cookie memory, share that too—I love hearing your stories. Happy baking!
Frequently Asked Questions
Why did my peanut butter blossom cookies turn out flat?
Flat cookies usually happen for one of three reasons: your butter was too soft or melted, you used natural peanut butter that’s too oily, or you overmixed the dough. Make sure your butter is softened but not melted, use a processed peanut butter like Jif or Skippy, and mix just until the flour disappears.
Can I use crunchy peanut butter instead of creamy?
Yes, you can! Crunchy peanut butter will give the cookies a nice texture with little bits of peanut throughout. The cookies might spread slightly more because the peanut pieces prevent the dough from holding together as tightly, but they’ll still be delicious.
How do I keep the Hershey’s kisses from melting completely?
Press the kisses into the cookies immediately after they come out of the oven, but don’t press too hard. The residual heat should soften the chocolate slightly without melting it completely. Let the cookies cool on the baking sheet for 5 minutes before transferring to a wire rack. This allows the chocolate to set properly.
Can I make the dough ahead of time?
Absolutely! You can refrigerate the dough for up to 3 days. Roll the dough into balls and coat them in sugar just before baking. If the dough is too cold to roll easily, let it sit at room temperature for 10-15 minutes. You can also freeze the dough balls for up to 3 months.
Why did my cookies turn out dry and crumbly?
Dry, crumbly cookies usually mean you added too much flour. Make sure you’re spooning the flour into your measuring cup and leveling it off, rather than scooping directly from the bag. Also, check your baking time—overbaking can dry out cookies quickly. Remember, they should look slightly soft in the center when you take them out of the oven.
Pin This Recipe!
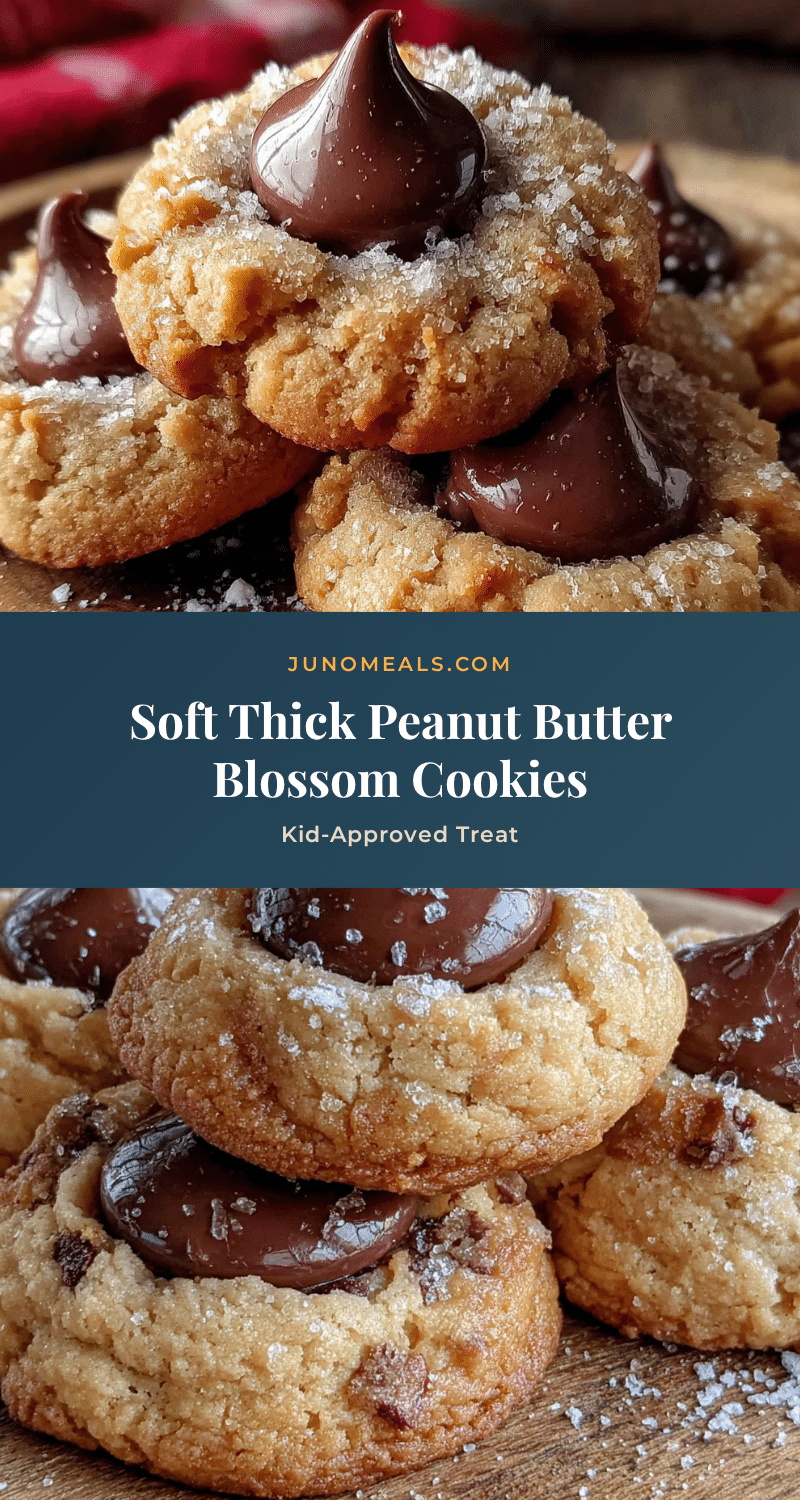
Soft Thick Peanut Butter Blossom Cookies Easy Kid-Approved Recipe

These soft thick peanut butter blossom cookies are perfectly soft, perfectly peanut buttery, and topped with that iconic Hershey’s kiss. A simple, kid-approved recipe that comes together in under 30 minutes with basic pantry ingredients.
- Prep Time: 15 minutes
- Cook Time: 10 minutes
- Total Time: 25 minutes
- Yield: 36 cookies 1x
- Category: Dessert
- Cuisine: American
Ingredients
- 1/2 cup (1 stick, 113g) unsalted butter, softened
- 1/2 cup (130g) creamy peanut butter (Jif or Skippy recommended)
- 1/2 cup (100g) granulated sugar (plus 1/4 cup for rolling)
- 1/2 cup (100g) packed light brown sugar
- 1 large egg, at room temperature
- 1 teaspoon vanilla extract
- 1 and 1/2 cups (190g) all-purpose flour
- 1 teaspoon baking soda
- 1/2 teaspoon baking powder
- 1/4 teaspoon salt
- 36–40 Hershey’s Kisses, unwrapped
Instructions
- Preheat your oven to 375°F (190°C). Line two baking sheets with parchment paper or silicone mats.
- In a large mixing bowl, beat the softened butter, granulated sugar, and brown sugar together until light and fluffy, about 2-3 minutes. Scrape down the sides of the bowl halfway through.
- Beat in the creamy peanut butter until fully combined. The mixture will look like thick frosting.
- Beat in the egg and vanilla extract until just combined. Don’t overmix.
- In a separate bowl, whisk together the flour, baking soda, baking powder, and salt.
- Gradually add the dry ingredients to the wet mixture, mixing on low speed or folding with a spatula until just combined. Stop as soon as the flour disappears.
- Place about 1/4 cup of granulated sugar in a small bowl. Using a cookie scoop or two spoons, portion the dough into 1.5-tablespoon balls (about 25g each). Roll each ball between your palms until smooth, then roll in the sugar to coat completely.
- Arrange the sugar-coated dough balls on the prepared baking sheets, spacing them about 2 inches apart.
- Bake for 8-10 minutes, or until the edges are lightly golden and the centers still look slightly soft and puffy.
- As soon as the cookies come out of the oven, press a Hershey’s kiss firmly into the center of each cookie. Don’t press too hard.
- Let the cookies cool on the baking sheet for 5 minutes before transferring to a wire rack to cool completely.
Notes
For best results, use processed peanut butter like Jif or Skippy, not natural peanut butter. Butter should be softened but not melted. Have Hershey’s kisses unwrapped before cookies come out of the oven. Cookies can be stored in an airtight container at room temperature for up to 5 days. Freeze baked cookies for up to 3 months or unbaked dough balls for up to 3 months.
Nutrition
- Serving Size: 1 cookie
- Calories: 145
- Sugar: 11
- Sodium: 95
- Fat: 8
- Saturated Fat: 3.5
- Carbohydrates: 17
- Protein: 3
Keywords: peanut butter blossoms, peanut butter cookies, Hershey's kisses, soft cookies, thick cookies, kid-friendly, easy cookies, classic cookies, holiday cookies


