That first bite—the one where the edge shatters and the center gives way like a warm, buttery hug—still takes me straight to my tiny apartment kitchen at 11 PM on a Tuesday.
I was craving cookies, obviously. Not the kind of craving you can talk yourself out of, but the kind that makes you dig through the pantry like you’re searching for buried treasure. The problem? I had just moved, my fridge was mostly empty, and I definitely did not have the patience (or the willpower) to chill dough for two hours. So I did something reckless. I mixed up a tiny batch of cookie dough, scooped it straight onto the tray, and shoved it in the oven. No chilling. No waiting. Just pure, impulsive cookie logic.
Honestly, I expected a flat, greasy mess. What came out of the oven was anything but. The edges were crisp and caramelized, the centers were soft and gooey, and the whole apartment smelled like a bakery that had materialized out of thin air. I stood there, eating one straight off the baking sheet (burning my fingers, not caring), and realized I had accidentally stumbled onto something worth keeping.
That’s the thing about this small batch chocolate chip cookie recipe. It doesn’t ask you to plan ahead. It doesn’t demand patience. It just shows up when you need it, delivers exactly what you’re hoping for, and disappears before you have time to regret a single bite.
Why You’ll Love This Recipe
Let’s be real for a second. Most cookie recipes are designed for a crowd. They make two dozen cookies, which is great if you’re feeding a party but terrible if you’re a single person (or a couple) who just wants a warm cookie without committing to a week of leftovers. This recipe solves that problem beautifully.
- Quick & Easy: From craving to cookie in under 20 minutes. No chilling, no complicated steps, no waiting around.
- Simple Ingredients: You probably have everything in your kitchen right now. Butter, sugar, an egg, flour, chocolate chips—that’s it.
- Perfect for Late-Night Cravings: This is the cookie you make when the urge hits at 10 PM and you refuse to be denied.
- Crowd-Pleaser (for a Small Crowd): Makes exactly 6 perfect cookies. Enough to share, but not so many you feel obligated.
- Unbelievably Delicious: The texture is honestly perfect—crispy edges, soft centers, and that irresistible slightly underbaked chewiness in the middle.
What makes this different from every other no-chill cookie recipe out there? It’s the balance. Most no-chill cookies spread too much or turn out flat. I spent weeks tweaking the ratio of butter to flour, adjusting the sugar, and testing different baking times until I got it right. The result is a cookie that looks like it came from a bakery but takes almost no effort. It’s comfort food at its most honest—no pretense, no waiting, just pure satisfaction.
What Ingredients You Will Need
This recipe uses simple, everyday ingredients to deliver big flavor without the fuss. Everything here is probably already in your pantry, which is exactly the point.
- Unsalted butter, melted and slightly cooled (4 tablespoons / 57g) — Melting the butter is key here. It gives the cookies a chewier texture and deeper flavor without needing to cream anything. I recommend using a good-quality butter like Kerrygold if you have it.
- Granulated sugar (3 tablespoons / 38g) — Adds sweetness and helps with that crispy edge.
- Light brown sugar, packed (3 tablespoons / 43g) — This is where the chewiness comes from. The molasses in brown sugar keeps the centers soft and adds a warm, caramel-like flavor.
- Large egg yolk (1 yolk, about 18g) — Just the yolk. Using only the yolk gives you richness and tenderness without making the dough too wet. Save the egg white for scrambled eggs tomorrow morning.
- Vanilla extract (1/2 teaspoon) — Pure vanilla extract makes a noticeable difference here. Imitation vanilla will work, but the flavor won’t be as warm and rounded.
- All-purpose flour (1/2 cup minus 1 tablespoon / 60g) — Yes, the measurement is specific. I found that using slightly less flour than a full half-cup prevents the cookies from being too cakey. Spoon and level your flour—don’t scoop directly with the measuring cup.
- Baking soda (1/4 teaspoon) — Helps the cookies spread just enough and gives them a slight lift.
- Salt (1/4 teaspoon) — Don’t skip this. Salt balances the sweetness and makes the chocolate flavor pop. I use fine sea salt.
- Semi-sweet chocolate chips (1/3 cup / 60g) — I prefer Ghirardelli or Guittard for the best melt and flavor. You can also chop up a chocolate bar if you want those irregular puddles of chocolate.
That’s it. Six ingredients (if you count vanilla and salt as pantry staples), one bowl, and zero waiting. The beauty of this recipe is that there’s nowhere to hide—every ingredient matters, so use good ones.
Equipment Needed
You don’t need much for this recipe, which is honestly my favorite part. Here’s what you’ll want to have on hand:
- Mixing bowl — Any medium-sized bowl works. I use a glass or ceramic bowl because they don’t retain heat, but metal is fine too.
- Whisk or wooden spoon — A whisk works great for combining the wet ingredients, but a sturdy wooden spoon or silicone spatula is perfect for folding in the flour and chocolate.
- Measuring cups and spoons — Accuracy matters with a small batch. Use proper measuring spoons, not your everyday silverware.
- Baking sheet — A half-sheet pan works perfectly. Avoid dark non-stick pans if possible—they absorb more heat and can cause the bottoms to brown too quickly.
- Parchment paper or silicone baking mat — Parchment is my preference because it’s easy cleanup and helps the cookies spread evenly. If you use a silicone mat, expect slightly less spread.
- Cookie scoop (optional but helpful) — A 1.5-tablespoon scoop makes perfectly uniform cookies. If you don’t have one, just use a regular spoon and try to make the portions equal.
- Cooling rack — Not strictly necessary, but it helps the cookies cool evenly without steaming on the bottom.
If you don’t have a baking sheet, a cast iron skillet works in a pinch (just reduce the baking time by a minute or two). And honestly, I’ve made these in a toaster oven before—they work great there too, just keep an eye on them.
Preparation Method
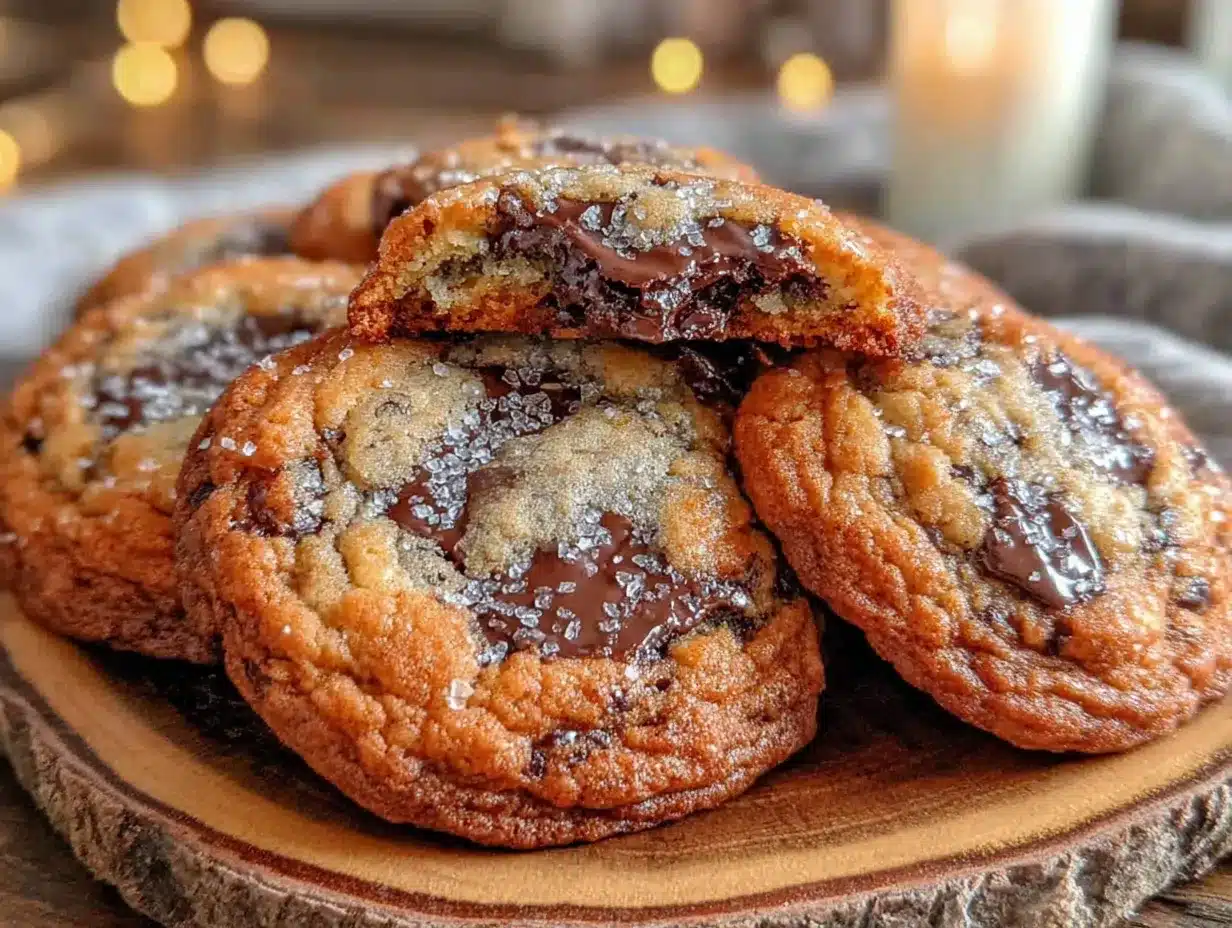
Alright, let’s make some cookies. This whole process takes about 15 minutes from start to finish, so preheat your oven first.
- Preheat your oven to 350°F (175°C). Line a baking sheet with parchment paper. Don’t skip the parchment—it prevents sticking and helps the cookies brown evenly.
- Melt the butter. Place 4 tablespoons of unsalted butter in a microwave-safe bowl and heat in 20-second bursts until just melted. You want it melted but not hot—let it sit for a minute if it’s steaming. The butter should be warm to the touch but not bubbling.
- Combine the sugars and butter. Add 3 tablespoons granulated sugar and 3 tablespoons packed light brown sugar to the melted butter. Whisk vigorously for about 30 seconds until the mixture looks smooth and glossy. This step is important—you’re dissolving the sugar into the butter, which helps create that crackly top.
- Add the egg yolk and vanilla. Drop in 1 large egg yolk and 1/2 teaspoon vanilla extract. Whisk until the mixture is thick, smooth, and slightly lighter in color. It should look like a thick caramel sauce. If it looks separated or greasy, you might have whisked too gently—just keep going until it comes together.
- Add the dry ingredients. Sprinkle 1/2 cup minus 1 tablespoon all-purpose flour, 1/4 teaspoon baking soda, and 1/4 teaspoon salt over the wet mixture. Use a spatula or wooden spoon to fold everything together gently. Stop as soon as the flour disappears—overmixing will make the cookies tough.
- Fold in the chocolate chips. Add 1/3 cup semi-sweet chocolate chips and fold them in with a few strokes. The dough will be soft and slightly sticky—that’s exactly what you want. Don’t be tempted to add more flour.
- Scoop the dough. Use a 1.5-tablespoon cookie scoop or a regular spoon to portion the dough into 6 equal balls. Place them on the prepared baking sheet, spacing them about 2 inches apart. The dough balls should be round and tall, not flattened. (Flattening them will make the cookies spread too thin.)
- Bake immediately. Pop the tray into the preheated oven and bake for 9-11 minutes. At 9 minutes, the cookies will be very soft and puffy with slightly golden edges. At 11 minutes, they’ll be more golden throughout with firmer centers. I personally pull them at 9 minutes and 30 seconds for that perfect gooey middle.
- Cool on the baking sheet. Let the cookies rest on the hot baking sheet for 5 minutes. This is crucial—they continue baking from the residual heat and set properly during this time. After 5 minutes, transfer them to a cooling rack. If you try to move them too early, they’ll fall apart.
One more thing: the cookies will look puffy and slightly underdone when you pull them out. Trust the process. They deflate as they cool, creating that perfect crinkly top and chewy center. If you wait until they look “done” in the oven, they’ll be overbaked and crunchy.
Cooking Tips & Techniques
I’ve made this recipe probably fifty times (not exaggerating), and I’ve learned a few things the hard way. Here’s what I wish someone had told me:
Don’t overmix the dough. This is the number one mistake I see people make. Once you add the flour, mix just until you can’t see any white streaks. Overmixing develops gluten, which makes cookies tough and cakey instead of tender and chewy. I learned this after making a batch that could have doubled as hockey pucks.
Use a kitchen scale if you have one. I know, I know—measuring cups are easier. But flour is notoriously tricky to measure by volume. One person’s “cup” of flour can be 20-30% more than another’s. Weighing your ingredients ensures consistent results every time. If you don’t have a scale, fluff your flour with a spoon, then spoon it into the measuring cup and level it off with a knife. Never scoop directly with the cup.
Watch the baking time like a hawk. Ovens vary wildly. My oven runs slightly hot, so 9 minutes is perfect. My friend’s oven takes a full 11 minutes. The first time you make these, check at 9 minutes and decide from there. The cookies are done when the edges are set and golden but the centers still look slightly soft and puffy.
Let them rest. I cannot stress this enough. Those 5 minutes on the hot baking sheet are non-negotiable. The cookies are too fragile to move right out of the oven, and they need that time to finish setting up. I ruined my first batch by trying to transfer them immediately—they turned into a delicious but ugly mess.
Room temperature ingredients matter less here. Since we’re using melted butter and just an egg yolk, you don’t need to worry about bringing anything to room temperature. That’s part of what makes this recipe so convenient. Just make sure your egg is at least somewhat fresh—an older egg yolk won’t emulsify as well.
Variations & Adaptations
One of the best things about this recipe is how flexible it is. Here are some variations I’ve tried and loved:
Double Chocolate Version: Replace 1 tablespoon of flour with 1 tablespoon of unsweetened cocoa powder. Use white chocolate chips or dark chocolate chunks instead of semi-sweet. The result is a rich, fudgy cookie that feels completely different from the original.
Gluten-Free Adaptation: Swap the all-purpose flour for a 1:1 gluten-free baking flour blend (I like Bob’s Red Mill). Add an extra tablespoon of flour because gluten-free blends tend to absorb less liquid. The texture will be slightly more delicate, but the flavor is still fantastic.
Add-In Swaps: Replace chocolate chips with an equal amount of chopped nuts (walnuts or pecans work beautifully), dried cranberries, or even toffee bits. For a salty-sweet version, press a few flakes of sea salt onto each cookie right before baking.
Vegan Option: Use 4 tablespoons of vegan butter (melted) and replace the egg yolk with 1 tablespoon of aquafaba (the liquid from a can of chickpeas) mixed with 1/2 teaspoon of cornstarch. The texture won’t be exactly the same—slightly less chewy—but it’s surprisingly good. I tested this for a friend and was genuinely impressed.
Brown Butter Version: Brown the butter before using it. Melt the butter in a small saucepan over medium heat, swirling occasionally, until it turns golden brown and smells nutty (about 3-4 minutes). Let it cool slightly before proceeding with the recipe. This adds a deep, toasty flavor that takes the cookies to another level. Just be careful not to burn the butter—it goes from brown to burnt very quickly.
Serving & Storage Suggestions
These cookies are best enjoyed warm, straight from the oven. That’s really the whole point of a small batch recipe—you make them, you eat them, you move on with your life. Serve them with a cold glass of milk, a scoop of vanilla ice cream, or just on their own. They don’t need anything else.
If you somehow have leftovers (it’s happened to me exactly once), store them in an airtight container at room temperature for up to 3 days. They’ll lose some of that fresh-from-the-oven magic, but they’ll still be delicious. To revive them, pop a cookie in the microwave for 10 seconds—it brings back the soft, gooey center.
You can also freeze the unbaked dough. Scoop the dough into balls, place them on a parchment-lined baking sheet, and freeze until solid (about 1 hour). Transfer the frozen dough balls to a zip-top bag and store for up to 3 months. When you’re ready to bake, place frozen dough balls on a baking sheet and add 2-3 minutes to the baking time. No need to thaw. This is my secret weapon for late-night cookie emergencies.
A note on flavor development: these cookies taste best within the first 12 hours. Unlike some cookie recipes that improve overnight (looking at you, chilled dough recipes), these are designed for immediate gratification. The texture is at its peak when the cookies are still slightly warm from the oven.
Nutritional Information & Benefits
Let’s be honest—cookies are a treat, not a health food. But here’s the approximate nutritional breakdown for one cookie (out of 6):
- Calories: ~185
- Fat: 11g
- Carbohydrates: 22g
- Protein: 2g
- Sugar: 14g
That said, there are a few redeeming qualities here. Dark chocolate (especially semi-sweet or darker) contains antioxidants and flavonoids that are good for heart health. The butter provides fat-soluble vitamins A, D, E, and K. And making a small batch means you’re less likely to overindulge—portion control built right into the recipe.
If you’re looking for a lighter option, you can reduce the sugar by 1 tablespoon total (use 2 tablespoons of each sugar instead of 3). The cookies won’t spread as much and will be slightly less sweet, but they’ll still be satisfying. I’ve also tried using coconut sugar instead of brown sugar, and it works well—just expect a slightly different texture and a more caramel-like flavor.
Conclusion
This small batch chocolate chip cookie recipe has become my go-to for a reason. It’s honest, it’s fast, and it delivers exactly what you’re craving without any fuss or waiting. No chilling, no complicated techniques, no massive batch that leaves you with cookies for two weeks. Just six perfect cookies, ready in under 20 minutes.
I love that this recipe meets you where you are—whether you’re having a rough day, celebrating a small victory, or just want something warm and sweet to end the night. It’s the kind of recipe that feels like a secret, even though I’m sharing it with everyone. And honestly? That’s the best kind of recipe to have in your back pocket.
Try it once, and I think you’ll understand why I keep coming back to it. If you make these cookies (and I really hope you do), leave a comment below and let me know how they turned out. Did you stick with classic chocolate chips, or did you try one of the variations? I’d love to hear about it. And if you’re in the mood for another small-batch treat, check out these mini lemon blueberry cheesecakes—they’re perfect for when you want something a little more special but still manageable.
Happy baking, friend. Go make some cookies.
Frequently Asked Questions
Can I use salted butter instead of unsalted?
Yes, but reduce the added salt to just a pinch (about 1/8 teaspoon). Salted butter already contains salt, and you don’t want the cookies to be overly salty. If you only have salted butter on hand, it works fine—just taste the dough before adding extra salt.
Why did my cookies spread too much?
This usually happens for one of three reasons: your butter was too hot when you mixed it, your dough was too warm when it went into the oven, or you used too little flour. Make sure your melted butter has cooled slightly before adding the other ingredients, and don’t let the scooped dough sit on the baking sheet for too long before baking. If your kitchen is very warm, pop the scooped dough in the fridge for 10 minutes before baking.
Can I double this recipe?
Absolutely. Simply double all the ingredients. The only thing that changes is that you’ll use a whole egg instead of just one yolk (since two yolks would be 36g, which is close to a whole egg). Use 1 large egg instead of 2 yolks when doubling. The baking time stays the same.
Can I use milk chocolate or dark chocolate chips?
Yes, any chocolate works here. Milk chocolate will make the cookies sweeter, while dark chocolate (60-70% cacao) will give a more intense, less sweet flavor. I personally prefer semi-sweet because it hits that perfect middle ground, but feel free to use whatever you have on hand.
How do I know when the cookies are done baking?
The edges should be golden brown and set, while the centers still look slightly puffy and soft. The cookies will continue to bake on the hot baking sheet after you pull them out, so it’s better to underbake slightly than overbake. If the centers look completely set and firm in the oven, they’re already overdone.
Pin This Recipe!
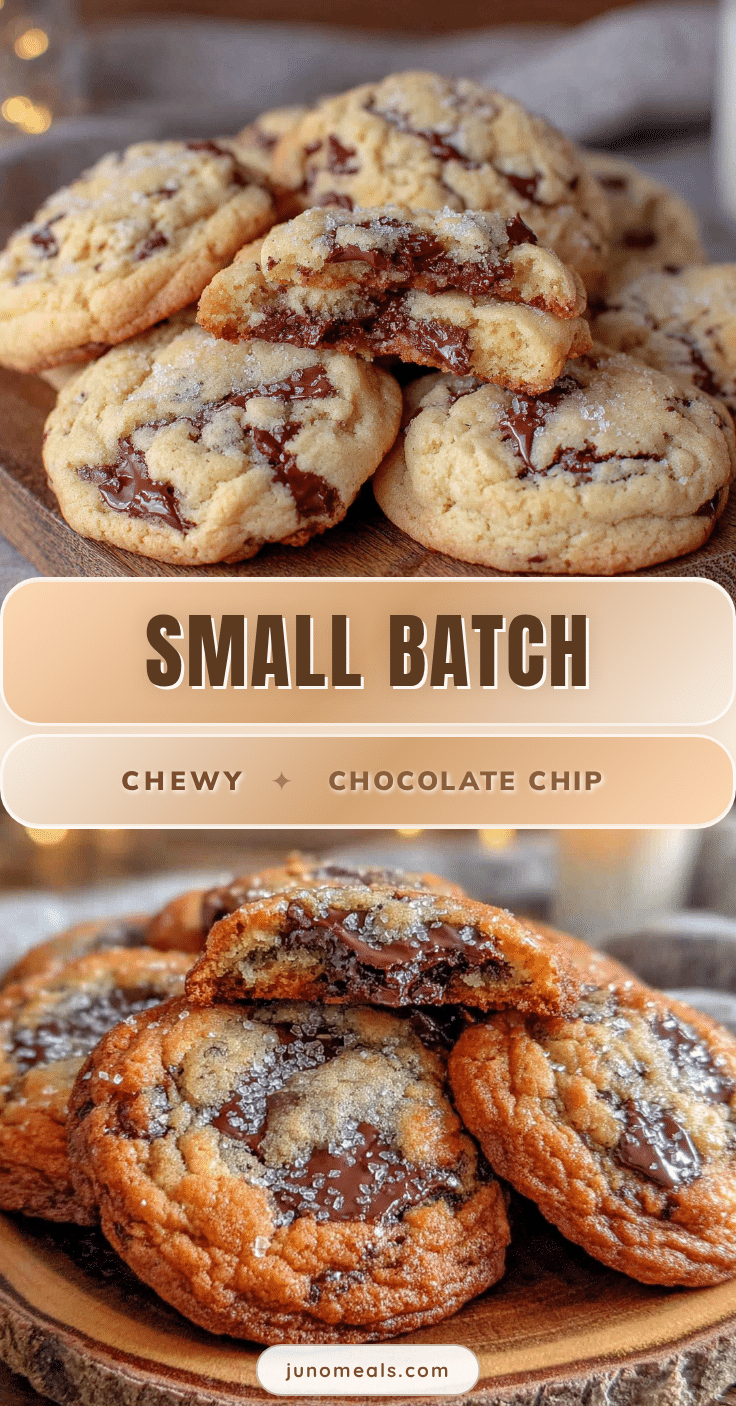
Small Batch Chocolate Chip Cookies: Best No-Chill Recipe

This small batch chocolate chip cookie recipe delivers 6 perfect cookies in under 20 minutes with no chilling required. Crispy edges, soft gooey centers, and simple pantry ingredients make it the ultimate solution for late-night cravings.
- Prep Time: 10 minutes
- Cook Time: 10 minutes
- Total Time: 20 minutes
- Yield: 6 cookies 1x
- Category: Dessert
- Cuisine: American
Ingredients
- 4 tablespoons unsalted butter, melted and slightly cooled (57g)
- 3 tablespoons granulated sugar (38g)
- 3 tablespoons light brown sugar, packed (43g)
- 1 large egg yolk (about 18g)
- 1/2 teaspoon vanilla extract
- 1/2 cup minus 1 tablespoon all-purpose flour (60g)
- 1/4 teaspoon baking soda
- 1/4 teaspoon salt
- 1/3 cup semi-sweet chocolate chips (60g)
Instructions
- Preheat your oven to 350°F (175°C). Line a baking sheet with parchment paper.
- Melt the butter in a microwave-safe bowl in 20-second bursts until just melted. Let it cool slightly if steaming.
- Add granulated sugar and packed light brown sugar to the melted butter. Whisk vigorously for about 30 seconds until smooth and glossy.
- Add the egg yolk and vanilla extract. Whisk until the mixture is thick, smooth, and slightly lighter in color, like thick caramel sauce.
- Sprinkle flour, baking soda, and salt over the wet mixture. Fold gently with a spatula or wooden spoon until just combined—do not overmix.
- Fold in the chocolate chips with a few strokes. The dough will be soft and slightly sticky.
- Scoop the dough into 6 equal balls using a 1.5-tablespoon cookie scoop or spoon. Place on the prepared baking sheet, spacing about 2 inches apart. Do not flatten.
- Bake immediately for 9-11 minutes. At 9 minutes, cookies will be soft and puffy with golden edges; at 11 minutes, more golden throughout. For gooey centers, bake 9 minutes 30 seconds.
- Let cookies rest on the hot baking sheet for 5 minutes—they continue baking from residual heat. Then transfer to a cooling rack.
Notes
Don’t overmix the dough—mix just until flour disappears. Use a kitchen scale for accuracy if possible. Watch baking time closely; ovens vary. The 5-minute rest on the baking sheet is crucial for proper setting. Cookies are best enjoyed warm within 12 hours. For vegan option, use 4 tablespoons vegan butter and replace egg yolk with 1 tablespoon aquafaba mixed with 1/2 teaspoon cornstarch.
Nutrition
- Serving Size: 1 cookie
- Calories: 185
- Sugar: 14
- Sodium: 95
- Fat: 11
- Saturated Fat: 7
- Carbohydrates: 22
- Fiber: 1
- Protein: 2
Keywords: small batch chocolate chip cookies, no chill cookies, quick cookies, easy cookie recipe, late night cookies, 6 cookies


