By the fifth time I made this spiderweb cookie cake in a single week, I had finally stopped overthinking the web. The first few attempts were a mess—literally. I tried piping the web too thick, then too thin, then with a toothpick that dragged more than it drew. But by batch number five, something clicked. The butter was the perfect temperature, the cocoa powder had settled into the dough just right, and my hand finally stopped shaking over the batter. I stood there in my kitchen, staring at a giant cookie that actually looked like it belonged in a bakery window, and I laughed out loud. Not because it was perfect—but because I had been so determined to get it right that I forgot to just enjoy the process. This spiderweb Halloween cookie cake became my little obsession, and honestly, I think it stuck around because it was the first Halloween treat that felt like me. Not too fussy, not too simple, but just spooky enough to make you smile.
Why You’ll Love This Recipe
This isn’t just another Halloween dessert. It’s the kind of recipe that makes you look like a kitchen pro without the stress. I’ve tested this spiderweb cookie cake more times than I care to admit, and every single version came out delicious—even the ugly ones. Here’s why this one’s a keeper:
- Quick & Easy: From start to finish, you’re looking at about 30 minutes. Perfect for last-minute Halloween parties or a fun weeknight baking session with the kids.
- Simple Ingredients: No weird specialty items here. You probably have most of this in your pantry right now.
- Perfect for Halloween: It’s festive without being over-the-top. Great for classroom treats, potlucks, or just a cozy night in with a scary movie.
- Crowd-Pleaser: I’ve brought this to three different gatherings, and it disappears every time. Kids love the web, adults love the cookie.
- Unbelievably Delicious: The edges are slightly crisp, the center is soft and chewy, and the chocolate glaze with the web design adds just the right amount of sweetness.
What makes this version different? It’s the texture. Most giant cookies end up either too cakey or too flat. I spent weeks tweaking the butter-to-sugar ratio until I got that perfect balance—crisp on the outside, tender in the middle. And the web? I figured out a piping trick that makes it look clean and professional, even if you’ve never decorated a cookie in your life.
This spiderweb cookie cake isn’t just good—it’s the kind of dessert that makes you close your eyes after the first bite. It’s comfort food with a spooky twist, and it’s guaranteed to make your Halloween a little sweeter.
What Ingredients You Will Need
This recipe uses simple, everyday ingredients to create something that feels special. No fancy baking skills required—just a few pantry staples and a little patience for the web design.
- All-purpose flour (2 cups / 240g) – The base of the cookie. I recommend King Arthur Flour for consistent results, but any brand works.
- Unsalted butter (1 cup / 226g, softened) – Make sure it’s at room temperature. Cold butter won’t cream properly with the sugar.
- Granulated sugar (3/4 cup / 150g) – Adds sweetness and helps create those crispy edges.
- Light brown sugar (3/4 cup / 150g, packed) – This gives the cookie its chewy texture and a subtle caramel flavor.
- Large egg (1, room temperature) – Binds everything together. Let it sit out for 15 minutes before starting.
- Vanilla extract (2 teaspoons) – Pure vanilla makes a difference here. Imitation works, but the flavor won’t be as rich.
- Baking soda (1 teaspoon) – Helps the cookie spread just enough without becoming a pancake.
- Salt (1/2 teaspoon) – Balances the sweetness. Don’t skip it.
- Dark chocolate chips (1 cup / 175g) – I use Ghirardelli 60% cacao chips. They melt beautifully and aren’t too sweet.
- For the glaze: Powdered sugar (1 cup / 120g), cocoa powder (2 tablespoons), milk (2-3 tablespoons), and vanilla extract (1/2 teaspoon).
A quick note on substitutions: If you need a dairy-free option, use plant-based butter and dairy-free chocolate chips. For a gluten-free version, swap the all-purpose flour with a 1:1 gluten-free baking blend. The texture will be slightly different, but still delicious. I’ve tried both, and honestly, the gluten-free version is almost as good as the original.
Equipment Needed
You don’t need a professional bakery setup for this spiderweb cookie cake. Here’s what I used:
- 10-inch cast iron skillet or round cake pan – A cast iron skillet gives the best crispy edges, but a regular cake pan works perfectly too.
- Electric hand mixer or stand mixer – Creaming the butter and sugar by hand is possible, but your arm will thank you for using a mixer.
- Mixing bowls – One large, one medium.
- Piping bag or zip-top bag – For the spiderweb design. A zip-top bag with a tiny corner snipped off works just as well.
- Toothpick or skewer – For dragging the web lines.
- Parchment paper – Makes cleanup so much easier.
If you don’t have a cast iron skillet, don’t worry. I’ve made this in a regular 9-inch cake pan, and it turned out great. The edges just won’t be quite as crispy. Also, if you don’t have a piping bag, a small zip-top bag is your best friend. Just fill it with the glaze, snip off a tiny corner, and you’re good to go.
Preparation Method
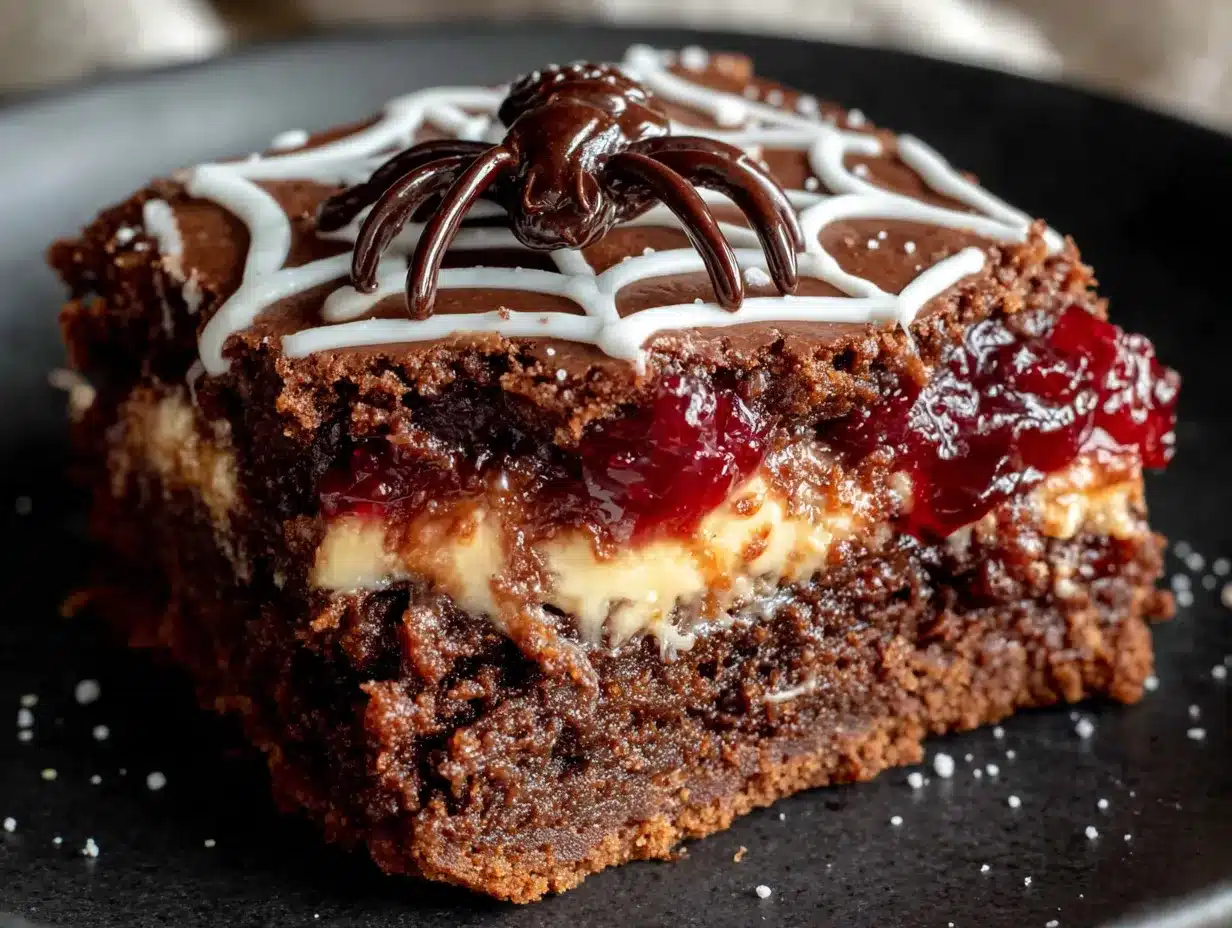
Let’s make this spiderweb cookie cake. I’ll walk you through every step, including the little tricks I learned the hard way.
- Preheat your oven to 350°F (175°C). Grease your skillet or cake pan with butter or non-stick spray. If using a cake pan, line the bottom with parchment paper for easy removal.
- Cream the butter and sugars together. In a large bowl, beat the softened butter, granulated sugar, and brown sugar until light and fluffy. This takes about 3-4 minutes with an electric mixer. Scrape down the sides of the bowl halfway through. The mixture should look pale and slightly airy.
- Add the egg and vanilla. Beat in the egg and vanilla extract until just combined. Don’t overmix here—you don’t want to incorporate too much air.
- Mix the dry ingredients. In a separate bowl, whisk together the flour, baking soda, and salt. Gradually add this to the wet mixture, mixing on low speed until just combined. The dough will be thick and slightly sticky.
- Fold in the chocolate chips. Use a spatula to gently fold in the dark chocolate chips. Make sure they’re evenly distributed throughout the dough.
- Press the dough into the pan. Transfer the dough to your prepared skillet or cake pan. Use your fingers or the back of a spoon to press it into an even layer. Don’t press too hard—just enough to spread it out.
- Bake for 18-22 minutes. The edges should be golden brown and set, but the center will still look slightly soft. That’s exactly what you want. A toothpick inserted in the center should come out with a few moist crumbs, not wet batter. Let the cookie cool in the pan for 10 minutes, then transfer to a wire rack to cool completely.
- Make the glaze. While the cookie cools, whisk together the powdered sugar, cocoa powder, milk, and vanilla extract in a small bowl. You want a smooth, thick consistency—think heavy cream. If it’s too thick, add a tiny bit more milk. If it’s too thin, add a little more powdered sugar.
- Create the spiderweb. Once the cookie is completely cool, spoon the glaze into your piping bag or zip-top bag. Pipe a small circle in the center of the cookie. Then pipe a larger circle around it, and another larger circle around that—like a target. You should have 3-4 concentric circles total.
- Drag the web lines. Use a toothpick or skewer to drag lines from the center outward. Start at the center circle and drag through all the circles to the edge. Repeat this 8 times around the cookie, spacing the lines evenly. The glaze will stretch and create the web effect.
- Let it set. Allow the glaze to set for about 15-20 minutes before slicing. The web will hold its shape beautifully.
One thing I learned the hard way: don’t rush the cooling step. If the cookie is even slightly warm, the glaze will melt and turn into a mess. Patience pays off here.
Cooking Tips & Techniques
I’ve made this spiderweb cookie cake enough times to know exactly where things can go wrong. Here are my best tips for getting it right every time:
- Room temperature ingredients matter. Cold butter won’t cream properly, and a cold egg can seize the dough. Let everything sit out for 20-30 minutes before starting.
- Don’t overbake. The biggest mistake I made was leaving the cookie in the oven too long. It continues to cook in the pan as it cools, so pull it out when the center still looks slightly underdone.
- Use a light hand with the glaze. When piping the circles, keep the lines thin. Thick glaze lines won’t drag as cleanly, and the web effect gets lost.
- Work quickly with the toothpick. Once you start dragging the lines, the glaze begins to set. Do all 8 drags within a minute or two for the best results.
- Multitask the cooling. While the cookie cools, make the glaze and clean up your workspace. It saves time and keeps your kitchen organized.
I once tried to make the web with a fork instead of a toothpick. Don’t do that. The lines were way too thick, and it looked more like a spiderweb that had been through a hurricane. Stick with the toothpick—it’s simple and effective.
Variations & Adaptations
This spiderweb cookie cake is super flexible. Here are a few ways I’ve changed it up:
- White chocolate web: Swap the dark chocolate chips for white chocolate, and use white chocolate for the glaze too. It gives the cookie a totally different look and a sweeter, creamier flavor.
- Peanut butter swirl: Add 1/2 cup of creamy peanut butter to the dough along with the egg. Swirl a little extra peanut butter on top before baking for a Reese’s-inspired version.
- Gluten-free option: Use a 1:1 gluten-free baking flour. I’ve tried this with Cup4Cup, and the texture was surprisingly close to the original.
- Mini cookie cakes: Divide the dough into 4-5 small ramekins and bake for 12-14 minutes. Perfect for individual servings at a party.
- Spiderweb color swap: Use a white glaze instead of chocolate, and add a few drops of orange food coloring to the web. It makes the spiderweb pop against the dark cookie.
My personal favorite variation? The peanut butter swirl. I made it for a Halloween party last year, and people were asking for the recipe before they even finished their first slice. It’s rich, indulgent, and just a little bit dangerous.
Serving & Storage Suggestions
This spiderweb cookie cake is best served warm, but it’s also delicious at room temperature. Here’s how to get the most out of it:
- Serving temperature: If you want that gooey, melty chocolate experience, pop individual slices in the microwave for 10-15 seconds. For a more cookie-like texture, serve at room temperature.
- Presentation: Cut the cookie into wedges like a pizza. Place each slice on a small plate with a dollop of whipped cream or a scoop of vanilla ice cream. The contrast of warm cookie and cold ice cream is heavenly.
- Complementary dishes: This cookie cake pairs beautifully with a glass of cold milk, a hot cup of coffee, or a pumpkin spice latte. For a full Halloween spread, serve it alongside some mini lemon blueberry cheesecakes for a fun dessert table.
- Storage: Store leftover cookie cake in an airtight container at room temperature for up to 3 days. The glaze will soften slightly, but the flavor stays great.
- Freezing: You can freeze the unbaked dough in the pan (wrap it tightly in plastic wrap and foil) for up to 3 months. Bake directly from frozen, adding 5-7 minutes to the baking time.
- Reheating: For best results, reheat slices in a 300°F oven for 5 minutes. The microwave works in a pinch, but the edges won’t be as crisp.
The flavors actually develop over time. Day-old cookie cake tastes even richer, with a deeper chocolate flavor. Just keep it covered so it doesn’t dry out.
Nutritional Information & Benefits
Let’s be real—this is a treat, not a health food. But here’s what you’re working with per serving (based on 8 slices):
- Calories: Approximately 420 per slice
- Fat: 22g (mostly from butter and chocolate)
- Carbohydrates: 55g
- Protein: 5g
- Fiber: 2g
- Sugar: 38g
On the bright side, dark chocolate is packed with antioxidants, and the cocoa powder in the glaze adds a little extra. If you’re watching your sugar intake, you can reduce the granulated sugar by 1/4 cup without affecting the texture too much. For a lower-carb version, try using a sugar substitute like monk fruit sweetener—though the texture will be slightly different.
This recipe is not gluten-free by default, but it’s easy to adapt. It contains dairy and eggs, so it’s not vegan-friendly unless you make substitutions. Personally, I think it’s worth every calorie, especially when you’re sharing it with people you love.
Conclusion
This spiderweb Halloween cookie cake is everything I want in a holiday dessert—fun, festive, and genuinely delicious. It’s the kind of recipe that brings people together, whether you’re making it for a party or just for yourself on a cozy October evening. I love how forgiving it is. Even if your web isn’t perfect, the cookie itself is so good that nobody will care.
I hope you give this recipe a try. Customize it however you like—add sprinkles, swap the chocolate, make it your own. That’s the beauty of baking. And when you do make it, I’d love to hear how it turned out. Drop a comment below, share a photo, or tag me on social media. Let’s make this Halloween a little sweeter, one cookie cake at a time.
Happy baking, and happy Halloween!
Frequently Asked Questions
Can I make this spiderweb cookie cake ahead of time?
Absolutely. You can bake the cookie a day in advance and add the web glaze just before serving. Store the baked, unglazed cookie in an airtight container at room temperature.
Why did my spiderweb glaze melt?
This usually happens if the cookie is still warm when you pipe the glaze. Make sure the cookie is completely cooled to room temperature before adding the web design.
Can I use a different pan size?
Yes. A 9-inch cake pan works perfectly, but the cookie will be slightly thicker. You may need to add 2-3 minutes to the baking time. A 12-inch skillet will give you a thinner, crispier cookie.
How do I get clean lines for the spiderweb?
Use a thin piping tip or a zip-top bag with a tiny corner snipped off. Keep the glaze lines thin, and drag the toothpick quickly from the center outward. Practice on a piece of parchment paper first if you’re nervous.
Can I freeze the finished cookie cake?
Yes, but freeze it without the glaze. Wrap the baked, cooled cookie tightly in plastic wrap and foil. Freeze for up to 3 months. Thaw at room temperature, then add the web design fresh.
Pin This Recipe!

Perfect Spiderweb Cookie Cake: Easy Halloween Dessert Idea

This spiderweb Halloween cookie cake is a festive and delicious dessert that’s quick and easy to make. With a soft, chewy center and slightly crisp edges, topped with a chocolate glaze spiderweb, it’s the perfect treat for Halloween parties or a cozy night in.
- Prep Time: 10 minutes
- Cook Time: 20 minutes
- Total Time: 30 minutes
- Yield: 8 servings 1x
- Category: Dessert
- Cuisine: American
Ingredients
- 2 cups (240g) all-purpose flour
- 1 cup (226g) unsalted butter, softened
- 3/4 cup (150g) granulated sugar
- 3/4 cup (150g) light brown sugar, packed
- 1 large egg, room temperature
- 2 teaspoons vanilla extract
- 1 teaspoon baking soda
- 1/2 teaspoon salt
- 1 cup (175g) dark chocolate chips
- For the glaze: 1 cup (120g) powdered sugar
- 2 tablespoons cocoa powder
- 2–3 tablespoons milk
- 1/2 teaspoon vanilla extract
Instructions
- Preheat your oven to 350°F (175°C). Grease your skillet or cake pan with butter or non-stick spray. If using a cake pan, line the bottom with parchment paper for easy removal.
- Cream the butter and sugars together. In a large bowl, beat the softened butter, granulated sugar, and brown sugar until light and fluffy. This takes about 3-4 minutes with an electric mixer. Scrape down the sides of the bowl halfway through. The mixture should look pale and slightly airy.
- Add the egg and vanilla. Beat in the egg and vanilla extract until just combined. Don’t overmix here—you don’t want to incorporate too much air.
- Mix the dry ingredients. In a separate bowl, whisk together the flour, baking soda, and salt. Gradually add this to the wet mixture, mixing on low speed until just combined. The dough will be thick and slightly sticky.
- Fold in the chocolate chips. Use a spatula to gently fold in the dark chocolate chips. Make sure they’re evenly distributed throughout the dough.
- Press the dough into the pan. Transfer the dough to your prepared skillet or cake pan. Use your fingers or the back of a spoon to press it into an even layer. Don’t press too hard—just enough to spread it out.
- Bake for 18-22 minutes. The edges should be golden brown and set, but the center will still look slightly soft. That’s exactly what you want. A toothpick inserted in the center should come out with a few moist crumbs, not wet batter. Let the cookie cool in the pan for 10 minutes, then transfer to a wire rack to cool completely.
- Make the glaze. While the cookie cools, whisk together the powdered sugar, cocoa powder, milk, and vanilla extract in a small bowl. You want a smooth, thick consistency—think heavy cream. If it’s too thick, add a tiny bit more milk. If it’s too thin, add a little more powdered sugar.
- Create the spiderweb. Once the cookie is completely cool, spoon the glaze into your piping bag or zip-top bag. Pipe a small circle in the center of the cookie. Then pipe a larger circle around it, and another larger circle around that—like a target. You should have 3-4 concentric circles total.
- Drag the web lines. Use a toothpick or skewer to drag lines from the center outward. Start at the center circle and drag through all the circles to the edge. Repeat this 8 times around the cookie, spacing the lines evenly. The glaze will stretch and create the web effect.
- Let it set. Allow the glaze to set for about 15-20 minutes before slicing. The web will hold its shape beautifully.
Notes
Make sure the cookie is completely cool before adding the glaze to prevent it from melting. For best results, use room temperature ingredients. The cookie continues to cook as it cools, so remove it from the oven when the center still looks slightly underdone. Work quickly when dragging the web lines as the glaze begins to set.
Nutrition
- Serving Size: 1 slice
- Calories: 420
- Sugar: 38
- Sodium: 280
- Fat: 22
- Saturated Fat: 13
- Carbohydrates: 55
- Fiber: 2
- Protein: 5
Keywords: spiderweb cookie cake, Halloween dessert, easy Halloween recipe, chocolate cookie cake, spiderweb cake, Halloween baking


