I was standing in the baking aisle of our local grocery store last December, grabbing a last-minute can of evaporated milk for something else entirely, when the woman next to me opened a tin of butter cookies. That familiar, almost floral scent of sweetened butter hit me—and suddenly I was seven years old, perched on a wobbly wooden stool in my Aunt Lena’s cramped kitchen in Chicago. She was hunched over a cookie press, her knuckles dusted with flour, muttering something about the dough being too soft. I remember she let me press the trigger once, and the star-shaped spritz cookie flew right off the tray and landed on the floor. She didn’t yell. She just picked it up, brushed it off, and popped it in her mouth with a wink. That memory—the smell, the laughter, the complete lack of perfection—came rushing back so fast I nearly dropped my shopping basket. I honestly haven’t thought about that afternoon in years, but I knew right then I had to try making them myself. Maybe you’ve had a moment like that, where a random smell yanks you backward in time. For me, it was the start of a ten-year quest to recreate those exact cookies. Not just any spritz cookies—the ones that taste like pure butter and vanish from the plate before the coffee gets cold. This is that recipe, finally nailed down after a lot of trial and a fair bit of error.
Why You’ll Love This Recipe
Let me tell you, I have tested more spritz cookie recipes than I care to count. Some were too dry, some spread into unrecognizable blobs, and a few just tasted like sugary shortening. This recipe is the one I bring to every holiday party and every family dinner where I want to show off a little. Here is why it works so well for hosts like us.
- Quick & Easy: From start to finish, these cookies take under 30 minutes. The dough comes together in one bowl, and you don’t need to chill it. That means you can whip up a batch between answering the door and checking the roast.
- Simple Ingredients: You likely have everything in your pantry right now. Butter, sugar, flour, an egg, vanilla, and a pinch of salt. No weird extracts or specialty flours needed.
- Perfect for Gatherings: These cookies were made for parties. They look fancy with their pressed shapes, but they are secretly the easiest thing on your dessert table. Guests always grab two—one to eat and one to admire.
- Crowd-Pleaser: I have served these to kids, grandparents, and that one cousin who claims they don’t eat sweets. Every single time, the plate comes back empty. The buttery flavor is just that addictive.
- Unbelievably Delicious: The texture is what gets people. They are crisp on the edges but somehow dissolve the second they hit your tongue. It is comfort food at its finest, and honestly, it makes you look like a hero with almost no effort.
What makes this version different from the hundreds of other spritz recipes out there? It comes down to the technique. I spent years tweaking the ratio of butter to flour and the exact mixing time. Most recipes tell you to cream the butter and sugar until fluffy, but I found that over-creaming makes the cookies spread too much. This version uses a slightly firmer dough that holds its shape perfectly in the press, giving you those beautiful, defined ridges every time. Plus, I add a tiny splash of almond extract alongside the vanilla. It is subtle, but it rounds out the buttery flavor in a way that makes people ask, “What is in these?” with a puzzled smile.
Honestly, this recipe is the kind that makes you close your eyes after the first bite. It is nostalgic without being complicated, and it is exactly what you need when you want to impress a crowd without spending your whole afternoon in the kitchen. It is comfort food reimagined—faster, simpler, but with the same soul-soothing satisfaction.
What Ingredients You Will Need
This recipe uses simple, wholesome ingredients to deliver that signature buttery flavor and delicate texture. Most of these are pantry staples, which is part of the beauty of spritz cookies. You don’t need a special trip to the store—just good, honest butter and a few basics.
- 1 cup (226g) unsalted butter, softened — This is the star of the show. I recommend using a high-quality European-style butter like Kerrygold for the richest flavor. The higher fat content makes the cookies extra tender. Make sure it is truly softened to room temperature, not melted. If you press your finger into it, it should leave an indent without sliding.
- ¾ cup (150g) granulated sugar — Regular white sugar works perfectly here. It gives the cookies structure and that slight crunch on the edges. I have tried using superfine sugar, but honestly, standard granulated works just as well.
- 1 large egg, room temperature — The egg binds everything together and adds richness. Take it out of the fridge about 30 minutes before you start baking. If you forget, place the egg in a bowl of warm water for 5 minutes.
- 1 teaspoon vanilla extract — Pure vanilla extract makes a noticeable difference. I use Nielsen-Massey Madagascar vanilla for its smooth, floral notes. Avoid imitation vanilla if you can—it can leave a chemical aftertaste in such a simple recipe.
- ¼ teaspoon almond extract — This is my secret ingredient. Just a tiny bit adds a nutty, almost marzipan-like undertone that makes the cookies taste more complex. If you have guests with nut allergies, you can leave it out, but I really encourage you to try it at least once.
- 2 ¼ cups (280g) all-purpose flour — Spoon and level your flour. Scooping directly from the bag packs it down and gives you too much flour, which makes the dough stiff and hard to press. I use Gold Medal unbleached all-purpose flour for consistent results.
- ½ teaspoon salt — Fine sea salt is best. It balances the sweetness and enhances the butter flavor. Do not skip it—unsalted cookies taste flat.
- Food coloring (optional) — If you want colored spritz cookies for holidays, add a few drops of gel food coloring to the dough after mixing. I use Wilton gel colors because they don’t change the dough consistency. Liquid food coloring can make the dough too wet, so stick with gel.
For the topping (optional but recommended):
- Sprinkles, colored sugar, or sanding sugar — Press these onto the cookies right after they come out of the press, before baking. They add a festive crunch and make the cookies look even more special on a platter.
- Royal icing or melted chocolate — For a more decorated look, you can dip the cooled cookies in melted chocolate or drizzle them with royal icing. I do this when I want to make them look extra fancy for a holiday cookie exchange.
Equipment Needed
You don’t need much to make these cookies, but a few specific tools make the process much smoother. Here is what I use every time.
- Cookie press — This is non-negotiable for spritz cookies. I have tried three different brands over the years, and my favorite is the OXO Good Grips Cookie Press. It is sturdy, easy to load, and comes with multiple discs for different shapes. The trigger mechanism is smooth, so you don’t end up with mangled cookies. If you are on a budget, the Wilton Cookie Press works fine, but the plastic feels a bit flimsy after repeated use.
- Baking sheets — Use light-colored, rimmed baking sheets. Dark sheets absorb more heat and can brown the bottoms of your cookies too quickly. I use Nordic Ware aluminum half-sheet pans. They are affordable and last forever.
- Parchment paper or silicone baking mats — Do not grease your baking sheets. The dough has enough butter that it won’t stick, but parchment paper makes cleanup effortless and helps the cookies bake evenly. Silpat mats also work well, but I find parchment gives slightly crisper bottoms.
- Stand mixer or hand mixer — A stand mixer with the paddle attachment makes creaming the butter and sugar a breeze, but a hand mixer works perfectly too. Just make sure to scrape down the bowl a few times to ensure everything is evenly mixed.
- Cooling rack — Spritz cookies are delicate when warm. Transferring them to a wire rack after a few minutes on the baking sheet prevents them from over-baking and keeps their shape intact.
- Spatula — A thin, flexible metal spatula is best for lifting the cookies off the parchment without breaking them. I have broken more cookies than I want to admit using a thick plastic spatula.
Preparation Method
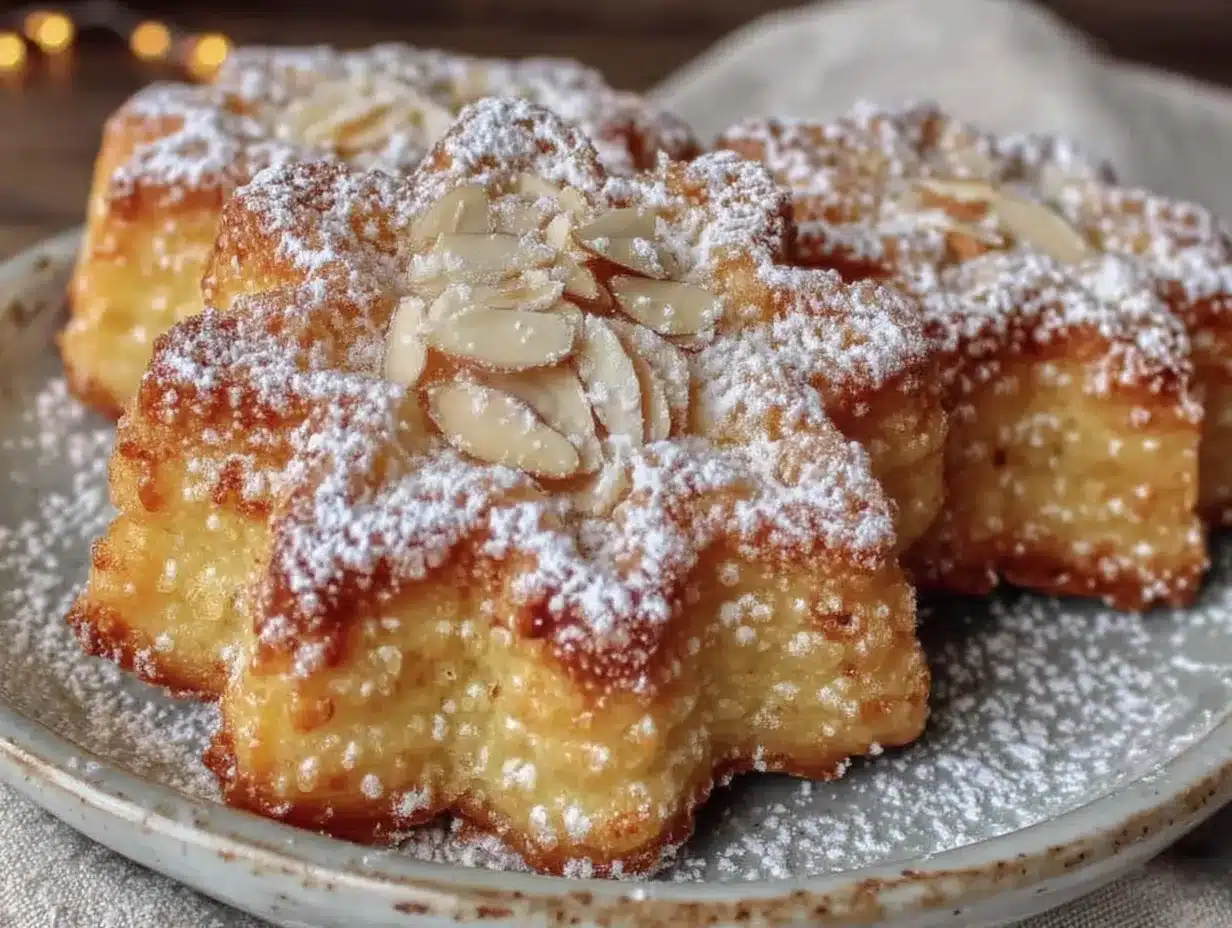
Follow these steps carefully, and you will have perfect spritz cookies every time. The key is not to overwork the dough and to keep everything at the right temperature.
- Preheat your oven to 375°F (190°C). Line your baking sheets with parchment paper or silicone mats. Do not grease them. Set them aside.
- Cream the butter and sugar. In the bowl of a stand mixer fitted with the paddle attachment, beat the softened butter and granulated sugar together on medium speed for about 2 minutes. You want the mixture to be light and fluffy but not overly aerated. Scrape down the sides and bottom of the bowl once during mixing. If you are using a hand mixer, the same timing applies.
- Add the egg and extracts. Add the room-temperature egg, vanilla extract, and almond extract. Beat on low speed until just combined, about 30 seconds. The mixture might look slightly curdled at this point—that is normal. Do not overmix.
- Combine the dry ingredients. In a separate medium bowl, whisk together the all-purpose flour and salt. With the mixer on low speed, gradually add the flour mixture to the butter mixture. Mix until the flour is just incorporated and the dough comes together. It should be soft but not sticky. If you pinch a piece, it should hold together without crumbling. If it feels too dry, add 1 teaspoon of milk. If it feels too sticky, add 1 tablespoon of flour.
- Load the cookie press. Fit your cookie press with the desired disc shape. I love the classic spritz shape—it looks like a small star or flower. Scoop the dough into the press chamber, pressing it down firmly to eliminate air pockets. Twist on the cap and plunger.
- Press the cookies. Hold the press perpendicular to the baking sheet. Press the trigger firmly and release. Lift the press straight up without twisting. The cookie should release cleanly. If the dough sticks to the press, it might be too warm. Pop the loaded press in the refrigerator for 10 minutes to firm up the dough. Space the cookies about 1 inch apart—they don’t spread much, but they need a little breathing room.
- Add toppings (optional). If you are using sprinkles or colored sugar, sprinkle them on the cookies immediately after pressing, before baking. The dough will be slightly tacky, so the sprinkles will stick without any additional glue.
- Bake. Place the baking sheet in the preheated oven and bake for 8 to 10 minutes. The cookies are done when the edges are just barely golden brown. The centers will still look pale. Do not overbake—they continue to set on the baking sheet after you pull them out.
- Cool. Let the cookies rest on the baking sheet for 2 minutes. Then, carefully transfer them to a wire cooling rack using a thin metal spatula. They are fragile when warm, so handle them gently. Let them cool completely before storing or decorating.
Pro tip: If your first few cookies come out misshapen, don’t panic. Just scrape the dough back into the press and try again. The dough can be re-pressed multiple times as long as you don’t overwork it. I always do a test press on a piece of parchment to make sure the dough is the right consistency before committing to the whole batch.
Cooking Tips & Techniques
After making these cookies dozens of times, I have learned a few things the hard way. Here are my best tips to save you from the same mistakes.
The butter temperature is everything. I cannot stress this enough. If your butter is too cold, the dough will be stiff and hard to press. If it is too warm, the cookies will spread and lose their shape. The ideal butter should be soft enough to leave a dent when you press it, but still hold its shape. I leave mine on the counter for about an hour before baking. In a pinch, you can microwave it at 50% power in 10-second bursts, but be careful—melted butter ruins the texture.
Do not overmix the dough. Overmixing develops gluten, which makes the cookies tough instead of tender. Mix just until the flour disappears into the dough. A few streaks of flour are better than a tough cookie. I learned this the hard way after making a batch that came out like hockey pucks. My husband still jokes about it.
Chill the dough if needed. If your kitchen is warm or your hands are hot, the dough can get too soft to press. If the cookies start sticking to the press or losing their shape, pop the loaded press in the fridge for 10 to 15 minutes. This firms up the butter and makes the dough cooperative again. I do this frequently during summer baking.
Rotate your baking sheets halfway through. Ovens have hot spots. Rotating the baking sheet halfway through baking ensures even browning. I also recommend baking one sheet at a time in the center of the oven. If you try to bake two sheets at once, the cookies on the bottom rack might brown too quickly on the bottom.
Use a light touch with the press. When you press the trigger, do it firmly but quickly. Holding the press down too long can cause the dough to squish out unevenly. And always lift straight up—no twisting. Twisting ruins the shape and leaves you with a mangled cookie.
Variations & Adaptations
One of the best things about spritz cookies is how easy they are to customize. Here are some of my favorite variations that I have tested over the years.
Chocolate Spritz Cookies: Replace ¼ cup (30g) of the all-purpose flour with ¼ cup (25g) of unsweetened cocoa powder. Sift the cocoa powder with the flour to avoid lumps. The cookies will have a rich, fudgy flavor that pairs beautifully with the butter. I make these for Christmas and they disappear faster than the plain ones.
Lemon Spritz Cookies: Add the zest of one lemon to the butter and sugar mixture during creaming. Replace the vanilla extract with lemon extract for an even brighter flavor. These are perfect for spring gatherings or bridal showers. I served them at a friend’s baby shower last year, and everyone asked for the recipe.
Gluten-Free Spritz Cookies: Substitute the all-purpose flour with a high-quality 1-to-1 gluten-free baking flour blend that contains xanthan gum. I have had good results with Bob’s Red Mill Gluten-Free 1-to-1 Baking Flour. The texture is slightly more crumbly than the original, but the flavor is still fantastic. Just note that the dough might be a bit more delicate when pressing.
Vegan Spritz Cookies: Use vegan butter sticks (like Earth Balance) and replace the egg with 2 tablespoons of aquafaba (the liquid from a can of chickpeas). The cookies will be a little less rich, but they still hold their shape and taste delicious. I tested this version for a friend who follows a plant-based diet, and she said they were the best vegan cookies she had ever had.
Spiced Spritz Cookies: Add 1 teaspoon of ground cinnamon, ½ teaspoon of ground nutmeg, and ¼ teaspoon of ground cloves to the flour mixture. These are wonderful for fall gatherings and Thanksgiving. The spices complement the butter without overpowering it.
Serving & Storage Suggestions
These cookies are perfect for serving at room temperature. They are at their best within the first 24 hours, when the texture is perfectly crisp on the outside and tender on the inside. I like to arrange them on a large platter in a single layer, sometimes alternating plain and chocolate versions for visual contrast. For holiday parties, I dust them with a light sprinkle of powdered sugar just before serving—it makes them look like they are dusted with snow.
What to serve alongside: Spritz cookies pair beautifully with a hot cup of coffee, tea, or a glass of cold milk. If you are hosting a dessert table, place them next to other bite-sized treats like chocolate truffles or mini cheesecakes. They also work wonderfully as part of a cookie platter with gingerbread and sugar cookies.
Storage: Store the cooled cookies in an airtight container at room temperature for up to 1 week. Layer them between sheets of parchment paper to prevent them from sticking together. If you live in a humid climate, add a silica gel packet to the container to keep them crisp.
Freezing: These cookies freeze beautifully. Place the cooled, undecorated cookies in a single layer on a baking sheet and freeze until solid, about 1 hour. Transfer them to a freezer-safe container or zip-top bag, layering parchment between stacks. They will keep for up to 3 months. Thaw at room temperature for 15 minutes before serving. You can also freeze the unbaked dough in the cookie press. Wrap the loaded press in plastic wrap and freeze for up to 2 months. When ready to bake, let the press sit at room temperature for 10 minutes, then press and bake as directed, adding 1 to 2 minutes to the baking time.
Flavor development: Honestly, these cookies taste even better the next day. The flavors meld together, and the texture becomes even more melt-in-your-mouth. I often make them a day ahead of a party and store them in an airtight container. Nobody has ever complained.
Nutritional Information & Benefits
Here is the estimated nutritional breakdown for one spritz cookie (based on a batch of 48 cookies). Keep in mind that these values are approximate and can vary based on specific brands and any additions like sprinkles or chocolate.
| Nutrient | Amount per Cookie |
|---|---|
| Calories | 65 |
| Total Fat | 4g |
| Saturated Fat | 2.5g |
| Cholesterol | 15mg |
| Sodium | 30mg |
| Total Carbohydrates | 7g |
| Sugars | 3g |
| Protein | 1g |
While these cookies are certainly a treat, they do offer a few minor benefits. The butter provides a small amount of vitamin A and healthy fats. The egg adds protein and B vitamins. And honestly, sometimes the biggest benefit is the joy of sharing something homemade with the people you care about. I believe in balance—enjoying a couple of these cookies alongside a balanced diet is perfectly fine.
Dietary considerations: These cookies contain dairy (butter), eggs, and gluten (flour). They are not suitable for vegan, dairy-free, or gluten-free diets unless you use the substitutions listed in the variations section. They are nut-free if you omit the almond extract.
Conclusion
This melt-in-your-mouth buttery spritz cookies recipe is the one I keep coming back to year after year. It is simple enough for a weekday baking session but impressive enough for the fanciest holiday party. The buttery flavor, the delicate texture, and the way they make people smile—there is just nothing quite like it. I love that I can make a batch in under 30 minutes and still feel like I put in real effort. Honestly, it is the kind of recipe that makes you look like a baking pro even if you are just starting out.
I encourage you to make these your own. Try the lemon variation for a spring brunch, or add sprinkles for a kid’s birthday party. Play around with the shapes and colors. The recipe is forgiving, and the results are always delicious. When you make them—and I hope you do—come back and let me know how they turned out. Did you try a new variation? Did your guests fight over the last one? I would love to hear your story in the comments below. And if you share them on social media, tag me so I can see your beautiful creations. Happy baking, friend!
Frequently Asked Questions
Why did my spritz cookies spread too much?
This usually happens when the butter is too soft or the dough is too warm. Make sure your butter is softened but not melted, and chill the loaded cookie press for 10 minutes if your kitchen is warm. Also, check that you measured your flour correctly—too little flour can cause spreading.
Can I use margarine instead of butter?
I do not recommend it. Margarine has a higher water content than butter, which can cause the cookies to spread and lose their shape. The flavor also suffers. Stick with real unsalted butter for the best results.
My cookie press is sticking. What should I do?
If the dough is sticking to the press, it is likely too warm. Pop the loaded press in the refrigerator for 10 to 15 minutes to firm up the dough. You can also try lightly dusting the inside of the press with flour before loading it. If the disc is clogged, clean it thoroughly and try again.
How do I get clean, defined shapes from my cookie press?
The key is the right dough consistency. It should be soft but not sticky. If the dough is too stiff, the shapes will be ragged. If it is too soft, they will blur. Hold the press perpendicular to the baking sheet, press firmly, and lift straight up without twisting. Practice on a piece of parchment paper first.
Can I make the dough ahead of time?
Yes! You can prepare the dough up to 3 days in advance and store it in an airtight container in the refrigerator. Let it sit at room temperature for about 15 minutes before loading the press. You can also freeze the dough in the press for up to 2 months—just wrap it tightly in plastic wrap and thaw slightly before pressing.
Pin This Recipe!
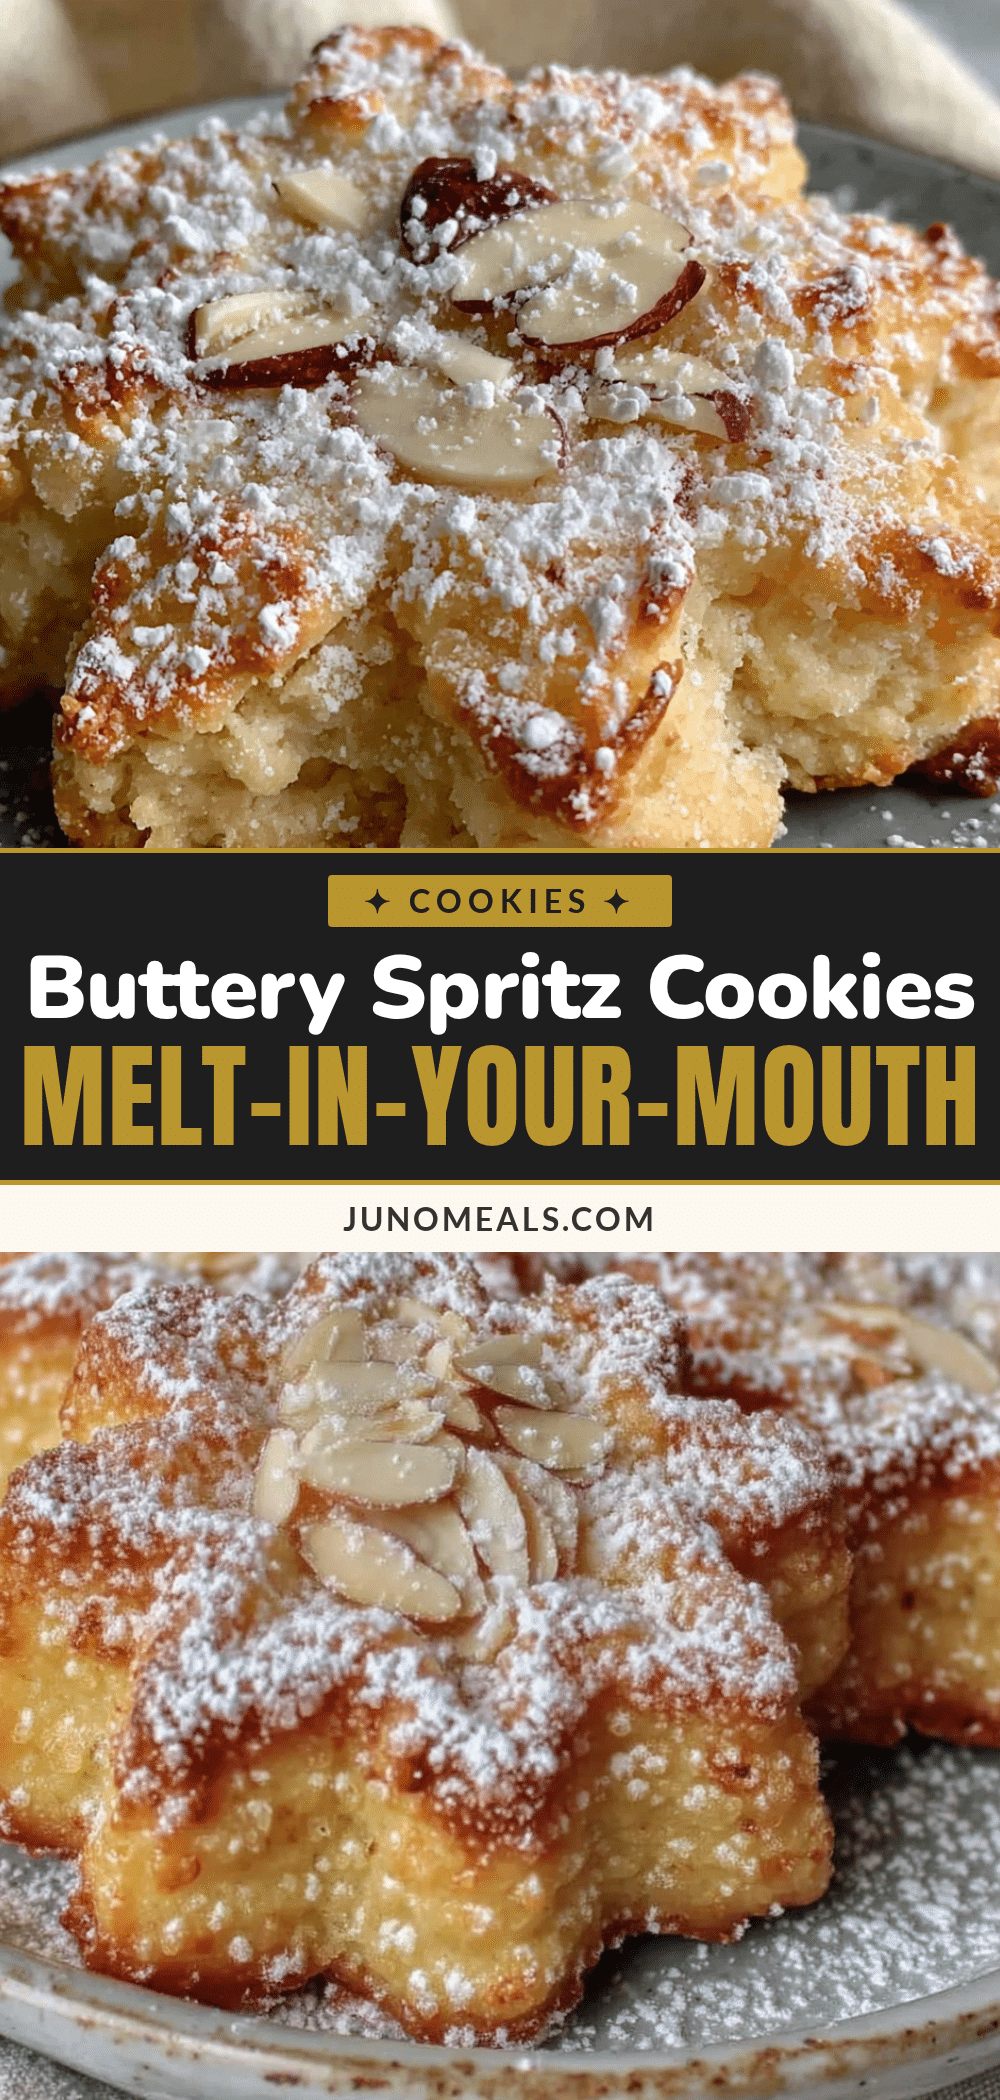
Melt-in-Your-Mouth Buttery Spritz Cookies: Easy Guest-Favorite Recipe
These buttery spritz cookies are crisp on the edges and melt in your mouth, made with simple ingredients and a cookie press for beautiful shapes. Perfect for holiday parties or any gathering, they come together in under 30 minutes and are always a crowd-pleaser.
- Prep Time: 15 minutes
- Cook Time: 10 minutes
- Total Time: 25 minutes
- Yield: 48 cookies 1x
- Category: Dessert
- Cuisine: American
Ingredients
- 1 cup (226g) unsalted butter, softened
- 3/4 cup (150g) granulated sugar
- 1 large egg, room temperature
- 1 teaspoon vanilla extract
- 1/4 teaspoon almond extract
- 2 1/4 cups (280g) all-purpose flour
- 1/2 teaspoon salt
- Food coloring (optional)
- Sprinkles, colored sugar, or sanding sugar (optional)
- Royal icing or melted chocolate (optional)
Instructions
- Preheat your oven to 375°F (190°C). Line your baking sheets with parchment paper or silicone mats. Do not grease them.
- In the bowl of a stand mixer fitted with the paddle attachment, beat the softened butter and granulated sugar together on medium speed for about 2 minutes until light and fluffy. Scrape down the sides and bottom of the bowl once during mixing.
- Add the room-temperature egg, vanilla extract, and almond extract. Beat on low speed until just combined, about 30 seconds. The mixture might look slightly curdled—that is normal. Do not overmix.
- In a separate medium bowl, whisk together the all-purpose flour and salt. With the mixer on low speed, gradually add the flour mixture to the butter mixture. Mix until the flour is just incorporated and the dough comes together. It should be soft but not sticky. If it feels too dry, add 1 teaspoon of milk. If it feels too sticky, add 1 tablespoon of flour.
- Fit your cookie press with the desired disc shape. Scoop the dough into the press chamber, pressing it down firmly to eliminate air pockets. Twist on the cap and plunger.
- Hold the press perpendicular to the baking sheet. Press the trigger firmly and release. Lift the press straight up without twisting. Space the cookies about 1 inch apart.
- If using sprinkles or colored sugar, sprinkle them on the cookies immediately after pressing, before baking.
- Bake for 8 to 10 minutes, until the edges are just barely golden brown. The centers will still look pale. Do not overbake.
- Let the cookies rest on the baking sheet for 2 minutes. Then, carefully transfer them to a wire cooling rack using a thin metal spatula. Let them cool completely before storing or decorating.
Notes
Butter temperature is crucial—softened but not melted. If dough is too warm, chill the loaded press for 10 minutes. Do not overmix the dough to avoid tough cookies. Rotate baking sheets halfway through for even browning. Cookies can be frozen for up to 3 months.
Nutrition
- Serving Size: 1 cookie
- Calories: 65
- Sugar: 3
- Sodium: 30
- Fat: 4
- Saturated Fat: 2.5
- Carbohydrates: 7
- Protein: 1
Keywords: spritz cookies, butter cookies, Christmas cookies, easy cookie recipe, cookie press cookies, holiday baking


