The PTA Halloween party was in six hours and I’d completely forgotten. I mean, completely. My phone buzzed with the reminder notification—the one I’d set three weeks ago thinking I was so organized—and I nearly dropped my coffee. Everyone else would be bringing elaborate homemade treats. Caramel apples dipped in sparkly sugar. Ghost-shaped cookies with perfect royal icing. A witch’s cauldron cake that probably took someone an entire weekend.
I had a package of Oreos, some sugar-free vanilla pudding mix, and a bag of gummy worms leftover from my son’s movie night. Not exactly Pinterest-worthy. My kitchen looked like a tiny disaster zone—there was a crack in my favorite mixing bowl I’d been meaning to replace, and I couldn’t find my measuring cups anywhere. I used a coffee mug instead. Honestly, I was ready to show up with a store-bought veggie tray and call it a day.
But then I remembered these little cups I’d made once for a birthday party. The ones where you crush up cookies to look like dirt and stick gummy worms in them. Only this time, I thought, what if I made them a little lighter? Not so heavy on the sugar? Something the health-conscious moms (like me) could feel okay about their kids eating before the sugar rush of trick-or-treating later. Maybe you’ve been there too—wanting your kids to have fun without the full-on sugar hangover.
So I threw together a batch of these Lighter Halloween Dirt Cups. And let me tell you, they disappeared faster than anything else on the dessert table. One of the other moms actually asked me for the recipe while licking her spoon clean. That’s when I knew this was something special. Not fancy. Not complicated. Just good, simple, and a little bit lighter. And honestly, that’s why I keep making them every single Halloween now.
Why You’ll Love This Recipe
These Lighter Halloween Dirt Cups are the kind of treat that makes you feel like you’re getting away with something. They taste indulgent—creamy, chocolatey, with that fun crunch from the Oreo “dirt”—but they won’t leave you or your kids crashing from a sugar overload. I’ve tested this recipe about four times now (tough job, I know) and it’s become my go-to for Halloween parties, classroom celebrations, and even just a fun weekend dessert in October.
- Quick & Easy: You can whip these up in under 15 minutes. No baking, no fancy equipment, no stress. Perfect for the night before a school party or when you realize you need a treat ASAP.
- Simple Ingredients: You probably already have most of this stuff in your pantry. Oreos, pudding mix, milk, and gummy worms. That’s it. No weird specialty items.
- Perfect for Halloween: These are basically the unofficial dessert of October 31st. Kids go crazy for the gummy worms poking out of the “dirt.” It’s spooky, fun, and totally kid-approved.
- Crowd-Pleaser: I’ve brought these to three different events now and they get rave reviews every single time. Adults love them just as much as kids. There’s something about digging into a cup of “dirt” that brings out the kid in everyone.
- Unbelievably Delicious: The combination of the creamy pudding, the crunchy cookie crumbs, and the chewy gummy worms is honestly perfect. It’s texture heaven in a little cup.
What makes this version different from all the other dirt cup recipes out there? It’s the lighter twist. Most recipes call for heavy cream, full-fat pudding made with whole milk, and loads of extra sugar. I’ve swapped in sugar-free pudding mix and used low-fat milk or even unsweetened almond milk. You honestly cannot taste the difference. It’s still rich and creamy and totally satisfying. This isn’t just another dirt cup recipe—it’s the one you’ll actually feel good about serving.
What Ingredients You Will Need
This recipe keeps things simple. You don’t need a grocery list a mile long or any hard-to-find ingredients. Everything here is stuff you can grab at your regular grocery store, and most of it you might already have on hand. Here’s what you’ll need to make these Lighter Halloween Dirt Cups:
For the Pudding Layer
- 1 box (1 ounce) sugar-free instant chocolate pudding mix — This is the secret to keeping things light. I like the Jell-O brand best. It sets up perfectly and has that rich chocolate flavor without all the extra sugar.
- 2 cups cold low-fat milk — You can use 2% or 1%. I’ve even used unsweetened vanilla almond milk and it worked great. Just make sure it’s cold so the pudding sets properly.
- 1 cup plain nonfat Greek yogurt — This is my little trick. It adds creaminess and protein while cutting down on the fat. You won’t taste it at all, I promise. Just make sure it’s plain, not vanilla.
For the Dirt Layer
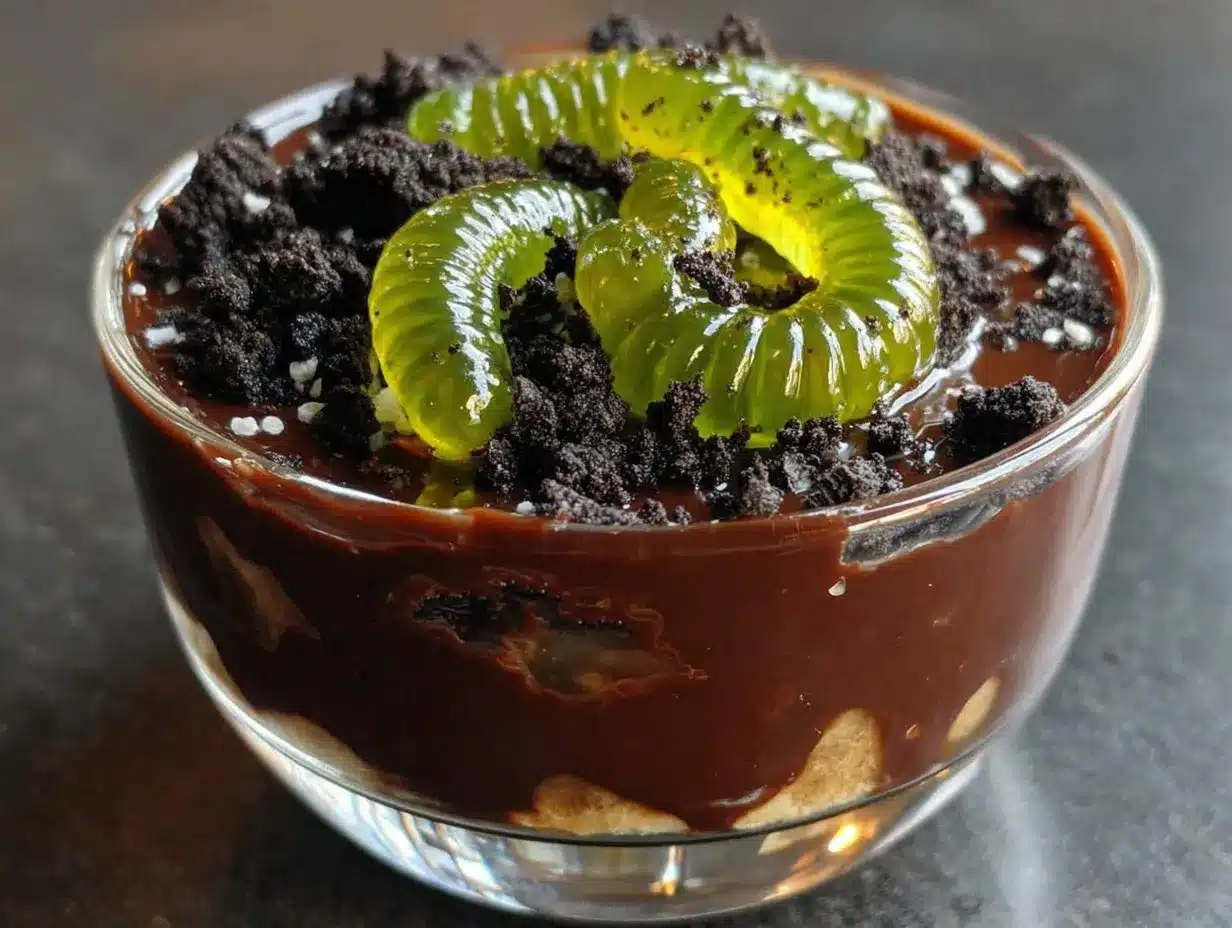
- 12 Oreo cookies — You’ll crush these up to make the “dirt.” I use regular Oreos, but you could use reduced-fat ones if you want to lighten it up even more. Just don’t use Double Stuf—the extra filling makes the dirt clumpy instead of crumbly.
For the Decoration
- 12-15 gummy worms — Go for the classic bright-colored ones. They look the most fun poking out of the dirt. I like the Trolli brand, but any brand works.
- Optional: 2 tablespoons dark chocolate shavings — This is totally optional, but it makes the dirt look more realistic. I use a vegetable peeler to shave off curls from a dark chocolate bar.
A quick note on substitutions: If you’re dairy-free, you can use unsweetened oat milk or coconut milk (the kind in a carton, not a can) and a dairy-free yogurt. The texture will be slightly thinner, but still delicious. For a gluten-free version, use gluten-free chocolate sandwich cookies. They work exactly the same way.
Equipment Needed
You don’t need a lot of fancy equipment for this recipe. That’s honestly one of the best things about it. Here’s what you’ll need:
- 6 small cups or ramekins — I use clear plastic cups because they look cute and you can see the layers. But any small glass bowls or even mason jars work great. Clear cups really show off the dirt and worm effect though.
- Mixing bowl — Any medium-sized bowl works. I have a cracked glass one that I really need to replace, but it still does the job.
- Whisk — For mixing the pudding. A fork works in a pinch, but a whisk gives you a smoother result.
- Measuring cups and spoons — Or just use a coffee mug like I did that first time. A 1-cup measure is really all you need.
- Rolling pin or food processor — For crushing the Oreos. A rolling pin and a zip-top bag is the classic method. I’ve also used the bottom of a heavy skillet. A food processor makes it faster, but honestly, the bag-and-rolling-pin method is more fun and gives you better control over the crumb size.
- Spoon or small spatula — For layering the pudding and crumbs.
If you don’t have a rolling pin, just put the Oreos in a zip-top bag and smash them with a heavy can or a meat mallet. It’s oddly satisfying. My kids love helping with this part.
Preparation Method
Alright, let’s get to the fun part. These Lighter Halloween Dirt Cups come together in no time. Here’s exactly how to do it:
- Make the pudding: In your mixing bowl, whisk together the sugar-free chocolate pudding mix and 2 cups of cold low-fat milk. Whisk for about 2 minutes until it starts to thicken. It should look smooth and glossy. Don’t over-whisk or it’ll get too thick too fast. Let it sit for about 5 minutes to set up slightly.
- Add the yogurt: Once the pudding has thickened a bit, fold in the 1 cup of plain Greek yogurt. Mix gently until it’s completely combined and smooth. The yogurt adds that creamy texture and a protein boost without changing the flavor. You should end up with a thick, mousse-like mixture.
- Crush the Oreos: While the pudding is setting, crush your Oreos. Put them in a zip-top bag and seal it tight (leave a little air in the bag so they have room to move). Use your rolling pin or the bottom of a skillet to crush them into fine crumbs. You want a mix of fine “dirt” and a few slightly larger pieces for texture. Don’t crush them into dust—you want some little chunks to look like real soil.
- Layer the cups: Now comes the fun part. Grab your 6 clear cups. Start with a layer of the chocolate pudding mixture at the bottom—about 2-3 tablespoons per cup. Then add a generous layer of Oreo crumbs on top of the pudding. Repeat this process: another layer of pudding, then another layer of crumbs. End with the Oreo crumbs on top so it looks like a little cup of dirt.
- Add the worms: Here’s where it gets really fun. Take your gummy worms and gently push them into the top layer of Oreo crumbs. Let a few worms “escape” over the edge of the cup. You want them to look like they’re crawling out of the dirt. I usually use 2-3 worms per cup, but you can use more if you’re feeling generous.
- Chill: Pop the cups in the refrigerator for at least 30 minutes before serving. This lets the pudding set up completely and the flavors meld together. If you’re making them for a party, you can make them a day ahead and keep them covered in the fridge.
- Garnish (optional): Right before serving, sprinkle a few dark chocolate shavings on top for an extra touch. It makes the “dirt” look even more realistic and adds a little chocolate intensity.
A quick warning: Don’t skip the chilling step. I did that once when I was in a hurry and the pudding was too soft. The worms sank right to the bottom instead of poking out. Still tasted good, but it didn’t have that same spooky effect.
Cooking Tips & Techniques
I’ve made these Lighter Halloween Dirt Cups more times than I can count, and I’ve learned a few things along the way. Here are my best tips to make sure yours turn out perfect every time:
Use cold milk. This is non-negotiable. The pudding mix needs cold liquid to set up properly. If your milk is room temperature, the pudding will be runny and never really thicken. I keep my milk in the fridge until the last minute.
Don’t overmix the pudding. Whisk it just until it starts to thicken—about 2 minutes. If you keep going, it can get grainy or develop lumps. You want it smooth and creamy. Trust the process and let it sit for those 5 minutes.
Crush the Oreos the right way. I learned this the hard way. If you crush them too fine, they turn into dust and don’t look like dirt. If you leave them too chunky, they don’t look like dirt either. Aim for a texture similar to coarse sand. A few slightly bigger pieces are fine—they add to the realistic look.
Layer carefully. Use a spoon to gently spread each layer. You want distinct layers of pudding and crumbs so it looks like a little dirt cup. If you dump everything in at once, it’ll just be a brown mess. Patience pays off here.
Make ahead for best results. These actually taste better the next day. The Oreo crumbs soften slightly and meld with the pudding, creating this amazing texture. So if you’re planning for a party, make them the night before. Just keep them covered in the fridge.
One mistake I made: The first time I made these, I used reduced-fat Oreos thinking it would be even lighter. The crumbs were way too dry and didn’t stick to the pudding at all. Stick with regular Oreos—the little bit of filling helps the crumbs cling to the pudding.
Variations & Adaptations
One of the best things about this recipe is how easy it is to change it up. Here are some variations I’ve tried and loved:
Dairy-Free Version: Use unsweetened oat milk or coconut milk (from a carton) and a dairy-free plain yogurt. I’ve used almond milk too, but the pudding comes out a little thinner. Oat milk gives the best texture. Use gluten-free chocolate sandwich cookies if you need it to be gluten-free as well.
Pumpkin Spice Dirt Cups: For a fall twist, swap the chocolate pudding for sugar-free vanilla pudding and add 1 teaspoon of pumpkin pie spice to the pudding mix. Use crushed graham crackers instead of Oreos for the “dirt.” Top with a few candy pumpkins instead of gummy worms. It’s like fall in a cup.
Peanut Butter Chocolate: Add 2 tablespoons of powdered peanut butter (like PB2) to the pudding mix before whisking. It gives you that peanut butter flavor without the extra fat and calories. Top with a few mini chocolate chips mixed into the Oreo crumbs. My kids go crazy for this version.
Spooky Spider Cups: Instead of gummy worms, use pretzel sticks broken in half to look like spider legs sticking out of the dirt. Place a dark chocolate candy (like a chocolate-covered almond) in the center for the spider body. It’s a little less sweet but super cute.
Individual Trifles: For a fancier presentation, layer the pudding and Oreo crumbs in small mason jars. Top with a dollop of light whipped cream and a single gummy worm. It looks so much more elevated than plastic cups, but it’s the same easy recipe.
Serving & Storage Suggestions
These Lighter Halloween Dirt Cups are best served cold, right out of the fridge. The contrast between the cool, creamy pudding and the crunchy cookie crumbs is what makes them so good. I like to serve them in clear cups so everyone can see the layers and the gummy worms poking out.
For a Halloween party, arrange the cups on a platter or tray. You can add a few extra gummy worms around the base of the cups for a creepy-crawly effect. A little sign that says “Dirt Cups” or “Worm Farm” adds a fun touch. If you’re feeling extra festive, sprinkle some orange and black sprinkles on top.
These pair perfectly with other Halloween treats. I’ve served them alongside spooky Halloween punch and a plate of healthy Halloween snack board for a complete party spread. The punch is bright purple and fizzy, which looks amazing next to the brown dirt cups.
Storage: Keep any leftover cups covered in the refrigerator for up to 3 days. The Oreo crumbs will soften over time, but that’s honestly not a bad thing—it becomes almost like a chocolate mousse with cookie bits throughout. Just don’t leave them out at room temperature for more than 2 hours, especially if you used dairy products.
Freezer option: You can freeze these! Make them in silicone cups or freezer-safe containers. Freeze for up to 1 month. Thaw in the refrigerator overnight before serving. The texture will be a bit icier, but still delicious. I wouldn’t freeze them with the gummy worms in place though—they get weirdly hard. Add fresh worms after thawing.
One thing I love about this recipe is how the flavors develop. The first day, the Oreo crumbs are crunchy and the pudding is light. By day two, everything melds together into this rich, creamy dessert that tastes even better. So don’t worry if you have leftovers—they’re still amazing the next day.
Nutritional Information & Benefits
Let’s be real—these are still a treat. But compared to traditional dirt cups made with heavy cream and full-fat everything, these are a huge improvement. Here’s the approximate nutritional breakdown per cup (based on 6 servings):
| Nutrient | Amount Per Cup |
|---|---|
| Calories | 185 |
| Total Fat | 4g |
| Saturated Fat | 1.5g |
| Carbohydrates | 32g |
| Fiber | 2g |
| Sugar | 18g |
| Protein | 8g |
| Calcium | 120mg |
The Greek yogurt adds a solid 8 grams of protein per serving, which helps balance out the sugar and keeps everyone fuller longer. The sugar-free pudding mix cuts the sugar by about half compared to regular pudding. And using low-fat milk instead of whole milk saves you about 30 calories and 3 grams of fat per serving.
These are also a great option for anyone watching their sugar intake. The gummy worms are the main source of added sugar, and you can control how many you use. I’ve even made them with sugar-free gummy worms (they’re a little less chewy, but they work).
Just a heads up: these contain dairy and wheat (from the Oreos). If you have allergies, check the labels on your pudding mix and cookies. Some brands may have traces of nuts or soy.
Conclusion
These Lighter Halloween Dirt Cups have honestly become a staple in my house every October. They’re fun, they’re easy, and they let me feel good about what I’m feeding my kids and their friends. No sugar crashes, no guilt, just pure Halloween fun in a cup.
I love how customizable they are—you can make them dairy-free, gluten-free, or switch up the flavors depending on what you have on hand. And the best part? They take less than 15 minutes to put together. That’s a win in my book, especially during the chaos of Halloween week.
I’d love to hear how yours turn out. Did you try a fun variation? Did your kids love the gummy worms poking out? Drop a comment below and let me know. And if you’re looking for more easy Halloween treats, check out my healthy Halloween desserts collection. Happy Halloween, friends—go make some dirt!
Frequently Asked Questions
Can I make these Lighter Halloween Dirt Cups ahead of time?
Absolutely! In fact, they taste even better the next day. Make them up to 24 hours in advance and keep them covered in the refrigerator. Just add the gummy worms right before serving so they stay chewy and don’t sink into the pudding.
Can I use regular pudding mix instead of sugar-free?
Yes, you can. Just keep in mind that regular pudding mix has more sugar and calories. If you use regular pudding, you might want to skip the chocolate shavings on top to keep things balanced. The texture will be the same either way.
What if I don’t have clear cups?
No problem at all. You can use small mason jars, glass bowls, or even paper cups. The clear cups just let you see the layers and the gummy worms, which is part of the fun. But the taste is exactly the same no matter what you serve them in.
Can I use a different type of cookie for the dirt?
Definitely. Chocolate wafer cookies, gluten-free chocolate cookies, or even crushed chocolate graham crackers all work great. Just avoid cookies with a lot of filling (like Double Stuf Oreos) because they make the crumbs too sticky and clumpy.
How many servings does this recipe make?
This recipe makes 6 servings if you use standard 6-ounce cups or ramekins. If you use smaller cups (like 4-ounce shot glasses for a party), you can get 8-10 servings. Just adjust the layers accordingly. The pudding and Oreo amounts stay the same.
Pin This Recipe!
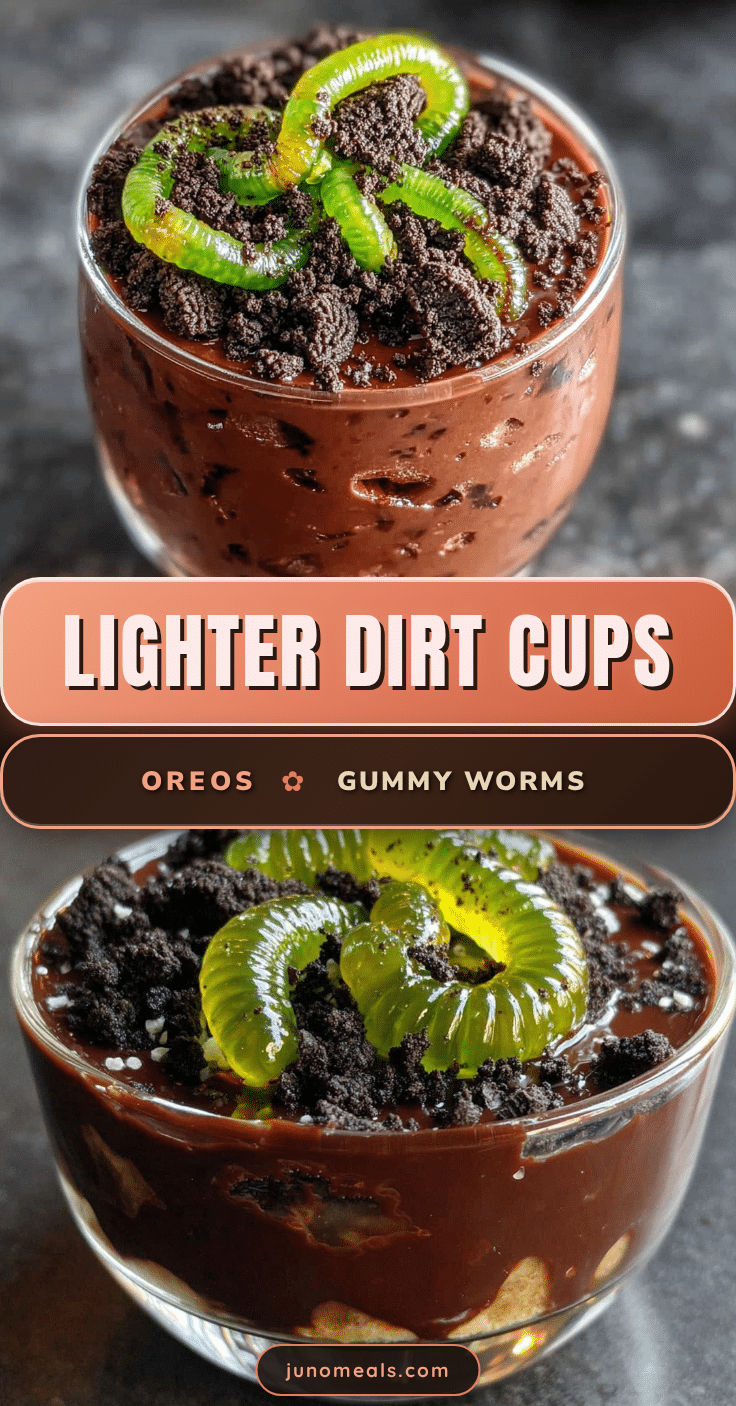
Lighter Halloween Dirt Cups: Easy Oreo & Gummy Worm Recipe
These Lighter Halloween Dirt Cups are a fun, easy, and healthier twist on the classic Halloween treat. Made with sugar-free pudding, Greek yogurt, and Oreo ‘dirt,’ they’re creamy, chocolatey, and perfect for parties without the sugar overload.
- Prep Time: 15 minutes
- Cook Time: 0 minutes
- Total Time: 45 minutes (includes chilling time)
- Yield: 6 servings 1x
- Category: Dessert
- Cuisine: American
Ingredients
- 1 box (1 ounce) sugar-free instant chocolate pudding mix
- 2 cups cold low-fat milk
- 1 cup plain nonfat Greek yogurt
- 12 Oreo cookies
- 12–15 gummy worms
- 2 tablespoons dark chocolate shavings (optional)
Instructions
- In a mixing bowl, whisk together the sugar-free chocolate pudding mix and 2 cups of cold low-fat milk for about 2 minutes until it starts to thicken. Let it sit for 5 minutes to set up slightly.
- Fold in the 1 cup of plain Greek yogurt until completely combined and smooth.
- Place the Oreos in a zip-top bag and crush them with a rolling pin or the bottom of a skillet into fine crumbs with some slightly larger pieces.
- Layer the cups: In 6 clear cups, add about 2-3 tablespoons of the pudding mixture, then a generous layer of Oreo crumbs. Repeat with another layer of pudding and another layer of crumbs, ending with Oreo crumbs on top.
- Gently push gummy worms into the top layer of Oreo crumbs, letting a few ‘escape’ over the edge of the cup.
- Refrigerate for at least 30 minutes before serving.
- Optional: Sprinkle dark chocolate shavings on top right before serving.
Notes
Use cold milk for the pudding to set properly. Don’t overmix the pudding. Crush Oreos to a coarse sand texture. Layer carefully for distinct layers. Make ahead for best results—these taste even better the next day. For dairy-free, use unsweetened oat milk and dairy-free yogurt. For gluten-free, use gluten-free chocolate sandwich cookies.
Nutrition
- Serving Size: 1 cup
- Calories: 185
- Sugar: 18
- Fat: 4
- Saturated Fat: 1.5
- Carbohydrates: 32
- Fiber: 2
- Protein: 8
Keywords: Halloween dirt cups, lighter dirt cups, Oreo gummy worm dessert, easy Halloween treat, no-bake dessert, sugar-free pudding, healthy Halloween dessert


