My daughter looked up from the cookbook she was flipping through—the one with the creepy-crawly spiders on the cover—and asked why I couldn’t just dump all the Halloween candy onto one big board and call it dinner. I started to explain that a proper meal needs protein, fruit, something green, and that a pile of sugar wasn’t a balanced approach. Then I stopped. Honestly, I had to stop because she had a point. Not about the nutrition part, but about the idea itself. Why couldn’t we make a board that was fun and spooky and actually filled them up before the sugar crash hit?
That Tuesday afternoon, standing over a cutting board with a bag of candy corn in one hand and a block of cheddar in the other, I realized I’d been overthinking Halloween dinner for years. The kids didn’t want a sit-down meal before trick-or-treating. They wanted something they could graze on, something that looked like it belonged at a monster party. So I grabbed a pumpkin-shaped platter I’d picked up at a thrift store for two dollars and started building. The result was a mess at first—too much candy, not enough cheese, everything sliding around. But by the third attempt, something clicked. The kids actually ate the grapes because they were “spider eggs.” They dipped pretzels in peanut butter because it looked like “witch’s brew.” And that candy corn I was skeptical about? It became the star of the show, tucked between orange cheese cubes and ghost-shaped crackers.
This board has become our Halloween tradition now, and I keep making it because it solves the one problem every parent faces on October 31st: how to get real food into kids before they fill up on sugar. Maybe you’ve been there, standing in the kitchen at 4 PM, wondering if a handful of baby carrots qualifies as dinner. This board is the answer. It’s quick, it’s silly, and it actually works. Let me show you how to build one that your kids will fight over—in a good way.
Why You’ll Love This Recipe
This isn’t just another snack board thrown together at the last minute. I’ve tested this combo on my own kids, their friends, and a few skeptical neighbors who showed up at our porch. Every single person walked away impressed—and full. Here’s why this one works so well.
- Quick & Easy: You can assemble this board in under 15 minutes. No cooking required. Just wash, slice, and arrange. Perfect for that chaotic window between school pickup and costume struggles.
- Simple Ingredients: Everything comes from a regular grocery store. No fancy cheese shops or specialty spice blends. You probably already have half of these items in your pantry right now.
- Perfect for Halloween Night: This board is designed to be eaten standing up, with sticky fingers, between doorbell rings. It’s the ultimate grab-and-go dinner that still feels like a treat.
- Crowd-Pleaser: My pickiest eater—the one who claims to hate cheese, fruit, and basically everything except chicken nuggets—cleaned this board. Twice. The candy corn does the heavy lifting here, drawing them in so they actually try the good stuff.
- Unbelievably Delicious: The sweet-salty combo of candy corn with sharp cheddar is genuinely addictive. I know it sounds weird. I was skeptical too. But trust me on this one. It works.
What makes this recipe different from every other Halloween snack board you’ve seen is the balance. It’s not just a pile of candy with a few sad carrot sticks on the side. Every element has a purpose, a flavor pairing, and a way to trick kids into eating something real. The candy corn isn’t just decoration—it’s the secret weapon that makes the cheese and fruit disappear. And that’s a Halloween miracle right there.
What Ingredients You Will Need
This recipe uses simple, everyday ingredients to create a board that looks elaborate but comes together in minutes. The magic is in the arrangement and the unexpected pairings. Here’s what you’ll need to grab.
- Candy Corn (1 cup): The star of the show. I use Brach’s classic candy corn for that perfect orange-yellow-white stripe. Don’t skip this—it’s what makes the board feel like Halloween.
- Sharp Cheddar Cheese (8 ounces), cubed: The sharpness cuts through the sweetness of the candy corn beautifully. I recommend Tillamook or Cabot for consistent quality. Cut into 1-inch cubes so little hands can grab them easily.
- Colby Jack Cheese (8 ounces), sliced into triangles: The orange and white layers match the candy corn theme perfectly. Use a crinkle cutter if you want extra fun shapes.
- Baby Carrots (1 cup): These become “witch fingers” when arranged properly. They add crunch and a vegetable win for parents.
- Red Seedless Grapes (1 cup): Cut these in half lengthwise and they look like creepy eyeballs. Kids love this. I promise.
- Pretzel Sticks (1 cup): These are “broomsticks” or “witch’s brew stirrers.” They add salt to balance all the sweet elements.
- Peanut Butter (1/2 cup): Use this as a dip for the pretzels and apples. It adds protein and makes the board feel more substantial. Use sunflower seed butter if you need a nut-free option.
- Green Apple (1 large), sliced: The tartness cuts through the sugar. Toss slices in a little lemon juice to prevent browning.
- Halloween-themed Crackers (1 cup): Look for ghost, pumpkin, or bat shapes. Pepperidge Farm Goldfish makes a Halloween mix that works great.
- Mozzarella String Cheese (4 sticks), cut in half: These become “ghost fingers” when arranged on the board. They’re mild enough for picky eaters.
- Black Olives (1/2 cup): These are “spider bodies.” Use whole olives for the body and slice a few for legs. They add a briny pop that contrasts with the sweet elements.
- Graham Crackers (4 sheets), broken into pieces: These act as “graveyard stones” and provide a neutral base for the sweeter toppings.
- Marshmallows (1/2 cup): Regular or mini. They’re “ghost poofs” and add a soft, pillowy texture to the board.
I usually grab a few extra bags of candy corn because they tend to disappear before I even start assembling. The kids find them irresistible straight from the bag, so buy double what you think you need.
Equipment Needed
You don’t need fancy equipment for this board. That’s part of the beauty. Here’s what I use every time.
- Large Wooden Board or Platter (at least 16 inches): I use a round wooden board I found at a thrift store for five dollars. A large cutting board works too. The key is having enough surface area to spread everything out so it looks abundant.
- Small Bowls (2-3): Use these for dips like peanut butter or to hold the candy corn separately. Little ceramic ramekins work perfectly.
- Cheese Knife or Small Spatula: For spreading peanut butter and cutting cheese cubes. Nothing fancy needed.
- Crinkle Cutter (optional but fun): This makes wavy edges on cheese slices and apple pieces. Kids notice these little details.
- Paring Knife: For slicing grapes, apples, and olives. A sharp one makes the job faster.
If you don’t have a wooden board, a large baking sheet lined with parchment paper works just as well. I’ve done that plenty of times when my board was in the dishwasher. The kids don’t care what it’s served on—they just care about the candy corn.
Preparation Method
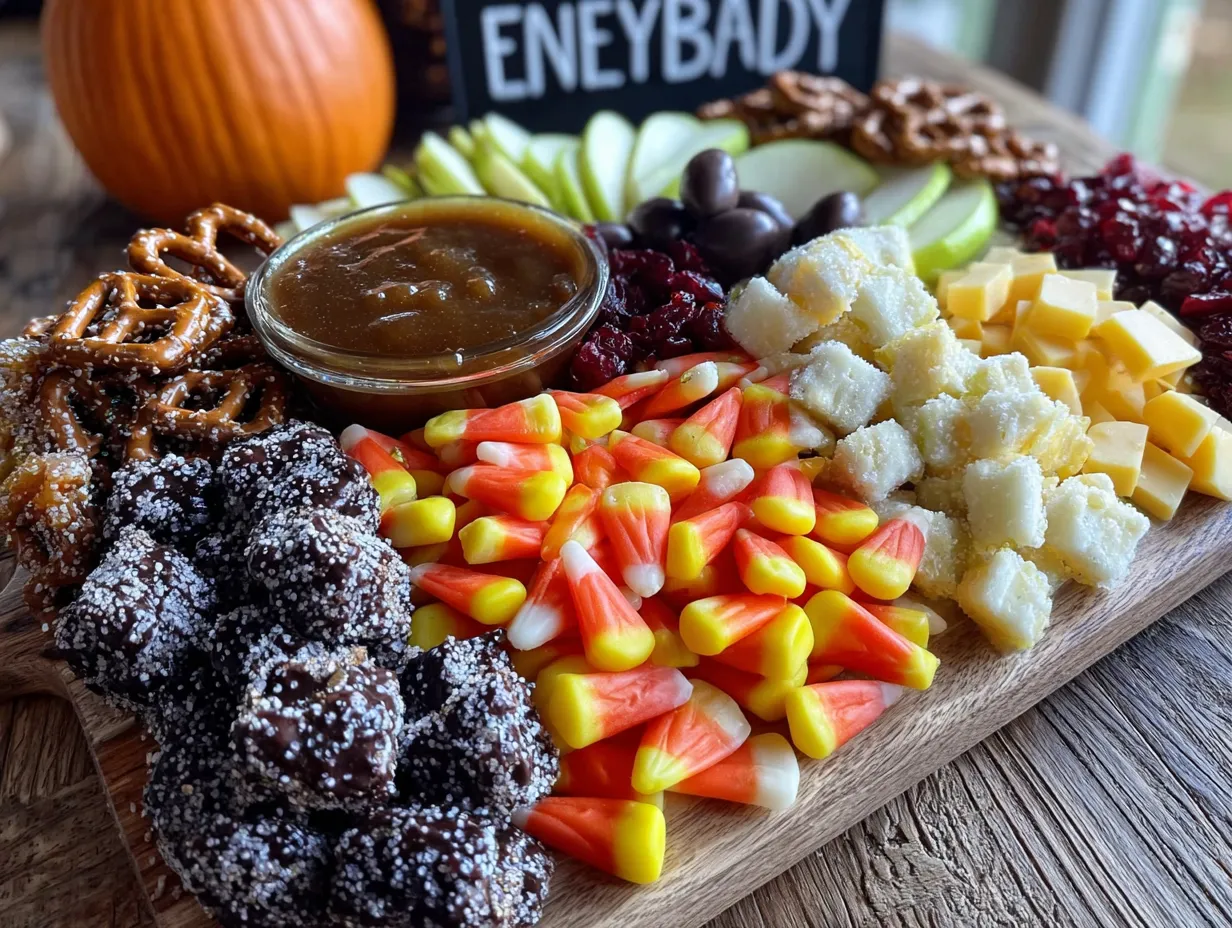
This board comes together in about 15 minutes. I usually assemble it while the kids are getting their costumes on, so it’s ready when they come downstairs. Here’s my step-by-step process.
Step 1: Prep Your Ingredients (5 minutes)
Wash the grapes and baby carrots. Pat them dry with a paper towel—wet ingredients make the board soggy. Cut the cheddar cheese into 1-inch cubes. Slice the Colby Jack into triangles using a crinkle cutter if you have one. Cut the green apple into thin slices and toss them in a bowl with a squeeze of lemon juice to keep them from turning brown. Cut the string cheese sticks in half crosswise. Slice the black olives in half lengthwise to create little spider bodies.
Step 2: Arrange the Bowls and Dips (2 minutes)
Place your small bowls on the board first. I put the peanut butter in one bowl and a pile of candy corn in another. Position them off-center so there’s room for everything else. The bowls act as anchors for the rest of the arrangement.
Step 3: Add the Cheese and Protein (3 minutes)
Scatter the cheddar cubes and Colby Jack triangles around the bowls. Don’t line them up neatly—you want a casual, abundant look. Place the string cheese halves near the edge of the board so they’re easy to grab. Add the black olive spiders in a few clusters. They should look like they’re crawling across the board, which the kids will find hilarious.
Step 4: Add the Fruits and Vegetables (3 minutes)
Arrange the baby carrots in a small pile, pointing them in different directions so they look like witch fingers. Place the grape halves cut-side up so they look like eyeballs. Fan out the apple slices near the cheddar—the tart apple pairs perfectly with sharp cheese. The grapes and apples add color contrast against the orange and yellow cheese.
Step 5: Add the Crunchy Elements (2 minutes)
Scatter the pretzel sticks around the board, pointing in different directions. Add the Halloween crackers in small clusters. Break the graham crackers into pieces and tuck them between the cheese cubes. These add texture and give kids something to scoop up the peanut butter.
Step 6: Add the Candy Corn and Marshmallows (2 minutes)
This is the final touch. Sprinkle the remaining candy corn around the board, focusing on areas near the cheese and apples. The contrast of orange and yellow against the white cheese is visually striking. Add the marshmallows in small piles—they look like little ghost poofs. I tuck a few marshmallows next to the candy corn for a sweet-sweet combo that kids go crazy for.
Step 7: Final Adjustments (1 minute)
Step back and look at your board. Fill in any empty spots with extra crackers or candy corn. You want the board to look full and abundant. If you see a bare patch, add a few more pretzels or grapes. The goal is to make it look like a feast, not a carefully measured snack.
Sensory Cue: When you’re done, the board should look like a Halloween party exploded on a platter. The orange of the cheddar and candy corn should pop against the green of the apples and grapes. The black olives add drama. The white marshmallows and string cheese break up the color. It should look almost too pretty to eat—but trust me, it won’t last long.
Cooking Tips & Techniques
I’ve made this board about a dozen times now, and I’ve learned a few things the hard way. Here are my best tips to save you the same mistakes.
Don’t Overcrowd the Board: I made this mistake the first time. I tried to fit everything on a small platter, and it looked like a pile of ingredients instead of a curated board. Use a large board or platter. Space things out so each element has room to breathe. Kids love picking and choosing, and they need visual space to see what’s available.
Keep the Candy Corn Separate at First: I learned this one when my candy corn got soggy from sitting next to the grapes. Store the candy corn in a separate bowl until you’re ready to serve. Sprinkle it on just before the kids come to the table. This keeps it crunchy and bright.
Use Room Temperature Cheese: Cold cheese doesn’t have as much flavor. Take the cheddar and Colby Jack out of the fridge about 15 minutes before you start assembling. Room temperature cheese tastes creamier and pairs better with the candy corn.
Prep Everything Before You Start: I used to wash grapes while trying to arrange the board, and it was a mess. Chop all your fruits, veggies, and cheese first. Put them in separate bowls. Then assemble everything at once. This cuts your total time in half.
Make It Interactive: Let the kids help arrange the board. My daughter loves placing the olive spiders and grape eyeballs. It gives her ownership over the meal, and she’s more likely to eat something she helped create. Plus, it keeps them busy while you finish up the last-minute costume adjustments.
The Candy Corn Trick: If your kids are hesitant about trying cheese, place a piece of candy corn right next to a cheese cube on the board. The visual pairing makes them curious. I’ve seen kids pop both in their mouth together and discover the sweet-salty combo on their own. It’s a magic trick that works every time.
Variations & Adaptations
This board is endlessly customizable. Here are a few ways I’ve adapted it for different needs and occasions.
Nut-Free Version: Swap the peanut butter for SunButter or WowButter. Both are nut-free and safe for school events. You can also skip the dip entirely and use hummus instead. The kids still love dipping pretzels and apples.
Vegan Version: Use vegan cheese shreds or cubes made from cashews or coconut oil. Replace the string cheese with vegan mozzarella sticks. Use a plant-based yogurt dip instead of peanut butter. The candy corn is surprisingly vegan-friendly, so that part stays the same.
Gluten-Free Version: Swap the graham crackers for gluten-free graham crackers or rice cakes. Use gluten-free pretzel sticks. Most candy corn is gluten-free, but double-check the label. The rest of the board is naturally gluten-free.
Savory Lover’s Version: Add some pepperoni slices or salami to the board. The salty meat balances the sweet candy corn beautifully. I’ve done this for adult Halloween parties, and it’s always a hit. Add some pickles or pickled vegetables for extra tang.
Spooky Dessert Board: Skip the cheese and crackers entirely. Load the board with candy corn, marshmallows, chocolate-covered pretzels, gummy worms, and Halloween-themed cookies. Add a bowl of caramel or chocolate sauce for dipping. This version is pure sugar, but for a Halloween party, it’s perfect.
My Personal Variation: I once added a small bowl of warm caramel sauce to the board, and it was gone in five minutes. The kids dipped everything—apples, pretzels, marshmallows, even the cheese. It was messy but unforgettable. I now add it every year as a special treat.
Serving & Storage Suggestions
This board is best served immediately, but there are a few tricks to keep it fresh if you’re prepping ahead.
Serving Temperature: Serve the board at room temperature. The cheese tastes better, and the fruit is more flavorful. If you’ve prepped ahead, take the board out of the fridge about 20 minutes before serving. The candy corn should stay crunchy, so add it last.
Presentation Tips: Place the board on a low coffee table or kitchen island so kids can reach it easily. Add a few small plates and napkins nearby. I like to put a few Halloween-themed toothpicks in a cup for easy grabbing. It makes the board feel more like a party.
Complementary Dishes: This board is meant to be a meal on its own, but you can add a few extra items if you want. A bowl of popcorn with Halloween sprinkles is a fun addition. Mini pumpkin muffins or ghost-shaped cookies round out the spread. For drinks, serve apple cider or hot chocolate with marshmallows.
Storage Instructions: This board doesn’t store well once assembled because the candy corn gets soft and the crackers get stale. If you have leftovers, separate the components. Store the cheese in an airtight container in the fridge for up to 3 days. The fruit and vegetables can be stored separately. The candy corn and crackers should go in a sealed bag at room temperature. Reassemble fresh the next day if you want to serve it again.
Reheating Tips: There’s nothing to reheat here, but if you’ve stored the cheese separately, let it come to room temperature before serving again. The candy corn will lose some crunch after a day, so it’s best to use fresh candy corn for the second round.
Flavor Development: The flavors don’t improve with time on this board. It’s all about the fresh, crunchy, cold elements. That’s why I recommend serving it immediately. The magic is in the first few minutes when everything is at its peak.
Nutritional Information & Benefits
This board is a balanced meal disguised as a treat. Here’s what you’re actually getting when your kids dig in.
Estimated Nutritional Values (per serving, based on 6 servings):
- Calories: 380
- Protein: 14g
- Carbohydrates: 42g
- Fat: 18g
- Fiber: 4g
- Sugar: 22g (12g from added sugar, 10g from natural sources)
Health Benefits of Key Ingredients: The cheese provides calcium and protein for growing bones and muscles. The apples and grapes offer fiber and vitamin C. The baby carrots are packed with beta-carotene for eye health. The peanut butter adds healthy fats and protein to keep kids full longer. Even the candy corn has a small role—it makes the healthy stuff more appealing, which is a win in my book.
Dietary Considerations: This board is vegetarian-friendly. With the nut-free substitutions listed above, it can be made safe for school events. The gluten-free version works well for celiac guests. The candy corn is generally vegan, but always check the label for honey or gelatin.
Potential Allergens: This recipe contains dairy (cheese), peanuts (peanut butter), and gluten (crackers, pretzels). Adjust as needed for your family’s needs. The candy corn is typically free of major allergens, but check the packaging.
My Wellness Perspective: I don’t believe in making Halloween completely sugar-free. That’s not realistic, and it takes the fun out of the holiday. What I do believe in is balance. This board gives kids the candy corn they crave while also sneaking in protein, fiber, and vitamins. They leave the table full and satisfied, not crashing from a sugar high. That’s a Halloween win in my book.
Conclusion
This Kid-Approved Halloween Charcuterie Board with Candy Corn has become the highlight of our Halloween tradition. It’s the one meal that actually gets eaten before the candy haul begins, and it’s the one I look forward to making every year. The best part? It’s not just for Halloween. I’ve made a version for Thanksgiving, Christmas, and even birthday parties. The candy corn swaps out for seasonal candy, but the concept stays the same: a board that’s fun, filling, and secretly nutritious.
I want you to take this idea and make it your own. Swap in your kids’ favorite fruits. Use their preferred cheese. Add their go-to dip. The beauty of a charcuterie board is that it’s endlessly customizable. You can’t mess it up. Trust me, I’ve tried.
I’d love to hear how your board turns out. Leave a comment below and tell me what your kids loved most. Did the grape eyeballs creep them out? Did the candy corn and cheddar combo surprise them? Share your photos and tag me on social media. I can’t wait to see your Halloween creations. Now go make that board—your kids are waiting!
Frequently Asked Questions
Can I make this board ahead of time?
You can prep the ingredients ahead—wash the fruit, cut the cheese, portion out the crackers—but assemble the board no more than 30 minutes before serving. The candy corn gets soft if it sits too long, and the crackers lose their crunch. Store prepped ingredients in separate containers in the fridge, then assemble fresh right before the kids come to the table.
How much candy corn should I use?
I use about 1 cup of candy corn for a standard board serving 4-6 kids. If your kids are candy corn fanatics like mine, buy an extra bag and keep it hidden. You can always add more to the board, but you can’t take it away once they see it. A little goes a long way—the candy corn is meant to be a highlight, not the main event.
What if my kids don’t like cheese?
This is more common than you’d think. Start with mild cheeses like Colby Jack or mozzarella string cheese. Place a piece of candy corn right next to the cheese on the board. The visual pairing makes kids curious, and they often try the cheese just because it’s next to the candy. If that doesn’t work, skip the cheese and add more fruit, pretzels, and dips. The board is flexible.
Can I use a different candy instead of candy corn?
Absolutely. Candy pumpkins, candy corn’s orange cousins, work great. You can also use M&M’s in Halloween colors, Reese’s Pieces, or even chocolate ghosts. The key is choosing a candy that adds color contrast to the board. Candy corn’s orange, yellow, and white stripes are visually striking against the green apples and orange cheese, but any Halloween-themed candy will work.
How do I keep the apple slices from turning brown?
Toss the apple slices in a bowl with a tablespoon of lemon juice or lime juice. The acid prevents oxidation and keeps the apples looking fresh for hours. If you don’t have citrus, submerge the slices in a bowl of cold water with a pinch of salt for 5 minutes, then pat them dry. This trick works surprisingly well and doesn’t leave a salty taste.
Pin This Recipe!
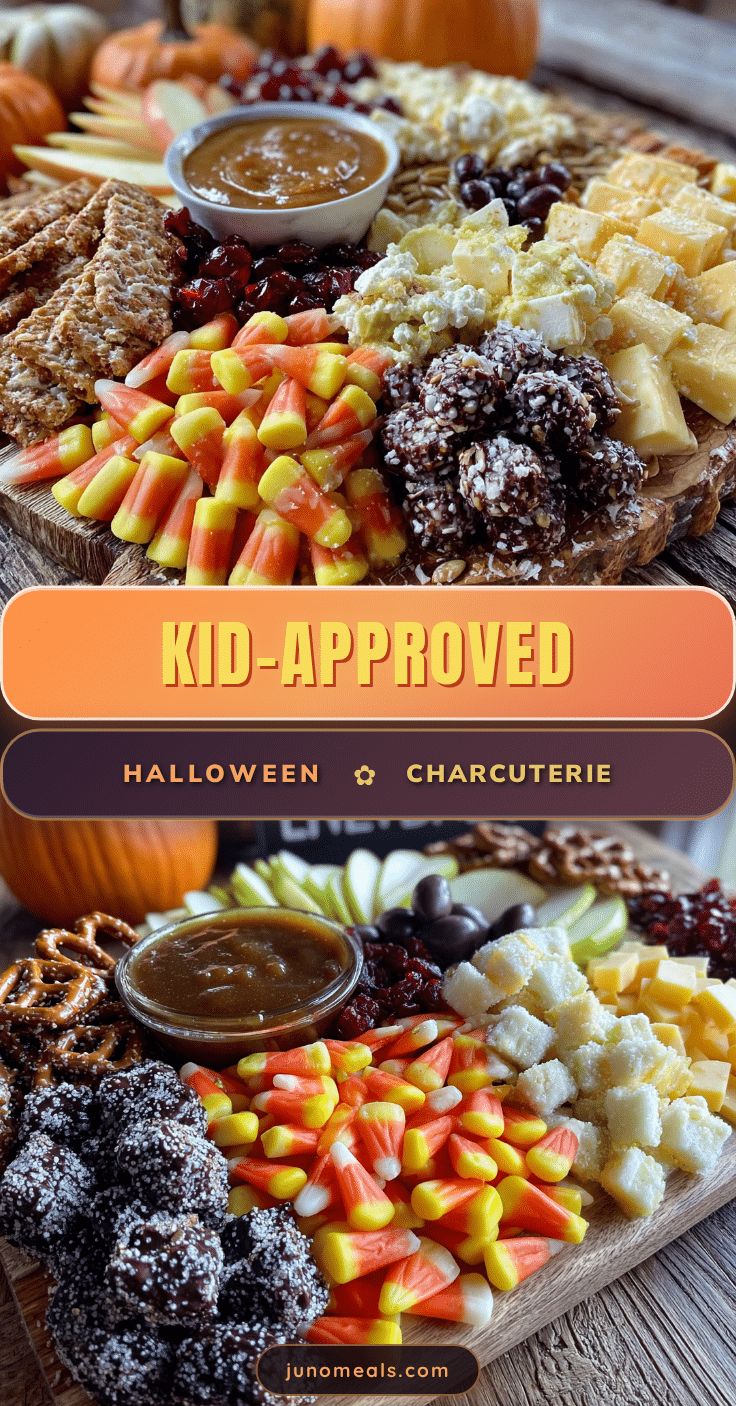
Kid-Approved Halloween Charcuterie Board with Candy Corn
A fun and spooky Halloween charcuterie board that combines candy corn with cheese, fruits, and veggies to create a balanced, kid-friendly meal before trick-or-treating. Quick to assemble and perfect for grazing.
- Prep Time: 15 minutes
- Cook Time: 0 minutes
- Total Time: 15 minutes
- Yield: 6 servings 1x
- Category: Appetizer
- Cuisine: American
Ingredients
- 1 cup candy corn
- 8 ounces sharp cheddar cheese, cubed
- 8 ounces Colby Jack cheese, sliced into triangles
- 1 cup baby carrots
- 1 cup red seedless grapes, halved lengthwise
- 1 cup pretzel sticks
- 1/2 cup peanut butter
- 1 large green apple, sliced
- 1 cup Halloween-themed crackers
- 4 mozzarella string cheese sticks, cut in half
- 1/2 cup black olives
- 4 sheets graham crackers, broken into pieces
- 1/2 cup marshmallows
Instructions
- Wash grapes and baby carrots; pat dry. Cut cheddar into 1-inch cubes. Slice Colby Jack into triangles using a crinkle cutter if desired. Slice green apple and toss with lemon juice to prevent browning. Cut string cheese sticks in half crosswise. Slice black olives in half lengthwise.
- Place small bowls on the board for peanut butter and a portion of candy corn. Position them off-center.
- Scatter cheddar cubes and Colby Jack triangles around the bowls. Add string cheese halves near the edge. Place black olive spiders in clusters.
- Arrange baby carrots in a small pile, pointing in different directions. Place grape halves cut-side up. Fan out apple slices near the cheddar.
- Scatter pretzel sticks around the board. Add Halloween crackers in small clusters. Break graham crackers into pieces and tuck between cheese cubes.
- Sprinkle remaining candy corn around the board, focusing near cheese and apples. Add marshmallows in small piles.
- Fill any empty spots with extra crackers or candy corn to make the board look abundant.
Notes
Prep all ingredients before assembling. Keep candy corn separate until serving to prevent sogginess. Use room temperature cheese for better flavor. Let kids help arrange for fun. For nut-free, substitute peanut butter with SunButter or WowButter.
Nutrition
- Serving Size: 1 serving
- Calories: 380
- Sugar: 22
- Sodium: 520
- Fat: 18
- Saturated Fat: 9
- Carbohydrates: 42
- Fiber: 4
- Protein: 14
Keywords: Halloween charcuterie board, candy corn, kid-friendly, Halloween snack, no-cook, party platter


