That deep, dark purple—almost black, really, with just a hint of ruby catching the light when you hold the jar up to the window. And that’s the whole point of making homemade elderberry syrup. It’s not about the sweetness, though the honey helps. It’s not even about the warmth of the cinnamon, which I love. It’s about that color. That color means you’ve extracted every bit of goodness from those tiny, powerful berries. I first made a batch during a particularly brutal February, when it felt like everyone in my house was sniffling in unison. I had a bag of dried elderberries in the pantry from a health food store run I’d almost forgotten about, and a desperate need to feel like I was doing something proactive. The syrup turned out exactly that deep, jewel-toned purple, and honestly, I felt a little bit of relief just looking at it. This homemade elderberry syrup with honey and cinnamon became our winter ritual. It’s not a magic potion, but it’s something real you can make with your own hands, and that counts for a lot when you’re trying to keep your family well. It’s the recipe that stuck because it was born out of necessity, not a Pinterest board.
Why You’ll Love This Homemade Elderberry Syrup Recipe
After a few seasons of making this syrup, I’ve got the process down to a science. It’s become one of those recipes I can practically make in my sleep, and I love it more each time. Here’s why I think you’ll feel the same way.
- Incredibly Easy: This is a simple, 3-ingredient recipe that comes together in about 45 minutes, most of which is hands-off simmering. It’s perfect for a weekend afternoon.
- Simple, Wholesome Ingredients: You only need dried elderberries, raw honey, and a cinnamon stick. No weird additives or hard-to-find extracts. You can find everything at a well-stocked grocery store or online.
- A Staple for Cold & Flu Season: This is my go-to for fall and winter. It’s a comforting, proactive way to support the immune system when everyone around you is sniffling. I keep a jar in the fridge from October through March.
- Crowd-Pleaser for All Ages: Even my picky kids will take a spoonful of this. It’s sweet and spicy, not like medicine at all. It’s a family-approved wellness ritual.
- Unbelievably Satisfying to Make: There’s something deeply satisfying about watching the water turn that deep, rich purple. It feels like you’re bottling up a little bit of protection for your family.
What makes this version different from others? It’s the balance. I’ve tested this with different ratios of berries to water, and this one gives you a potent syrup that’s not too thick or too thin. The cinnamon isn’t just for flavor—it adds its own immune-supporting properties and a warmth that makes the honey taste even richer. This isn’t just another wellness trend; it’s a traditional remedy made simple and delicious. It’s the kind of recipe that makes you feel like a kitchen herbalist, even if you’ve never made a syrup before.
What Ingredients You Will Need
This recipe relies on just a few key ingredients to create a potent and delicious syrup. Each one plays a crucial role, and they are all pantry-friendly staples.
- 1 cup dried elderberries: These are the star of the show. Dried elderberries are widely available in health food stores, co-ops, and online. Look for deep, dark purple berries that are plump and not shriveled. I usually buy a large bag from Mountain Rose Herbs at the start of fall. They have a consistently high quality. Do not use fresh elderberries, as they must be cooked before consumption.
- 3 cups filtered water: Using filtered water is a good practice for any herbal preparation. It ensures no off-flavors from tap water interfere with the delicate taste of the berries and honey. The water is the base that extracts all the goodness from the elderberries.
- 1 cup raw honey: Raw, unprocessed honey is ideal for this recipe. It contains its own beneficial enzymes and properties that are often lost in pasteurized honey. The honey acts as both a sweetener and a natural preservative. I prefer a mild-flavored honey like clover or orange blossom so it doesn’t overpower the elderberries. For a vegan option, you can substitute with maple syrup or agave nectar, but the syrup will be thinner and won’t have the same shelf life.
- 1 cinnamon stick: A single cinnamon stick adds a warm, spicy depth that perfectly complements the tartness of the elderberries. It also brings its own immune-supportive and anti-inflammatory benefits. I recommend using a Ceylon cinnamon stick if you can find it, as it has a more delicate flavor. If you only have ground cinnamon, use 1/2 teaspoon, but be aware it may make the syrup a bit cloudy.
- Optional: 1-inch piece of fresh ginger, sliced: I often add a few slices of fresh ginger for an extra warming kick and added immune support. It pairs beautifully with the cinnamon and elderberries. This is a personal favorite variation.
Equipment Needed
You don’t need any fancy equipment to make this syrup. A few basic kitchen tools will do the job perfectly.
- Medium saucepan with a lid: A 2-quart saucepan is the perfect size. A heavy-bottomed pot helps distribute heat evenly and prevents scorching.
- Fine-mesh strainer or cheesecloth: This is essential for straining out the cooked berries and cinnamon stick. A fine-mesh strainer works great and is easy to clean. If you want a super clear syrup, you can line the strainer with a double layer of cheesecloth.
- Glass jar or bottle for storage: A 16-ounce (1 pint) glass jar with a tight-fitting lid is ideal. I use a Weck jar or a simple Mason jar. Make sure the jar is thoroughly cleaned and sterilized by washing it in hot, soapy water or running it through the dishwasher.
- Wooden spoon or silicone spatula: For stirring the berries as they simmer.
- Funnel (optional but helpful): A small funnel makes pouring the finished syrup into the jar much neater and less messy.
That’s it! No special equipment required. This is a very forgiving recipe that uses tools you likely already have in your kitchen. I’ve used an old pasta pot in a pinch, and it worked just fine.
Preparation Method
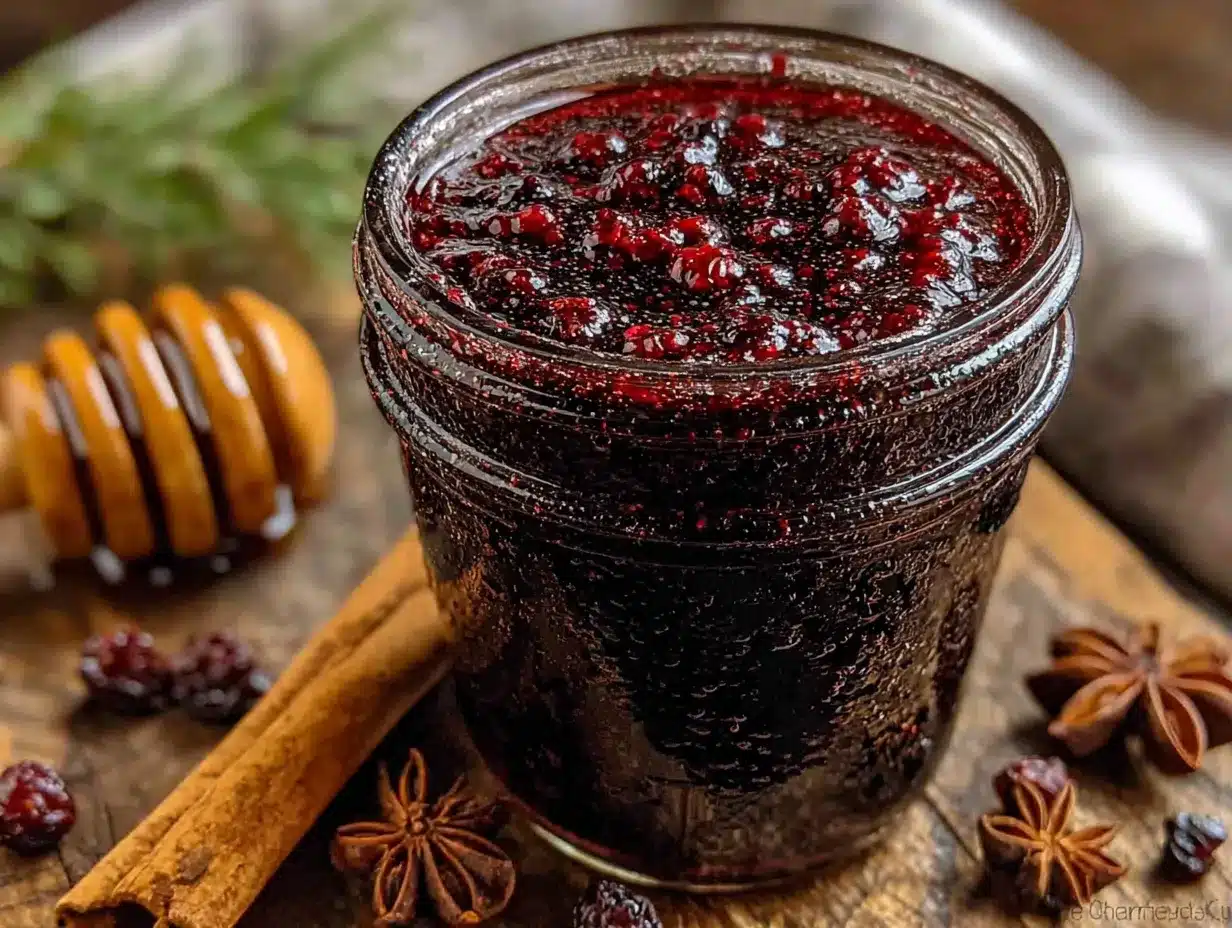
Making this syrup is a simple, hands-off process. You’ll be rewarded with a beautiful, deeply flavored syrup that feels like a true accomplishment.
- Combine and Simmer: In your medium saucepan, combine the 1 cup of dried elderberries, 3 cups of filtered water, and the cinnamon stick (and optional ginger slices, if using). Bring the mixture to a boil over high heat. Once it reaches a rolling boil, reduce the heat to low, cover the pot with the lid, and let it simmer gently for 30-40 minutes. The liquid will turn a deep, dark purple, and the berries will become plump and soft. The smell at this stage is incredible—earthy, fruity, and warm.
- Mash the Berries (Optional but Recommended): After the simmering time is up, remove the pot from the heat. Using the back of a wooden spoon or a potato masher, gently mash the berries against the side of the pot. This helps release even more of their beneficial compounds and flavor into the liquid. Don’t go crazy—just a few good mashes will do the trick.
- Strain the Mixture: Place your fine-mesh strainer over a large bowl or a 4-cup liquid measuring cup. Carefully pour the hot berry mixture through the strainer. Use the back of a spoon to press down on the berries in the strainer to extract every last drop of that precious purple liquid. Discard the spent berries and cinnamon stick (they go straight into my compost bin).
- Cool Slightly: Let the strained liquid cool in the bowl for about 10-15 minutes. It should be warm but not hot to the touch. This is a critical step—if you add the honey to a liquid that is too hot, you can destroy some of the beneficial enzymes in the raw honey. Patience here is key.
- Stir in the Honey: Once the liquid has cooled slightly, add the 1 cup of raw honey. Whisk or stir gently until the honey is completely dissolved into the warm elderberry liquid. The syrup will become beautifully glossy and fragrant. Taste it at this point—it should be sweet, slightly tart, and warmly spiced. If you want it a little sweeter, you can add an extra tablespoon or two of honey.
- Bottle and Store: Using your funnel, pour the finished syrup into your clean glass jar. Seal it tightly with the lid. Let it cool completely to room temperature before placing it in the refrigerator.
Cooking Tips & Techniques
Over the years, I’ve learned a few tricks that make this process even smoother. Here are my best tips for perfect homemade elderberry syrup every time.
- Don’t Over-Boil: A gentle simmer is your friend. A vigorous boil can evaporate too much water, making your syrup too thick and concentrated, and it can also break down some of the beneficial compounds in the berries. Keep it at a low, lazy bubble.
- The Cool-Down is Crucial: I cannot stress this enough. I once got impatient and added the honey while the liquid was still quite hot. The resulting syrup was fine, but it was thinner and didn’t have the same rich, complex flavor. Let that liquid cool down for the full 10-15 minutes.
- Double Strain for Clarity: If you want a syrup that is perfectly clear and free of any sediment, line your strainer with a double layer of cheesecloth or a nut milk bag before straining. This catches any tiny berry particles. I usually skip this step because I don’t mind a little sediment, but it’s an option for a more polished look.
- Use a Potato Masher: A potato masher is my favorite tool for mashing the berries after they’ve simmered. It’s much more effective than a wooden spoon and gets the job done in seconds. This is a great tip for maximizing your yield.
- Start with a Clean Jar: This is a simple step that makes a big difference in shelf life. A clean, sterilized jar prevents any unwanted bacteria from contaminating your syrup. I always wash my jar in the dishwasher right before I start making the syrup.
Variations & Adaptations
This recipe is a wonderful base for experimentation. Here are a few of my favorite ways to change it up.
- Spiced Elderberry Syrup: Add 2-3 whole cloves, a star anise, and a strip of orange zest to the pot along with the cinnamon stick. This creates a wonderfully complex, chai-like flavor that is perfect for the holidays. I made this version last December and it was a huge hit.
- Ginger & Turmeric Boost: Add a 1-inch piece of fresh ginger (sliced) and a 1-inch piece of fresh turmeric (sliced or grated) to the simmering pot. Both are powerful anti-inflammatory ingredients that complement the elderberries beautifully. This is my go-to variation when I feel like I need some extra support.
- Herbal Infusion: Add a few sprigs of fresh thyme or a tablespoon of dried rose hips to the pot during the last 10 minutes of simmering. Thyme is great for respiratory support, and rose hips add a boost of vitamin C and a lovely floral note.
- Honey Alternatives: For a vegan-friendly version, replace the honey with an equal amount of maple syrup or agave nectar. The flavor will change slightly, but it will still be delicious and effective. Keep in mind that these alternatives won’t have the same preservative qualities as honey, so the syrup should be used within 2-3 weeks.
- Low-Sugar Version: You can reduce the honey to 1/2 cup or 3/4 cup for a less sweet syrup. The flavor will be more tart and berry-forward. Just be aware that this will shorten the shelf life, so make a smaller batch or plan to use it quickly.
Serving & Storage Suggestions
Knowing how to use and store your syrup is just as important as making it. Here’s how to get the most out of your batch.
- Dosage: For adults, I recommend 1 tablespoon daily for general maintenance. During cold and flu season, or if you feel a tickle in your throat, you can increase this to 1 tablespoon 2-3 times a day. For children over 1 year old, give 1 teaspoon daily. Always consult with a pediatrician before giving any herbal remedy to children.
- How to Take It: You can take it straight off the spoon (my kids love this), or mix it into a small glass of warm water or tea. It’s also delicious drizzled over yogurt, oatmeal, or pancakes for a wellness-infused breakfast. I sometimes add a splash to sparkling water for a festive, immune-supporting mocktail.
- Storage: Store your homemade elderberry syrup in a sealed glass jar in the refrigerator. It will keep well for up to 3 months. The honey acts as a natural preservative, which is why it has such a good shelf life for a homemade product.
- Freezing: For longer storage, you can freeze the syrup in ice cube trays. Once frozen, pop the cubes out and store them in a freezer-safe bag. They will keep for up to 6 months. Thaw a cube or two in the fridge overnight as needed. This is a great way to have a supply ready to go all year round.
- How Flavors Develop: The flavors will continue to meld and deepen over the first few days in the fridge. The cinnamon becomes more pronounced, and the honey’s sweetness rounds out. It’s even better on day two or three!
Nutritional Information & Benefits
While this syrup is not a medicine, it is a wonderful way to incorporate some powerful, nutrient-dense ingredients into your daily routine.
- Estimated Nutrition per 1 Tablespoon Serving: Calories: 45, Total Fat: 0g, Sodium: 1mg, Total Carbohydrates: 12g, Sugars: 11g (from honey). This is a concentrated source of natural sugars, so a little goes a long way.
- Elderberries: These tiny dark berries are packed with antioxidants, particularly anthocyanins (which give them that deep purple color) and flavonoids. They are traditionally used to support the immune system and may help reduce the duration and severity of cold and flu symptoms.
- Raw Honey: Raw honey is a natural source of antioxidants and enzymes. It has antimicrobial and soothing properties, making it a classic remedy for sore throats and coughs.
- Cinnamon: This warming spice is rich in antioxidants and has anti-inflammatory properties. It can help regulate blood sugar and adds a wonderful depth of flavor without any extra sugar.
- Dietary Considerations: This recipe is naturally gluten-free, dairy-free, and soy-free. For a vegan option, substitute the honey with maple syrup or agave. It is not suitable for children under 1 year old due to the honey content.
I love that this syrup allows me to take a proactive, natural approach to wellness during the colder months. It feels good to know exactly what’s in it and that I made it myself.
Conclusion
This homemade elderberry syrup with honey and cinnamon is more than just a recipe—it’s a small, powerful ritual for the winter season. It’s easy to make, uses simple ingredients you can feel good about, and has become a staple in my home for good reason. The deep, rich color and the sweet, spicy warmth are a comfort in themselves. I encourage you to make a batch and customize it to your taste. Add more ginger, try a different honey, or throw in a clove or two. This recipe is a starting point for your own kitchen wellness practice.
I’d love to hear how yours turns out! Leave a comment below and tell me what variations you tried, or share a photo of your beautiful purple syrup. And if you’re looking for another simple, feel-good treat, you might also enjoy my mini lemon blueberry cheesecakes—they’re a completely different kind of comfort, but just as satisfying to make. Happy simmering!
Frequently Asked Questions
Can I use fresh elderberries instead of dried?
No, you should never use fresh elderberries in this recipe. Fresh elderberries must be cooked thoroughly before consumption, as they contain a compound that can cause nausea and digestive upset. Dried elderberries are the safe and proper choice for making syrup.
How long does homemade elderberry syrup last?
When stored properly in a sealed glass jar in the refrigerator, this syrup will last for up to 3 months. The raw honey acts as a natural preservative. If you notice any mold, off-odors, or a change in texture, it’s best to discard it and make a fresh batch.
Can I give this syrup to my children?
Yes, you can give this syrup to children over 1 year old. The recommended dose is 1 teaspoon daily for general maintenance. Do not give this syrup to infants under 1 year old due to the risk of botulism from the honey. Always consult with your pediatrician before introducing any new herbal remedy to your child’s routine.
What is the best way to take elderberry syrup?
The most common way is to take it straight off a spoon. You can also mix it into a small glass of warm water or tea for a soothing drink. It’s delicious drizzled over yogurt, oatmeal, or even pancakes. Some people add a splash to sparkling water for a festive mocktail.
Can I make this syrup without honey?
Yes, you can substitute the honey with an equal amount of maple syrup or agave nectar for a vegan-friendly version. Keep in mind that these alternatives won’t have the same preservative qualities as honey, so the syrup will have a shorter shelf life of about 2-3 weeks in the refrigerator. You can also reduce the honey for a less sweet version.
Pin This Recipe!
Homemade Elderberry Syrup Easy 3-Ingredient Recipe
This homemade elderberry syrup with honey and cinnamon is a simple, 3-ingredient recipe that comes together in about 45 minutes. It’s a comforting, proactive way to support the immune system during cold and flu season.
- Prep Time: 5 minutes
- Cook Time: 40 minutes
- Total Time: 45 minutes
- Yield: 16 servings 1x
- Category: Condiment
- Cuisine: American
Ingredients
- 1 cup dried elderberries
- 3 cups filtered water
- 1 cup raw honey
- 1 cinnamon stick
- Optional: 1-inch piece of fresh ginger, sliced
Instructions
- Combine and Simmer: In a medium saucepan, combine the dried elderberries, filtered water, and cinnamon stick (and optional ginger slices, if using). Bring to a boil over high heat, then reduce heat to low, cover, and simmer gently for 30-40 minutes.
- Mash the Berries (Optional but Recommended): Remove the pot from heat. Using the back of a wooden spoon or a potato masher, gently mash the berries against the side of the pot to release more flavor and beneficial compounds.
- Strain the Mixture: Place a fine-mesh strainer over a large bowl or liquid measuring cup. Pour the hot berry mixture through the strainer, pressing down on the berries with a spoon to extract all the liquid. Discard the spent berries and cinnamon stick.
- Cool Slightly: Let the strained liquid cool for 10-15 minutes until warm but not hot to the touch.
- Stir in the Honey: Add the raw honey to the warm liquid and whisk or stir gently until completely dissolved.
- Bottle and Store: Pour the syrup into a clean glass jar using a funnel. Seal tightly and let cool completely to room temperature before refrigerating.
Notes
Do not use fresh elderberries; they must be cooked. For a vegan option, substitute honey with maple syrup or agave nectar, but the syrup will have a shorter shelf life (2-3 weeks). The syrup can be frozen in ice cube trays for up to 6 months.
Nutrition
- Serving Size: 1 tablespoon
- Calories: 45
- Sugar: 11
- Sodium: 1
- Carbohydrates: 12
Keywords: elderberry syrup, homemade syrup, immune support, cold and flu, honey, cinnamon, natural remedy


