There used to be a little bakery off Highway 71, just past the old feed store, that made an apple dapple cake I still dream about. When they closed their doors three summers ago—just a handwritten sign taped to the window saying “Thank you for the memories”—I honestly felt a little lost. That cake was my go-to for everything. Potlucks, Sunday dinners, quiet Tuesday afternoons when I needed something sweet. It had this dense, almost pudding-like crumb, studded with tender apple chunks and pecans, and a glaze that soaked right into every crevice. I tried recreating it maybe eight times before I got close. The first attempt was a dry, crumbly mess. The second one fell apart when I flipped it out of the pan. My family was getting pretty tired of being taste-testers, let me tell you.
Then it hit me—buttermilk. That tangy, creamy secret that makes baked goods tender and gives glaze that perfect balance of sweet and sharp. I called my neighbor Carol, who used to work at that bakery, and she confirmed it. “Buttermilk,” she said. “In the cake and the glaze. That’s the whole trick.” So I went back to the kitchen, determined to get it right. And you know what? This version—my homemade apple dapple cake with a simple buttermilk glaze—is even better than the one I’d been chasing. It’s the kind of cake that makes you close your eyes after the first bite. The kind that disappears before you’ve even poured yourself a second cup of coffee. Maybe you’ve been there, missing a recipe from a place that’s gone. This one’s for you.
Why You’ll Love This Apple Dapple Cake
Look, I’ve tested a lot of apple cake recipes over the years. Some are too dry. Some are so dense they feel like eating a brick. Others just don’t have enough apple flavor. This one? It hits every single note just right.
- Simple Ingredients : You probably have most of this in your pantry right now. No fancy extracts or hard-to-find flours. Just good, honest baking staples.
- Perfect for Family Gatherings : This cake feeds a crowd and then some. It’s the first thing to go at potlucks, and I’ve never had leftovers last more than a day.
- Budget-Friendly : Apples are cheap, especially in the fall. This cake stretches a few dollars into something that feels truly special.
- Picky Eater Approved : My youngest won’t touch a raw apple, but she’ll eat three slices of this cake. Something about the warm spices and that glaze just wins everyone over.
- Leftovers That Reheat Beautifully : A quick 15 seconds in the microwave, and it tastes like it just came out of the oven. The glaze soaks in even more overnight.
- Unbelievably Moist : The buttermilk and oil combination creates a crumb that’s tender, almost velvety. You won’t need a glass of milk to wash it down.
What makes this different from other apple cakes is the texture. It’s not light and fluffy like a sponge cake. It’s dense and rich, almost like a pound cake, but with all those juicy apple bits throughout. The buttermilk glaze seeps into the warm cake, creating this incredible sweet-tangy layer that makes every bite better than the last. I’ve had friends tell me it’s the best cake they’ve ever eaten. I’m not one to brag, but honestly, I agree.
What Ingredients You Will Need
This recipe uses simple, wholesome ingredients to deliver bold flavor and satisfying texture without the fuss. Most of these are pantry staples, so you can whip this up anytime a craving hits.
For the Apple Dapple Cake
- 3 cups all-purpose flour (I use Gold Medal, but any brand works fine)
- 1 teaspoon baking soda (make sure it’s fresh—check the date!)
- 1 teaspoon salt (regular table salt is fine)
- 2 teaspoons ground cinnamon (adds warmth and depth)
- 1/2 teaspoon ground nutmeg (freshly grated if you have it, but pre-ground works)
- 1 1/2 cups vegetable oil (canola or sunflower oil also work)
- 2 cups granulated sugar
- 3 large eggs (room temperature for best incorporation)
- 1 teaspoon vanilla extract (pure, not imitation, if you can swing it)
- 3 cups peeled and chopped apples (about 3 medium apples—I love Honeycrisp or Granny Smith)
- 1 cup chopped pecans (walnuts work too, or leave them out for a nut-free version)
- 1 cup sweetened shredded coconut (optional, but it adds such a nice texture)
For the Buttermilk Glaze
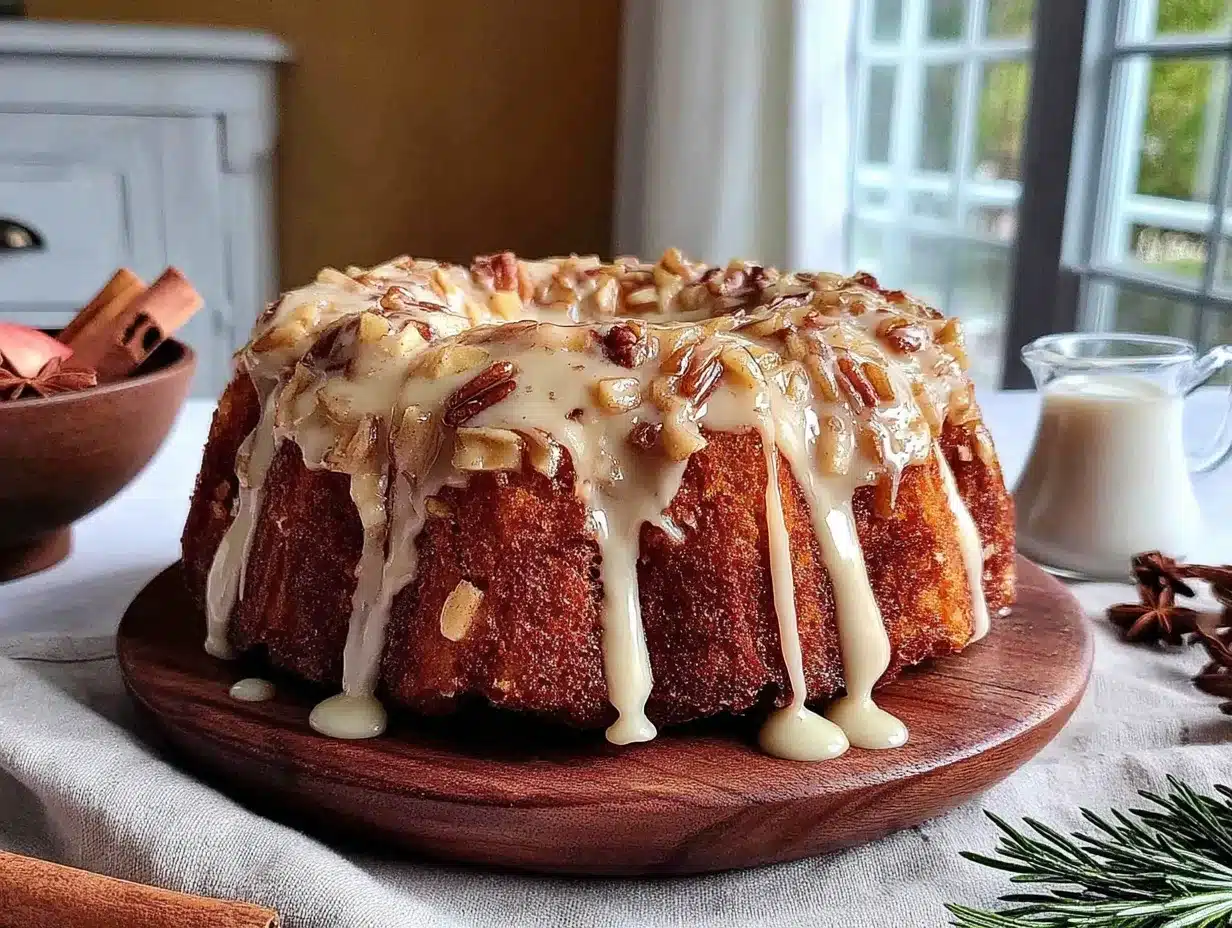
- 1/2 cup unsalted butter
- 1/2 cup buttermilk (shake the carton before measuring)
- 1 cup granulated sugar
- 1 teaspoon vanilla extract
- 1/2 teaspoon baking soda (this gives the glaze a little fizz and lightness)
A quick note on apples: you want something that holds its shape during baking. Granny Smith is my go-to because it’s tart enough to balance all that sugar. Honeycrisp is sweeter and also works beautifully. Avoid Red Delicious—they get mushy and weird. I learned that the hard way.
For the buttermilk, I really do recommend the real thing. But if you’re in a pinch, you can make a quick substitute: add 1 tablespoon of lemon juice or white vinegar to a measuring cup, then fill with regular milk to the 1-cup line. Let it sit for 5 minutes, and you’ve got buttermilk. I’ve done this plenty of times when I forgot to buy it.
Equipment Needed
You don’t need a fancy kitchen to make this cake. Here’s what you’ll need:
- 10-inch tube pan or Bundt pan (I prefer a tube pan for even baking, but a Bundt gives a prettier shape)
- Large mixing bowl
- Medium mixing bowl
- Whisk
- Wooden spoon or spatula
- Vegetable peeler (for the apples)
- Chef’s knife and cutting board
- Measuring cups and spoons
- Saucepan (for the glaze)
- Cooling rack
If you don’t have a tube pan, a 9×13-inch baking dish works too. Just reduce the baking time by about 10 minutes and check for doneness early. I’ve used my grandmother’s old glass baking dish before, and it turned out just fine—just a little less dramatic looking.
Preparation Method
This cake comes together in about 20 minutes of active work. The rest is just waiting (and smelling the most incredible aromas).
- Preheat your oven to 325°F (165°C). Grease your tube pan or Bundt pan really well. I use a pastry brush to spread softened butter into every nook and cranny, then dust it lightly with flour. Don’t skip this step—I’ve lost a beautiful cake to a stubborn pan before.
- In a medium bowl, whisk together the flour, baking soda, salt, cinnamon, and nutmeg. Set this aside for now. This ensures your leavening and spices are evenly distributed throughout the cake.
- In a large bowl, combine the oil and sugar. Beat them together with a wooden spoon until they’re well combined. It won’t get fluffy like butter and sugar, but that’s okay—this cake gets its texture from the oil and apples.
- Add the eggs one at a time, beating well after each addition. Then stir in the vanilla extract. The mixture should look smooth and slightly thickened.
- Gradually add the flour mixture to the wet ingredients, stirring just until combined. Don’t overmix! A few streaks of flour are fine—they’ll disappear when you add the apples. Overmixing makes the cake tough.
- Fold in the chopped apples, pecans, and coconut (if using). Use a gentle hand here. You want the apples distributed evenly, but you don’t want to crush them. The batter will be very thick—almost like cookie dough. That’s exactly right.
- Spoon the batter into your prepared pan and spread it evenly. It will be quite full—that’s fine. This cake doesn’t rise dramatically.
- Bake for 1 hour and 15 minutes to 1 hour and 25 minutes, or until a toothpick inserted near the center comes out clean or with just a few moist crumbs. My oven runs hot, so I start checking at 70 minutes. The top should be a deep golden brown, and the edges will start pulling away from the pan slightly.
- While the cake bakes, make the glaze. In a saucepan, combine the butter, buttermilk, and sugar. Bring to a boil over medium heat, stirring constantly. Let it boil for exactly 1 minute, then remove from heat. Stir in the vanilla and baking soda. The mixture will foam up—that’s the baking soda reacting. It settles down quickly.
- When the cake comes out of the oven, let it cool in the pan for just 5 minutes. Then, using a skewer or a long toothpick, poke holes all over the top of the cake—about 20 to 30 holes. This lets the glaze soak deep into the cake.
- Pour about half the warm glaze over the cake while it’s still in the pan. Let it soak in for about 10 minutes. Then carefully invert the cake onto your serving plate. Pour the remaining glaze over the top, letting it drip down the sides.
- Let the cake cool completely before slicing. I know it’s tempting to cut into it right away, but the glaze needs time to set. If you can wait, cover it and let it sit overnight. The flavor gets even better.
Cooking Tips & Techniques
I’ve made this cake more times than I can count, and I’ve learned a few things along the way. Here are the tricks that make a real difference:
Don’t skip the poking step. I know it feels aggressive, but those holes are what make this cake so incredibly moist. The glaze seeps in and creates that signature texture. I once forgot to poke the holes, and the glaze just sat on top like a sad puddle. Learn from my mistake.
Use room temperature eggs. Cold eggs can make the batter seize up, especially when you’re adding them to oil. Just leave them on the counter for 30 minutes before you start. If you’re in a hurry, place them in a bowl of warm water for 5 minutes.
Toast your pecans first. Spread them on a baking sheet and toast at 350°F for about 5-7 minutes, until they smell nutty. This brings out their flavor and keeps them crunchy in the cake. I skipped this step once when I was in a rush, and the pecans were just kind of… there. Toasting makes them sing.
Watch the glaze carefully. It can go from perfect to burnt in seconds. Keep stirring the whole time it’s on the heat, and take it off as soon as it reaches a full boil. The baking soda makes it foam, so use a saucepan that’s bigger than you think you need. I learned this after cleaning a sticky mess off my stovetop.
Let the cake cool completely before storing. If you wrap it while it’s still warm, the condensation will make the top sticky and soggy. I usually let it sit on the counter for a full 2 hours before covering it.
Variations & Adaptations
This recipe is wonderfully flexible. Here are some ways to make it your own:
Gluten-Free Version: Substitute the all-purpose flour with a good gluten-free baking blend that contains xanthan gum. I’ve used Bob’s Red Mill 1-to-1 Baking Flour with great results. The texture is slightly more tender, but still delicious.
Dairy-Free Adaptation: Use a plant-based buttermilk substitute—add 1 tablespoon of lemon juice to 1 cup of unsweetened almond or oat milk. For the glaze, use vegan butter and the same dairy-free buttermilk substitute. It works perfectly.
Spice It Up: Add 1/2 teaspoon of ground ginger and 1/4 teaspoon of ground cloves for a more complex spice profile. This is lovely in the fall, especially around Thanksgiving.
Add a Crunch Topping: Before baking, sprinkle the top of the batter with a mixture of 2 tablespoons of brown sugar, 1 tablespoon of melted butter, and 1/4 cup of chopped pecans. It creates a lovely, crackly crust.
Make it a Layer Cake: Bake the batter in two 9-inch round cake pans for about 35-40 minutes. Make a double batch of the glaze and use it between the layers and on top. It’s stunning for birthdays.
Apple Swap: Try pears instead of apples for a different take. Bartlett or Bosc pears work beautifully. You might need to add an extra tablespoon of flour since pears are juicier than apples.
Serving & Storage Suggestions
This cake is wonderful served warm or at room temperature. If you’re reheating individual slices, 15-20 seconds in the microwave is perfect. The glaze softens and gets a little gooey—heavenly.
For a truly indulgent dessert, serve each slice with a scoop of vanilla bean ice cream or a dollop of lightly sweetened whipped cream. A drizzle of caramel sauce never hurts either. I like to add a sprinkle of flaky sea salt on top—it balances the sweetness beautifully.
This cake pairs wonderfully with a cup of hot coffee or a glass of cold milk. For a fall gathering, serve it with warm apple cider or a chai latte.
Storage: Cover the cake tightly with plastic wrap or store it in an airtight container at room temperature for up to 4 days. The flavor actually improves after the first day as the glaze continues to soak in. I honestly prefer it on day two.
Freezing: This cake freezes beautifully. Wrap it tightly in plastic wrap, then in a layer of aluminum foil. Freeze for up to 3 months. To thaw, leave it at room temperature for about 4 hours. You can also freeze individual slices for quick treats. Just wrap each slice in plastic wrap and pop them in a freezer bag.
Reheating from frozen: Microwave a single slice for about 30-40 seconds, or warm slices in a 300°F oven for about 10 minutes. The glaze will be soft and glossy again.
Nutritional Information & Benefits
Let’s be honest—this is a treat, not a health food. But it does have some redeeming qualities.
| Per Slice (1/12 of cake) | Approximate Value |
|---|---|
| Calories | 480 |
| Total Fat | 26g |
| Saturated Fat | 7g |
| Cholesterol | 55mg |
| Sodium | 320mg |
| Total Carbohydrates | 62g |
| Dietary Fiber | 3g |
| Sugars | 42g |
| Protein | 5g |
The apples provide a decent amount of fiber and vitamin C. Pecans are rich in healthy fats and antioxidants. And the buttermilk adds calcium and probiotics (though most are killed during baking). The coconut offers some fiber and healthy fats too.
For dietary considerations: this recipe contains gluten, dairy, eggs, and tree nuts (pecans and coconut). It’s not suitable for vegans or those with severe nut allergies. For a nut-free version, simply omit the pecans and coconut.
I personally believe in balance. This cake is for celebrations, cozy weekends, and moments when you need a little sweetness in your life. Enjoy it without guilt, and maybe take an extra walk tomorrow. That’s my philosophy, anyway.
Conclusion
This apple dapple cake with buttermilk glaze is more than just a recipe—it’s a little piece of comfort you can make in your own kitchen. It brings back that bakery memory every single time I bake it, but now it’s even better because I made it myself. The dense, moist crumb. The tender apple chunks. That glossy, tangy-sweet glaze that soaks into every bite. It’s everything I was chasing, and more.
I hope you give this cake a try, whether you’re recreating a memory of your own or just looking for a dessert that will make everyone at the table happy. Don’t be afraid to make it your own—swap the nuts, add some extra spice, or double the glaze (I won’t tell).
When you make it, I’d love to hear how it turned out. Drop a comment below and let me know if your family loved it as much as mine does. Did you make any changes? Did it bring back a memory? Share your story—I read every single comment, and nothing makes me happier than knowing this cake brought a little joy to your table.
Happy baking, friend. Your kitchen is about to smell amazing.
Frequently Asked Questions
Can I use a different type of pan?
Absolutely. A 9×13-inch baking dish works well—just reduce the baking time to about 50-60 minutes. You can also use two 9-inch round pans for a layer cake, baking for 35-40 minutes. Just keep an eye on it and test with a toothpick.
Why is my glaze separating or looking greasy?
This usually happens if the glaze boils too long or if the heat is too high. Make sure you’re stirring constantly and remove it from heat as soon as it reaches a full boil. If it does separate, try whisking in a tablespoon of warm water to bring it back together.
Can I make this cake ahead of time?
Yes! This cake actually tastes better the next day. Bake it, glaze it, and let it cool completely. Then cover it tightly and store at room temperature. The flavors meld together beautifully overnight. It’s perfect for making the day before a party.
Can I use pre-shredded coconut instead of shredded?
You can, but the texture will be different. Sweetened shredded coconut (the finer kind) will distribute more evenly throughout the batter. The larger flaked coconut gives more distinct coconut pieces. Both work, so use what you have on hand.
How do I know when the cake is done baking?
Insert a wooden toothpick or a thin skewer into the center of the cake. If it comes out clean or with just a few moist crumbs clinging to it, the cake is done. If it comes out with wet batter, bake for another 5-10 minutes and test again. The top should also be a deep golden brown and the edges should start pulling away from the pan.
Pin This Recipe!
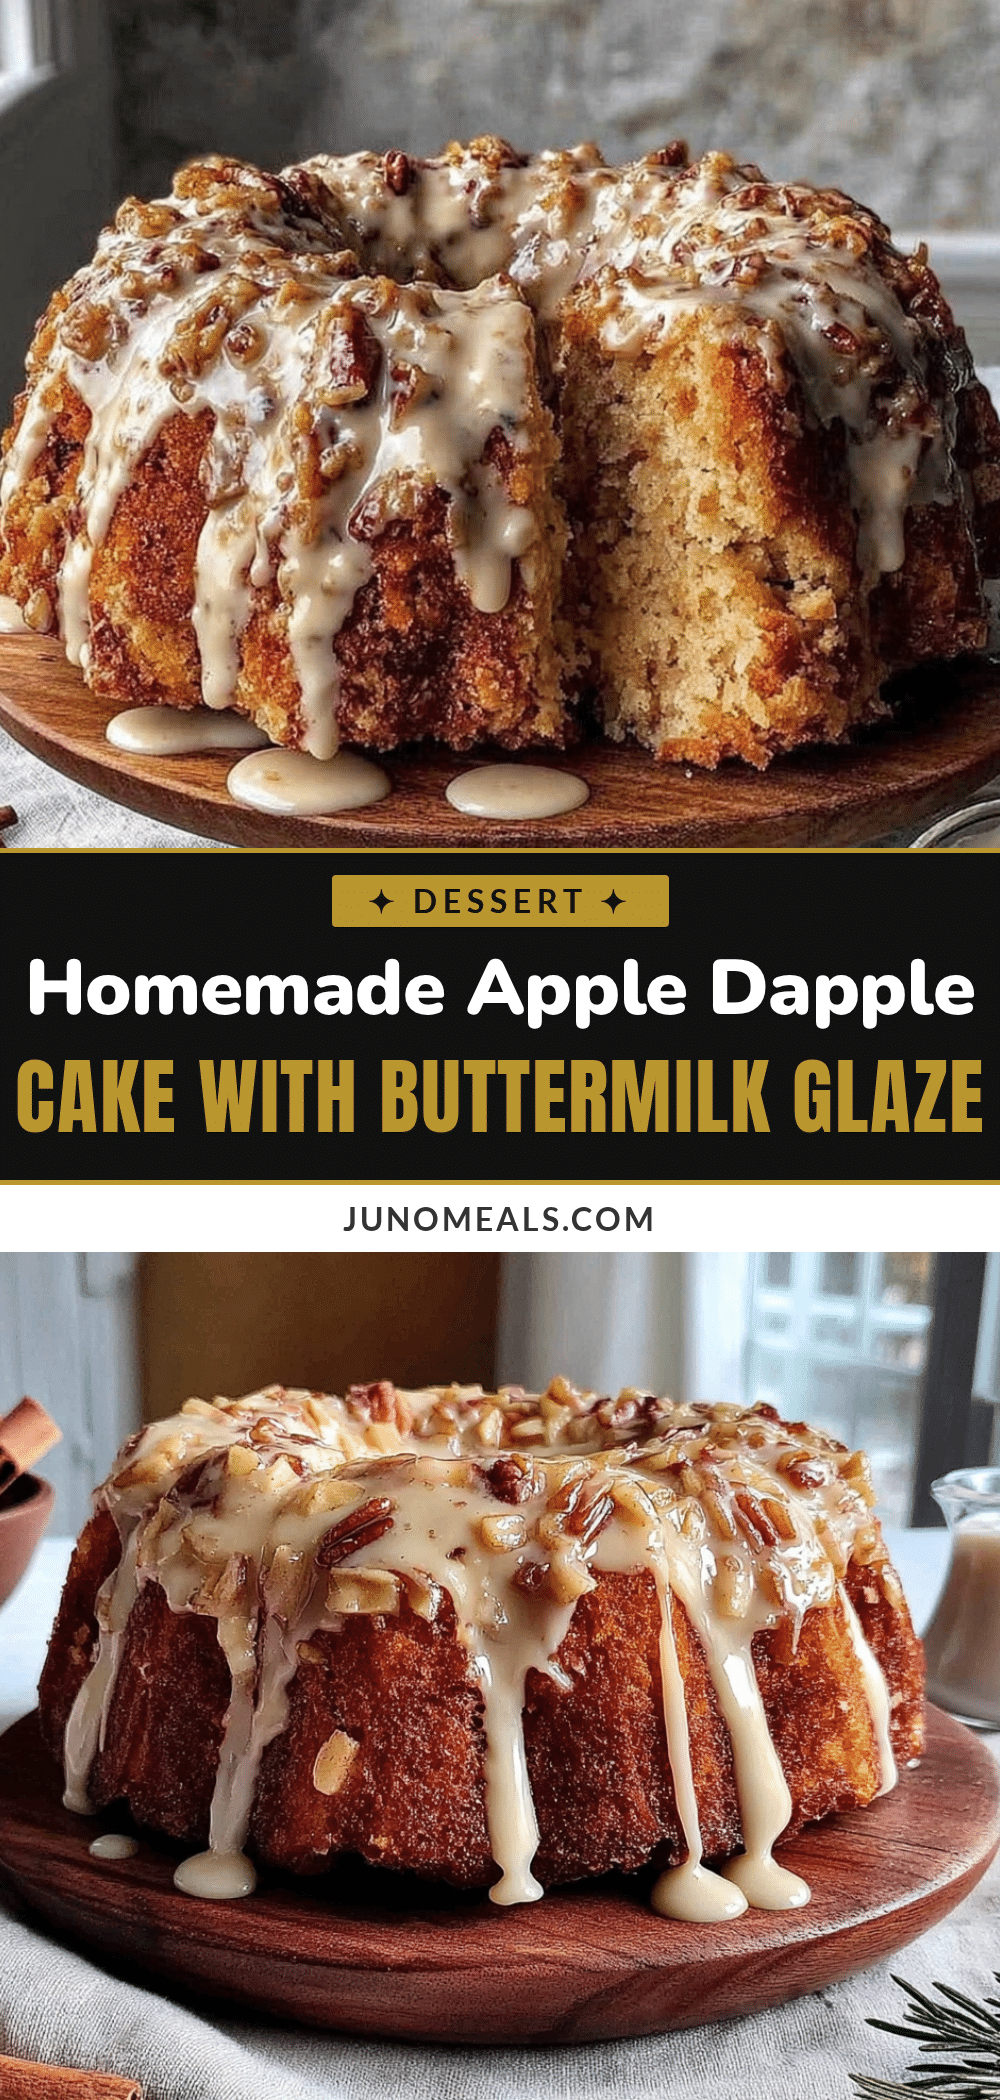
Homemade Apple Dapple Cake with Easy Buttermilk Glaze
A dense, moist apple cake studded with tender apple chunks and pecans, topped with a tangy-sweet buttermilk glaze that soaks into every crevice. This recipe recreates a beloved bakery favorite, using buttermilk for incredible tenderness and flavor.
- Prep Time: 20 minutes
- Cook Time: 1 hour 20 minutes
- Total Time: 1 hour 40 minutes
- Yield: 12 servings 1x
- Category: Dessert
- Cuisine: American
Ingredients
- 3 cups all-purpose flour
- 1 teaspoon baking soda
- 1 teaspoon salt
- 2 teaspoons ground cinnamon
- 1/2 teaspoon ground nutmeg
- 1 1/2 cups vegetable oil
- 2 cups granulated sugar
- 3 large eggs, room temperature
- 1 teaspoon vanilla extract
- 3 cups peeled and chopped apples (about 3 medium apples, such as Honeycrisp or Granny Smith)
- 1 cup chopped pecans
- 1 cup sweetened shredded coconut (optional)
- 1/2 cup unsalted butter
- 1/2 cup buttermilk
- 1 cup granulated sugar (for glaze)
- 1 teaspoon vanilla extract (for glaze)
- 1/2 teaspoon baking soda (for glaze)
Instructions
- Preheat oven to 325°F (165°C). Grease a 10-inch tube pan or Bundt pan well with butter and dust with flour.
- In a medium bowl, whisk together flour, baking soda, salt, cinnamon, and nutmeg. Set aside.
- In a large bowl, combine oil and sugar; beat with a wooden spoon until well combined.
- Add eggs one at a time, beating well after each addition. Stir in vanilla extract.
- Gradually add flour mixture to wet ingredients, stirring just until combined. Do not overmix.
- Fold in chopped apples, pecans, and coconut (if using) gently until evenly distributed. Batter will be very thick.
- Spoon batter into prepared pan and spread evenly.
- Bake for 1 hour 15 minutes to 1 hour 25 minutes, or until a toothpick inserted near the center comes out clean or with a few moist crumbs. Start checking at 70 minutes.
- While cake bakes, make glaze: In a saucepan, combine butter, buttermilk, and sugar. Bring to a boil over medium heat, stirring constantly. Boil for exactly 1 minute, then remove from heat. Stir in vanilla and baking soda (mixture will foam).
- When cake comes out of oven, let cool in pan for 5 minutes. Poke 20-30 holes all over the top of the cake with a skewer or long toothpick.
- Pour about half the warm glaze over the cake while still in the pan. Let soak for 10 minutes.
- Carefully invert cake onto serving plate. Pour remaining glaze over the top, letting it drip down the sides.
- Let cake cool completely before slicing. For best flavor, cover and let sit overnight.
Notes
For best results, use room temperature eggs. Toast pecans before adding for enhanced flavor. Do not skip poking holes in the cake—this allows the glaze to soak in. Let cake cool completely before storing to avoid sogginess. Cake can be made a day ahead; flavor improves overnight. For a nut-free version, omit pecans and coconut. For gluten-free, use a 1-to-1 gluten-free baking blend with xanthan gum. For dairy-free, use plant-based buttermilk substitute and vegan butter.
Nutrition
- Serving Size: 1 slice (1/12 of cak
- Calories: 480
- Sugar: 42
- Sodium: 320
- Fat: 26
- Saturated Fat: 7
- Carbohydrates: 62
- Fiber: 3
- Protein: 5
Keywords: apple dapple cake, buttermilk glaze, apple cake, fall dessert, pecan cake, easy cake recipe


