“Wait, there’s no mayo in this?” My friend Jen stared at the container I’d just pulled from my bag, fork already hovering. She’d watched me make it the night before, but I guess seeing and believing are two different things. I just shrugged and slid the container closer. “Taste it first, ask questions later.”
That was the thing about this chickpea salad — it looked like the classic version everyone grew up with, but it wasn’t weighed down by all that heavy dressing. I’d been playing around with lunch ideas that wouldn’t leave me sluggish by 2 PM, and this one just… worked. The first time I made it, I honestly wasn’t expecting much. Chickpeas, veggies, some spices — how exciting could it be, right?
But then I took a bite. And then another. And suddenly I was standing over the bowl, fork in hand, wondering where half the batch went. It had that perfect balance of creamy and crunchy, savory and fresh. No mayo needed. No weird ingredients either. Just real food that actually fills you up without making you regret it an hour later.
These lunchbox cups came about because I needed something portable. Something I could grab on my way out the door and eat cold if I had to. Something that wouldn’t get sad and soggy by noon. And honestly? They turned out better than I expected. The kind of recipe you keep coming back to, not because you have to, but because you actually want to.
Why You’ll Love This Recipe
Let me tell you why this one’s different. I’ve tested this recipe about six times before getting it just right — the first batch was too dry, the second too wet, the third needed more crunch. But this version? This is the one I keep making on repeat.
- Ready in 20 Minutes: No cooking required. Just chop, mix, and pack. Perfect for Sunday meal prep or a quick morning assembly.
- Simple Ingredients: You probably have most of these in your pantry right now. No fancy health food store runs needed.
- Perfect for Lunchboxes: Stays fresh for days in the fridge. Doesn’t get soggy. Holds up beautifully in containers or bento boxes.
- Crowd-Pleaser: My picky nephew ate an entire cup without asking what was in it. That’s a win in my book.
- Actually Satisfying: Thanks to the chickpeas and healthy fats, you’ll stay full for hours. No 3 PM snack attacks here.
What makes this recipe stand out from all the other chickpea salads out there? It’s the texture. Most versions either turn into mushy paste or stay too chunky. I found a sweet spot — mashing some chickpeas while leaving others whole. That gives you creamy bites and hearty bites in every forkful.
And the flavor? The smoked paprika does something magical here. It adds this subtle warmth that makes you think there’s bacon in there. There isn’t, of course. But the first time I added it, I literally stopped and said “huh” out loud. That’s when I knew I was onto something.
This is the kind of recipe that makes healthy eating feel easy. Not a chore. Not a punishment. Just good food that happens to be good for you. And honestly, that’s the sweet spot.
What Ingredients You Will Need
This recipe uses simple, wholesome ingredients that work together to create something surprisingly delicious. Most of these are pantry staples, so you can probably make this right now without a grocery trip.
- Chickpeas, 2 cans (15 oz each), drained and rinsed — I prefer Bush’s Best or Goya for consistent texture. Look for cans without BPA lining if that matters to you.
- Red onion, 1/2 cup finely diced — soak in cold water for 5 minutes if you want milder flavor. Pat dry before adding.
- Celery, 2-3 stalks, finely diced — gives that essential crunch. Remove the strings if they’re tough.
- Red bell pepper, 1/2 cup finely diced — adds sweetness and color. Orange or yellow work too.
- Plain Greek yogurt, 1/3 cup (use full-fat for creaminess, 2% works fine) — this replaces the mayo entirely. Fage or Chobani are my go-tos.
- Dijon mustard, 1 tablespoon — adds tang and depth. Whole grain mustard works beautifully too.
- Lemon juice, 2 tablespoons, freshly squeezed — bottled won’t give you the same brightness. Trust me on this one.
- Extra virgin olive oil, 1 tablespoon — use a good-quality one here since you’ll taste it.
- Smoked paprika, 1 teaspoon — this is the secret ingredient. Regular paprika won’t give you the same effect.
- Garlic powder, 1/2 teaspoon — not fresh garlic here, it’s too sharp cold. Powder blends in better.
- Salt, 1/2 teaspoon, or to taste — I use fine sea salt.
- Black pepper, 1/4 teaspoon, freshly ground — don’t skip this, it wakes up all the other flavors.
- Fresh parsley, 2 tablespoons chopped — optional but recommended. Dill works great too if you have it.
- Lettuce cups or tortillas, for serving — butter lettuce, romaine hearts, or whole wheat tortillas all work.
Equipment Needed
You don’t need much for this recipe, which is part of the appeal. Here’s what you’ll need:
- Mixing bowl, medium-sized — any bowl works, but a wide one makes mashing easier.
- Potato masher or fork — I use a fork most of the time, but a potato masher gives you more control. My first few batches were too mushy because I went overboard with the mashing.
- Cutting board and knife — a sharp chef’s knife makes dicing vegetables so much easier. Dull knives are dangerous, honestly.
- Measuring cups and spoons — for accuracy, especially with the yogurt and lemon juice.
- Muffin tin or small cups — for portioning into lunchbox cups. Standard 12-cup muffin tins work perfectly. Silicone cups are great for easy removal.
- Air-tight containers — for storing leftovers. Glass containers keep everything fresher longer.
If you don’t have a muffin tin, you can use small ramekins or even shape the mixture into patties. I’ve used disposable paper cups in a pinch — just line them with lettuce leaves first. Not fancy, but it works.
Preparation Method
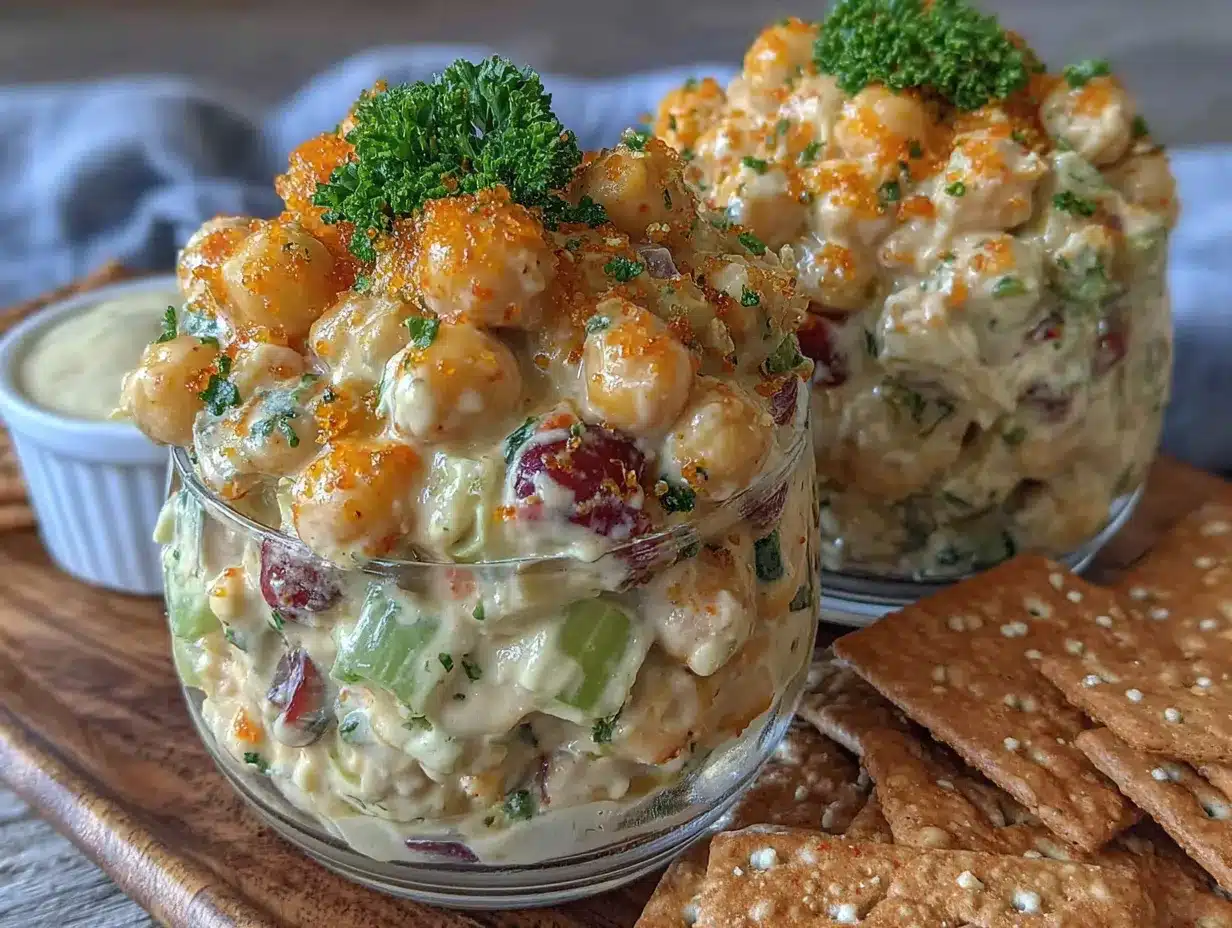
- Prep your vegetables first. Finely dice the red onion, celery, and red bell pepper. Aim for small, uniform pieces — about 1/4 inch. This ensures every bite has a little bit of everything. If you’re using parsley, chop it now too. Set everything aside.
- Drain and rinse the chickpeas. Pour both cans into a colander and rinse thoroughly under cold water. Let them drain for a minute or two — excess water will make your salad watery. Shake the colander a few times to get rid of extra moisture.
- Mash the chickpeas. Transfer the chickpeas to your mixing bowl. Using a fork or potato masher, mash about two-thirds of them. You want some whole chickpeas remaining for texture. Here’s the trick I learned from my third failed batch — don’t over-mash. Stop when it looks like chunky refried beans. You should still see individual chickpea pieces.
- Add the yogurt mixture. In a small bowl, whisk together the Greek yogurt, Dijon mustard, lemon juice, olive oil, smoked paprika, garlic powder, salt, and pepper. Taste it — it should be tangy and slightly smoky. Adjust salt if needed.
- Combine everything. Pour the yogurt mixture over the mashed chickpeas. Add the diced vegetables and parsley. Fold everything together gently until well combined. Don’t stir too vigorously — you want to keep some texture.
- Taste and adjust. This is the most important step. Grab a spoon and taste your creation. Need more salt? Add it. Want more tang? Another squeeze of lemon. More smokiness? Another pinch of paprika. Trust your taste buds here.
- Chill for 15 minutes. Cover the bowl and pop it in the fridge. This lets the flavors meld together. I know you’re hungry, but this short wait makes a real difference. The yogurt thickens slightly, the vegetables soften just a bit, and everything comes together.
- Assemble the lunchbox cups. Line a muffin tin with lettuce leaves or small tortilla rounds. Spoon the chickpea salad into each cup, pressing down gently. You should get about 6-8 cups depending on how full you fill them. Top with a sprinkle of fresh parsley or a dash of paprika for color.
- Pack and go. Transfer the cups to your lunchbox. If you’re meal prepping, store the salad and cups separately and assemble right before eating. This keeps everything fresh and crisp.
Cooking Tips & Techniques
I’ve made this recipe enough times to know exactly where things can go wrong. Here’s what I’ve learned the hard way:
Don’t skip the rinsing step. Canned chickpeas come packed in liquid that’s starchy and salty. Rinsing them removes that canned taste and gives you a cleaner flavor. I once forgot to rinse and the salad tasted like… well, like a can. Not great.
Pat your veggies dry. After dicing the onion, celery, and bell pepper, give them a quick pat with a paper towel. Extra moisture is the enemy here. My second batch turned into soup because I added wet vegetables. Learn from my mistakes.
The mashing technique matters. I mentioned this before, but it’s worth repeating. Mash two-thirds, leave one-third whole. This gives you that perfect contrast between creamy and chunky. If you want it smoother for sandwiches, mash more. If you want it chunkier for dipping, mash less. You’re in control here.
Let it rest overnight if you can. The flavors get even better after 24 hours in the fridge. The smoked paprika really sinks in, the lemon mellows out, and everything becomes more cohesive. I actually prefer day-old chickpea salad to fresh. Who knew?
Temperature matters. Serve this cold or at room temperature. Don’t microwave it — the yogurt will separate and you’ll end up with a weird watery mess. If you want it warm, let it sit on the counter for 15 minutes before eating.
Variations & Adaptations
One of the best things about this recipe is how flexible it is. Here are some variations I’ve tried and loved:
Mediterranean Version: Add 1/4 cup chopped sun-dried tomatoes, 2 tablespoons crumbled feta cheese, and 1 tablespoon capers. Swap the parsley for fresh dill. This version is incredible stuffed into pita bread with some fresh greens.
Curry Chickpea Salad: Replace the smoked paprika with 1 teaspoon curry powder and 1/4 teaspoon turmeric. Add 2 tablespoons golden raisins and 1 tablespoon chopped cilantro. The sweetness from the raisins balances the warm spices beautifully.
Avocado Version: Mash half an avocado with the chickpeas and reduce the yogurt to 2 tablespoons. The avocado adds creaminess and healthy fats. Just know this version won’t keep as long — eat within 24 hours or the avocado will brown.
Vegan Adaptation: Swap the Greek yogurt for plain coconut yogurt or a thick cashew cream. Use maple syrup instead of honey if your yogurt isn’t sweetened. The texture will be slightly different, but still delicious.
Extra Crunch Version: Add 1/4 cup chopped walnuts or toasted sunflower seeds right before serving. My husband loves this version — he says it feels more like a meal than a salad.
Spicy Kick: Add 1/2 teaspoon cayenne pepper or a diced jalapeño (seeds removed). The heat pairs surprisingly well with the cool yogurt base. Start with less — you can always add more.
Serving & Storage Suggestions
These lunchbox cups are incredibly versatile when it comes to serving. Here’s how I like to enjoy them:
Serving Temperature: Cold or room temperature is best. If you’ve chilled the salad, let it sit out for 10 minutes before eating to take the chill off. The flavors open up more at room temperature.
Presentation Ideas: Serve the chickpea salad in butter lettuce cups for a low-carb option, or scoop it into small tortilla bowls for a fun lunch. You can also stuff it into bell pepper halves or hollowed-out cucumber boats for extra veggies.
What to Serve With: These pair beautifully with fresh fruit, veggie sticks, or a handful of crispy roasted chickpeas for extra crunch. A side of whole grain crackers or pita chips works great too. For a complete lunch, add a small cup of soup or a simple green salad.
Storage Instructions: Keep the chickpea salad in an airtight container in the refrigerator for up to 5 days. The flavors actually improve after day one. Do not freeze — the yogurt will separate and the texture will be ruined.
Reheating: Don’t do it. Seriously. This salad is meant to be eaten cold. If you absolutely must have it warm, let it sit at room temperature for 30 minutes. That’s as warm as it should get.
Meal Prep Tips: Make the salad up to 3 days ahead and store it in the fridge. Assemble the cups the night before or morning of. If you’re packing for work, keep the salad and cups separate until lunchtime to prevent sogginess.
Nutritional Information & Benefits
Per serving (1 lunchbox cup, about 1/2 cup of salad):
- Calories: 185
- Protein: 9g
- Carbohydrates: 22g
- Fiber: 6g
- Fat: 7g
- Saturated Fat: 1.5g
- Sodium: 320mg
These numbers are estimates — they’ll vary based on your specific ingredients and portion sizes.
Health Benefits: Chickpeas are packed with fiber and plant-based protein, which keeps you full and supports digestive health. Greek yogurt adds probiotics for gut health and calcium for bones. The vegetables provide vitamins A and C, plus antioxidants. This is a balanced meal that won’t spike your blood sugar.
Dietary Considerations: This recipe is naturally vegetarian and can be made vegan with simple swaps. It’s gluten-free as written. High in fiber and protein, moderate in healthy fats. Low in added sugars.
Potential Allergens: Contains dairy from the Greek yogurt. For a dairy-free version, use coconut yogurt or a cashew-based alternative. Check your mustard for any hidden ingredients if you have sensitivities.
Conclusion
Look, I’m not saying this chickpea salad will change your life. But it might change your lunch routine. It’s one of those recipes that proves healthy food doesn’t have to be boring, complicated, or expensive. Just real ingredients, put together in a way that makes sense.
What I love most about these lunchbox cups is how adaptable they are. You can make them exactly as written, or you can play around with add-ins and spices until they’re uniquely yours. That’s the beauty of a simple recipe — it gives you a foundation to build on.
I’d love to hear how yours turn out. Did you add something unexpected? Leave out an ingredient? Make a version your kids actually ate? Drop a comment below and let me know. And if you’re looking for more easy lunch ideas, check out these mini lemon blueberry cheesecakes for a sweet treat to pack alongside your savory cups.
Happy cooking, friends. Here’s to lunches that actually make you excited to open your lunchbox.
Frequently Asked Questions
Can I use dried chickpeas instead of canned?
Absolutely. Cook 1 cup of dried chickpeas according to package directions until tender but not mushy. Drain well and let cool completely before using. You’ll need about 3 cups of cooked chickpeas to replace two cans. The texture will be slightly firmer, which actually works great in this recipe.
How long does this chickpea salad keep in the fridge?
Stored in an airtight container, it stays fresh for up to 5 days. The flavors actually get better after a day or two. If you notice any liquid pooling at the bottom, just stir it back in before serving. Don’t keep it past 5 days — the vegetables will start to lose their crunch.
Can I make this without Greek yogurt?
Yes! For a dairy-free version, use mashed avocado, hummus, or a thick cashew cream. For a different flavor, try silken tofu blended with lemon juice and mustard. Each option gives you a slightly different texture, but they all work. Just avoid regular mayonnaise if you’re going for the “no mayo” theme.
What’s the best way to pack these for lunch?
Use a bento box or divided container to keep the chickpea salad separate from any crackers, fruit, or veggies. If you’re using lettuce cups, pack them separately and assemble at lunchtime. The salad itself travels well and doesn’t need to be kept cold for a few hours, though refrigeration is best.
Can I add protein like chicken or tuna?
Sure! Shredded cooked chicken, canned tuna (drained), or even crumbled tofu work great. Just reduce the chickpeas slightly to keep the proportions balanced. I’ve added leftover rotisserie chicken before and it was fantastic — turned the salad into an even heartier meal. Just remember that adding protein will change the nutritional values and storage time.
Pin This Recipe!
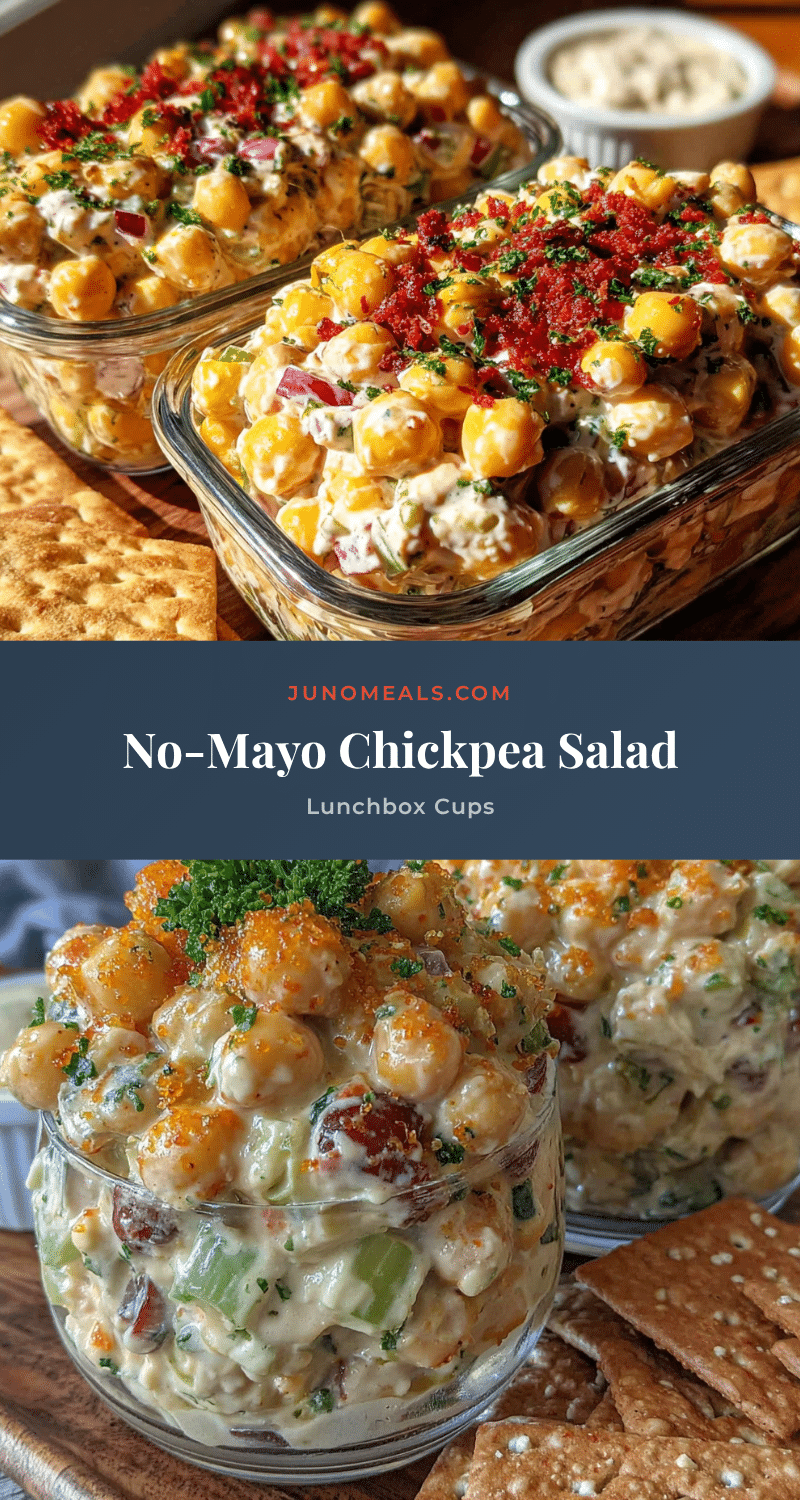
Healthy No-Mayo Chickpea Salad Lunchbox Cups
A creamy, crunchy chickpea salad made without mayo, perfect for lunchboxes. Ready in 20 minutes with simple ingredients, this satisfying recipe stays fresh for days and is packed with protein and fiber.
- Prep Time: 15 minutes
- Cook Time: 0 minutes
- Total Time: 20 minutes
- Yield: 6-8 servings 1x
- Category: Lunch
- Cuisine: American
Ingredients
- 2 cans (15 oz each) chickpeas, drained and rinsed
- 1/2 cup finely diced red onion
- 2–3 stalks celery, finely diced
- 1/2 cup finely diced red bell pepper
- 1/3 cup plain Greek yogurt (full-fat or 2%)
- 1 tablespoon Dijon mustard
- 2 tablespoons freshly squeezed lemon juice
- 1 tablespoon extra virgin olive oil
- 1 teaspoon smoked paprika
- 1/2 teaspoon garlic powder
- 1/2 teaspoon fine sea salt, or to taste
- 1/4 teaspoon freshly ground black pepper
- 2 tablespoons chopped fresh parsley (optional)
- Lettuce cups or tortillas, for serving
Instructions
- Finely dice the red onion, celery, and red bell pepper into small, uniform pieces (about 1/4 inch). Chop parsley if using. Set aside.
- Drain and rinse the chickpeas thoroughly under cold water. Let them drain for a minute or two, shaking the colander to remove excess moisture.
- Transfer chickpeas to a mixing bowl. Using a fork or potato masher, mash about two-thirds of them, leaving some whole for texture. Stop when it looks like chunky refried beans.
- In a small bowl, whisk together Greek yogurt, Dijon mustard, lemon juice, olive oil, smoked paprika, garlic powder, salt, and pepper. Taste and adjust seasoning if needed.
- Pour the yogurt mixture over the mashed chickpeas. Add diced vegetables and parsley. Fold gently until well combined, keeping some texture.
- Taste and adjust seasoning as needed—add more salt, lemon juice, or smoked paprika to your preference.
- Cover the bowl and refrigerate for at least 15 minutes to let flavors meld.
- Line a muffin tin with lettuce leaves or small tortilla rounds. Spoon chickpea salad into each cup, pressing down gently. Makes about 6-8 cups.
- Transfer cups to lunchbox. For meal prep, store salad and cups separately and assemble before eating.
Notes
Don’t skip rinsing chickpeas—it removes canned taste. Pat diced veggies dry to avoid watery salad. Mash two-thirds of chickpeas for perfect texture. Flavors improve after 24 hours in fridge. Serve cold or at room temperature; do not microwave. For vegan version, swap Greek yogurt with coconut yogurt or cashew cream.
Nutrition
- Serving Size: 1 lunchbox cup (abou
- Calories: 185
- Sodium: 320
- Fat: 7
- Saturated Fat: 1.5
- Carbohydrates: 22
- Fiber: 6
- Protein: 9
Keywords: chickpea salad, no mayo, healthy lunch, meal prep, vegetarian, gluten-free, lunchbox cups, easy recipe


