My neighbor handed me a warm muffin wrapped in a napkin last fall, and I honestly almost said no thank you. I have this thing about healthy baked goods—they are usually dry, sad little things that taste like a compromise you did not ask for. She insisted, so I took a bite, and then I just stood there on her porch chewing slowly. It was moist, sweet in a real way, and had this soft, almost buttery crumb that made zero sense for something she called a healthy banana oat muffin. I asked for the recipe before I finished the first one, and she laughed and said it was just something she threw together for her kids lunchboxes. That is when it clicked—this was not a diet muffin pretending to be dessert. It was an honest, everyday muffin that happened to be good for you. I have made them at least once a week since that afternoon, and they have quietly become the most requested thing I bake.
Why You Will Love This Recipe
I tested this recipe six times before I felt comfortable sharing it, and my kids ate every single failed batch without complaint. That is when I knew it was something special. These muffins are not just healthy—they are genuinely delicious in a way that does not require explanation or apology.
- Quick & Easy: You can have these in the oven in about 10 minutes. No mixer required, no weird steps. Just a bowl, a spoon, and a little patience.
- Simple Ingredients: Everything on the list is probably already in your pantry. No trips to specialty stores or expensive superfood powders.
- Perfect for Lunchboxes: They hold up beautifully in a lunch bag, do not get soggy, and taste great at room temperature. My kids say they are better than the store-bought ones.
- Crowd-Pleaser: I have brought these to playdates, school events, and even a book club meeting where nobody knew they were healthy until I mentioned it. They disappeared.
- Unbelievably Delicious: The secret is using very ripe bananas and a specific ratio of oats to flour that gives you a tender crumb without any butter or refined sugar.
This is not another dry, flavorless healthy muffin recipe. It is the one you will actually want to make again and again—the kind that makes you feel good about feeding your family without sacrificing taste.
What Ingredients You Will Need
This recipe relies on simple, real-food ingredients that work together to create a muffin that is both nourishing and satisfying. Most of these are pantry staples, which makes this recipe perfect for those mornings when you realize you have nothing packed for lunch.
- Ripe Bananas: 3 large bananas, mashed (about 1 ½ cups). The riper the better—those spotty, almost-black bananas are ideal because they provide natural sweetness and moisture. If your bananas are not quite ripe enough, you can roast them in the oven at 350°F for 10 minutes to bring out their sweetness.
- Rolled Oats: 1 ½ cups (150g). I use old-fashioned rolled oats, not quick oats, because they give the muffins a heartier texture and more fiber. Bob’s Red Mill is my go-to brand for consistent results.
- Whole Wheat Flour: 1 cup (120g). White whole wheat flour works beautifully here if you want a milder flavor. You can also use all-purpose flour if that is what you have on hand.
- Greek Yogurt: ½ cup (120g) plain, full-fat or 2%. This is the secret to keeping these muffins incredibly moist without adding oil or butter. The tanginess also complements the banana flavor perfectly.
- Honey or Maple Syrup: ⅓ cup (80ml). Either works well. Honey gives a slightly floral sweetness, while maple syrup adds a warmer, deeper note. I use local honey when I have it.
- Eggs: 2 large eggs, room temperature. They help bind everything together and add structure. For a vegan version, you can use flax eggs (2 tablespoons ground flaxseed mixed with 6 tablespoons water).
- Coconut Oil: ¼ cup (60ml) melted and slightly cooled. It adds a subtle richness without making the muffins greasy. You can substitute melted butter or any neutral oil.
- Vanilla Extract: 1 teaspoon. Pure vanilla makes a difference here, but imitation works fine in a pinch.
- Baking Soda: 1 teaspoon. Make sure it is fresh—old baking soda will give you flat, dense muffins.
- Baking Powder: 1 teaspoon. This gives them a little extra lift.
- Cinnamon: 1 teaspoon. It pairs beautifully with banana and adds warmth without being overpowering.
- Salt: ½ teaspoon. Do not skip this—it balances the sweetness and enhances all the flavors.
- Optional Mix-ins: ½ cup chocolate chips, chopped walnuts, or dried cranberries. I usually add dark chocolate chips because my kids go crazy for them, but the muffins are perfectly delicious without any additions.
Equipment Needed
You do not need fancy equipment for these muffins, which is part of why I love this recipe so much. Here is what you will need:
- Muffin Tin: A standard 12-cup muffin tin works perfectly. I prefer a non-stick one, but any metal or silicone pan will do.
- Muffin Liners: Paper liners make cleanup easy, but you can grease the pan directly with coconut oil if you prefer. I like using unbleached parchment liners.
- Large Mixing Bowls: You will need two—one for the dry ingredients and one for the wet. Nothing fancy, just something big enough to mix without spilling.
- Whisk and Wooden Spoon: A whisk for the wet ingredients and a sturdy spoon or spatula for folding everything together. You can use a hand mixer if you want, but honestly, it is not necessary.
- Measuring Cups and Spoons: Accurate measurements matter in baking, so take the extra few seconds to level off your flour and oats.
- Cooling Rack: Not strictly necessary, but it helps the muffins cool evenly without getting soggy on the bottom. A wire rack is a worthwhile investment if you bake often.
- Ice Cream Scoop: This is my favorite tool for evenly portioning batter into the muffin cups. It makes the process so much faster and cleaner.
Preparation Method
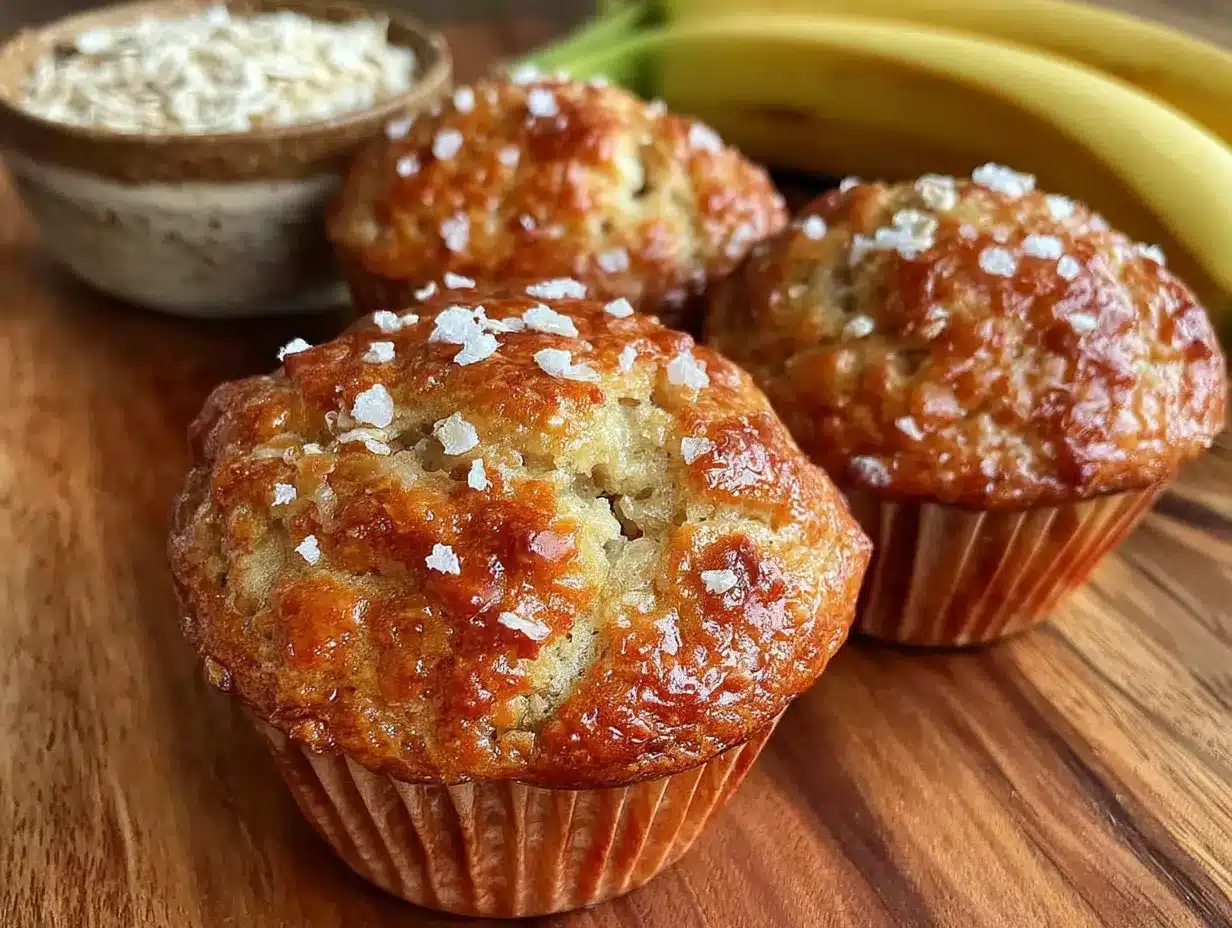
- Preheat and Prep: Preheat your oven to 350°F (175°C). Line your muffin tin with paper liners or grease the cups lightly with coconut oil. This step ensures your muffins come out cleanly and makes cleanup a breeze.
- Mash the Bananas: In a large bowl, mash your ripe bananas with a fork until they are mostly smooth with a few small lumps remaining. You want some texture left—completely smooth banana puree can make the muffins dense. The bananas should measure about 1 ½ cups.
- Mix the Wet Ingredients: Add the Greek yogurt, honey or maple syrup, eggs, melted coconut oil, and vanilla extract to the mashed bananas. Whisk everything together until it is well combined and smooth. The mixture should look creamy and slightly thick, with no streaks of egg or oil visible.
- Combine the Dry Ingredients: In a separate medium bowl, whisk together the whole wheat flour, rolled oats, baking soda, baking powder, cinnamon, and salt. Make sure the baking soda and powder are evenly distributed so you do not end up with a bitter pocket of leavener in one muffin.
- Fold Together: Pour the dry ingredients into the wet ingredients and fold gently with a spatula or wooden spoon. Stop mixing as soon as you no longer see dry flour—overmixing will make your muffins tough and rubbery. A few lumps are perfectly fine and actually desirable.
- Add Mix-ins: If you are using chocolate chips, nuts, or dried fruit, gently fold them in at this point. Do not overmix; just a few turns of the spatula to distribute them evenly.
- Fill the Muffin Cups: Using an ice cream scoop or a spoon, divide the batter evenly among the 12 muffin cups. Each cup should be about ¾ full. This gives the muffins room to rise without spilling over the edges.
- Bake: Place the muffin tin in the preheated oven and bake for 18-22 minutes. The muffins are done when a toothpick inserted into the center of one comes out clean or with just a few moist crumbs attached. The tops should be golden brown and spring back lightly when touched.
- Cool: Let the muffins cool in the pan for 5 minutes, then transfer them to a wire rack to cool completely. If you try to remove them too soon, they might stick to the liners. Patience here pays off.
Cooking Tips & Techniques
I learned a few things the hard way while testing this recipe, and I want to save you the same frustration.
Do not overmix the batter. This is the most common mistake people make with muffin recipes. Mix until the flour just disappears, then stop. Overmixing develops the gluten in the flour, which leads to dense, tough muffins instead of tender, fluffy ones.
Use room temperature ingredients. Cold eggs or yogurt can cause the coconut oil to solidify when you mix them together, creating lumps in your batter. Let everything sit on the counter for about 20 minutes before you start, or warm the eggs in a bowl of warm water for a few minutes.
Let the batter rest. If you have time, let the mixed batter sit for 10 minutes before spooning it into the muffin cups. This gives the oats time to absorb some of the liquid, which results in a more tender texture. I discovered this trick by accident when I got distracted by a phone call, and the muffins turned out noticeably better.
Check your oven temperature. Ovens run hot or cold more often than you think. An inexpensive oven thermometer can save you from baking a whole batch at the wrong temperature. If your muffins are browning too quickly on top but still raw in the middle, your oven is probably running hot.
Fill empty cups with water. If you are not filling all 12 muffin cups, add a tablespoon or two of water to the empty wells. This helps the muffins bake more evenly and prevents your pan from warping over time.
Variations & Adaptations
One of the best things about this recipe is how easy it is to adapt based on what you have in your kitchen or what your family likes.
- Gluten-Free Version: Swap the whole wheat flour for a good gluten-free all-purpose blend, and make sure your oats are certified gluten-free. I have used King Arthur Flour’s measure-for-measure blend with great results.
- Vegan Version: Replace the eggs with flax eggs (2 tablespoons ground flaxseed mixed with 6 tablespoons water, let sit for 5 minutes) and use a plant-based yogurt like coconut or almond milk yogurt. The texture will be slightly denser but still delicious.
- Nut-Free School Version: Skip the walnuts and use sunflower seeds or pumpkin seeds instead. You can also add dried fruit like raisins or chopped dates for sweetness and texture.
- Lower Sugar Option: Reduce the honey or maple syrup to ¼ cup and add an extra ripe banana. The muffins will be less sweet but still flavorful, especially if you add cinnamon and a pinch of nutmeg.
- Pumpkin Banana Muffins: Replace half the mashed banana with canned pumpkin puree, add an extra teaspoon of pumpkin pie spice, and reduce the honey to ¼ cup. This is my favorite fall variation, and it pairs beautifully with a hot cup of coffee.
- Chocolate Banana Muffins: Add 2 tablespoons of unsweetened cocoa powder to the dry ingredients and fold in ½ cup of dark chocolate chips. My kids call these dessert muffins, but they are still packed with whole grains and protein.
Serving & Storage Suggestions
These muffins are incredibly versatile when it comes to serving. They are fantastic warm from the oven with a pat of butter melting on top, but they are just as good at room temperature straight from the lunchbox.
For school lunches, I usually pack one muffin alongside some apple slices, a cheese stick, and a small container of yogurt. The muffins hold up beautifully and do not get soggy or fall apart, even after several hours in a lunch bag. My kids actually prefer them slightly cool because the texture firms up a bit.
Storage: Keep the muffins in an airtight container at room temperature for up to 4 days. If you live in a humid climate, I recommend storing them in the refrigerator to prevent mold. They will stay fresh for about a week in the fridge.
Freezing: These muffins freeze like a dream. Let them cool completely, then place them in a single layer in a freezer-safe bag or container. They will keep for up to 3 months. To thaw, just leave one on the counter for about 30 minutes, or pop it in the microwave for 15-20 seconds. You can also pack a frozen muffin directly into a lunchbox—it will be thawed and perfectly ready to eat by lunchtime.
I have also discovered that the flavors actually improve after a day or two. The oats continue to absorb moisture, making the muffins even more tender on day two. So do not hesitate to make a double batch—you will be glad you did.
Nutritional Information & Benefits
Each muffin (based on the recipe as written, without mix-ins) contains approximately 185 calories, 5g protein, 32g carbohydrates, 4g fiber, and 6g fat. The exact numbers will vary depending on your specific ingredients and any additions you make.
These muffins are packed with nutritional benefits that make them a smart choice for busy families. The rolled oats provide soluble fiber, which helps keep blood sugar stable and keeps kids feeling full longer. The Greek yogurt adds protein and probiotics, while the bananas contribute potassium and natural sweetness without refined sugar.
If you are watching your sugar intake, these muffins are a great option because the sweetness comes primarily from fruit and a modest amount of honey or maple syrup. They are also free from refined flour, artificial preservatives, and processed oils. For parents of children with common allergies, this recipe is easily adaptable to be nut-free, egg-free, or dairy-free without sacrificing taste or texture.
I love knowing that when I pack these muffins in my kids’ lunches, I am giving them something that will actually fuel their afternoon instead of just filling their stomachs with empty calories. That peace of mind is worth more than any convenience food.
Conclusion
These healthy banana oat muffins have become a staple in my kitchen for good reason. They are simple enough to whip up on a Sunday afternoon, forgiving enough to survive a busy school week, and delicious enough that nobody will guess they are actually good for them. I have lost count of how many times I have doubled this recipe to share with friends, neighbors, and teachers.
I encourage you to make these your own. Add whatever mix-ins your family loves, adjust the sweetness to your taste, and do not be afraid to experiment with different flours or add-ins. The beauty of this recipe is its flexibility—it works with whatever you have on hand.
If you try these muffins, I would love to hear how they turned out. Drop a comment below and let me know what variations you tried or how your kids liked them. And if you are looking for another lunchbox-friendly treat, you should definitely try these mini lemon blueberry cheesecakes for a special occasion. Happy baking, friends—you have got this.
Frequently Asked Questions
Can I make these muffins without a muffin tin?
Yes, you can bake the batter in a greased 8×8 inch baking dish for about 25-30 minutes to make a banana oat bread instead. Just check for doneness with a toothpick. The texture will be slightly different but still delicious.
Why did my muffins turn out dry?
Dry muffins usually mean you overbaked them or used too much flour. Make sure you measure your flour correctly by spooning it into the measuring cup and leveling it off. Also, check your oven temperature with a thermometer to ensure it is accurate.
Can I use frozen bananas?
Absolutely. Thaw frozen bananas completely and drain off any excess liquid before mashing. They will be very soft and may release more moisture than fresh bananas, so you might need to add a tablespoon or two of extra oats to compensate.
How do I make these muffins dairy-free?
Use a dairy-free yogurt like coconut or almond milk yogurt, and replace the melted coconut oil with a neutral oil like avocado oil. The muffins will still be moist and tender. You can also use a flax egg instead of a regular egg if you want them to be fully plant-based.
Can I make these muffins ahead of time for a school week?
Yes, and I actually recommend it. Bake them on Sunday, let them cool completely, and store them in an airtight container. They will stay fresh for up to 4 days at room temperature or a week in the fridge. You can also freeze them for up to 3 months and thaw as needed.
Pin This Recipe!
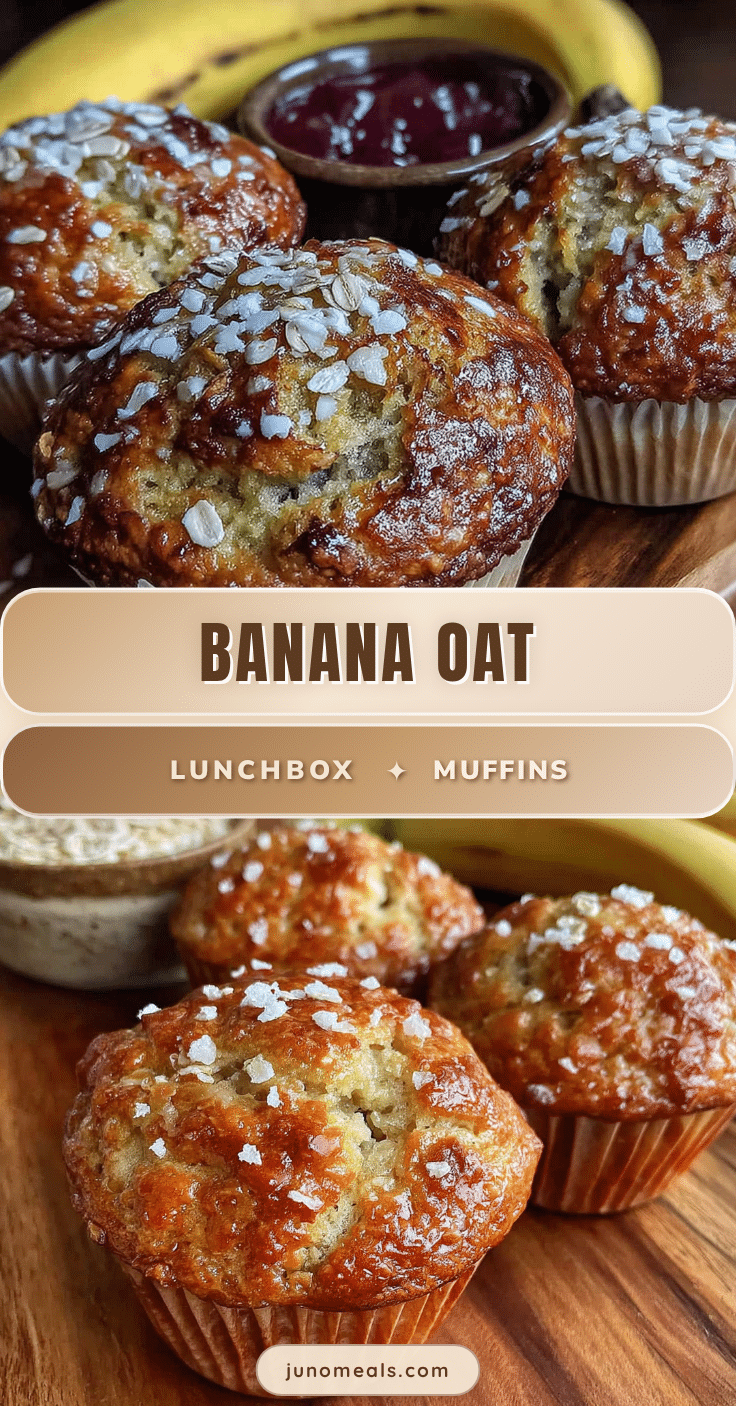
Healthy Banana Oat Muffins: Best Easy Lunchbox Recipe

These healthy banana oat muffins are moist, sweet, and have a soft, buttery crumb. Made with simple ingredients like ripe bananas, rolled oats, and Greek yogurt, they are perfect for lunchboxes and are a crowd-pleaser.
- Prep Time: 10 minutes
- Cook Time: 20 minutes
- Total Time: 30 minutes
- Yield: 12 muffins 1x
- Category: Breakfast, Snack
- Cuisine: American
Ingredients
- 3 large ripe bananas, mashed (about 1 ½ cups)
- 1 ½ cups (150g) rolled oats
- 1 cup (120g) whole wheat flour
- ½ cup (120g) plain Greek yogurt (full-fat or 2%)
- ⅓ cup (80ml) honey or maple syrup
- 2 large eggs, room temperature
- ¼ cup (60ml) coconut oil, melted and slightly cooled
- 1 teaspoon vanilla extract
- 1 teaspoon baking soda
- 1 teaspoon baking powder
- 1 teaspoon cinnamon
- ½ teaspoon salt
- ½ cup chocolate chips, chopped walnuts, or dried cranberries (optional)
Instructions
- Preheat oven to 350°F (175°C). Line a 12-cup muffin tin with paper liners or grease with coconut oil.
- In a large bowl, mash bananas with a fork until mostly smooth with a few lumps.
- Add Greek yogurt, honey/maple syrup, eggs, melted coconut oil, and vanilla extract to the bananas. Whisk until well combined and smooth.
- In a separate medium bowl, whisk together whole wheat flour, rolled oats, baking soda, baking powder, cinnamon, and salt.
- Pour dry ingredients into wet ingredients and fold gently with a spatula until just combined. Do not overmix; a few lumps are fine.
- If using, gently fold in chocolate chips, nuts, or dried fruit.
- Divide batter evenly among 12 muffin cups, filling each about ¾ full.
- Bake for 18-22 minutes, until a toothpick inserted into the center comes out clean or with a few moist crumbs.
- Let muffins cool in the pan for 5 minutes, then transfer to a wire rack to cool completely.
Notes
Do not overmix the batter to avoid tough muffins. Use room temperature ingredients to prevent coconut oil from solidifying. Let batter rest for 10 minutes before baking for a more tender texture. Check oven temperature with a thermometer for accuracy. Fill empty muffin cups with water to ensure even baking.
Nutrition
- Serving Size: 1 muffin
- Calories: 185
- Sugar: 12
- Sodium: 180
- Fat: 6
- Saturated Fat: 3
- Carbohydrates: 32
- Fiber: 4
- Protein: 5
Keywords: banana oat muffins, healthy muffins, lunchbox muffins, easy muffin recipe, whole wheat muffins


