Introduction
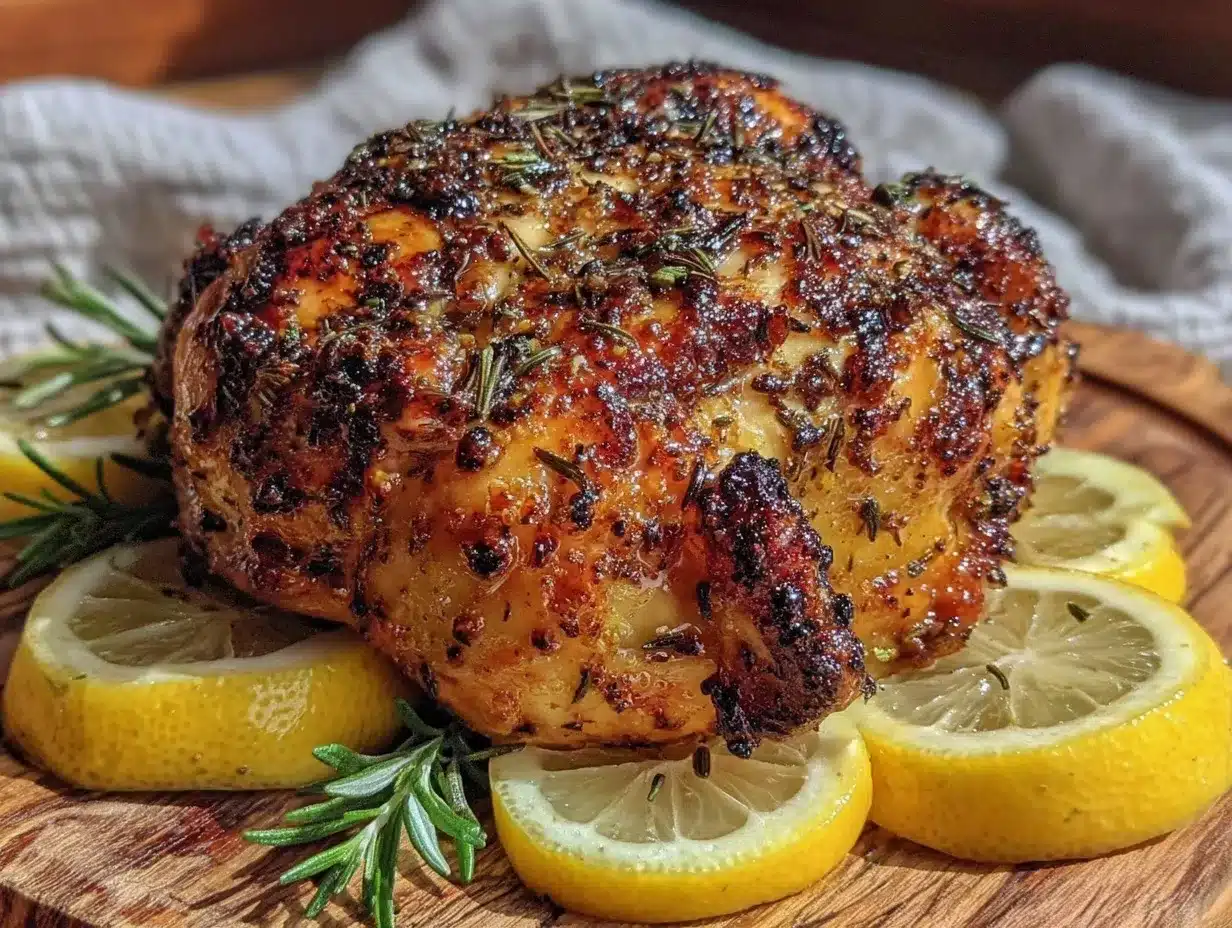
My partner took one bite of this grilled beer can chicken and immediately asked if we could make it again this weekend—three weekends in a row, no prompting. I remember watching him lean back, eyes closing just a second as the zesty lemon herb rub hit his taste buds, that perfect balance of tangy and savory. The grill smoke swirling around us, the golden-browned skin crackling ever so slightly, and that juicy, tender chicken dripping with flavor—it all felt like something special was happening right in our backyard.
It wasn’t just the usual barbecue; this recipe brought something new to the table. The lemon and herbs gave it a brightness I hadn’t expected, cutting through the smoky richness. I caught the way the chicken stayed moist, even with that crispy exterior, which usually takes some serious skill. Honestly, it was the kind of meal that made the evening feel relaxed and a little celebratory without any fuss.
Watching him savor each bite, I realized this was more than just grilled chicken—it was the kind of recipe that could turn an ordinary weekend into a small event. That’s why this flavorful grilled beer can chicken with zesty lemon herb rub stuck with me. It’s not just about cooking; it’s about those moments when food quietly brings people together, making memories one bite at a time.
Why You’ll Love This Recipe
This grilled beer can chicken isn’t just another backyard barbecue staple; it’s a recipe I’ve perfected after a few misses and messy dinners. Here’s why it’s a winner every time:
- Quick & Easy: It comes together in under an hour of active prep, great for spontaneous weekend grilling sessions.
- Simple Ingredients: No need for exotic spices or hard-to-find items; the lemon, herbs, and pantry staples are all you need.
- Perfect for Outdoor Gatherings: Whether it’s a casual family dinner or a weekend hangout, this dish always brings people to the table.
- Crowd-Pleaser: Kids and adults alike go crazy for the crispy skin and zesty rub combo—no complaints, just requests for seconds.
- Unbelievably Delicious: The beer can steams the chicken from the inside, keeping it juicy while the lemon herb rub crisps up on the outside.
What sets this recipe apart is the zesty lemon herb rub that’s fresh but not overpowering, and the grilling method that locks in moisture without soggy skin. I’ve tried other versions that ended up dry or bland, but this one hits that sweet spot every time. It’s the kind of recipe that makes you close your eyes and savor the flavor, knowing you nailed it. Plus, it’s a little conversation starter at the grill, especially if you pair it with sides like a crisp salad or something sweet like those mini lemon blueberry cheesecakes for dessert.
What Ingredients You Will Need
This recipe uses simple, wholesome ingredients to deliver bold flavor and satisfying texture without the fuss. Most of these are pantry staples or easy to find at your local market.
- Whole Chicken: About 4 to 5 pounds (1.8 to 2.3 kg), preferably organic or free-range for better flavor.
- Beer Can: A standard 12 oz (355 ml) can of your favorite beer (lager or pale ale works best).
- Lemon: Zest and juice of 1 large lemon (adds brightness and balances richness).
- Fresh Herbs: 2 tablespoons each of chopped rosemary, thyme, and parsley (fresh gives the best aroma).
- Garlic: 3 cloves, minced (provides savory depth).
- Olive Oil: 3 tablespoons, preferably extra virgin (helps the rub stick and adds richness).
- Paprika: 1 tablespoon for smoky flavor and color.
- Salt & Pepper: 2 teaspoons kosher salt and 1 teaspoon freshly ground black pepper.
- Optional: A pinch of cayenne if you like a little kick.
If you want to switch things up, you can easily swap the beer for a non-alcoholic option like sparkling apple cider—just keep in mind it may alter the subtle steam flavor inside the chicken. For a gluten-free version, choose a gluten-free beer or cider. I prefer brands like Sierra Nevada or Blue Moon for their balanced flavor, but honestly any decent lager will do.
Equipment Needed
- Grill: A charcoal or gas grill with a lid is essential to get that smoky flavor and even cooking.
- Beer Can Chicken Roaster: Optional but helpful to keep the chicken stable on the can. If you don’t have one, you can improvise with heavy-duty aluminum foil to make a stand.
- Meat Thermometer: Highly recommended for checking internal temperature (aim for 165°F/74°C).
- Mixing Bowl: For combining the lemon herb rub ingredients.
- Brush: To spread the rub evenly on the chicken skin.
- Tongs & Heat-Resistant Gloves: For safe handling of the hot chicken and grill grates.
If you’re on a budget, you can skip the specialized roaster, but be careful balancing the chicken on the beer can. I’ve found that a sturdy grill grate and patience go a long way. Also, keeping your grill clean and well-oiled helps prevent sticking and flare-ups, which can be a pain with whole chicken.
Preparation Method
- Prepare the Chicken (15 minutes): Remove any giblets from the cavity and pat the chicken dry with paper towels—this helps the skin crisp up. Loosen the skin gently with your fingers to allow the rub to penetrate better.
- Make the Lemon Herb Rub (5 minutes): In a mixing bowl, combine the lemon zest, lemon juice, minced garlic, chopped herbs, olive oil, paprika, salt, pepper, and cayenne if using. Stir until well mixed and aromatic.
- Rub the Chicken (10 minutes): Spread the lemon herb rub all over the chicken, including under the skin where possible, and inside the cavity. Don’t be shy—this is where the flavor really builds up. Let the chicken sit at room temperature for about 10 minutes while you prep the grill.
- Preheat the Grill (10 minutes): Set up your grill for indirect heat—medium-high on one side and off on the other. Aim for around 375°F (190°C). If using charcoal, bank the coals to one side. Clean and oil the grill grates to prevent sticking.
- Set up the Beer Can (5 minutes): Open the beer can and drink or pour out about half. Optionally, add a few sprigs of herbs or a smashed garlic clove inside the can for extra aroma. Place the chicken cavity over the beer can, making sure it’s stable.
- Grill the Chicken (60-75 minutes): Place the chicken upright on the indirect heat side of the grill. Close the lid and cook until the internal temperature reaches 165°F (74°C) in the thickest part of the thigh, about 1 to 1¼ hours. Avoid opening the lid too often; you want to keep the heat steady.
- Check for Doneness: Insert a meat thermometer carefully without touching bone. If the temperature is right and the skin is golden brown and crisp, you’re good to go.
- Rest the Chicken (10 minutes): Carefully remove the chicken from the grill (use gloves!). Let it rest upright off the beer can on a platter to allow juices to redistribute before carving.
Pro tip: If the skin starts to get too dark before the chicken is cooked through, move it to indirect heat or lower the grill temperature slightly. And don’t rush the resting time; carving too soon can make it dry.
Cooking Tips & Techniques
Getting beer can chicken right can be tricky, but a few tips can make a world of difference:
- Dry the Skin Thoroughly: Moisture is the enemy of crisp skin. Patting the chicken dry before the rub is key.
- Use Indirect Heat: Direct flames will burn the skin before the inside cooks. Setting up your grill for indirect heat is a game-changer.
- Monitor Temperature: A meat thermometer is your best friend here. Guesswork leads to dry or undercooked chicken.
- Don’t Skip the Rest: Letting the chicken rest after grilling locks in juiciness and makes carving easier.
- Balance Flavors: The lemon herb rub is zesty but not overpowering. Adjust salt and herbs to your taste, but keep the lemon brightness—it cuts through the richness perfectly.
I’ve learned the hard way that rushing or skipping steps often means dry chicken or uneven cooking. Once I got the hang of the indirect heat and rubbing the chicken thoroughly, the results were consistent and delicious every time. Multitasking by prepping sides while the chicken grills helps keep everything smooth and stress-free.
Variations & Adaptations
This grilled beer can chicken is versatile and easy to adapt:
- Spicy Kick: Add chili powder or smoked chipotle to the rub for a smoky heat.
- Herb Swap: Use basil, oregano, or tarragon instead of rosemary and thyme for a Mediterranean twist.
- Gluten-Free: Ensure your beer is gluten-free or substitute with sparkling water and lemon juice for steam.
- Different Cooking Methods: Try roasting the chicken in the oven using the same rub and beer can technique if grilling isn’t an option.
- Non-Alcoholic Option: Replace beer with apple cider or ginger ale for a fruity, sweet steam effect.
Personally, I once tried marinating the chicken overnight in the lemon herb mixture and found it intensified the flavors even more. Just be careful not to over-marinate or the lemon juice can start to “cook” the meat slightly, altering the texture.
Serving & Storage Suggestions
Serve this chicken hot off the grill, ideally sliced and plated with some fresh herbs sprinkled on top. It pairs wonderfully with grilled vegetables, a crisp green salad, or even a light pasta dish. For drinks, a chilled white wine or a citrusy beer complements the zesty rub beautifully.
Leftovers can be stored in an airtight container in the refrigerator for up to 3 days. Reheat gently in the oven at 350°F (175°C) covered with foil to keep the meat moist. You can also shred leftover chicken for sandwiches, tacos, or salads.
The flavors actually deepen a bit after a day, making cold chicken salads or wraps a tasty follow-up meal. Just remember that reheating too aggressively dries the meat, so low and slow is the way to go.
Nutritional Information & Benefits
This grilled beer can chicken is a lean protein powerhouse, providing about 300-350 calories per serving (depending on portion size). The lemon and fresh herbs add antioxidants and vitamin C, while the olive oil contributes heart-healthy fats. Using skin-on chicken gives flavor and crispiness but also adds fat, so feel free to remove skin if you want a lighter meal.
It’s naturally gluten-free (check your beer choice), low-carb, and free from artificial additives. Perfect for anyone looking to enjoy a flavorful, wholesome meal without complicated ingredients or processes.
Conclusion
This flavorful grilled beer can chicken with zesty lemon herb rub has become a go-to recipe for easy weekend grilling. It’s simple enough to throw together after a busy day but special enough to make any meal feel like a little celebration. The bright lemon and fresh herbs cut through the smoky richness, delivering juicy meat and crispy skin every time.
I love how you can tailor it with different herbs or spice levels to match your mood or the occasion. Whether you’re feeding a hungry crowd or just craving a comforting, satisfying dinner, it’s a recipe that delivers on all fronts.
If you give it a try, I’d love to hear how it turns out or any personal twists you add. Enjoy the grill and the good company that comes with it!
Frequently Asked Questions
Can I use a different type of alcohol instead of beer?
Yes, you can use hard cider or even a non-alcoholic sparkling beverage like apple cider or ginger ale. Just note that the flavor and steaming effect might vary slightly.
What if I don’t have a beer can chicken roaster?
You can improvise by shaping heavy-duty aluminum foil into a stable stand. Just be careful balancing the chicken upright to avoid spills or tipping.
How do I know when the chicken is fully cooked?
The safest way is to use a meat thermometer. The internal temperature should reach 165°F (74°C) in the thickest part of the thigh without touching bone.
Can I prepare the chicken in advance?
Absolutely! You can apply the rub and marinate the chicken overnight in the fridge, then bring it to room temperature before grilling.
Is it okay to grill the chicken directly over the flame?
It’s best to use indirect heat to avoid burning the skin and ensure even cooking. Direct heat can cause flare-ups and dry out the meat.
Pin This Recipe!

Flavorful Grilled Beer Can Chicken Recipe with Zesty Lemon Herb Rub Made Easy

A juicy and tender grilled beer can chicken with a zesty lemon herb rub that delivers crispy skin and bright, savory flavors. Perfect for easy weekend grilling and outdoor gatherings.
- Prep Time: 30 minutes
- Cook Time: 1 hour 15 minutes
- Total Time: 1 hour 45 minutes
- Yield: 4 to 6 servings 1x
- Category: Main Course
- Cuisine: American
Ingredients
- 1 whole chicken (4 to 5 pounds, preferably organic or free-range)
- 1 standard 12 oz (355 ml) can of beer (lager or pale ale recommended)
- Zest and juice of 1 large lemon
- 2 tablespoons chopped fresh rosemary
- 2 tablespoons chopped fresh thyme
- 2 tablespoons chopped fresh parsley
- 3 cloves garlic, minced
- 3 tablespoons extra virgin olive oil
- 1 tablespoon paprika
- 2 teaspoons kosher salt
- 1 teaspoon freshly ground black pepper
- Pinch of cayenne pepper (optional)
Instructions
- Prepare the Chicken (15 minutes): Remove any giblets from the cavity and pat the chicken dry with paper towels. Loosen the skin gently with your fingers to allow the rub to penetrate better.
- Make the Lemon Herb Rub (5 minutes): In a mixing bowl, combine lemon zest, lemon juice, minced garlic, chopped herbs, olive oil, paprika, salt, pepper, and cayenne if using. Stir until well mixed and aromatic.
- Rub the Chicken (10 minutes): Spread the lemon herb rub all over the chicken, including under the skin and inside the cavity. Let the chicken sit at room temperature for about 10 minutes while you prep the grill.
- Preheat the Grill (10 minutes): Set up your grill for indirect heat—medium-high on one side and off on the other. Aim for around 375°F (190°C). Clean and oil the grill grates to prevent sticking.
- Set up the Beer Can (5 minutes): Open the beer can and drink or pour out about half. Optionally add herbs or a smashed garlic clove inside the can. Place the chicken cavity over the beer can, ensuring stability.
- Grill the Chicken (60-75 minutes): Place the chicken upright on the indirect heat side of the grill. Close the lid and cook until the internal temperature reaches 165°F (74°C) in the thickest part of the thigh.
- Check for Doneness: Use a meat thermometer to confirm the temperature. The skin should be golden brown and crisp.
- Rest the Chicken (10 minutes): Remove the chicken from the grill carefully and let it rest upright off the beer can on a platter to allow juices to redistribute before carving.
Notes
If skin darkens too quickly, move chicken to indirect heat or lower grill temperature. Do not rush resting time to keep chicken juicy. For gluten-free, use gluten-free beer or substitute with sparkling water and lemon juice. Marinating overnight intensifies flavor but avoid over-marinating to prevent texture changes.
Nutrition
- Serving Size: 1 serving (approxima
- Calories: 325
- Sugar: 0.5
- Sodium: 700
- Fat: 18
- Saturated Fat: 4
- Carbohydrates: 2
- Fiber: 0.5
- Protein: 35
Keywords: grilled chicken, beer can chicken, lemon herb rub, backyard barbecue, easy grilling, summer recipe, outdoor cooking


