My brain does this thing where it refuses to accept that Halloween snacks have to be either cute or creepy but never both. I want the skulls. I want the cheese. I want something that makes guests do that double-take where they’re not sure if they should eat it or photograph it. That’s literally the exact moment this board was born — standing in my kitchen at 10 PM, staring at a bag of prosciutto and a skull-shaped silicone mold I bought on a whim three Octobers ago. The mold had been sitting in the back of my baking drawer, gathering dust and judgment. But suddenly it clicked: why not make the cheese the star? Not just any cheese, but cheese that looks like tiny, edible skulls staring back at you from a board full of savory goodness. No frosting, no sugar, no fuss. Just pure, unapologetic savory snackery dressed up in its spookiest form.
I tested this board for a Halloween party last year, and honestly, it was the first thing to disappear. People picked up a skull-shaped cheese wedge, paused, grinned, and then ate it with zero guilt. That’s the magic here — it’s not a gimmick that sacrifices flavor for aesthetics. The cheese is still good cheese. The meats are still quality. The crackers are still crunchy. But everything looks like it crawled out of a mildly haunted charcuterie board. This isn’t complicated. It’s just clever. And that’s exactly what I want in a Halloween appetizer — something that looks like it took hours but actually came together in under thirty minutes.
The first time I made these cheese skulls, I used a cheap cheddar block and it crumbled so badly I almost gave up. But I learned. Now I know exactly which cheeses hold their shape, how long to press them, and what to pair them with so the whole board feels cohesive. This isn’t a recipe that needs perfection. It needs personality. And honestly, that’s way more fun. So if you’re ready to make a Halloween snack that’s equal parts spooky and delicious, let’s get into it. Trust me — your guests will remember this board long after the candy bowl is empty.
Why You’ll Love This Recipe
Let me be real with you — I’ve tested a lot of Halloween appetizers over the years, and most of them fall into one of two categories: either they look amazing but taste mediocre, or they taste great but look like an afterthought. This board breaks that pattern completely. It’s the rare Halloween recipe that delivers on both fronts without making you feel like you’re running a catering operation out of your kitchen.
- Quick & Easy : This whole board comes together in about 30 minutes of active time. The cheese skulls need a few hours in the fridge to set, but that’s hands-off time. Perfect for busy Halloween weeknights or last-minute party prep.
- Simple Ingredients : You don’t need any specialty Halloween-themed snacks. The ingredients are all standard charcuterie board staples — cheese, cured meats, crackers, olives, nuts. The only special item is a skull-shaped silicone mold, which costs about $8 online.
- Perfect for Halloween Parties : This board is a guaranteed conversation starter. It works for adult Halloween gatherings, family-friendly parties, or even as a spooky snack for a movie night. It’s not overly gory or childish — it hits that sweet spot of fun and sophisticated.
- Crowd-Pleaser : I’ve served this to kids, adults, picky eaters, and cheese snobs. Everyone loves it. The skull shape makes people smile, and the flavor combos keep them coming back for more.
- Unbelievably Delicious : The texture of the pressed cheese combined with the salty prosciutto, tangy pickles, and crunchy crackers is honestly next-level. It’s comfort food disguised as art.
What makes this recipe different from every other Halloween charcuterie board you’ve seen is the technique. Instead of just arranging store-bought ingredients in a spooky pattern, you’re actually making the centerpiece — those cheese skulls. The process is simple but the result is dramatic. It’s the kind of board that makes people say, “Wait, you made that?” and then immediately ask for the recipe. Plus, it’s endlessly customizable. Swap in your favorite cheeses, meats, and accompaniments based on what you have or what your guests love. This isn’t a rigid recipe — it’s a framework for your own spooky creativity.
What Ingredients You Will Need
This recipe uses simple, high-quality ingredients that come together to create a visually stunning and delicious Halloween spread. The beauty of this board is that you can customize almost everything based on what you have or what your guests prefer. Here’s what I recommend for the best results.
For the Cheese Skulls
- 8 ounces block mozzarella cheese (low-moisture, whole milk works best — it holds its shape beautifully and has a mild flavor that pairs with everything)
- 8 ounces block cheddar cheese (sharp or medium, orange cheddar gives the best color contrast against the mozzarella)
- 4 ounces cream cheese, softened (this helps bind the shredded cheese and adds a creamy texture — use full-fat for best results)
- 1 tablespoon milk (only if needed — helps thin the cream cheese for easier mixing)
For the Charcuterie Board
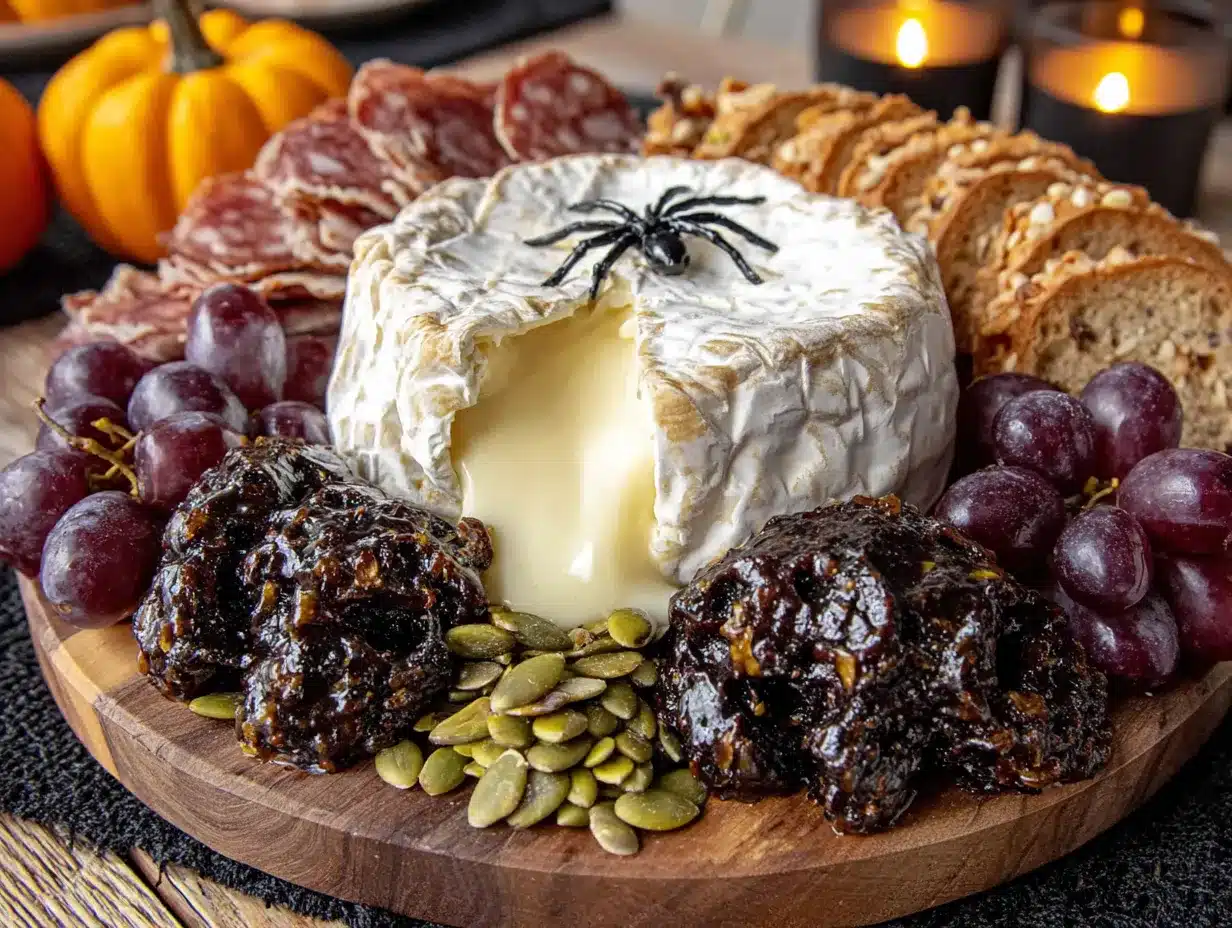
- 6 ounces prosciutto (thinly sliced — I recommend Boar’s Head or Columbus for consistent quality)
- 4 ounces salami (genoa or hard salami, sliced thin — the peppery flavor cuts through the richness of the cheese)
- 4 ounces pepperoni (mini or regular slices — adds a nice spicy kick)
- 1 cup assorted olives (kalamata, green, or castelvetrano — I love a mix for variety)
- 1 cup cherry tomatoes (halved or whole — adds freshness and color)
- 1/2 cup pickled vegetables (cornichons, pickled onions, or pickled peppers — the acidity balances the richness)
- 1 cup nuts (almonds, walnuts, or pecans — roasted and salted for crunch)
- 1 cup crackers (assorted shapes and flavors — water crackers, rosemary crackers, or everything bagel crackers work great)
- Fresh herbs for garnish (rosemary sprigs, thyme, or edible flowers — adds that final spooky touch)
Ingredient Selection Tips
When choosing your cheese blocks, look for ones that are firm and not overly soft or crumbly. Low-moisture mozzarella is ideal because it shreds easily and presses into a clean shape. For the cheddar, avoid pre-shredded cheese — it contains anti-caking agents that prevent it from binding properly. Always shred your own cheese from a block. Trust me on this one. For the meats, I prefer prosciutto di Parma for its delicate, buttery texture, but any good-quality prosciutto will work. If you’re serving this to a crowd with dietary restrictions, you can easily swap in dairy-free cheese alternatives (look for block-style vegan cheese that melts and presses well) and plant-based meats.
Substitution Guidance
- Dairy-free option: Use block-style vegan mozzarella and cheddar. Make sure they are firm enough to shred and press. Add a tablespoon of nutritional yeast to the cream cheese substitute for extra cheesy flavor.
- Gluten-free option: Use gluten-free crackers or sliced cucumber rounds as the base. Most cured meats and cheeses are naturally gluten-free, but double-check labels on any pre-seasoned items.
- Low-carb option: Skip the crackers and use cucumber slices, bell pepper strips, or endive leaves as vessels for the cheese and meat.
- Nut-free option: Omit the nuts and add extra olives, pickles, or roasted chickpeas for crunch.
Equipment Needed
You don’t need a lot of fancy equipment for this recipe, but a few key tools make the process much smoother. Here’s what you’ll need:
- Skull-shaped silicone mold — This is the star of the show. You can find these online for $8-$15. Look for one with a smooth interior surface so the cheese releases easily. I’ve tried a few different brands, and the Wilton skull mold works consistently well.
- Box grater or food processor with shredding disc — Shredding the cheese by hand works fine, but a food processor makes it lightning fast. Just be careful not to over-process or the cheese will turn into a paste.
- Mixing bowl — A medium-sized bowl for combining the shredded cheese and cream cheese.
- Rubber spatula — For mixing and pressing the cheese mixture into the mold.
- Plastic wrap — To cover the mold while it chills in the fridge.
- Large serving board or platter — A wooden cutting board, slate board, or marble slab works beautifully. Make sure it’s at least 12×16 inches to give everything room to spread out.
- Small bowls or ramekins — For holding olives, pickles, nuts, and any dips you want to include.
- Tongs or small serving spoons — For easy grabbing.
- Sharp knife and cutting board — For slicing any ingredients that need prep.
If you don’t have a skull mold, you can use any small, detailed silicone mold — bats, ghosts, pumpkins, or even a simple round mold with a spooky face drawn on with food-safe marker. The concept is the same. I’ve also seen people use mini Halloween-themed cookie cutters to press the cheese into shapes, though it’s a bit more fiddly. The silicone mold is definitely the easiest route. And honestly, it’s worth buying just for the reaction you’ll get when you pull those cheese skulls out of the fridge. Maintenance tip: hand wash the mold with mild soap and warm water, and let it air dry completely before storing to prevent any lingering odors.
Preparation Method
Alright, let’s get into the actual process. I’ve broken this down into clear steps so you can follow along without any confusion. Take your time with the cheese skulls — they’re the centerpiece, and getting them right makes the whole board shine.
Step 1: Shred the Cheeses
Start by shredding your mozzarella and cheddar cheeses using a box grater or food processor. You want finely shredded cheese — not too coarse, not too fine. Aim for shreds that are about 1/4 inch wide. Place the shredded mozzarella in one bowl and the shredded cheddar in another. You’ll need about 2 cups of each. If you’re using a food processor, pulse in short bursts to avoid turning the cheese into a paste. I learned this the hard way — trust me, you want shreds, not mush.
Step 2: Make the Cheese Mixture
In a medium mixing bowl, combine the softened cream cheese with 1 tablespoon of milk. Mix until smooth and creamy. This will be your binder. Now, add the shredded mozzarella and cheddar to the cream cheese mixture. Use a rubber spatula to fold everything together until the cheese shreds are evenly coated. The mixture should be sticky but hold together when pressed. If it feels too dry, add another teaspoon of milk. If it’s too wet, add a little more shredded cheese. You’re looking for a texture similar to play-dough — moldable but not greasy.
Step 3: Press the Cheese into the Skull Mold
Take your skull-shaped silicone mold and lightly spray it with non-stick cooking spray or brush it with a neutral oil (like avocado or grapeseed). This step is crucial — even with silicone, the cheese can stick if you skip this. Now, take small handfuls of the cheese mixture and press them firmly into the mold. Start with the eye sockets and nose cavity — make sure those details are filled completely. Then fill the rest of the mold, pressing down firmly to eliminate any air pockets. Use the back of a spoon or your fingers to smooth the surface. The cheese should be packed tightly so the skull holds its shape when unmolded.
Step 4: Chill the Cheese Skulls
Cover the filled mold with plastic wrap and place it in the refrigerator. Let it chill for at least 2 hours, but 4-6 hours is even better. Overnight works too. The chilling time allows the cream cheese to firm up and bind everything together. If you try to unmold too early, the skulls will fall apart. Patience here pays off. I usually make the cheese skulls the day before my party and just keep them in the fridge until I’m ready to assemble the board.
Step 5: Unmold the Cheese Skulls
Once the cheese mixture is fully chilled and firm, remove the mold from the fridge. Gently flex the silicone mold to loosen the edges. Then, carefully peel the mold away from the cheese skull. If it sticks, let it sit at room temperature for 2-3 minutes — the slight warmth helps release it. Place the unmolded skulls on a plate or cutting board. You should have perfectly formed cheese skulls with visible eye sockets, nose cavity, and teeth details. If any details are a bit blurry, you can use a toothpick to gently redefine them while the cheese is still cold.
Step 6: Assemble the Charcuterie Board
Now for the fun part. Take your large serving board or platter and start arranging the ingredients. Place the cheese skulls in the center or slightly off-center — they’re the focal point, so give them visual weight. Arrange the cured meats around the skulls, folding or rolling them into ribbons for texture. I like to place the prosciutto in loose waves and the salami in overlapping folds. Add the crackers in small clusters, fanning them out for easy grabbing. Fill small bowls with olives, pickles, and nuts, and place them in the gaps. Scatter the cherry tomatoes and any remaining ingredients in the empty spaces. Finally, garnish with fresh herbs — rosemary sprigs look like tiny trees and add a hauntingly beautiful touch. Step back and admire your work. Seriously, it’s going to look incredible.
Step 7: Serve Immediately or Refrigerate
This board is best served within an hour of assembly. If you need to make it ahead, prepare the cheese skulls and all the components separately, then assemble the board right before serving. You can keep the assembled board in the refrigerator for up to 2 hours, but cover it loosely with plastic wrap to prevent the crackers from getting stale. Let it sit at room temperature for 15-20 minutes before serving to allow the cheeses and meats to come to their optimal flavor temperature.
Cooking Tips & Techniques
Over the years, I’ve made this board more times than I can count, and I’ve definitely learned a few things the hard way. Here are my best tips to ensure your spooky charcuterie board turns out perfectly every time.
Don’t overwork the cheese mixture. When you’re mixing the shredded cheese with the cream cheese, stop as soon as everything is combined. Overmixing can cause the cheese to become greasy and separate, which makes the skulls less stable. Gentle folding is your friend here.
Use a light hand with the milk. The cream cheese should be soft enough to mix easily, but you don’t want it runny. Add milk one teaspoon at a time and only if needed. The goal is a paste-like consistency that holds its shape when pressed.
Press firmly into the mold. This is the most common mistake I see. People gently fill the mold, and then the skulls come out looking like blobs. You need to really pack the cheese mixture in there, especially into the small details like the eye sockets and teeth. Use your fingers or the back of a small spoon to press firmly.
Chill thoroughly before unmolding. I know it’s tempting to rush this step, but don’t. The cheese mixture needs time to set. If you try to unmold after only an hour, the skulls will likely fall apart. Give it at least 2 hours, and overnight is ideal. Your patience will be rewarded with perfectly formed skulls.
Temperature matters for serving. Cheese and cured meats taste best at room temperature. Take the board out of the fridge 15-20 minutes before serving. This allows the flavors to open up and the textures to soften slightly. But don’t leave it out for more than 2 hours for food safety reasons.
Balance your board visually. Think about color, texture, and height. The cheese skulls are pale and creamy, so balance them with dark olives, red tomatoes, green herbs, and brown crackers. Vary the shapes — round crackers, rectangular cheese cubes, folded meats — to keep the eye moving across the board.
One mistake I’ll never forget: The first time I made this, I used pre-shredded cheese from a bag. It was a disaster. The cheese wouldn’t bind, the skulls crumbled, and I ended up with a sad pile of cheese dust. That’s when I learned that pre-shredded cheese contains anti-caking agents that prevent it from melting or binding properly. Always shred your own cheese from a block. It makes all the difference.
Variations & Adaptations
One of the best things about this board is how customizable it is. Here are some of my favorite variations to keep things interesting.
Spicy Southwest Version
Swap the mozzarella and cheddar for pepper jack cheese and a smoked gouda. Add a pinch of cayenne pepper and smoked paprika to the cream cheese mixture for extra heat. Pair with spicy chorizo, jalapeño-stuffed olives, and tortilla chips instead of crackers. This version has a real kick and is perfect for adults who want something bold.
Mediterranean-Inspired Board
Use feta cheese (crumbled and mixed with cream cheese) and a mild provolone for the skulls. Add marinated artichoke hearts, roasted red peppers, kalamata olives, and fresh cucumber slices. Serve with pita chips or warm pita bread. The feta adds a tangy, salty note that pairs beautifully with the other Mediterranean flavors.
Sweet & Savory Version
For a twist, add a small bowl of honey or fig jam to the board for dipping. Use brie or camembert in the cheese skulls (it’s softer, so handle gently). Pair with dried figs, dried apricots, and candied walnuts. The sweetness balances the saltiness of the meats and cheeses beautifully. This version is especially popular at Halloween parties where guests want something a little different.
Dairy-Free Adaptation
Use block-style vegan mozzarella and cheddar. Make sure they are firm enough to shred. Mix with a vegan cream cheese alternative (I like Kite Hill or Miyoko’s). Add a tablespoon of nutritional yeast for extra cheesy flavor. The texture will be slightly different, but the skulls still hold their shape surprisingly well. Pair with vegan meats and crackers for a fully plant-based board.
Mini Skull Bites
If you don’t want a full board, make mini cheese skulls using a smaller mold. Serve them on toothpicks with a slice of salami and an olive for a perfect bite-sized appetizer. These are great for passing around at parties where people are mingling. They’re also adorable and get a lot of “oohs” and “ahhs.”
Serving & Storage Suggestions
This board is designed to be a showstopper, but it’s also practical. Here’s how to serve and store it for the best experience.
Serving Temperature: Serve the board at room temperature for optimal flavor. Remove it from the refrigerator 15-20 minutes before serving. The cheese will be creamier, the meats more flavorful, and the crackers perfectly crunchy. If you’re serving outdoors at a Halloween party, keep the board in a shaded area and don’t leave it out for more than 2 hours.
Presentation Tips: Arrange the ingredients in a way that feels organic and abundant. Don’t be afraid to overlap things — it looks more inviting. Use small bowls or ramekins for anything that might roll around (olives, nuts, pickles). Garnish with fresh herbs right before serving to keep them looking vibrant. I like to add a few edible flowers for a pop of color — pansies or nasturtiums work beautifully and are safe to eat.
Complementary Dishes: This board pairs wonderfully with a light, crisp white wine like Sauvignon Blanc or a sparkling Prosecco. For beer lovers, a pale ale or wheat beer complements the cheese and meats nicely. If you’re serving cocktails, a classic martini or a spicy margarita works well. For a non-alcoholic option, sparkling water with a splash of cranberry juice and a rosemary sprig is festive and refreshing. If you’re looking for a dessert to follow, these mini lemon blueberry cheesecakes are the perfect sweet ending — they’re also great for parties and can be made ahead of time.
Storage Instructions: If you have leftovers, separate the components before storing. The cheese skulls can be stored in an airtight container in the refrigerator for up to 3 days. The meats should be wrapped tightly in plastic wrap and stored separately. Crackers should be kept in a sealed bag or container at room temperature to maintain their crunch. Olives, pickles, and nuts can be stored in their original containers or small airtight containers in the fridge.
Reheating: This board is served cold or at room temperature, so no reheating is needed. However, if the cheese skulls have been refrigerated, let them sit at room temperature for 15-20 minutes before serving to soften slightly. The flavors actually develop and improve over time, so leftovers the next day are still delicious — just a little softer in texture.
Make-Ahead Tips: The cheese skulls can be made up to 2 days in advance and stored in the refrigerator. The meats, olives, and nuts can be prepped a day ahead. Assemble the board no more than 2 hours before serving to keep the crackers fresh and the herbs vibrant. This makes party prep a breeze — you can focus on other dishes while the centerpiece is already done.
Nutritional Information & Benefits
While this board is definitely an indulgence, it does offer some nutritional benefits thanks to the high-quality ingredients. Here’s a general breakdown per serving (about 1/8 of the board):
| Nutrient | Amount Per Serving |
|---|---|
| Calories | 380-420 |
| Protein | 18-22g |
| Fat | 28-32g |
| Saturated Fat | 12-15g |
| Carbohydrates | 12-16g |
| Fiber | 2-4g |
| Sugar | 3-5g |
| Sodium | 800-1000mg |
Health Benefits: Cheese is a good source of calcium and protein, which support bone health and muscle repair. Cured meats provide iron and B vitamins, though they should be enjoyed in moderation due to their sodium content. Olives and nuts offer healthy monounsaturated fats and antioxidants that support heart health. The fresh herbs and tomatoes add a small amount of vitamins A and C. While this isn’t a health food, it’s a balanced snack that provides sustained energy — much better than processed Halloween candy.
Dietary Considerations: This recipe is naturally gluten-free if you use gluten-free crackers. It’s low-carb and keto-friendly if you skip the crackers and use cucumber slices or bell pepper strips instead. For a dairy-free version, use vegan cheese alternatives. The main allergens are dairy (cheese) and gluten (crackers), so be sure to label your board clearly if serving to guests with allergies.
Personal Perspective: I love that this board feels like a treat without being overly indulgent. It’s the kind of snack that satisfies savory cravings and keeps you full and happy during a long Halloween party. Plus, because it’s so visually engaging, you tend to eat more mindfully — picking and choosing rather than mindlessly munching. That’s a win in my book.
Conclusion
This Spooky Halloween Charcuterie Skulls Board is hands-down one of my favorite things to make for Halloween. It’s creative without being complicated, impressive without being stressful, and delicious without being fussy. The cheese skulls are the kind of centerpiece that makes people stop and stare — and then reach for a cracker to scoop one up. It’s the perfect balance of spooky fun and genuine flavor.
I love that this recipe lets you be creative. You can swap in your favorite cheeses, meats, and accompaniments based on what you have or what your guests love. It’s not a rigid formula — it’s a canvas for your own spooky masterpiece. And honestly, that’s what makes it so much fun to make and share. Whether you’re hosting a big Halloween bash or just want to surprise your family with a fun snack, this board delivers every time.
I’d love to hear how yours turns out! Drop a comment below and let me know what combinations you tried — did you go classic, spicy, or sweet? Share your photos and tag me on social media so I can see your spooky creations. And if you’re looking for more Halloween inspiration, check out our full recipe collection for more party-perfect ideas. Happy haunting, and happy snacking!
Frequently Asked Questions
Can I make the cheese skulls without a skull mold?
Yes, you can use any small silicone mold with detailed shapes — bats, ghosts, pumpkins, or even a simple round mold. You can also press the cheese mixture into a small bowl and carve a skull face into the surface with a toothpick. It won’t be as detailed, but it still looks spooky and fun.
How far in advance can I make this board?
The cheese skulls can be made up to 2 days in advance and stored in the refrigerator. The meats, olives, and nuts can be prepped a day ahead. Assemble the board no more than 2 hours before serving to keep the crackers fresh and the herbs vibrant.
Can I use pre-shredded cheese for the skulls?
I strongly recommend against it. Pre-shredded cheese contains anti-caking agents like cellulose or potato starch that prevent it from binding properly. The skulls will be crumbly and won’t hold their shape. Always shred your own cheese from a block for the best results.
What if my cheese skulls fall apart when I unmold them?
If your skulls crumble, the mixture likely wasn’t chilled long enough or wasn’t pressed firmly enough into the mold. Try chilling for at least 4 hours next time, and make sure you’re packing the cheese mixture tightly into every crevice. You can also add a little more cream cheese to help bind the mixture.
Can I freeze the cheese skulls?
Freezing is not recommended. The texture of the cheese changes significantly when frozen and thawed — it becomes grainy and watery. The skulls are best made fresh or up to 2 days ahead and stored in the refrigerator.
Pin This Recipe!
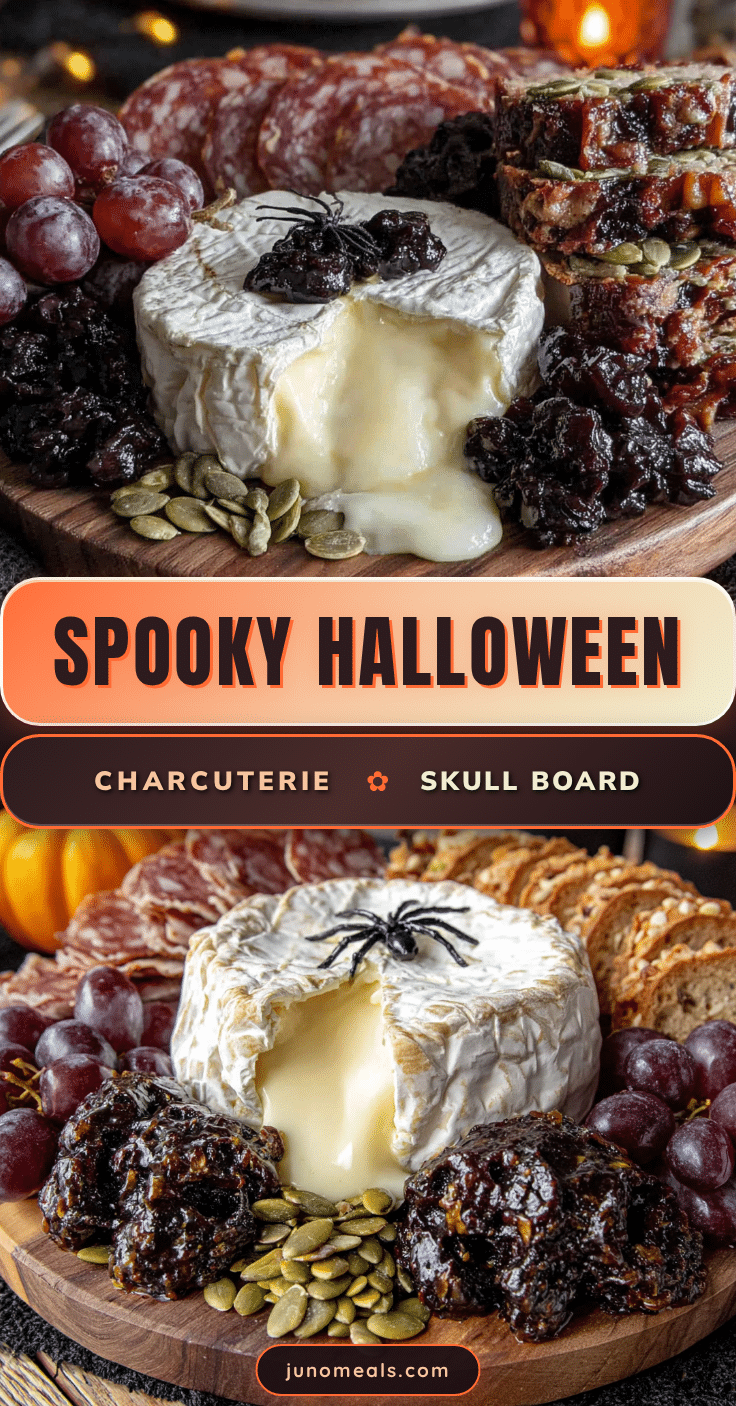
Easy Spooky Halloween Charcuterie Skulls Board
A savory Halloween charcuterie board featuring cheese skulls made from mozzarella, cheddar, and cream cheese, surrounded by cured meats, olives, nuts, and crackers. It’s a spooky yet delicious appetizer that comes together in under 30 minutes of active time.
- Prep Time: 30 minutes
- Cook Time: 0 minutes
- Total Time: 2 hours 30 minutes (includes chilling time)
- Yield: 8 servings 1x
- Category: Appetizer
- Cuisine: American
Ingredients
- 8 ounces block mozzarella cheese (low-moisture, whole milk)
- 8 ounces block cheddar cheese (sharp or medium, orange)
- 4 ounces cream cheese, softened
- 1 tablespoon milk (only if needed)
- 6 ounces prosciutto, thinly sliced
- 4 ounces salami (genoa or hard salami, sliced thin)
- 4 ounces pepperoni (mini or regular slices)
- 1 cup assorted olives (kalamata, green, or castelvetrano)
- 1 cup cherry tomatoes (halved or whole)
- 1/2 cup pickled vegetables (cornichons, pickled onions, or pickled peppers)
- 1 cup nuts (almonds, walnuts, or pecans, roasted and salted)
- 1 cup crackers (assorted shapes and flavors)
- Fresh herbs for garnish (rosemary sprigs, thyme, or edible flowers)
Instructions
- Shred the mozzarella and cheddar cheeses using a box grater or food processor. You need about 2 cups of each. Place in separate bowls.
- In a medium mixing bowl, combine the softened cream cheese with 1 tablespoon of milk. Mix until smooth and creamy.
- Add the shredded mozzarella and cheddar to the cream cheese mixture. Fold with a rubber spatula until evenly coated. The mixture should be sticky but hold together when pressed.
- Lightly spray a skull-shaped silicone mold with non-stick cooking spray or brush with neutral oil.
- Press small handfuls of the cheese mixture firmly into the mold, starting with the eye sockets and nose cavity. Fill completely, pressing down to eliminate air pockets. Smooth the surface with a spoon or fingers.
- Cover the filled mold with plastic wrap and refrigerate for at least 2 hours, preferably 4-6 hours or overnight.
- Once chilled and firm, remove the mold from the fridge. Gently flex the silicone to loosen edges, then carefully peel the mold away from the cheese skull. If it sticks, let it sit at room temperature for 2-3 minutes.
- Place the unmolded cheese skulls on a large serving board or platter as the centerpiece.
- Arrange the cured meats around the skulls, folding or rolling them into ribbons. Add crackers in small clusters. Fill small bowls with olives, pickles, and nuts, and place them in gaps. Scatter cherry tomatoes and remaining ingredients in empty spaces.
- Garnish with fresh herbs. Serve immediately or refrigerate for up to 2 hours. Let sit at room temperature for 15-20 minutes before serving.
Notes
Pre-shredded cheese contains anti-caking agents that prevent binding; always shred your own cheese from a block. Chill the cheese skulls for at least 2 hours, preferably overnight, for best results. The board is best served within an hour of assembly. Leftover cheese skulls can be stored in an airtight container in the refrigerator for up to 3 days.
Nutrition
- Serving Size: 1/8 of the board
- Calories: 400
- Sugar: 4
- Sodium: 900
- Fat: 30
- Saturated Fat: 13.5
- Carbohydrates: 14
- Fiber: 3
- Protein: 20
Keywords: Halloween charcuterie board, cheese skulls, spooky appetizer, Halloween snack, savory Halloween board


