My neighbor asked why I couldn’t just blend the roasted squash right into the cheese sauce instead of mashing it separately. I started to explain why that wouldn’t work — something about texture breakdown and emulsion science I’d read in a cooking blog years before. Then I stopped. Honestly? I had no good reason. I just assumed it would turn into a weird, baby-food-like mess.
So I tried it. On a Tuesday night, with a slightly cracked casserole dish and a cheap immersion blender I’d grabbed on sale three winters ago. And let me tell you — it was one of those moments where you stand over the stove, tasting from the spatula, and just laugh at yourself for being so stubborn. The sauce turned out silky, velvety, and somehow even creamier than the classic version. The squash didn’t just disappear into the background — it became the star, adding this gentle sweetness that made the sharp cheddar pop even more.
That night, I ate two bowls. Maybe three. I wasn’t counting. I was too busy wondering how many other times I’d missed out on something great because I was too sure I already knew the answer. Maybe you’ve been there — that moment when a simple suggestion from someone else ends up completely changing how you cook a dish forever. This recipe is the result of that humbling Tuesday night. It’s cozy, it’s comforting, and it’s proof that sometimes the best cooking happens when you let go of what you think you know.
Why You’ll Love This Recipe
This isn’t just another mac and cheese recipe. It’s the kind of meal that wraps around you like a warm blanket on a cold day. After testing this dish more times than I’d like to admit (my family is officially tired of mac and cheese, but they keep eating it anyway), I can tell you exactly why this version stands out.
- Quick & Easy: Everything comes together in one pot in under 30 minutes. No boiling pasta separately, no making a roux in another pan, no complicated steps. Just one pot, minimal cleanup, and dinner on the table fast.
- Simple Ingredients: You likely already have most of these in your kitchen. Pasta, cheese, milk, butter — and a humble butternut squash that does all the heavy lifting. No fancy grocery store trips required.
- Perfect for Cozy Nights: This is the dish you make when the weather turns cold, when you’ve had a rough day, or when you just need something that feels like a hug in a bowl. It’s comfort food at its finest.
- Crowd-Pleaser: I’ve served this to kids, picky eaters, and adults who swear they don’t like squash. Every single person has asked for seconds. The squash adds creaminess without screaming “vegetable” — it just makes the cheese sauce better.
- Unbelievably Delicious: The texture is next-level. Silky, smooth, and perfectly coats every piece of pasta. The sweetness of the roasted squash balances the sharp cheddar in a way that feels both familiar and surprising.
What makes this recipe different from the rest is the technique. Blending the roasted squash directly into the cheese sauce creates an ultra-creamy base without needing heavy cream or a complicated béchamel. It’s healthier than traditional mac and cheese, faster than most versions, and somehow even more satisfying. This isn’t just another version — it’s the best version I’ve ever made.
What Ingredients You Will Need
This recipe uses simple, wholesome ingredients that come together to create something truly special. Most of these are pantry staples, and the butternut squash does the heavy lifting for flavor and texture.
- Butternut squash (1 medium, about 2 pounds) — peeled, seeded, and cubed into 1-inch pieces. Look for one that feels heavy for its size with firm, unblemished skin. (I prefer organic when available, but conventional works just fine.)
- Elbow macaroni (8 ounces, about 2 cups) — or any small pasta shape you love. Shells, cavatappi, or rotini all work beautifully. (I’ve tested this with gluten-free pasta too, and it works great — just adjust cooking time.)
- Sharp cheddar cheese (8 ounces, about 2 cups shredded) — freshly shredded from a block melts much smoother than pre-shredded, which contains anti-caking agents. (I recommend Tillamook or Cabot for exceptional flavor.)
- Milk (1 cup) — whole milk gives the creamiest result, but 2% works well too. For a dairy-free version, unsweetened oat milk or cashew milk are my go-tos.
- Butter (2 tablespoons) — unsalted so you can control the salt level. (Kerrygold is my favorite for its rich, grassy flavor.)
- Chicken or vegetable broth (1 cup) — adds depth of flavor that water alone can’t provide. (I use low-sodium broth to keep salt levels in check.)
- Garlic (3 cloves, minced) — fresh garlic adds a savory note that complements the sweet squash perfectly. (In a pinch, ½ teaspoon garlic powder works.)
- Dijon mustard (1 teaspoon) — trust me on this. It doesn’t make the sauce taste like mustard; it brightens the cheese flavor and adds complexity.
- Salt (1 teaspoon, plus more for pasta water) — I use fine sea salt for cooking. (Kosher salt works too; just adjust the quantity slightly.)
- Black pepper (½ teaspoon, freshly ground) — adds a subtle warmth that balances the creamy sauce.
- Nutmeg (¼ teaspoon, freshly grated if possible) — this is the secret ingredient that makes everything taste cozier. A tiny amount goes a long way.
- Optional toppings — panko breadcrumbs (½ cup) mixed with melted butter (1 tablespoon) for a crispy top, or fresh sage leaves fried in butter for a seasonal touch.
For the squash, look for one that’s firm and heavy. If you’re short on time, many grocery stores sell pre-cubed butternut squash in the produce section. Just know that it tends to dry out faster than whole squash, so you may need to add a splash more broth when blending.
Equipment Needed
You don’t need a fancy kitchen to make this recipe. Here’s what you’ll actually use:
- Large pot or Dutch oven (5-6 quart) — this is your one-pot wonder. A heavy-bottomed pot distributes heat evenly and prevents scorching. (I use my Le Creuset Dutch oven, but any large pot works.)
- Immersion blender or regular blender — an immersion blender makes this truly one-pot, but a countertop blender works too. Just let the squash cool slightly before blending, and vent the lid to avoid pressure buildup.
- Chef’s knife and cutting board — for prepping the squash. A sharp knife makes this job much easier. (I learned the hard way that a dull knife + hard squash = dangerous.)
- Vegetable peeler — for removing the squash skin. A Y-shaped peeler gives you more control than a straight one.
- Box grater — for shredding cheese. Microplane works too, but a box grater is faster for larger amounts.
- Measuring cups and spoons — accuracy matters in this recipe, especially with the seasonings.
- Wooden spoon or silicone spatula — for stirring. Silicone won’t scratch your pot.
If you don’t have an immersion blender, don’t worry. Let the cooked squash cool for 5 minutes, transfer it to a regular blender with a cup of the cooking liquid, and blend until smooth. Just be careful — hot liquids expand in blenders, so work in batches and hold the lid down with a towel.
Preparation Method
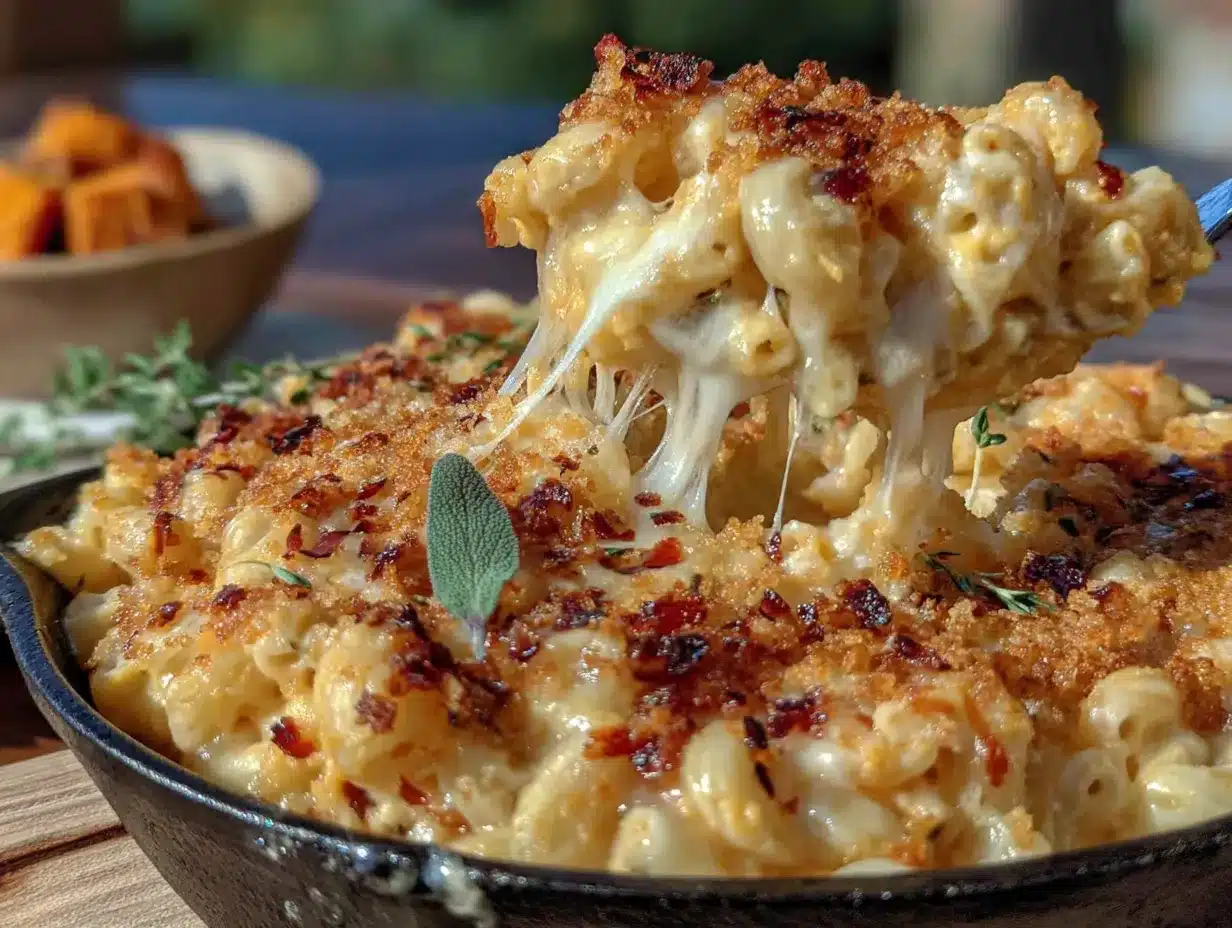
Let’s make this cozy dish come to life. I’ve broken it down into clear steps with all the little details I wish someone had told me the first time.
- Prep the squash. Peel the butternut squash using a vegetable peeler. Cut off the top and bottom, then slice it in half lengthwise. Scoop out the seeds with a spoon (save them for roasting if you’re feeling ambitious!). Cut the flesh into 1-inch cubes. This takes about 8-10 minutes your first time, but you’ll get faster. Pro tip: if the squash feels too hard to cut, microwave it whole for 2 minutes to soften it slightly.
- Start cooking the squash. In your large pot, combine the cubed squash with 1 cup of chicken or vegetable broth. Bring to a boil over medium-high heat, then reduce to medium-low, cover, and simmer for 12-15 minutes. The squash is ready when you can easily pierce a piece with a fork — it should be tender but not falling apart. The liquid should have mostly evaporated. If there’s still a lot of liquid, remove the lid and cook for another 2-3 minutes.
- Cook the pasta. While the squash simmers, bring a separate pot of salted water to a boil. Cook the macaroni according to package directions until al dente — usually 7-9 minutes. Drain well, but don’t rinse. (Rinsing removes the starch that helps the sauce cling to the pasta.) Set aside.
- Blend the squash. Remove the pot from heat. Add the butter, minced garlic, Dijon mustard, salt, pepper, and nutmeg to the cooked squash. Using an immersion blender, blend until completely smooth. If using a regular blender, transfer the squash mixture carefully and blend in batches. The sauce should look velvety and have a beautiful golden-orange color. Taste it here — it should be savory with a hint of sweetness.
- Make the cheese sauce. Return the pot to medium-low heat. Pour in the milk and stir until combined. Gradually add the shredded cheddar cheese, a handful at a time, stirring constantly. Keep stirring until each addition is fully melted before adding more. This takes about 3-4 minutes total. The sauce will look thin at first — don’t panic. It thickens as the cheese melts and the sauce heats through.
- Combine everything. Add the cooked pasta to the pot with the cheese sauce. Stir gently until every piece of macaroni is coated in that creamy, golden sauce. If the sauce seems too thick, add a splash of warm milk or pasta water to loosen it. If it’s too thin, let it simmer for another minute or two while stirring.
- Optional: Make it bubbly. If you want a crispy topping, transfer the mac and cheese to a baking dish. Mix ½ cup panko breadcrumbs with 1 tablespoon melted butter and sprinkle over the top. Broil on high for 2-3 minutes, watching carefully so it doesn’t burn. The topping should be golden brown and crunchy.
- Rest and serve. Let the mac and cheese sit for 2-3 minutes before serving. This allows the sauce to set slightly and the flavors to meld together. Serve warm, garnished with fresh cracked pepper or a sprinkle of fresh sage if you’re feeling fancy.
A few things I’ve learned the hard way: Don’t rush the cheese melting. High heat can make the cheese seize up and turn grainy. Low and slow is the way to go. Also, if you’re making this ahead, undercook the pasta by a minute — it will continue cooking when you reheat it later.
Cooking Tips & Techniques
After making this recipe more times than I can count (including a memorable disaster where I forgot the cheese entirely — yes, really), here are the tips that make a real difference.
Roast the squash for deeper flavor. While the stovetop method works great for speed, roasting the squash takes this dish to another level. Toss the cubed squash with olive oil, salt, and pepper, then roast at 400°F for 25-30 minutes until caramelized. The browning adds a nutty, sweet depth that you just can’t get from boiling. I do this on Sunday afternoons when I’m meal prepping, and it makes weekday dinners so much easier.
Temperature matters for cheese. Cold cheese straight from the fridge takes longer to melt and can clump. Shred your cheese while the squash is cooking, and let it sit at room temperature for 10-15 minutes. This small step prevents that annoying graininess that sometimes happens with homemade cheese sauces.
Don’t skip the mustard and nutmeg. I know they sound weird in mac and cheese. I ignored them for years. But these two ingredients are what separate good mac and cheese from unforgettable mac and cheese. The mustard brightens the cheese flavor without tasting like mustard, and nutmeg adds this warm, almost floral note that makes everything taste cozier. You won’t taste either individually — you’ll just wonder why your mac and cheese tastes so much better than usual.
Save your pasta water. Before draining the pasta, scoop out about ½ cup of the starchy cooking water. If your sauce needs thinning later, this is the perfect addition. The starch helps the sauce cling to the pasta and adds body without diluting flavor.
One mistake I still make. Over-stirring the sauce after adding the cheese. Once the cheese is melted and smooth, stop stirring. Agitation can cause the sauce to break or become stringy. Gentle folds are all you need to combine everything.
Variations & Adaptations
This recipe is wonderfully flexible. Here are some variations I’ve tested and loved.
Vegetable-packed version: Add 2 cups of steamed broccoli florets or roasted cauliflower when you combine the pasta and sauce. The florets soak up the cheese sauce and become little pockets of goodness. I’ve also added sautéed mushrooms and spinach — the mushrooms add an earthy depth that pairs beautifully with the squash.
Protein boost: Stir in 2 cups of shredded rotisserie chicken or crispy bacon bits before serving. For a vegetarian protein option, add 1 can of drained and rinsed white beans (cannellini or great northern) — they blend right in and add creaminess. My husband loves this version with leftover Thanksgiving turkey.
Dairy-free adaptation: Use unsweetened oat milk or cashew milk instead of regular milk, and replace the butter with vegan butter or olive oil. For the cheese, I’ve had great success with Violife or Daiya shreds — they melt surprisingly well. The squash makes the sauce so creamy that you honestly won’t miss the dairy as much as you’d think.
Spicy kick: Add ¼ teaspoon of cayenne pepper or red pepper flakes along with the nutmeg. Or stir in 2 tablespoons of chopped pickled jalapeños just before serving. The heat cuts through the richness and adds a nice contrast to the sweet squash.
Herb-infused version: Add 1 tablespoon of fresh chopped sage or thyme when you blend the squash. These earthy herbs complement the sweetness beautifully. I’ve also topped the finished dish with crispy fried sage leaves — it looks impressive but takes only 2 minutes.
Gluten-free option: Use your favorite gluten-free pasta. I’ve tested this with Banza chickpea pasta and Jovial brown rice pasta — both work well. Just be careful not to overcook gluten-free pasta, as it can turn mushy quickly. Cook it 1 minute less than the package directs.
Serving & Storage Suggestions
Serving: Serve this mac and cheese warm, straight from the pot or baking dish. It’s perfect on its own as a main dish, but it also pairs beautifully with a simple side salad dressed with lemon vinaigrette — the acidity cuts through the richness. For a heartier meal, serve alongside roasted chicken, grilled sausage, or a piece of crispy fish. A glass of crisp white wine or a cold beer balances the creamy sauce nicely.
Presentation: For a cozy dinner, serve in shallow bowls with a sprinkle of fresh black pepper and a few sage leaves on top. If you’re feeling fancy, individual ramekins with a crispy panko topping make for an impressive presentation at dinner parties.
Storage: Leftovers keep beautifully in the refrigerator for 4-5 days. Store in an airtight container. The sauce will thicken as it sits, which is completely normal. When reheating, add a splash of milk or broth to loosen it up.
Reheating: The best way to reheat is on the stovetop over medium-low heat, stirring occasionally and adding a splash of milk as needed. The microwave works in a pinch — reheat in 30-second intervals, stirring between each, and add a tablespoon of water or milk. If you have leftovers with a crispy topping, reheat in the oven at 350°F for 10-15 minutes to restore the crunch.
Freezing: This mac and cheese freezes surprisingly well. Let it cool completely, then transfer to a freezer-safe container. It keeps for up to 3 months. Thaw overnight in the refrigerator, then reheat on the stovetop or in the oven. Note: If you added a crispy topping, freeze it separately and add it fresh when reheating.
Flavor development: Honestly, this dish tastes even better the next day. The flavors meld together overnight, and the sauce gets even creamier. I sometimes make it a day ahead on purpose — it’s that good.
Nutritional Information & Benefits
This cozy mac and cheese isn’t just delicious — it also offers some surprising nutritional benefits thanks to the butternut squash.
| Nutrient | Amount per Serving (1 cup) |
|---|---|
| Calories | 385 |
| Protein | 14g |
| Carbohydrates | 42g |
| Fiber | 4g |
| Fat | 18g |
| Saturated Fat | 10g |
| Vitamin A | 180% DV |
| Vitamin C | 25% DV |
| Calcium | 30% DV |
| Iron | 10% DV |
Butternut squash is packed with vitamin A (from beta-carotene), which supports eye health and immune function. It’s also a good source of fiber, which helps keep you full and supports digestive health. The sharp cheddar adds calcium and protein, making this a more balanced meal than traditional mac and cheese.
This recipe is naturally vegetarian and can easily be made gluten-free or dairy-free with the substitutions mentioned above. It’s also nut-free (unless you use a nut-based milk alternative). The squash adds volume and nutrients without adding many calories, so you get a bigger, more satisfying portion for fewer calories than traditional mac and cheese.
From a wellness perspective, this is one of those recipes that feels indulgent but actually has some redeeming qualities. It’s the kind of meal I feel good about serving my family on a busy weeknight — comforting, satisfying, and secretly packed with vegetables.
Frequently Asked Questions
Can I use frozen butternut squash? Absolutely. Frozen cubed butternut squash works perfectly and saves you the prep time. Use about 3 cups of frozen squash (no need to thaw) and add 2-3 minutes to the cooking time. The texture will be slightly softer, but it blends just as smoothly.
Why did my cheese sauce turn out grainy? Grainy cheese sauce usually happens from high heat or pre-shredded cheese. Always use freshly shredded cheese from a block — the anti-caking agents in pre-shredded cheese prevent smooth melting. Also, keep the heat low when melting the cheese and stir constantly. If your sauce does turn grainy, try whisking in a teaspoon of cornstarch dissolved in cold water — it can sometimes help smooth things out.
Can I make this recipe vegan? Yes! Use unsweetened oat milk or cashew milk, vegan butter, and your favorite dairy-free cheese shreds. I’ve had the best results with Violife or Miyoko’s brands. The squash makes the sauce so creamy that the vegan version is surprisingly close to the original. Add an extra tablespoon of nutritional yeast for a cheesier flavor.
How do I prevent the mac and cheese from drying out when reheating? Add a splash of milk or broth before reheating, and cover the dish with a lid or foil to trap steam. Reheat gently — low and slow is better than high heat, which can make the sauce separate. If using the microwave, stir every 30 seconds and add liquid as needed.
Can I add other vegetables to this recipe? Definitely. Roasted broccoli, cauliflower, peas, or sautéed spinach all work beautifully. Add them when you combine the pasta and sauce. Just make sure any vegetables are cooked before adding — raw vegetables will release water and thin out the sauce. I love adding roasted broccoli florets for extra texture and nutrients.
Conclusion
This cozy butternut squash mac and cheese has become a staple in my kitchen for good reason. It’s the recipe I turn to when I need something comforting, when I want to sneak extra vegetables into dinner, or when I just want to prove to myself that simple ingredients can create something extraordinary. The silky sauce, the perfectly coated pasta, the subtle sweetness of the squash — it all comes together in a way that feels both familiar and fresh.
I hope you give this recipe a try, and I hope it becomes a favorite in your kitchen too. Don’t be afraid to make it your own — add your favorite mix-ins, adjust the seasonings, or experiment with different cheeses. That’s the beauty of cooking: every batch tells a slightly different story. If you make this, I’d love to hear how it turned out. Drop a comment below, share your twist on the recipe, or tag me in your photos. And if you’re looking for more cozy comfort food, you might also enjoy my creamy Tuscan chicken or one-pot garlic parmesan pasta — both are perfect for those nights when only something warm and satisfying will do.
Until next time, happy cooking — and don’t forget to taste as you go. Some of the best discoveries happen when you trust your instincts over a recipe. I learned that from a neighbor with a cracked casserole dish, and I’m so glad I did.
Pin This Recipe!
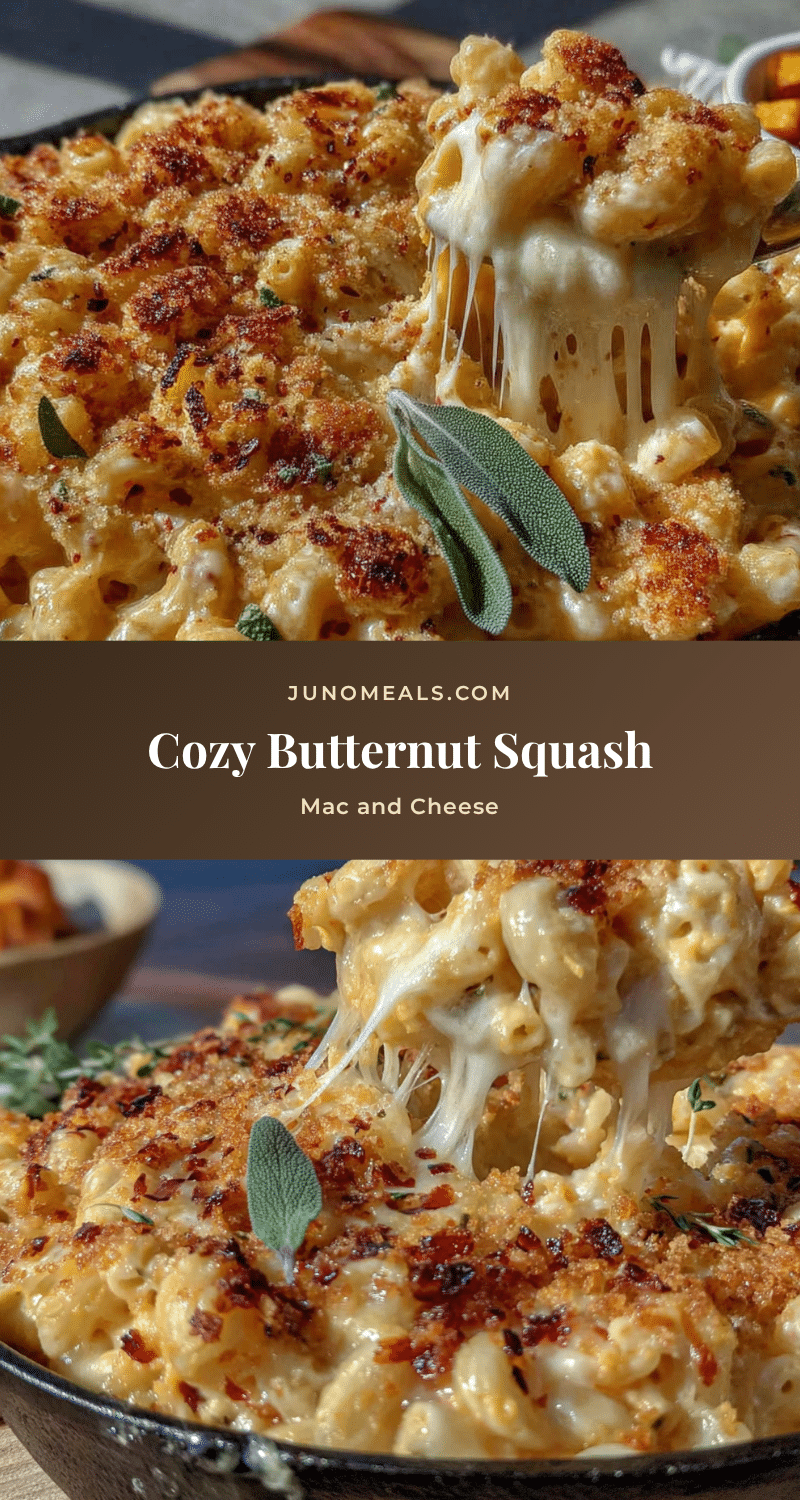
Easy One-Pot Butternut Squash Mac and Cheese

This creamy, velvety mac and cheese gets a healthy twist from roasted butternut squash blended into the cheese sauce. It’s a one-pot wonder that’s ready in under 30 minutes and packed with flavor.
- Prep Time: 15 minutes
- Cook Time: 20 minutes
- Total Time: 35 minutes
- Yield: 4 servings 1x
- Category: Main Course
- Cuisine: American
Ingredients
- 1 medium butternut squash (about 2 pounds), peeled, seeded, and cubed into 1-inch pieces
- 8 ounces elbow macaroni (about 2 cups)
- 8 ounces sharp cheddar cheese, freshly shredded (about 2 cups)
- 1 cup whole milk
- 2 tablespoons unsalted butter
- 1 cup low-sodium chicken or vegetable broth
- 3 cloves garlic, minced
- 1 teaspoon Dijon mustard
- 1 teaspoon fine sea salt, plus more for pasta water
- ½ teaspoon freshly ground black pepper
- ¼ teaspoon freshly grated nutmeg
- Optional: ½ cup panko breadcrumbs mixed with 1 tablespoon melted butter for topping
Instructions
- Prep the squash: Peel the butternut squash, cut off the top and bottom, slice in half lengthwise, and scoop out the seeds. Cut the flesh into 1-inch cubes.
- In a large pot or Dutch oven, combine the cubed squash with 1 cup of broth. Bring to a boil over medium-high heat, then reduce to medium-low, cover, and simmer for 12-15 minutes until the squash is tender and the liquid has mostly evaporated.
- While the squash simmers, bring a separate pot of salted water to a boil. Cook the macaroni according to package directions until al dente (7-9 minutes). Drain well (do not rinse) and set aside.
- Remove the pot from heat. Add the butter, minced garlic, Dijon mustard, salt, pepper, and nutmeg to the cooked squash. Using an immersion blender, blend until completely smooth. (Alternatively, transfer to a regular blender and blend in batches.)
- Return the pot to medium-low heat. Pour in the milk and stir until combined. Gradually add the shredded cheddar cheese, a handful at a time, stirring constantly until each addition is fully melted (about 3-4 minutes total).
- Add the cooked pasta to the pot and stir gently until every piece is coated in the cheese sauce. If the sauce is too thick, add a splash of warm milk or pasta water. If too thin, let it simmer for another minute or two.
- Optional: For a crispy topping, transfer the mac and cheese to a baking dish. Mix ½ cup panko breadcrumbs with 1 tablespoon melted butter and sprinkle over the top. Broil on high for 2-3 minutes until golden brown.
- Let the mac and cheese rest for 2-3 minutes before serving. Serve warm, garnished with fresh cracked pepper or fresh sage if desired.
Notes
For deeper flavor, roast the cubed squash at 400°F for 25-30 minutes instead of simmering. Let shredded cheese come to room temperature for smoother melting. Don’t skip the mustard and nutmeg—they enhance the cheese flavor without being noticeable. Save pasta water to thin the sauce if needed. This dish tastes even better the next day.
Nutrition
- Serving Size: 1 cup
- Calories: 385
- Sugar: 6
- Sodium: 580
- Fat: 18
- Saturated Fat: 10
- Carbohydrates: 42
- Fiber: 4
- Protein: 14
Keywords: butternut squash mac and cheese, one-pot mac and cheese, healthy mac and cheese, vegetarian mac and cheese, easy mac and cheese


