I pulled the pan out of the oven, and the smell hit me first—garlic, thyme, and that toasty scent of rice soaking up chicken drippings. My husband walked into the kitchen without saying a word, grabbed a fork, and just stood there eating straight from the pan. I didn’t even bother with plates. That was the moment I knew this easy one-pan lazy chicken and rice dinner had earned its permanent spot in our weekly rotation.
Honestly, this recipe started out of pure exhaustion. I had a long day, the fridge looked sad, and I needed something that didn’t require a million steps or a sink full of dishes. I threw a few chicken thighs into a skillet, dumped some rice around them, and prayed it would work. It did—better than I expected, actually. The rice came out fluffy, the chicken stayed juicy, and the whole thing came together with almost no effort on my part.
There is something about a meal that cooks itself while you sit on the couch that just feels like a win. This easy one-pan lazy chicken and rice dinner is that kind of meal. It is forgiving, flexible, and somehow tastes like you spent hours in the kitchen when you really just opened a few cans and let the oven do the work. I have made it at least a dozen times since that first desperate attempt, and it has never let me down.
Why You’ll Love This Recipe
Let me tell you why this one-pan chicken and rice has become my go-to for busy nights, lazy Sundays, and everything in between.
- One Pan, Minimal Mess: You only dirty one skillet. That is it. No extra pots, no separate bowls, no colander to rinse. Dinner is done, and cleanup takes about two minutes.
- Simple Pantry Ingredients: Chicken, rice, broth, a few seasonings, and maybe some veggies if you are feeling fancy. You probably have most of this stuff already.
- Perfect for Meal Prep: This recipe makes enough for leftovers, and honestly, it tastes even better the next day when the flavors have had time to meld together.
- Family-Approved: My picky-eater nephew actually asked for seconds. That never happens. This is one of those rare dishes that pleases both kids and adults without compromise.
- Foolproof Method: I have tested this recipe multiple times with different cuts of chicken and types of rice. It works every single time as long as you follow a few simple rules.
What makes this different from other chicken and rice recipes? It is the ratio. So many recipes end up with mushy rice or dry chicken because the liquid amounts are off. I spent several soggy dinners figuring out the perfect balance so you do not have to. The rice comes out tender but not sticky, and the chicken stays moist with that golden-brown skin on top.
This is the kind of meal that makes you feel like you have your life together, even on days when you definitely do not. It is comfort food that does not require a complicated grocery list or advanced planning. Just a little bit of faith and a hot oven.
What Ingredients You Will Need
This recipe uses simple, wholesome ingredients that come together to create something surprisingly delicious. No weird specialty items or hard-to-find spices here.
- Chicken thighs, bone-in and skin-on (about 4-6 thighs, roughly 2 pounds) — The bone keeps the meat moist during cooking, and the skin gets beautifully crispy. You can use boneless thighs, but reduce the cooking time by about 10 minutes.
- Long-grain white rice (1 ½ cups) — I prefer jasmine or basmati for their fluffy texture. Do not use instant rice or minute rice here; it will turn to mush.
- Chicken broth (2 ½ cups) — Low-sodium is best so you can control the salt. I like Swanson or Kitchen Basics for consistent flavor.
- Yellow onion (1 medium, diced) — Adds sweetness and depth as it cooks down.
- Garlic cloves (4 cloves, minced) — Fresh garlic makes a difference here. Skip the jarred stuff if you can.
- Butter (2 tablespoons) — For sautéing the aromatics and adding richness to the rice.
- Dried thyme (1 teaspoon) — Earthy and slightly floral. Pairs beautifully with chicken.
- Paprika (1 teaspoon) — Adds color and a subtle smokiness. Smoked paprika works great too.
- Salt (1 ½ teaspoons, divided) — Adjust based on your broth’s saltiness.
- Black pepper (½ teaspoon, freshly ground)
- Optional add-ins: Frozen peas (½ cup), sliced carrots (1 cup), or chopped parsley for garnish. These are nice but not necessary.
For the best results, use chicken thighs with the skin on. The skin renders fat that flavors the rice as it cooks, and it gets crispy in the oven. If you are watching your fat intake, you can remove the skin before eating, but I would keep it on during cooking for flavor.
If you want to swap the rice, brown rice works but needs more liquid and a longer cooking time (about 45-50 minutes). I have also used basmati rice with great success—it stays separate and fluffy. Avoid short-grain rice like sushi rice, which gets too sticky.
Equipment Needed
You do not need much for this recipe, which is part of the beauty of it.
- Large oven-safe skillet (12-inch cast iron or stainless steel) — This is the star of the show. I use my trusty Lodge cast iron skillet for everything, and it works perfectly here. If you do not have an oven-safe skillet, you can sear the chicken in a regular pan and transfer everything to a baking dish.
- Sharp knife — For dicing the onion and mincing garlic. A dull knife makes prep miserable.
- Cutting board — Preferably wood or plastic. Keep it stable with a damp paper towel underneath.
- Measuring cups and spoons — Rice-to-liquid ratios matter, so measure accurately.
- Wooden spoon or spatula — For stirring and scraping up the brown bits from the pan.
- Aluminum foil — To cover the skillet during the first part of baking so the rice steams properly.
If you are using a stainless steel skillet, make sure it is oven-safe up to 400°F. Most are, but check the handle. Some nonstick pans have plastic handles that cannot handle oven heat. I learned that the hard way, and it was not pretty.
Preparation Method
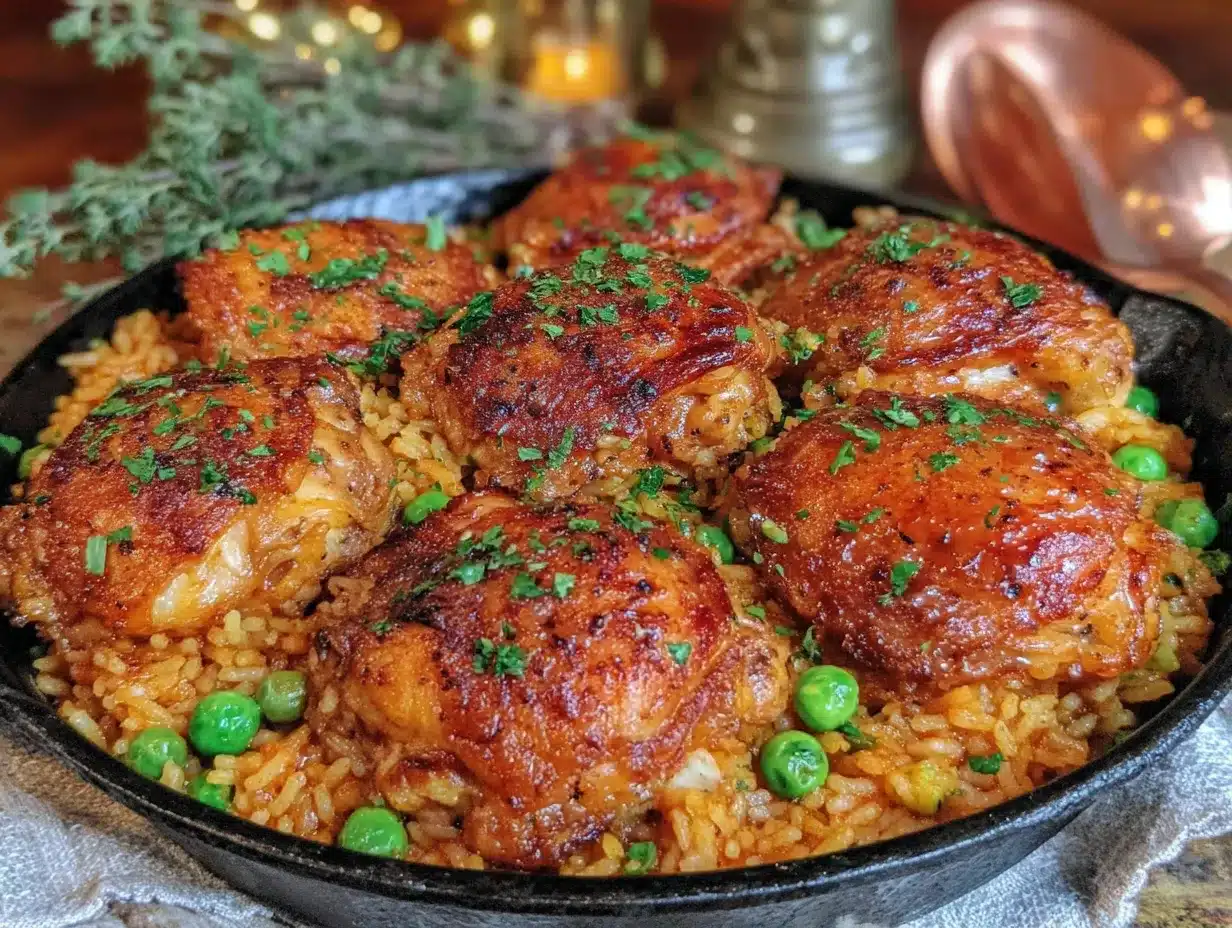
Preheat your oven to 375°F. Get everything prepped before you start cooking—chop the onion, mince the garlic, measure out the rice and broth. Trust me, it makes the process smoother.
Step 1: Season the chicken. Pat the chicken thighs dry with paper towels. This is important for crispy skin. Season both sides with 1 teaspoon of salt, the paprika, and half the black pepper. Let them sit while you heat the pan.
Step 2: Sear the chicken. Heat your skillet over medium-high heat. Add 1 tablespoon of butter and let it melt until it sizzles. Place the chicken thighs skin-side down in the skillet. Do not crowd them—work in batches if needed. Cook for 5-6 minutes until the skin is golden brown and crispy. Flip and cook for another 3 minutes. The chicken will not be fully cooked yet, and that is fine. Remove the chicken to a plate and set aside.
Step 3: Sauté the aromatics. Reduce the heat to medium. Add the remaining 1 tablespoon of butter to the skillet. Toss in the diced onion and cook for 3-4 minutes until it turns translucent and starts to soften. Add the minced garlic and dried thyme, and cook for another 30 seconds until fragrant. Stir constantly so the garlic does not burn.
Step 4: Toast the rice. Add the rice to the skillet and stir it around for about 2 minutes. You want the grains to get slightly translucent at the edges. This step adds a nutty flavor and helps the rice stay separate instead of clumping.
Step 5: Add the liquid. Pour in the chicken broth and the remaining ½ teaspoon of salt and pepper. Stir everything together, scraping up any browned bits from the bottom of the pan. Those bits are pure flavor—do not leave them behind. Bring the liquid to a gentle simmer.
Step 6: Arrange the chicken. Nestle the seared chicken thighs back into the skillet, skin-side up, pushing them slightly into the rice. The rice should be mostly submerged in the liquid. If you are adding frozen peas or carrots, scatter them around the chicken now.
Step 7: Bake covered. Cover the skillet tightly with aluminum foil. Bake for 25 minutes. The steam trapped inside will cook the rice perfectly.
Step 8: Bake uncovered. Remove the foil carefully—hot steam will escape. Continue baking for another 15-20 minutes until the chicken skin crisps up again and the rice is tender and has absorbed most of the liquid. The internal temperature of the chicken should reach 165°F.
Step 9: Rest before serving. Let the skillet rest for 5 minutes off the heat. This allows the rice to absorb any remaining liquid and makes it easier to serve. Fluff the rice gently with a fork before scooping.
If the rice looks a little wet after the cooking time, do not panic. Let it rest uncovered for another 5 minutes, and it will usually absorb the excess. If it is still soupy, you might have used too much broth or your oven runs cool. Next time, reduce the broth by ¼ cup.
Cooking Tips & Techniques
I have made this easy one-pan lazy chicken and rice dinner more times than I can count, and I have definitely made my share of mistakes along the way. Here is what I have learned so you can skip the trial and error.
Do not skip the searing step. I know it adds an extra 10 minutes, but it makes a huge difference. The Maillard reaction on the chicken skin creates deep, savory flavor that infuses the entire dish. Plus, you get those browned bits in the pan that flavor the rice. If you are truly in a rush, you can skip it, but the final dish will be noticeably less flavorful.
Watch your liquid ratio. This is the most common mistake people make with rice dishes. Too much liquid and you get porridge. Too little and you get crunchy, undercooked rice. I have found that 2 ½ cups of broth to 1 ½ cups of rice is the sweet spot for oven-baked rice. If you are using a different type of rice, adjust accordingly.
Cover it tightly. The foil needs to create a good seal so steam does not escape. If your skillet is too wide for the foil to stay put, double up the foil or use a lid if your skillet has one. I once used a loose piece of foil, and the rice came out dry and crunchy. Never again.
Let it rest. I know it is tempting to dig in right away, but that resting time is crucial. The rice continues to absorb liquid as it sits, and the chicken juices redistribute. Cutting into the chicken too soon will cause it to dry out.
Check your oven temperature. Ovens vary wildly. If your rice is still crunchy after the recommended baking time, your oven might run cool. An oven thermometer is a cheap investment that saves a lot of frustration.
Variations & Adaptations
This recipe is incredibly flexible, and I have tried several variations depending on what I have in the pantry.
Creamy Mushroom Version: Add 8 ounces of sliced mushrooms when you sauté the onions. After the rice is cooked, stir in ½ cup of heavy cream and ¼ cup of grated Parmesan cheese. It turns into a rich, comforting dish that feels like a hug in a bowl.
Spicy Cajun Twist: Replace the thyme and paprika with 2 teaspoons of Cajun seasoning. Add a diced bell pepper and a stalk of celery along with the onion. This version has a nice kick and pairs well with a side of collard greens or cornbread.
Lemon Herb Version: Add the zest of one lemon and 2 tablespoons of fresh lemon juice to the broth before baking. Throw in a few sprigs of fresh rosemary and thyme. The brightness cuts through the richness of the chicken beautifully.
Vegetarian Adaptation: Swap the chicken for 2 cups of diced mushrooms and 1 can of chickpeas (drained). Use vegetable broth instead of chicken broth. The cooking time stays about the same, though you will need to check the rice for doneness at the 25-minute mark.
Slow Cooker Method: Sear the chicken as directed, then transfer everything to a slow cooker. Cook on low for 4-5 hours or high for 2-3 hours. The rice will be softer and less distinct, but it is still delicious and even more hands-off.
I personally love the lemon herb version during spring and summer. It feels lighter and brighter, and the fresh herbs make the whole kitchen smell incredible. My husband always says it reminds him of Sunday dinners at his grandmother’s house.
Serving & Storage Suggestions
This dish is a complete meal on its own, but it pairs beautifully with a simple side dish if you want to round it out.
Serving Temperature: Serve hot, straight from the oven. The rice should be steaming, and the chicken skin should still have a bit of crispness. Garnish with fresh parsley or chopped green onions for a pop of color.
Side Dish Ideas: A simple green salad with lemon vinaigrette cuts through the richness nicely. Steamed green beans or roasted asparagus also work well. If you want something heartier, serve it with crusty bread to soak up any extra juices.
Storage: Let the dish cool completely before storing. Transfer leftovers to an airtight container and refrigerate for up to 4 days. The flavors actually deepen overnight, so leftovers are often better than the first serving.
Freezing: You can freeze this dish for up to 3 months. Portion it into individual containers for easy lunches. Thaw overnight in the refrigerator before reheating.
Reheating: The best way to reheat is in a covered skillet over medium-low heat with a splash of broth or water to add moisture. Microwave works in a pinch, but the rice can dry out. If using the microwave, cover the bowl with a damp paper towel to create steam.
I have found that this dish tastes even better the next day. The rice absorbs more flavor, and the chicken becomes incredibly tender. It is one of those rare recipes that gets better with time.
Nutritional Information & Benefits
Here is an approximate nutritional breakdown per serving (based on 4 servings with skin-on chicken thighs):
- Calories: 520
- Protein: 35g
- Fat: 22g
- Carbohydrates: 45g
- Fiber: 1g
- Sodium: 780mg
Chicken thighs are higher in fat than breasts, but that fat contributes to the moistness and flavor. They are also rich in B vitamins, selenium, and phosphorus, which support energy metabolism and bone health.
White rice provides quick energy and is easy to digest. If you want more fiber, swap half the white rice for brown rice or add vegetables like peas and carrots. I sometimes stir in a handful of spinach at the end for extra nutrients.
This recipe is naturally gluten-free as long as you use certified gluten-free broth. It is also nut-free and egg-free. If you are watching your sodium, use low-sodium broth and reduce the added salt.
I personally love that this meal keeps me full for hours without feeling heavy. It is comfort food that does not leave me sluggish afterward.
Conclusion
This easy one-pan lazy chicken and rice dinner has saved me on countless busy weeknights, lazy Sundays, and everything in between. It is the kind of recipe that proves you do not need fancy techniques or complicated ingredients to make something truly satisfying. Just good food, cooked simply, shared with the people you love.
I encourage you to make this recipe your own. Add your favorite vegetables, play with the seasonings, or try one of the variations I shared. The beauty of this dish is that it is forgiving and adaptable. You really cannot mess it up.
If you give this recipe a try, I would love to hear how it turned out. Leave a comment below and let me know what variations you tried. Did you add mushrooms? Go heavy on the garlic? Make it spicy? Share your stories—I genuinely love reading them.
Here is to more lazy dinners that taste like anything but.
Frequently Asked Questions
Can I use chicken breasts instead of thighs?
Yes, but be careful not to overcook them. Boneless, skinless chicken breasts will cook faster—check for doneness at the 20-minute mark. The rice might need a few extra minutes after removing the chicken.
Why is my rice still crunchy after baking?
Your oven might run cool, or the foil might not have been sealed tightly enough. Next time, check your oven temperature with an oven thermometer and make sure the foil is snug. You can also add ¼ cup more broth if your rice tends to be undercooked.
Can I make this in a regular baking dish instead of a skillet?
Absolutely. Sear the chicken in any pan, then transfer everything to a 9×13 baking dish. Cover with foil and bake as directed. The cooking time should be about the same.
How do I prevent the rice from becoming mushy?
Use long-grain rice, do not stir the rice too much after adding the liquid, and make sure you measure accurately. Also, let the dish rest after baking so the rice absorbs any excess liquid.
Can I add frozen vegetables directly to the pan?
Yes! Frozen peas, carrots, or corn can be added right before baking. No need to thaw them first. Just scatter them around the chicken and they will cook perfectly in the steam.
Pin This Recipe!

Easy One-Pan Lazy Chicken and Rice

A simple, one-pan dinner featuring juicy bone-in chicken thighs and fluffy rice, all cooked together with minimal effort and cleanup. Perfect for busy weeknights or lazy Sundays.
- Prep Time: 15 minutes
- Cook Time: 45 minutes
- Total Time: 1 hour
- Yield: 4 servings 1x
- Category: Main Course
- Cuisine: American
Ingredients
- 4–6 bone-in, skin-on chicken thighs (about 2 pounds)
- 1 ½ cups long-grain white rice (jasmine or basmati preferred)
- 2 ½ cups low-sodium chicken broth
- 1 medium yellow onion, diced
- 4 cloves garlic, minced
- 2 tablespoons butter
- 1 teaspoon dried thyme
- 1 teaspoon paprika
- 1 ½ teaspoons salt, divided
- ½ teaspoon freshly ground black pepper
- Optional: ½ cup frozen peas, 1 cup sliced carrots, chopped parsley for garnish
Instructions
- Preheat oven to 375°F.
- Pat chicken thighs dry with paper towels. Season both sides with 1 teaspoon salt, paprika, and half the black pepper.
- Heat a large oven-safe skillet over medium-high heat. Add 1 tablespoon butter and let it melt until sizzling. Place chicken thighs skin-side down in the skillet (work in batches if needed). Cook for 5-6 minutes until skin is golden brown and crispy. Flip and cook for another 3 minutes. Remove chicken to a plate and set aside.
- Reduce heat to medium. Add remaining 1 tablespoon butter to the skillet. Add diced onion and cook for 3-4 minutes until translucent. Add minced garlic and dried thyme, cook for 30 seconds until fragrant, stirring constantly.
- Add rice to the skillet and stir for about 2 minutes until grains become slightly translucent at the edges.
- Pour in chicken broth and remaining ½ teaspoon salt and pepper. Stir, scraping up any browned bits from the bottom of the pan. Bring to a gentle simmer.
- Nestle seared chicken thighs back into the skillet, skin-side up, pushing them slightly into the rice. If using frozen peas or carrots, scatter them around the chicken now.
- Cover the skillet tightly with aluminum foil. Bake for 25 minutes.
- Remove foil carefully. Continue baking for another 15-20 minutes until chicken skin crisps up and rice is tender. Internal temperature of chicken should reach 165°F.
- Let the skillet rest for 5 minutes off the heat. Fluff rice gently with a fork before serving.
Notes
Do not skip the searing step—it adds deep flavor. Use long-grain white rice; avoid instant or minute rice. Cover skillet tightly with foil to ensure proper steaming. Let the dish rest for 5 minutes after baking to allow rice to absorb excess liquid. For a vegetarian version, swap chicken for mushrooms and chickpeas, and use vegetable broth.
Nutrition
- Serving Size: 1 serving (about 1 c
- Calories: 520
- Sugar: 2
- Sodium: 780
- Fat: 22
- Saturated Fat: 8
- Carbohydrates: 45
- Fiber: 1
- Protein: 35
Keywords: one-pan chicken and rice, lazy dinner, easy chicken recipe, one skillet meal, weeknight dinner, comfort food, chicken thighs and rice


