My nephew asked why I couldn’t just crush the cookies and press them into the pan without melting butter first. I started to explain why that wouldn’t work — then stopped. He was eight, and he’d watched me make a dozen crusts before. He knew the drill. But something about his certainty made me pause. I handed him the bag of Biscoff cookies and a rolling pin, figuring we’d salvage the lesson somehow. Twenty minutes later, that crust held together better than any butter-bound version I’d ever made. The secret? The cookies themselves are so buttery and spiced that they practically glue themselves together under pressure.
Honestly, I was a little annoyed at how well it worked. I mean, I’d been doing it the “right” way for years — measuring butter, chilling the pan, worrying about crumb consistency. And here was a kid with a bag of cookies and a stubborn idea showing me up in my own kitchen. The power went out halfway through our baking afternoon, which is why we pivoted to no-bake in the first place. Sometimes the best recipes come from happy accidents — or in this case, a brownout and a very determined eight-year-old.
These Easy No-Bake Biscoff Cheesecake Bars for Fall have become my go-to for every autumn gathering since that afternoon. The filling is ridiculously simple — cream cheese, cookie butter, a little sugar, and some heavy cream. No gelatin, no eggs, no oven required. The topping is a drizzle of melted Biscoff spread and a sprinkle of crushed cookies that makes them look like you spent hours. Maybe you’ve been there — standing in a kitchen that suddenly went dark, trying to figure out how to salvage dessert plans. This recipe is the answer to that exact problem. It’s the kind of thing that makes you wonder why you ever bothered with complicated methods in the first place.
Why You’ll Love This Recipe
These cheesecake bars have become my most-requested fall dessert, and I completely understand why. They hit every single note you want from a seasonal treat without any of the stress.
- No-Bake & Foolproof : No water baths, no cracked tops, no worrying about whether your oven runs hot. You mix, you chill, you eat. It’s that simple.
- Minimal Ingredients : You need exactly seven ingredients for the whole thing, and four of them are probably in your kitchen right now. No specialty store runs required.
- Perfect for Fall Gatherings : Thanksgiving, Halloween parties, cozy Friendsgiving dinners — these bars fit every autumn occasion. They travel well and look gorgeous on a dessert table.
- Make-Ahead Friendly : They actually taste better after sitting in the fridge overnight. You can make them two days ahead without any quality loss.
- Crowd-Pleasing Flavor : That caramelized, spiced Biscoff flavor with creamy cheesecake filling is basically fall in dessert form. Kids love them. Adults love them more.
What makes these bars different from every other no-bake cheesecake recipe out there is the texture. Most no-bake cheesecakes use whipped cream or Cool Whip, which gives you a light, almost airy filling. This one uses a combination of cream cheese and heavy cream that you whip yourself, creating a dense, silky, almost mousse-like texture that actually tastes like real cheesecake. The cookie butter — that magical spread made from crushed Biscoff cookies — gets folded right into the filling, so every bite tastes like the cookies themselves.
I tested this recipe six times before I got the ratios right. Too much cookie butter and the filling gets heavy. Too little and you lose that signature flavor. The version I’m sharing with you is the one that made my nephew eat three bars in one sitting and then ask if we could make them again the next weekend. That’s the kind of endorsement you can trust.
What Ingredients You Will Need
This recipe uses simple, wholesome ingredients to deliver that signature Biscoff flavor and creamy texture without any complicated steps. Most of these are pantry staples, and the ones that aren’t are easy to find at any grocery store.
For the Crust
- Biscoff cookies – 250g (about 2 cups crushed). You’ll need the actual cookies, not the spread. I use the original flavor for the crust. (The caramelized spice flavor is essential here.)
- Melted butter – 60g (¼ cup). Unsalted is best so you control the salt level. If you only have salted, skip the pinch of salt in the filling.
- Light brown sugar – 2 tablespoons, packed. This adds a little extra molasses depth that plain white sugar doesn’t give you.
For the Cheesecake Filling
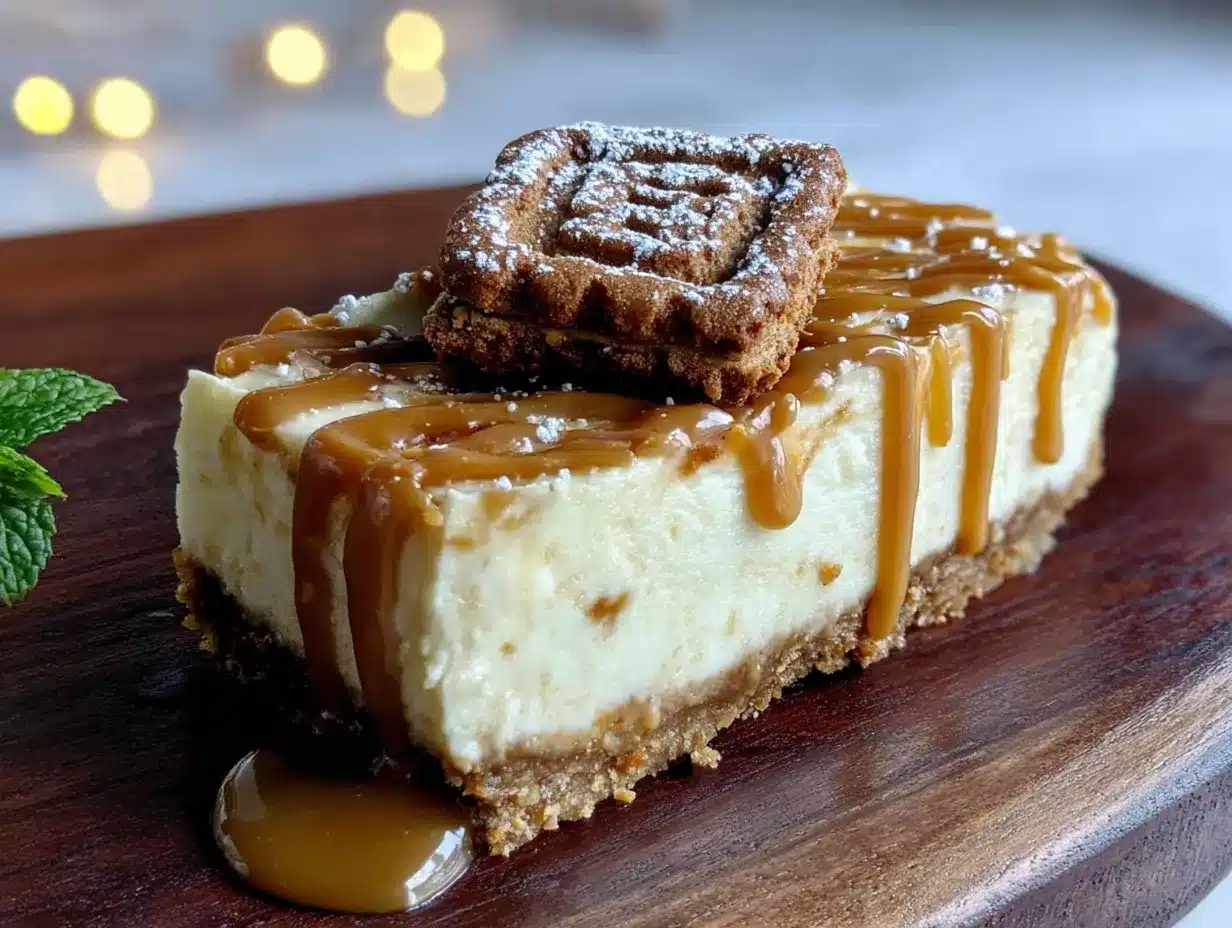
- Full-fat cream cheese – 450g (two 8-ounce blocks). Bring it to room temperature. Cold cream cheese creates lumps that no amount of mixing will fix. I recommend Philadelphia for the smoothest results.
- Biscoff cookie spread – 200g (¾ cup). This is the creamy spread, not the crunchy version. Look for it near the peanut butter or in the international foods aisle.
- Powdered sugar – 80g (⅔ cup). Sift it if it’s clumpy. Nobody wants sugar lumps in their cheesecake.
- Vanilla extract – 1 teaspoon. Pure vanilla makes a difference here. The fake stuff has a chemical aftertaste that doesn’t play well with the Biscoff spices.
- Heavy cream – 240ml (1 cup). Keep it cold. You’ll be whipping it into stiff peaks, and warm cream just won’t cooperate.
- Pinch of salt – Just a small one. It balances the sweetness.
For the Topping
- Biscoff cookie spread – 60g (¼ cup), warmed slightly for drizzling.
- Crushed Biscoff cookies – 3-4 cookies, crushed into crumbs and small pieces.
A quick note on substitutions: You can use a different brand of speculoos cookies if you can’t find Biscoff specifically. Lotus is the most common, but any caramelized spice cookie will work. For the cookie spread, look for “speculoos spread” or “cookie butter” — it’s the same thing under different names. If you need a dairy-free version, use vegan cream cheese and coconut cream instead of heavy cream. The texture will be slightly different, but the flavor is still fantastic.
Equipment Needed
You don’t need anything fancy for these bars, which is part of why I love them so much. Here’s what you’ll need:
- 9×9-inch square baking pan – This is the perfect size for bars that are thick enough to feel decadent but slice neatly. An 8×8 works too; your bars will just be a little taller.
- Parchment paper – Line your pan with two overlapping strips that hang over the edges. This creates “handles” that let you lift the entire block of cheesecake out for clean slicing.
- Food processor or rolling pin – A food processor makes quick work of crushing the cookies into fine crumbs. If you don’t have one, put the cookies in a ziplock bag and go at them with a rolling pin. It’s therapeutic, honestly.
- Electric hand mixer or stand mixer – You need something to whip the cream and beat the cream cheese. A whisk and some serious arm strength could work, but I wouldn’t recommend it.
- Large mixing bowls – At least two. One for the crust mixture and one for the filling.
- Spatula – For scraping every last bit of filling into the pan. Don’t waste that goodness.
- Measuring cups and spoons – Standard set for accurate measurements.
If you don’t have a 9×9 pan, a 9-inch springform pan works beautifully too. The bars will be round, but they’ll taste exactly the same. Just make sure your springform is completely sealed — the filling is thin enough to seep through a crack.
Preparation Method
- Prepare your pan. Cut two long strips of parchment paper, each about 8 inches wide. Lay them in the pan perpendicular to each other, letting the ends hang over the edges. This creates a sling that makes lifting the finished cheesecake out incredibly easy. Set the pan aside.
- Make the crust. Put the Biscoff cookies in your food processor and pulse until you have fine crumbs. You should have about 2 cups of crumbs. If you’re using the bag-and-rolling-pin method, crush them until no large pieces remain — you want a consistent texture. Transfer the crumbs to a medium bowl. Add the melted butter and brown sugar. Stir with a fork until every crumb is coated. The mixture should look like wet sand and hold together when you squeeze it.
- Press the crust. Dump the crumb mixture into your prepared pan. Use the bottom of a flat measuring cup or glass to press it down firmly and evenly. Don’t skimp on this step — a tightly packed crust won’t crumble when you cut the bars. Press it all the way to the edges and into the corners. Pop the pan in the fridge while you make the filling.
- Whip the cream. In a clean bowl (make sure there’s no grease or water residue), pour in the cold heavy cream. Using your hand mixer or stand mixer with the whisk attachment, whip on medium-high speed until stiff peaks form. This takes about 3-4 minutes. You’ll know it’s ready when you lift the beaters and the cream holds its shape without drooping. Set this bowl aside in the fridge.
- Beat the cream cheese. In a large bowl, beat the room-temperature cream cheese with the paddle attachment or beaters on medium speed until it’s completely smooth. Scrape down the sides and bottom of the bowl. Add the Biscoff spread, powdered sugar, vanilla, and salt. Beat on medium-low until everything is combined and smooth. Don’t overmix — you just want it uniform, not aerated.
- Fold in the whipped cream. Take your whipped cream out of the fridge. Add about a third of it to the cream cheese mixture. Use a spatula to fold it in gently — cut through the center, scrape along the bottom, and turn the bowl. Repeat until the first third is mostly incorporated. Add the remaining whipped cream and fold until you can’t see any white streaks. The mixture should be light, fluffy, and uniform in color.
- Spread the filling. Take the crust out of the fridge. Spoon the filling on top of the crust and spread it evenly. Use an offset spatula if you have one — it makes getting into the corners much easier. Smooth the top as best you can.
- Add the topping. Warm the 60g of Biscoff spread in the microwave for about 15 seconds. Stir until it’s smooth and drizzle-able. Use a spoon to drizzle it over the top of the cheesecake in a random pattern. Swirl it gently with a toothpick if you want a marbled look. Sprinkle the crushed cookies over everything.
- Chill. Cover the pan with plastic wrap and refrigerate for at least 6 hours, but overnight is better. The filling needs time to set completely. If you try to cut it too early, you’ll get a delicious mess instead of clean bars. Trust me on this — I learned the hard way.
- Slice and serve. When the cheesecake is fully set, lift it out of the pan using the parchment handles. Place it on a cutting board. Use a sharp knife (run it under hot water and wipe it dry between cuts for the cleanest slices) to cut into 16 equal bars. Wipe the knife after each cut to keep the edges neat.
Cooking Tips & Techniques
Let me save you from the mistakes I made during my six test batches. These tips will make your bars turn out perfect on the first try.
Room temperature cream cheese is non-negotiable. I know you’re in a hurry. I know you forgot to take it out of the fridge. But cold cream cheese creates lumps that no amount of beating will fix — and those lumps show up in your finished bars as weird, hard bits. Take it out 2 hours before you start. If you’re really stuck, cut it into cubes and microwave it at 50% power in 10-second bursts until it’s soft but not warm.
Don’t overwhip the cream. Stiff peaks mean the cream holds its shape but still looks smooth and glossy. If you keep going, you’ll get butter. It happens fast. Watch for the moment when the cream starts to look thick and the beaters leave visible trails. Stop immediately.
Press that crust like you mean it. A loose crust crumbles when you bite into it. A tight crust holds together perfectly. Use the flat bottom of a glass and lean into it. I press for about 2 minutes, making sure every inch is compacted. The crust should feel solid and firm when you’re done.
Patience with the chill time. Six hours is the minimum. Twelve hours is ideal. Overnight is perfect. The filling needs time to firm up enough for clean slicing. I made the mistake of cutting into a batch after 4 hours once, and I ended up with cheesecake soup. Delicious soup, but soup nonetheless.
Warm knife for clean cuts. Run your knife under hot water, dry it off, and make one clean cut. Wipe the blade and repeat. This gives you those gorgeous, Instagram-worthy slices with no smearing. If you’re making these for a gathering, this step makes them look professional.
Variations & Adaptations
These bars are incredibly adaptable. Here are some ways I’ve changed them up depending on the occasion or what I had in the pantry.
Pumpkin Biscoff Bars – Add 120g (½ cup) pumpkin puree and 1 teaspoon pumpkin pie spice to the cream cheese mixture. Reduce the heavy cream to 180ml (¾ cup) to compensate for the extra moisture. This version tastes like fall in every single bite.
Chocolate-Dipped Bars – After the bars are fully set and sliced, dip one end of each bar into melted dark chocolate. Let them set on a parchment-lined baking sheet. The bitterness of the dark chocolate balances the sweetness of the Biscoff beautifully.
Gluten-Free Version – This recipe is already gluten-free if you use certified gluten-free Biscoff cookies. Lotus Biscoff cookies are made with wheat flour, so check the label. There are several gluten-free speculoos cookie brands available that work perfectly.
Mini Cheesecake Cups – Instead of a pan, use a muffin tin lined with paper liners. Press about 1 tablespoon of crust mixture into each cup, then divide the filling evenly. Chill for 4 hours instead of 6. These are perfect for parties where you don’t want to deal with slicing.
Spiced Apple Variation – Sauté 1 diced apple with 2 tablespoons butter and 1 teaspoon cinnamon until soft. Let it cool completely. Swirl it into the cheesecake filling before chilling. The apple chunks add texture and a fresh fruitiness that cuts through the richness.
Serving & Storage Suggestions
These bars are best served cold, straight from the fridge. The filling is firm but creamy at refrigerator temperature, and the crust stays perfectly crunchy. If you let them sit out too long, the filling starts to soften and lose its structure.
For presentation, arrange the bars on a platter with a few whole Biscoff cookies tucked around them. A dusting of cinnamon or a drizzle of caramel sauce makes them look extra special for holidays. I like to serve them with a dollop of lightly sweetened whipped cream on the side — it adds a nice contrast to the dense cheesecake.
Storage is simple: keep them in an airtight container in the refrigerator for up to 5 days. Layer them between sheets of parchment paper so the toppings don’t stick together. The flavor actually improves after day one as the Biscoff flavor melds with the cream cheese.
You can freeze these bars too. Wrap individual bars tightly in plastic wrap, then place them in a freezer-safe container. They’ll keep for up to 3 months. Thaw them in the refrigerator overnight before serving. Don’t thaw them at room temperature — they’ll get too soft and lose their texture.
One thing I’ve noticed: these bars develop a deeper, more caramelized flavor after a day or two in the fridge. The Biscoff spread seems to intensify as it sits. So if you’re making them for a special occasion, make them two days ahead. Your future self will thank you.
Nutritional Information & Benefits
Per bar (based on 16 servings): Approximately 320 calories, 22g fat, 28g carbohydrates, 4g protein, 18g sugar. These are estimates and will vary based on specific brands and any modifications you make.
While these bars are definitely a treat, there are a few bright spots worth mentioning. The cream cheese provides calcium and a small amount of protein. The Biscoff cookies contain warming spices like cinnamon and nutmeg, which have anti-inflammatory properties. And honestly? Sometimes the nutritional benefit of a dessert is the joy it brings to a table full of people you love.
For dietary considerations: This recipe contains dairy and wheat. It can be made gluten-free with certified gluten-free cookies and dairy-free with vegan cream cheese and coconut cream. It’s not suitable for a low-sugar or keto diet as written, but you could experiment with a sugar-free cookie butter alternative.
I personally love that this dessert doesn’t pretend to be health food. It’s a celebration — and celebrations deserve the real thing.
Conclusion
These Easy No-Bake Biscoff Cheesecake Bars for Fall have become my signature autumn dessert, and I don’t see that changing anytime soon. They’re the recipe I bring to every Friendsgiving, the one that gets requested for Thanksgiving, the one that disappears fastest at Halloween parties. There’s something about that spiced cookie crust paired with the silky, cookie-butter-infused filling that people just can’t resist.
What I love most about this recipe is how forgiving it is. You can make it ahead, you can adapt it to what you have, you can double it for a crowd. It doesn’t require any special skills or expensive equipment. It’s just good, honest dessert that tastes like fall feels — warm, comforting, and a little bit magical.
I’d love to hear how these turn out for you. Did you try one of the variations? Did your family fight over the last bar? Drop a comment below and let me know. And if you’re looking for another no-bake favorite, check out my no-bake pumpkin cheesecake bars that use a similar technique with a completely different flavor profile. Happy baking — or rather, happy no-baking!
Frequently Asked Questions
Can I use a different size pan?
Yes. A 9×13 pan will give you thinner bars that set faster (about 4 hours). An 8×8 pan will give you taller bars that need a full 8 hours to set. Adjust your chill time accordingly.
Do I have to use Biscoff brand cookies?
Not at all. Any speculoos or caramelized spice cookie will work. Lotus is the most common alternative. The flavor will be slightly different depending on the brand, but the texture will be the same.
Can I make these dairy-free?
Absolutely. Use vegan cream cheese (I like Kite Hill or Violife), coconut cream instead of heavy cream, and a plant-based butter substitute. The texture will be slightly less firm, but the flavor is still wonderful.
Why did my filling turn out lumpy?
Your cream cheese was probably too cold. Always bring it to room temperature before mixing. If you do end up with lumps, try warming the bowl slightly and beating again — sometimes that helps smooth things out.
How far in advance can I make these?
You can make them up to 3 days ahead. Store them covered in the refrigerator. They actually taste better after a day or two as the flavors meld together. For best texture, don’t exceed 5 days of storage.
Pin This Recipe!
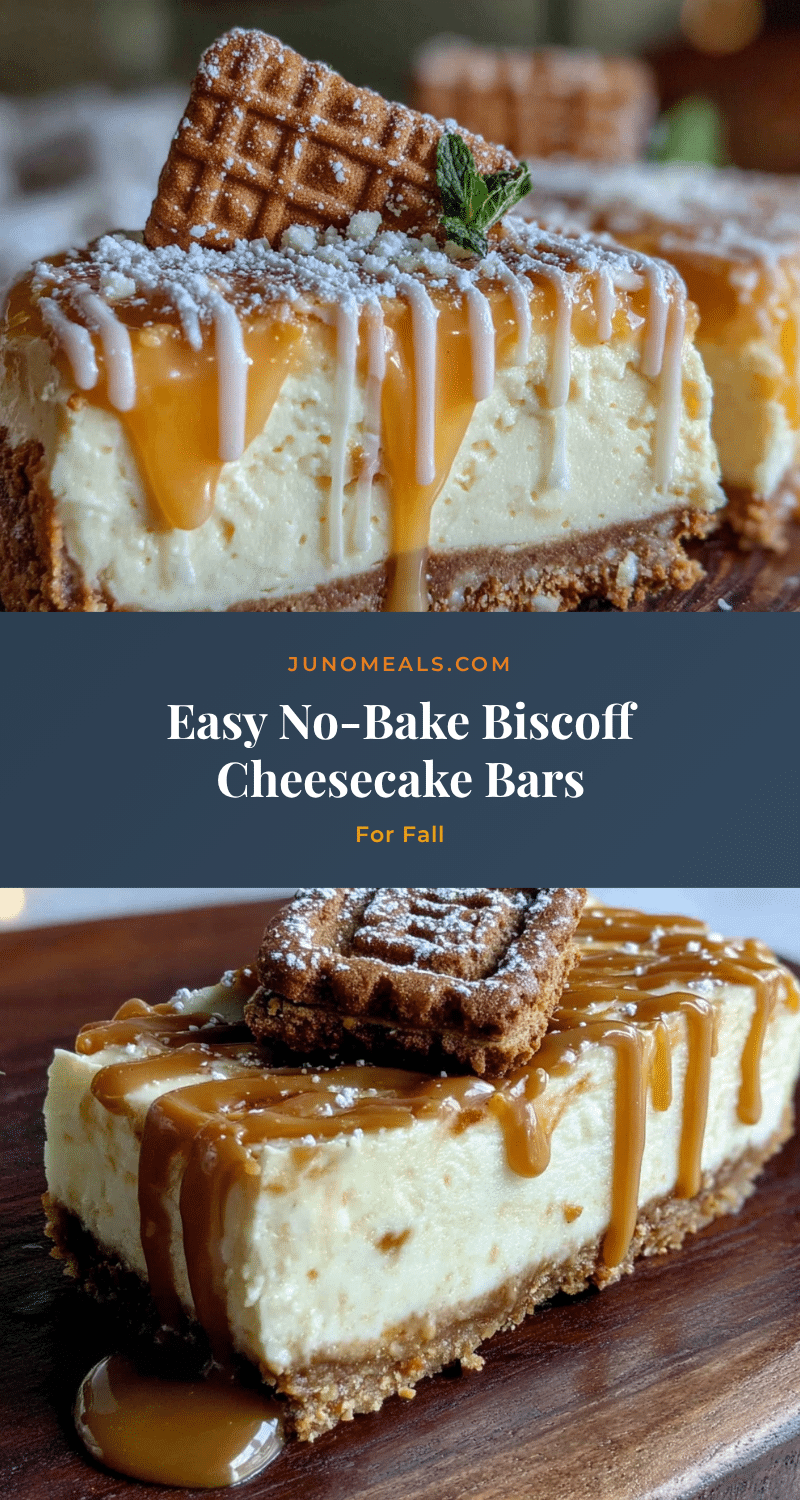
Easy No-Bake Biscoff Cheesecake Bars: Perfect Fall Dessert
These no-bake Biscoff cheesecake bars feature a buttery cookie crust and a silky, cookie-butter-infused filling. They’re the perfect make-ahead fall dessert that requires no oven and minimal effort.
- Prep Time: 20 minutes
- Cook Time: 0 minutes
- Total Time: 6 hours 20 minutes (includes chilling)
- Yield: 16 servings 1x
- Category: Dessert
- Cuisine: American
Ingredients
- 250g Biscoff cookies (about 2 cups crushed)
- 60g (¼ cup) unsalted butter, melted
- 2 tablespoons light brown sugar, packed
- 450g (two 8-ounce blocks) full-fat cream cheese, room temperature
- 200g (¾ cup) Biscoff cookie spread (creamy)
- 80g (⅔ cup) powdered sugar, sifted
- 1 teaspoon vanilla extract
- 240ml (1 cup) heavy cream, cold
- Pinch of salt
- 60g (¼ cup) Biscoff cookie spread, warmed (for topping)
- 3–4 Biscoff cookies, crushed (for topping)
Instructions
- Prepare your pan: Cut two long strips of parchment paper, each about 8 inches wide. Lay them in a 9×9-inch square baking pan perpendicular to each other, letting the ends hang over the edges to create a sling. Set aside.
- Make the crust: Pulse Biscoff cookies in a food processor until fine crumbs form (about 2 cups). Transfer to a medium bowl. Add melted butter and brown sugar. Stir with a fork until every crumb is coated and the mixture looks like wet sand.
- Press the crust: Dump the crumb mixture into the prepared pan. Use the bottom of a flat measuring cup or glass to press it down firmly and evenly, all the way to the edges and corners. Refrigerate while making the filling.
- Whip the cream: In a clean bowl, pour in cold heavy cream. Using a hand mixer or stand mixer with whisk attachment, whip on medium-high speed until stiff peaks form (about 3-4 minutes). Set aside in the fridge.
- Beat the cream cheese: In a large bowl, beat room-temperature cream cheese on medium speed until completely smooth. Scrape down sides. Add Biscoff spread, powdered sugar, vanilla, and salt. Beat on medium-low until combined and smooth.
- Fold in the whipped cream: Add about one-third of the whipped cream to the cream cheese mixture. Fold gently with a spatula until mostly incorporated. Add remaining whipped cream and fold until no white streaks remain and mixture is light and fluffy.
- Spread the filling: Remove crust from fridge. Spoon filling on top and spread evenly with an offset spatula. Smooth the top.
- Add the topping: Warm 60g Biscoff spread in microwave for about 15 seconds until smooth and drizzle-able. Drizzle over cheesecake in a random pattern. Swirl gently with a toothpick if desired. Sprinkle crushed cookies on top.
- Chill: Cover pan with plastic wrap and refrigerate for at least 6 hours, preferably overnight, until fully set.
- Slice and serve: Lift cheesecake out of pan using parchment handles. Place on cutting board. Use a sharp knife (run under hot water and wiped dry between cuts) to cut into 16 equal bars. Wipe knife after each cut for clean edges.
Notes
Room temperature cream cheese is essential to avoid lumps. Press the crust firmly for clean slices. Chill for at least 6 hours, preferably overnight. For clean cuts, use a warm knife wiped dry between slices. Bars can be stored in an airtight container in the refrigerator for up to 5 days or frozen for up to 3 months.
Nutrition
- Serving Size: 1 bar
- Calories: 320
- Sugar: 18
- Sodium: 180
- Fat: 22
- Saturated Fat: 12
- Carbohydrates: 28
- Fiber: 1
- Protein: 4
Keywords: no-bake cheesecake, Biscoff cheesecake bars, fall dessert, cookie butter cheesecake, easy dessert, no-bake dessert


