There used to be a little bakery-café on the corner of Elm and 3rd in my old neighborhood that made the most incredible vegetable platters for their Halloween party. When they closed down three years ago—the owner retired to Florida, can you blame her—I felt a genuine pang of loss. Not just for their salted caramel brownies (which were legendary), but for that skeleton veggie tray they’d put out every October. It was this perfect, silly, surprisingly delicious centerpiece that made you actually want to eat your vegetables at a party full of candy.
After six tries—including one where the “skeleton” looked more like a confused snowman—I finally got it. The secret, honestly, is in how you cut the veggies and the order you arrange them. You don’t need any special tools or artistic talent. I promise. If I can make a skeleton that doesn’t terrify small children (in a bad way), you absolutely can too.
Let me tell you, the first time I brought this to a friend’s Halloween potluck, people took photos before they took a single carrot stick. That’s the kind of reaction we’re going for here. It’s spooky, it’s healthy, and it takes maybe 20 minutes of actual work. Maybe you’ve been looking for that one dish that steals the show without stealing your whole evening? This is it. This veggie tray skeleton became my go-to for every Halloween gathering, and I have a feeling it’s about to become yours too.
Why You’ll Love This Halloween Veggie Tray Skeleton
Look, I’ve tested a lot of Halloween recipes over the years. Some are gorgeous but take hours. Others are quick but look like a hot mess. This one? It hits that sweet spot where it looks like you spent way more time than you actually did. Here’s why this recipe works so well for busy weeknights and Halloween parties alike:
- Quick & Easy: Comes together in under 25 minutes, perfect for those last-minute party invites or a fun after-school activity with the kids.
- Simple Ingredients: No fancy grocery trips needed. You likely already have most of these veggies in your fridge right now.
- Perfect for Halloween Parties: Great for potlucks, classroom celebrations, or just making a Tuesday night feel a little more festive.
- Crowd-Pleaser: Always gets rave reviews from kids and adults alike. Even the picky eaters reach for the “rib bones”.
- Unbelievably Healthy: The texture and flavor combo is next-level snack food, minus the sugar crash.
What makes this different from every other veggie tray out there is the presentation technique. Instead of just dumping veggies on a platter, you’re building a skeleton that actually looks like a skeleton. The trick is using the right vegetables for each body part—celery for the long bones, bell peppers for the organs, and cucumbers for the spine. It’s not just another veggie tray—it’s your best version of a Halloween centerpiece.
This recipe isn’t just good—it is the kind that makes people stop mid-conversation to ask where you bought it. It’s Halloween food reimagined—healthier, faster, but with the same festive satisfaction. Perfect for impressing guests without stress, or turning a simple snack into something memorable.
What Ingredients You Will Need
This recipe uses simple, wholesome ingredients to deliver a fun and healthy Halloween snack without the fuss. Most of these are pantry staples or easy to find at any grocery store. The key is picking fresh, firm vegetables that will hold their shape when arranged on the platter.
- For the Skeleton Body
- 1 large head of cauliflower (for the skull) – look for a firm, white head with tight florets
- 3-4 large carrots, peeled (for the arm and leg bones) – choose straight, thick carrots for easier cutting
- 2-3 celery stalks, trimmed (for the ribs and spine) – fresh, crisp celery works best
- 1 large red bell pepper (for the heart and other organs) – a bright, firm pepper adds great color
- 1 large yellow bell pepper (for additional organs or accents) – or use orange for variety
- 1 cucumber, sliced into rounds (for the spinal discs) – English cucumbers work great, less seedy
- 1 cup cherry tomatoes (for small joints or decorative accents) – any color works
- 1 cup broccoli florets (for the lungs or filler) – fresh, dark green florets
- 1/2 cup black olives, pitted (for the eyes and nose) – canned is fine, just drain well
- For the Dip
- 1 cup ranch dressing or hummus (for the “blood” and dipping) – store-bought is fine, or make your own
- Optional: 1/2 cup Greek yogurt (for a lighter dip option) – plain, full-fat works best
- For Decoration
- 1 large serving platter or cutting board (at least 18 inches long) – a white platter makes the skeleton pop
- Toothpicks (for securing parts if needed) – regular wooden ones work
I recommend using organic carrots if you can find them—they tend to be sweeter and hold their shape better when cut into sticks. For the cauliflower, look for one that’s naturally a bit oval-shaped; it makes a more convincing skull. If you’re feeding a crowd with dietary restrictions, swap the ranch for a dairy-free hummus or guacamole. In fall, you can even add some small sugar pumpkins around the platter for extra decoration.
Equipment Needed
You don’t need any fancy kitchen gadgets for this recipe. Here’s what you’ll need:
- Large Serving Platter or Cutting Board: At least 18 inches long. A white platter makes the skeleton stand out best. I use a wooden cutting board and it gives it a nice rustic feel.
- Sharp Chef’s Knife: For cutting carrots, celery, and bell peppers into clean shapes. A dull knife will crush your veggies.
- Cutting Board: A standard size board for prep work. Keep one for veggies only to avoid cross-contamination.
- Vegetable Peeler: For peeling carrots and cucumbers if needed. A Y-shaped peeler is my favorite—it’s faster.
- Small Bowl or Ramekin: For the dip. A dark bowl makes the “blood” look more dramatic.
- Toothpicks: Optional, but helpful for securing the skull or keeping rib bones in place.
- Paper Towels: For drying veggies after washing. Wet veggies slide around on the platter.
If you don’t have a large platter, use a baking sheet lined with parchment paper. It works just as well and gives you a nice edge to work with. I’ve also used a large pizza pan in a pinch—just make sure it’s clean!
Preparation Method
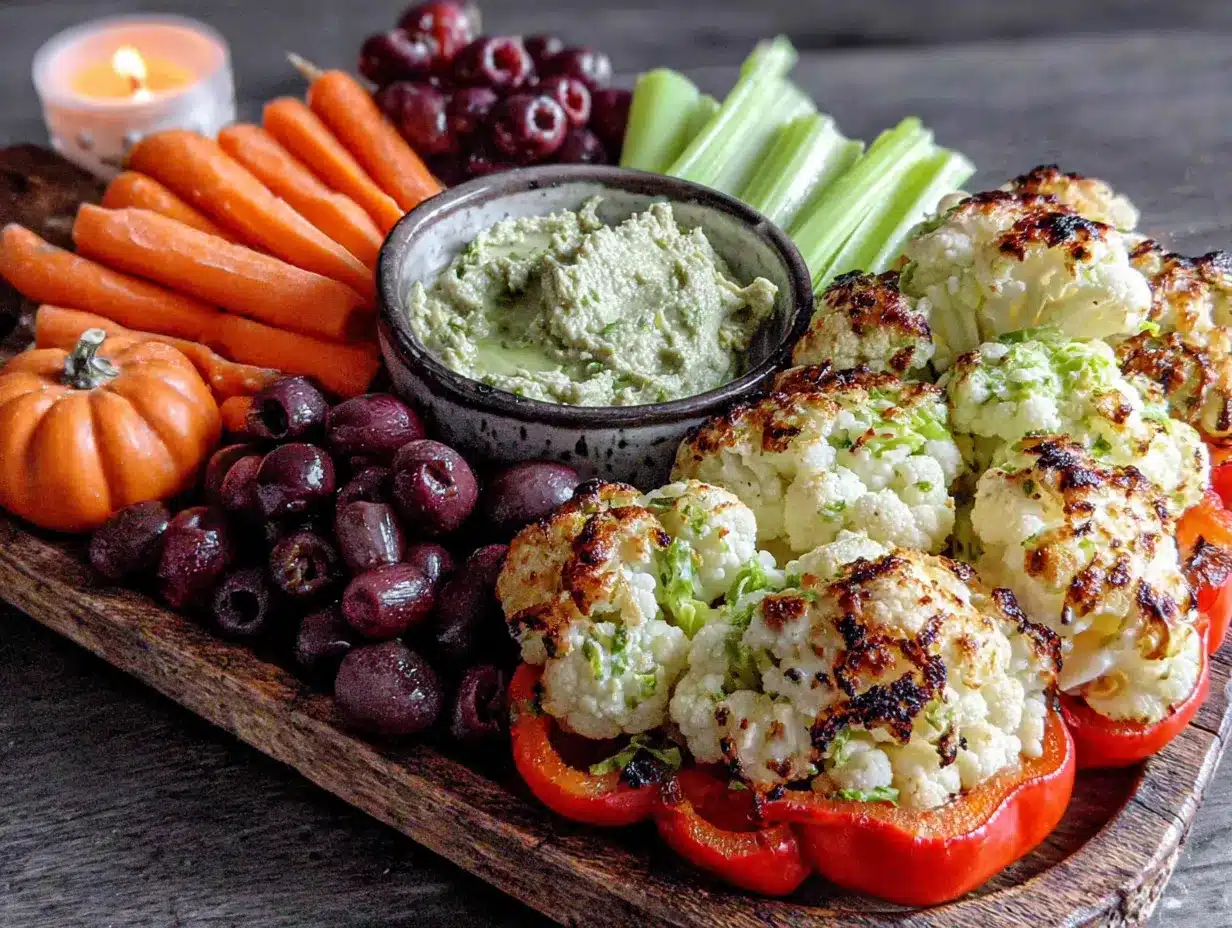
Let’s build this skeleton. It’s easier than you think, I promise. Take your time with the cutting, and the assembly will fly by.
- Prepare the Skull (5 minutes): Wash the cauliflower and cut off the bottom stem so it sits flat. Place it at the top center of your platter. Use two black olives for the eye sockets—push them gently into the cauliflower. Use one olive for the nose, placed just below the eyes. For the mouth, cut a small slit with your knife or arrange thin strips of red bell pepper in a grin. Set aside.
- Cut the Arm and Leg Bones (5 minutes): Peel the carrots and cut them into 3-inch long sticks. You want them to look like long bones. For the arms, cut two carrot sticks and place them angling out from the shoulders (just below the skull). For the legs, cut two longer carrot sticks and place them angling down from the hips. Save the carrot ends for smaller joints.
- Build the Ribcage (5 minutes): Cut the celery stalks into 2-inch pieces. Arrange them in a fan pattern below the skull, angling outward to form the ribs. You’ll need about 6-8 pieces on each side. Leave a gap in the center for the “organs.”
- Add the Spine (3 minutes): Slice the cucumber into thin rounds, about 1/4 inch thick. Place them in a straight line down the center of the ribcage, between the celery ribs. This creates the spinal column. It should look like a series of small green discs.
- Create the Organs (3 minutes): Cut the red bell pepper into a heart shape and place it in the center of the ribcage, over the spine. Cut the yellow bell pepper into a kidney or lung shape and place it next to the heart. Use broccoli florets to fill in any empty spaces around the organs—they look like little lungs.
- Add Small Joints and Details (2 minutes): Place cherry tomatoes at the ends of the arm and leg bones to look like knuckles or joints. Use halved olives for the elbows and knees. Arrange any remaining veggies around the edges of the platter for color.
- Add the Dip (2 minutes): Place a small bowl of ranch dressing or hummus near the skeleton’s mouth area. If you want to get creative, add a few drops of red food coloring to the ranch to make it look like “blood.” I skip this for kids’ parties, but adults love it.
- Final Adjustments (2 minutes): Step back and look at your skeleton. Adjust any veggies that look out of place. Make sure the skull is centered and the ribs are evenly spaced. Add any extra veggies to fill gaps. Your skeleton is ready to spook!
Pro tip: If the cauliflower skull keeps rolling, cut a tiny flat spot on the bottom with your knife. It’ll sit perfectly still. Also, wet your hands slightly when handling the olives—they stick to dry fingers and can tear.
Cooking Tips & Techniques
I’ve made this skeleton about a dozen times now, and let me tell you, I’ve learned a few things the hard way. Here are my best tips to make yours look amazing on the first try:
- Cut Evenly: The key to a professional-looking skeleton is uniform cuts. Take your time cutting the carrots and celery to the same length. It makes the bones look intentional and neat.
- Use a Template: If you’re nervous about the layout, sketch a quick skeleton shape on a piece of paper first. Place it under your platter (if it’s clear) or just use it as a visual guide. I did this my first time and it saved me from a lopsided skeleton.
- Keep Veggies Dry: After washing, pat everything dry with paper towels. Wet veggies slide around and make your skeleton look messy. Plus, the dip won’t stick to wet veggies.
- Build from the Inside Out: Start with the skull and spine, then add the ribs, then the organs, then the limbs. This way, you’re not moving things around once they’re in place.
- Don’t Overcrowd: Leave some space between the veggies. A skeleton that’s packed too tight looks like a jumble instead of a skeleton. Negative space is your friend.
- Prep Ahead: You can cut all the veggies up to 24 hours in advance. Store them in separate bags in the fridge. Assemble the skeleton just before serving so everything stays crisp.
My biggest failure? I once used baby carrots instead of full-sized ones for the bones. They were too short and stubby and my skeleton looked like it had dwarfism. Learn from my mistake—use full-sized carrots and cut them yourself.
Variations & Adaptations
This skeleton recipe is super flexible. Here are some ways to make it your own:
- Gluten-Free Version: The recipe is naturally gluten-free! Just make sure your ranch dressing or hummus is certified gluten-free if that’s a concern.
- Vegan Version: Use hummus or a dairy-free ranch for the dip. Everything else is plant-based. Easy swap.
- Low-Carb/Keto Version: Skip the carrots (they’re higher in carbs) and use more celery, cucumber, and bell peppers. Add some jicama sticks for crunch without the carbs.
- Spooky Color Theme: Use purple cauliflower for the skull (it looks eerie), orange bell peppers for the organs, and black olives for everything. It gives a darker, more Halloween-y vibe.
- Mini Skeletons: Make individual skeletons on small plates for each guest. Use smaller veggies (baby carrots, mini cucumbers) and a single broccoli floret for the skull. It’s adorable for kids’ parties.
- Dip Variations: Swap ranch for guacamole (green “goo”), beet hummus (deep red “blood”), or spinach dip (looks like slime). Each dip changes the whole mood of the tray.
I once made a “mummy” version by wrapping the skeleton in strips of cucumber peel. It looked like a mummy skeleton—totally extra, but the kids went wild for it. Don’t be afraid to experiment!
Serving & Storage Suggestions
This skeleton is best served fresh, but here’s how to handle it like a pro:
- Serving Temperature: Serve chilled or at room temperature. If you’ve prepped ahead, take it out of the fridge about 15 minutes before serving to take the chill off. The flavors are brighter that way.
- Presentation: Place the platter on a black or orange tablecloth for maximum Halloween effect. Add some fake spider webs around the edges or scatter a few plastic spiders on the platter. It makes the skeleton look like it crawled out of a grave.
- Complementary Dishes: This pairs great with other Halloween snacks like spooky Halloween popcorn mix, pumpkin-shaped cheeses, or a bowl of creamy pumpkin dip with apple slices. It’s also perfect alongside a witch’s brew punch for a full party spread.
- Storage: If you have leftovers (unlikely, but possible), store the veggies in an airtight container in the fridge for up to 3 days. The dip can be stored separately. The skeleton won’t hold its shape once moved, so don’t try to save it for the next party.
- Reheating: You don’t need to reheat anything! Just enjoy it cold. If the dip has been sitting out for more than 2 hours, toss it and use fresh dip for leftovers.
- Flavor Development: The veggies actually get a little more flavorful after sitting in the fridge overnight—the ranch or hummus seeps in slightly. But the texture gets softer, so it’s best eaten the same day.
Nutritional Information & Benefits
This veggie tray skeleton is packed with goodness. Here’s a rough breakdown per serving (about 1 cup of veggies with 2 tablespoons of dip):
- Calories: Approximately 120-150 calories per serving
- Protein: 3-5 grams (from the dip and veggies)
- Fiber: 4-6 grams (thanks to all those crunchy veggies)
- Vitamin A: 120% of your daily needs (from the carrots and bell peppers)
- Vitamin C: 80% of your daily needs (bell peppers and broccoli are loaded with it)
- Carbohydrates: 15-20 grams (mostly healthy complex carbs)
The health benefits here are no joke. Carrots are amazing for eye health, celery is great for hydration and digestion, and bell peppers are packed with antioxidants. The cauliflower skull is a cruciferous powerhouse that supports liver health. And the dip? Even ranch has some calcium and protein. Honestly, this is one of the healthiest Halloween snacks you can make. It’s naturally gluten-free, low in sugar, and can easily be made vegan. The only potential allergen is dairy in the ranch dressing, but that’s easy to swap out.
I love that I can serve this at a party full of candy and not feel guilty about reaching for it myself. It’s the kind of snack that makes you feel good about what you’re eating—even when it looks like a skeleton.
Conclusion
This Halloween veggie tray skeleton is more than just a snack—it’s a conversation starter, a photo op, and a genuinely delicious way to get your veggies in during the most candy-filled holiday of the year. It takes less than 30 minutes to put together, uses ingredients you probably already have, and looks like something you’d see in a magazine. Honestly, what more could you ask for?
I love that this recipe has become my signature Halloween dish. Every year, someone asks me to bring “the skeleton” to their party, and I never get tired of hearing people laugh when they realize it’s just vegetables. It’s silly, it’s fun, and it’s proof that healthy food can be the life of the party.
Now I want to see your skeletons! Tag me in your photos or leave a comment below telling me how yours turned out. Did you add any fun twists? Use a different dip? Make a mini version for your kids? I read every comment and I love hearing your stories. Go make that skeleton—your Halloween table is waiting!
Frequently Asked Questions
How far in advance can I make the veggie tray skeleton?
You can cut all the veggies up to 24 hours ahead and store them in separate bags in the fridge. But assemble the skeleton no more than 2 hours before serving to keep everything crisp and fresh. The veggies start to wilt and slide around if they sit too long.
Can I use different vegetables for the skeleton?
Absolutely! Swap in whatever you have on hand. Jicama makes great bones, zucchini works for the spine, and radishes can be used for small joints. Just keep the shapes similar—long and thin for bones, round for joints, and irregular for organs.
How do I keep the skeleton from falling apart?
Use toothpicks to secure the skull and any loose limbs. Just stick a toothpick into the bottom of the cauliflower and push it into the platter. For the ribs, make sure they’re snug against each other. A little pressure helps them stay in place.
Is this recipe kid-friendly for school parties?
Yes! Kids love building the skeleton and eating it. Just skip any “blood” effects for younger children and keep the olives whole (choking hazard for toddlers). You can even let the kids help arrange the veggies—it’s a fun activity.
What’s the best dip for this veggie tray skeleton?
Ranch dressing is the classic choice because it’s thick and stays put. Hummus works great too, especially beet hummus for a bloody effect. Guacamole is another favorite—it adds a creamy texture that contrasts nicely with the crunchy veggies.
Pin This Recipe!
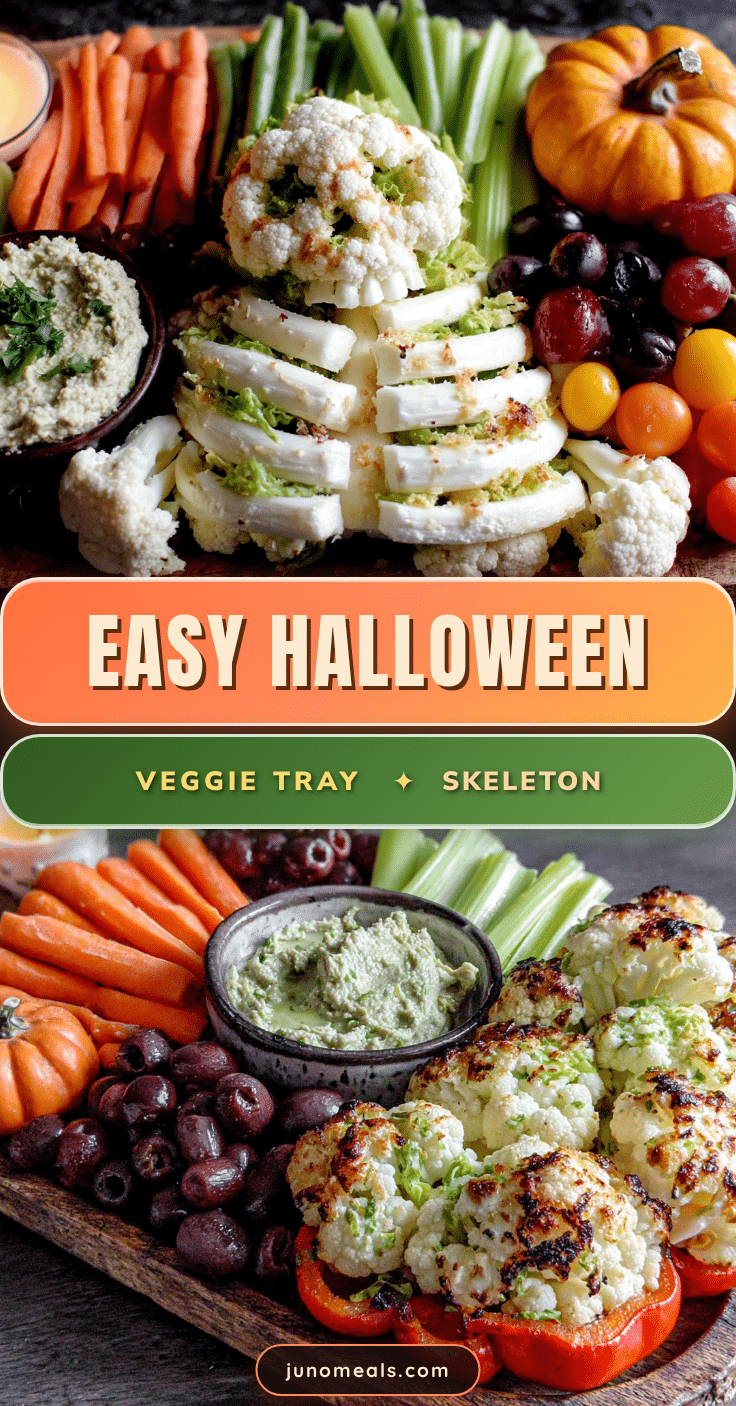
Easy Halloween Veggie Tray Skeleton: Best Healthy Party Idea
A fun and healthy Halloween centerpiece that looks like a skeleton made entirely from vegetables. Quick to assemble in under 25 minutes, this veggie tray is perfect for parties and gets rave reviews from kids and adults alike.
- Prep Time: 20 minutes
- Cook Time: 0 minutes
- Total Time: 20 minutes
- Yield: 8 servings 1x
- Category: Appetizer
- Cuisine: American
Ingredients
- 1 large head cauliflower (for the skull)
- 3–4 large carrots, peeled (for arm and leg bones)
- 2–3 celery stalks, trimmed (for ribs and spine)
- 1 large red bell pepper (for heart and organs)
- 1 large yellow bell pepper (for additional organs or accents)
- 1 cucumber, sliced into rounds (for spinal discs)
- 1 cup cherry tomatoes (for small joints or decorative accents)
- 1 cup broccoli florets (for lungs or filler)
- 1/2 cup black olives, pitted (for eyes and nose)
- 1 cup ranch dressing or hummus (for dip)
- 1/2 cup Greek yogurt (optional, for lighter dip)
- Toothpicks (for securing parts if needed)
Instructions
- Prepare the Skull: Wash the cauliflower and cut off the bottom stem so it sits flat. Place at top center of platter. Push two black olives into the cauliflower for eye sockets, one olive for the nose below the eyes. Cut a small slit for the mouth or arrange thin strips of red bell pepper in a grin. Set aside.
- Cut the Arm and Leg Bones: Peel carrots and cut into 3-inch long sticks. For arms, place two carrot sticks angling out from shoulders (just below skull). For legs, place two longer carrot sticks angling down from hips. Save carrot ends for smaller joints.
- Build the Ribcage: Cut celery stalks into 2-inch pieces. Arrange in a fan pattern below the skull, angling outward to form ribs. Use about 6-8 pieces on each side, leaving a gap in the center for organs.
- Add the Spine: Slice cucumber into thin rounds (about 1/4 inch thick). Place in a straight line down the center of the ribcage between the celery ribs to create the spinal column.
- Create the Organs: Cut red bell pepper into a heart shape and place in center of ribcage over the spine. Cut yellow bell pepper into a kidney or lung shape and place next to the heart. Use broccoli florets to fill empty spaces around organs.
- Add Small Joints and Details: Place cherry tomatoes at ends of arm and leg bones for knuckles or joints. Use halved olives for elbows and knees. Arrange remaining veggies around edges of platter for color.
- Add the Dip: Place a small bowl of ranch dressing or hummus near the skeleton’s mouth area. Optionally add a few drops of red food coloring to ranch for a ‘blood’ effect.
- Final Adjustments: Step back and adjust any veggies that look out of place. Ensure skull is centered and ribs are evenly spaced. Add extra veggies to fill gaps.
Notes
Cut veggies evenly for a professional look. Keep veggies dry after washing to prevent sliding. Build from the inside out (skull, spine, ribs, organs, limbs). Prep veggies up to 24 hours ahead and assemble just before serving. If cauliflower skull rolls, cut a flat spot on the bottom. Wet hands slightly when handling olives to prevent tearing.
Nutrition
- Serving Size: 1 cup of veggies wit
- Calories: 135
- Sugar: 6
- Sodium: 320
- Fat: 8
- Saturated Fat: 1.5
- Carbohydrates: 15
- Fiber: 5
- Protein: 4
Keywords: Halloween, veggie tray, skeleton, healthy party snack, vegetable platter, spooky, kid-friendly, gluten-free, vegan option


