My oldest came home from kindergarten one October with a crumpled flyer for the school Halloween party. “We need to bring treats,” she announced, like it was a presidential decree. I nodded, already mentally scanning the pantry shelves. I wanted something festive, obviously. But also something I could actually pull off after a full day of work and a toddler who thought the word “no” was a hilarious suggestion. I had been looking for a Halloween treat that actually looked impressive without requiring me to become a pastry chef. The kind of thing that makes other parents say “wow” but doesn’t make you want to cry in the kitchen. So I grabbed the box of cereal, the marshmallows, and a stick of butter. And honestly? This easy Halloween Rice Krispie Jack-O-Lantern treats recipe was born out of pure necessity. No frills. No fancy molds. Just a little bit of patience and a whole lot of orange food coloring.
These little guys are a staple now. Every October, without fail, my kids start asking when we’re going to make “the pumpkin treats.” They’re not complicated. They’re not fussy. But there’s something about turning a classic, gooey Rice Krispie treat into a tiny, edible jack-o-lantern that just feels right. It’s the kind of recipe that fills the house with that familiar butter-and-sugar smell, the one that immediately puts everyone in a good mood. And the best part? You don’t need any special cookie cutters or expensive decorating kits. Just your hands, a little bit of creativity, and about twenty minutes of your time.
This is the recipe that makes you feel like a Halloween hero without any of the stress. It’s simple enough for a weeknight, but fun enough for a party. And honestly, it’s the one thing I get asked for year after year. That’s how you know a recipe is a keeper.
Why You’ll Love This Recipe
Let’s be real for a second. There are a million Halloween treats out there. Some are gorgeous but take three hours. Others are quick but look like a science experiment gone wrong. These easy Halloween Rice Krispie Jack-O-Lantern treats hit that perfect sweet spot. They are genuinely simple, genuinely fun, and genuinely delicious. Here is why you’ll find yourself making them every single October.
- Quick & Easy: From start to finish, this recipe takes about 25 minutes. Most of that time is just letting the treats cool. The actual hands-on work is maybe 10 minutes. Perfect for busy parents, last-minute party prep, or when the Halloween spirit strikes unexpectedly.
- Simple Ingredients: You probably have almost everything in your pantry right now. Rice Krispies cereal, marshmallows, butter, and a little orange gel food coloring. That’s it. No special trips to a craft store or a fancy baking supply shop.
- Perfect for Kids & Parties: This is the ultimate kid-friendly activity. Little hands can help stir, shape the balls, and add the candy eyes. They make fantastic school party treats, classroom snacks, or additions to a Halloween dessert table. Pair them with our mini lemon blueberry cheesecakes for a truly unforgettable spread.
- Crowd-Pleaser: I have yet to meet a child (or adult, honestly) who doesn’t light up at the sight of these. They are familiar enough to be comforting, but festive enough to feel special. They disappear fast.
- Unbelievably Customizable: The base recipe is just the start. You can make them spooky, silly, or anything in between. It’s a blank canvas for Halloween creativity.
What makes these different from other Halloween treats is the texture. The classic Rice Krispie treat is already perfect—chewy, crispy, buttery. By shaping them into balls, you get a slightly denser, more satisfying bite. And the jack-o-lantern face? It’s not just decoration. It adds a little bit of crunch and a pop of sweetness from the candy corn or chocolate chips. It’s comfort food, reimagined for the spookiest season of the year.
What Ingredients You Will Need
This recipe relies on a handful of simple, pantry-friendly ingredients. Each one plays a specific role in creating that perfect, gooey texture and festive look. Don’t overthink it—just gather these basics, and you are already halfway there.
- 6 cups Rice Krispies cereal: The star of the show. You want the classic, puffed rice cereal. It provides that signature crunch and light texture. Make sure it’s fresh and not stale for the best results.
- 4 cups mini marshmallows (or 40 large marshmallows): Mini marshmallows melt faster and more evenly, which is why I prefer them. They create the sticky, gooey binder that holds everything together. Use a good quality brand for the smoothest melt.
- 3 tablespoons unsalted butter: Salted butter works in a pinch, but unsalted lets you control the final flavor. The butter adds richness and helps prevent the mixture from becoming too sticky to handle. I recommend using a brand like Land O’Lakes for consistent results.
- 1/2 teaspoon vanilla extract: A little vanilla goes a long way. It rounds out the sweetness and adds a warm, comforting flavor that makes these taste homemade, not just like a boxed mix.
- Orange gel food coloring: This is non-negotiable for the jack-o-lantern look. Liquid food coloring will make the mixture too wet and can result in a weird texture. Gel coloring gives you a vibrant, true orange without altering the consistency. I like the Wilton brand.
- Candy eyes: These are the classic Halloween candy eyes. You can find them at most grocery stores or online. They add that instant “character” face.
- Candy corn or black licorice (for the mouth): Candy corn is the traditional choice for a smile. For a scarier look, use small pieces of black licorice or even black decorating gel. I’ve also used mini chocolate chips for a more subtle face.
- Green sour punch straws or green fruit leather (for the stem): This is a fun, edible way to create the pumpkin stem. Green sour punch straws are sturdy and look perfect. Alternatively, you can use a small piece of green fruit leather rolled into a stem shape.
That’s the full list. No weird ingredients, no complicated shopping. Just good, simple stuff that comes together to make something special. If you are looking for other simple, crowd-pleasing ideas, browse our full collection of easy party recipes.
Equipment Needed
You don’t need a fully stocked professional kitchen for this one. In fact, you probably already own everything you need. Here’s the list of tools that will make the process smooth and easy.
- Large pot or Dutch oven: You need a big pot with plenty of room to stir the marshmallow mixture and cereal together. A non-stick pot is ideal, but any large, heavy-bottomed pot will work.
- Wooden spoon or silicone spatula: A sturdy spoon is essential for mixing the hot, sticky marshmallow mixture. A silicone spatula is great for scraping every last bit out of the pot.
- 9×13 inch baking pan: This is for pressing the Rice Krispie mixture into an even layer before cutting. If you don’t have a 9×13, an 8×8 pan will work, but your treats will be thicker.
- Parchment paper or wax paper: This is your best friend. Line your baking pan with parchment paper, leaving some overhang for easy lifting. You’ll also use it to press the mixture down without it sticking to your hands.
- Sharp knife or pizza cutter: A sharp knife makes clean cuts through the treats. A pizza cutter is even easier for getting straight lines.
- Small bowl of water: This is a pro tip. Keep a small bowl of water nearby to wet your hands slightly when shaping the treats. It prevents the mixture from sticking to your fingers.
- Wire cooling rack: Not strictly necessary, but it helps the treats cool evenly and prevents them from getting soggy on the bottom.
If you don’t have a pizza cutter, don’t worry. A sharp chef’s knife works perfectly. And if you don’t have a 9×13 pan, you can even shape the mixture free-form on a sheet of parchment paper. The key is to be resourceful, not perfect.
Preparation Method
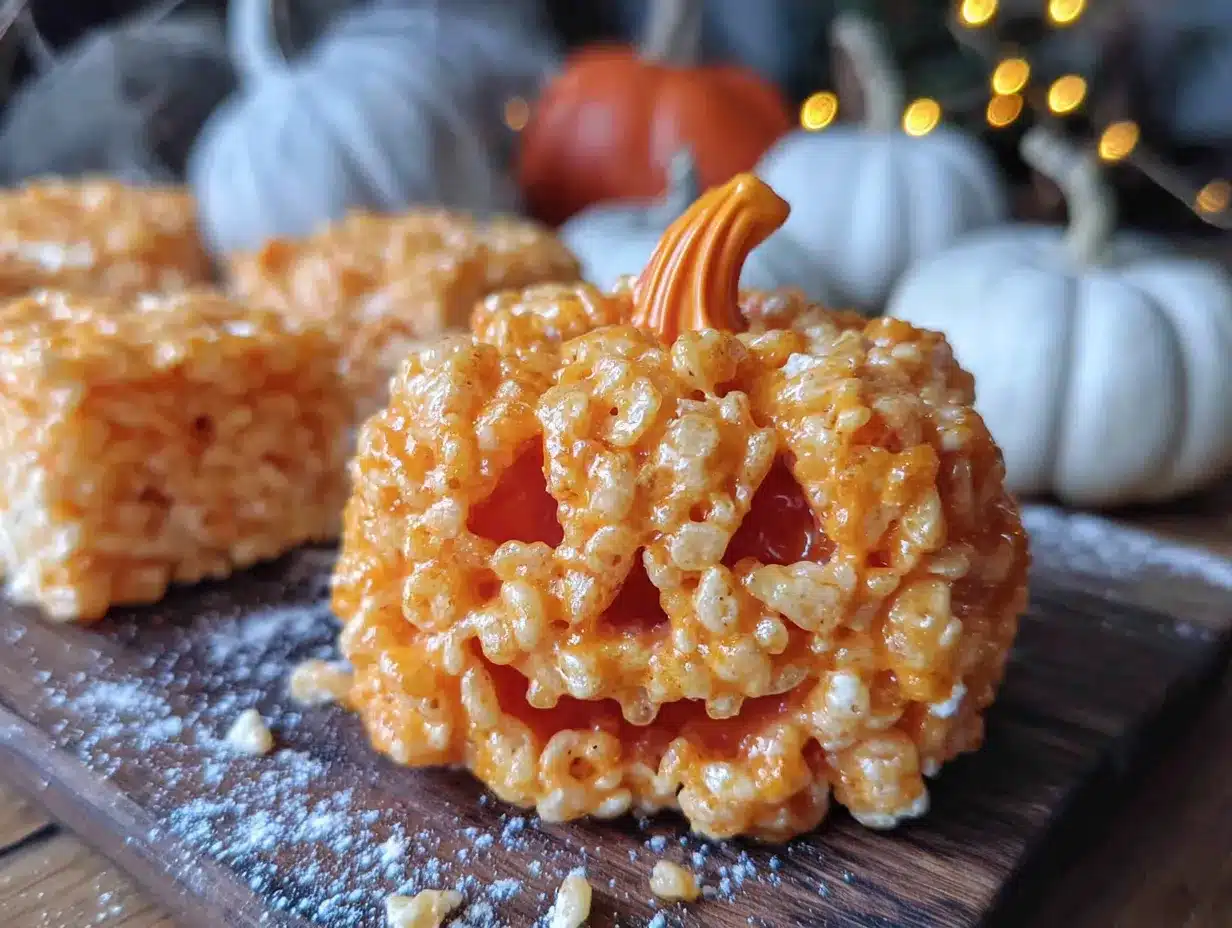
Alright, let’s get to the fun part. This is where the magic happens. Follow these steps carefully, and you will have a batch of adorable, delicious jack-o-lantern treats in no time.
- Prep your pan. Line a 9×13 inch baking pan with parchment paper, leaving a couple of inches of overhang on two opposite sides. This will make it easy to lift the entire block of treats out later. Lightly grease the parchment paper with a little butter or non-stick spray.
- Melt the butter. In a large pot or Dutch oven, melt the 3 tablespoons of unsalted butter over medium-low heat. Stir it occasionally so it doesn’t burn. You want it fully melted and just starting to bubble.
- Add the marshmallows. Pour in the 4 cups of mini marshmallows. Stir constantly with your wooden spoon or silicone spatula until the marshmallows are completely melted and smooth. This should take about 3-4 minutes. Don’t walk away—marshmallows can go from perfectly melted to scorched in a heartbeat.
- Add the vanilla and food coloring. Remove the pot from the heat. Stir in the 1/2 teaspoon of vanilla extract. Then, add your orange gel food coloring. Start with a small amount—about 1/4 teaspoon—and add more until you reach your desired shade of orange. Remember, the color will lighten slightly once you add the cereal. Stir until the color is evenly distributed.
- Mix in the cereal. Pour the 6 cups of Rice Krispies cereal into the pot. Gently fold the cereal into the marshmallow mixture until every piece is coated. Be careful not to crush the cereal too much; you want to keep those little puffs intact. The mixture will be thick and sticky.
- Press into the pan. Transfer the mixture into your prepared baking pan. Using a piece of parchment paper or wax paper (lightly greased), press the mixture down into an even, firm layer. Take your time with this step—a firm, even layer will give you cleaner cuts later.
- Cool completely. Let the treats cool in the pan at room temperature for at least 30 minutes. They need to be fully set before you cut them. If you are in a hurry, you can pop them in the refrigerator for 15 minutes.
- Cut into rounds. Once cooled, lift the block of treats out of the pan using the parchment overhang. Place it on a cutting board. Use a round cookie cutter (about 2.5 to 3 inches in diameter) to cut out circles. If you don’t have a round cutter, you can use a sharp knife to cut them into squares or rectangles—they will still look like pumpkins!
- Shape the jack-o-lanterns. This is where you get creative. Gently roll each circle between your palms to form a smooth ball. Don’t squeeze too hard; you want it to hold its shape, not become a dense rock.
- Add the faces. Press two candy eyes into each ball. For the mouth, use a small piece of candy corn or black licorice. You can make a happy smile, a scary grin, or a surprised “O” shape. Get the kids involved for this part!
- Add the stem. Gently press a piece of green sour punch straw or a rolled piece of green fruit leather into the top of each ball to form the stem.
- Serve or store. Your Easy Halloween Rice Krispie Jack-O-Lantern Treats are ready to go! Serve them immediately or store them in an airtight container.
A quick note on timing: The entire process, from melting the butter to shaping the last pumpkin, takes about 25 minutes of active work. The cooling time is the longest wait. Use that time to clean up your workspace or get the kids ready for the party!
Cooking Tips & Techniques
After making these treats for years (and a few failed attempts), I’ve picked up some tricks that make the process smoother and the results better. Here are my top tips.
- Don’t overheat the marshmallows. This is the most common mistake. If you cook the marshmallow mixture over too high heat or for too long, it will become hard and brittle once it cools. Keep the heat on medium-low and stir constantly. The moment the marshmallows are melted, remove the pot from the heat.
- Use gel food coloring. I cannot stress this enough. Liquid food coloring will make your mixture watery and can ruin the texture. Gel coloring is concentrated and won’t affect the consistency. It also gives you a much more vibrant, true orange color.
- Grease your hands and tools. The Rice Krispie mixture is incredibly sticky. Lightly greasing your hands, the spatula, and the parchment paper with butter or non-stick spray will make handling it infinitely easier. Keep a small bowl of water nearby to wet your fingers if needed.
- Work quickly. The mixture sets up fast. Once you add the cereal, you have a limited window to press it into the pan and shape it. Have your pan prepped and your tools ready before you start. Speed is your friend here.
- Let them cool completely before cutting. I know it’s tempting to dig in right away, but cutting warm treats will result in a crumbly, sticky mess. Patience pays off. A fully cooled block cuts much cleaner.
- Make extra. These treats are popular. I always double the recipe, especially if I’m taking them to a party or school event. They disappear faster than you’d expect.
One of my earliest failures was using too much butter, thinking it would make them “more buttery.” It just made them greasy and they fell apart. Learn from my mistakes! Stick to the measurements, and you’ll be golden.
Variations & Adaptations
This recipe is incredibly forgiving and easy to adapt. Don’t be afraid to make it your own. Here are some of my favorite variations.
- Spooky Ghosts: Skip the orange food coloring. Keep the mixture white. Shape into balls and use candy eyes and a small piece of black licorice for a ghostly mouth. They look adorable and are perfect for a more “scary” theme.
- Chocolate Pumpkins: For a richer flavor, swap 1/4 cup of the Rice Krispies for cocoa powder. Mix the cocoa powder with the melted marshmallow mixture before adding the cereal. You’ll get a beautiful, dark chocolate pumpkin that tastes amazing.
- Peanut Butter Pumpkins: Add 1/4 cup of creamy peanut butter to the marshmallow mixture after it melts. Stir until smooth. This adds a salty, nutty flavor that pairs perfectly with the sweet marshmallow and cereal. Be sure to check for allergies if serving to a crowd.
- Vegan Version: Use vegan marshmallows (Dandies brand works great), vegan butter, and ensure your cereal is vegan. The process is exactly the same, and the result is just as delicious. No one will know the difference.
- Gluten-Free: Rice Krispies are naturally gluten-free, but always check the label to ensure they are certified gluten-free if you are serving someone with celiac disease. The rest of the ingredients are naturally gluten-free.
- Mini Treats: Use a smaller cookie cutter (about 1.5 inches) to make bite-sized jack-o-lanterns. These are perfect for goodie bags or for little hands that can’t handle a full-sized treat.
I once made a batch with crushed pretzels mixed in for a salty-sweet crunch. It was a happy accident—the pretzels got a little soft, but the flavor was incredible. Don’t be afraid to experiment!
Serving & Storage Suggestions
These treats are best enjoyed fresh, but they do store well for a few days. Here is everything you need to know about serving and storing them.
- Serving Temperature: Serve them at room temperature. They are soft, chewy, and perfectly textured. If they have been refrigerated, let them sit out for 10-15 minutes before serving to soften up.
- Presentation: Arrange them on a festive platter or cake stand. You can line the platter with orange or black napkins for a pop of color. They look fantastic on a Halloween dessert table alongside other themed treats.
- Storage: Store leftover treats in an airtight container at room temperature for up to 3 days. Do not refrigerate them, as the cold will make them hard and stale. If you need to store them longer, you can freeze them.
- Freezing: To freeze, place the treats in a single layer on a baking sheet and freeze for 1 hour. Then, transfer them to a freezer-safe bag or container. They will keep for up to 3 months. Thaw at room temperature for about 30 minutes before serving.
- Reheating: If your treats have become a little stale, you can revive them. Place them on a microwave-safe plate and microwave for 5-10 seconds. This will soften them up and make them taste almost fresh again.
- Flavor Development: Like most Rice Krispie treats, these are actually best the day they are made. The texture is at its peak. However, they are still delicious the next day. The marshmallow will soften the cereal slightly, giving them a more uniform, chewy texture.
A pro tip: if you are making these for a party the next day, wait to add the candy faces until just before serving. The candy eyes can get a little sticky if they sit on the treats for too long. It’s a small detail, but it makes a difference in presentation.
Nutritional Information & Benefits
Let’s be honest—these are a treat, not a health food. But that doesn’t mean they can’t be enjoyed in moderation. Here is a general idea of what you are getting in each serving.
- Calories: Approximately 180-220 calories per treat (depending on size and decorations).
- Carbohydrates: Around 35-40 grams. The main source is the cereal and marshmallows.
- Fat: About 6-8 grams, primarily from the butter.
- Protein: A modest 2-3 grams.
- Sugar: Around 15-20 grams. This is the main indulgence.
From a health perspective, these are a fun, occasional treat. The Rice Krispies are fortified with iron and B vitamins, so there is a tiny nutritional silver lining. The butter provides a small amount of vitamin A. But honestly, this is a recipe for joy, not for a diet. Enjoy them for what they are—a delicious, festive, and memorable part of your Halloween celebration.
If you are looking for a slightly lighter option, you can use a sugar-free marshmallow alternative or a lower-calorie cereal. But in my opinion, part of the magic is the full-fat, full-sugar experience. It’s Halloween. Live a little.
Conclusion
These Easy Halloween Rice Krispie Jack-O-Lantern Treats are more than just a recipe. They are a tradition. They are the thing that gets my kids excited about the kitchen. They are the reason I don’t stress about the school Halloween party. They are simple, fun, and absolutely delicious. And honestly? They make me feel like a pretty good mom, even on a busy Tuesday night.
I encourage you to make them your own. Use different candy for the faces. Try a different color for the stem. Add a sprinkle of cinnamon for a fall twist. The beauty of this recipe is that it’s a starting point, not a strict rulebook. Let your creativity run wild.
I would love to hear how yours turn out! Drop a comment below and tell me about your favorite variation, or share a photo of your jack-o-lantern creations. And if you have a friend who is stressing about Halloween treats, send them this recipe. Trust me, they will thank you. Happy Halloween, and happy snacking!
Frequently Asked Questions
Can I use regular food coloring instead of gel?
You can, but I don’t recommend it. Liquid food coloring will add extra moisture to the marshmallow mixture, which can make the treats sticky and affect their texture. Gel food coloring is concentrated and won’t change the consistency. It also gives you a much brighter, more vibrant orange color.
How do I keep the treats from sticking to my hands?
This is the most common issue! Lightly grease your hands with a little butter or non-stick cooking spray before shaping the treats. You can also keep a small bowl of cold water nearby and dip your fingers in it. The water creates a barrier between the sticky mixture and your skin. Just don’t use too much water, or it will make the treats soggy.
Can I make these ahead of time for a party?
Absolutely! You can make the treats up to 2 days in advance. Store them in an airtight container at room temperature. I recommend waiting to add the candy faces until just before serving to keep them looking fresh and prevent the candy from getting sticky. They are a fantastic make-ahead option for busy hosts.
My treats turned out hard. What did I do wrong?
This usually happens for one of two reasons. First, you may have overcooked the marshmallow mixture. If you cook it over high heat or for too long, the sugar can crystallize and become hard. Second, you may have pressed the mixture too firmly into the pan. You want an even, firm layer, but don’t compact it like you are making a brick. Gentle pressure is best.
Can I use a different cereal?
Yes! The classic Rice Krispies are the standard, but you can get creative. Cocoa Krispies will give you a chocolatey version. Fruity Pebbles will add a fun, colorful twist. Just keep in mind that different cereals have different textures and sweetness levels, so the final result may vary slightly. Experiment and have fun with it!
Pin This Recipe!
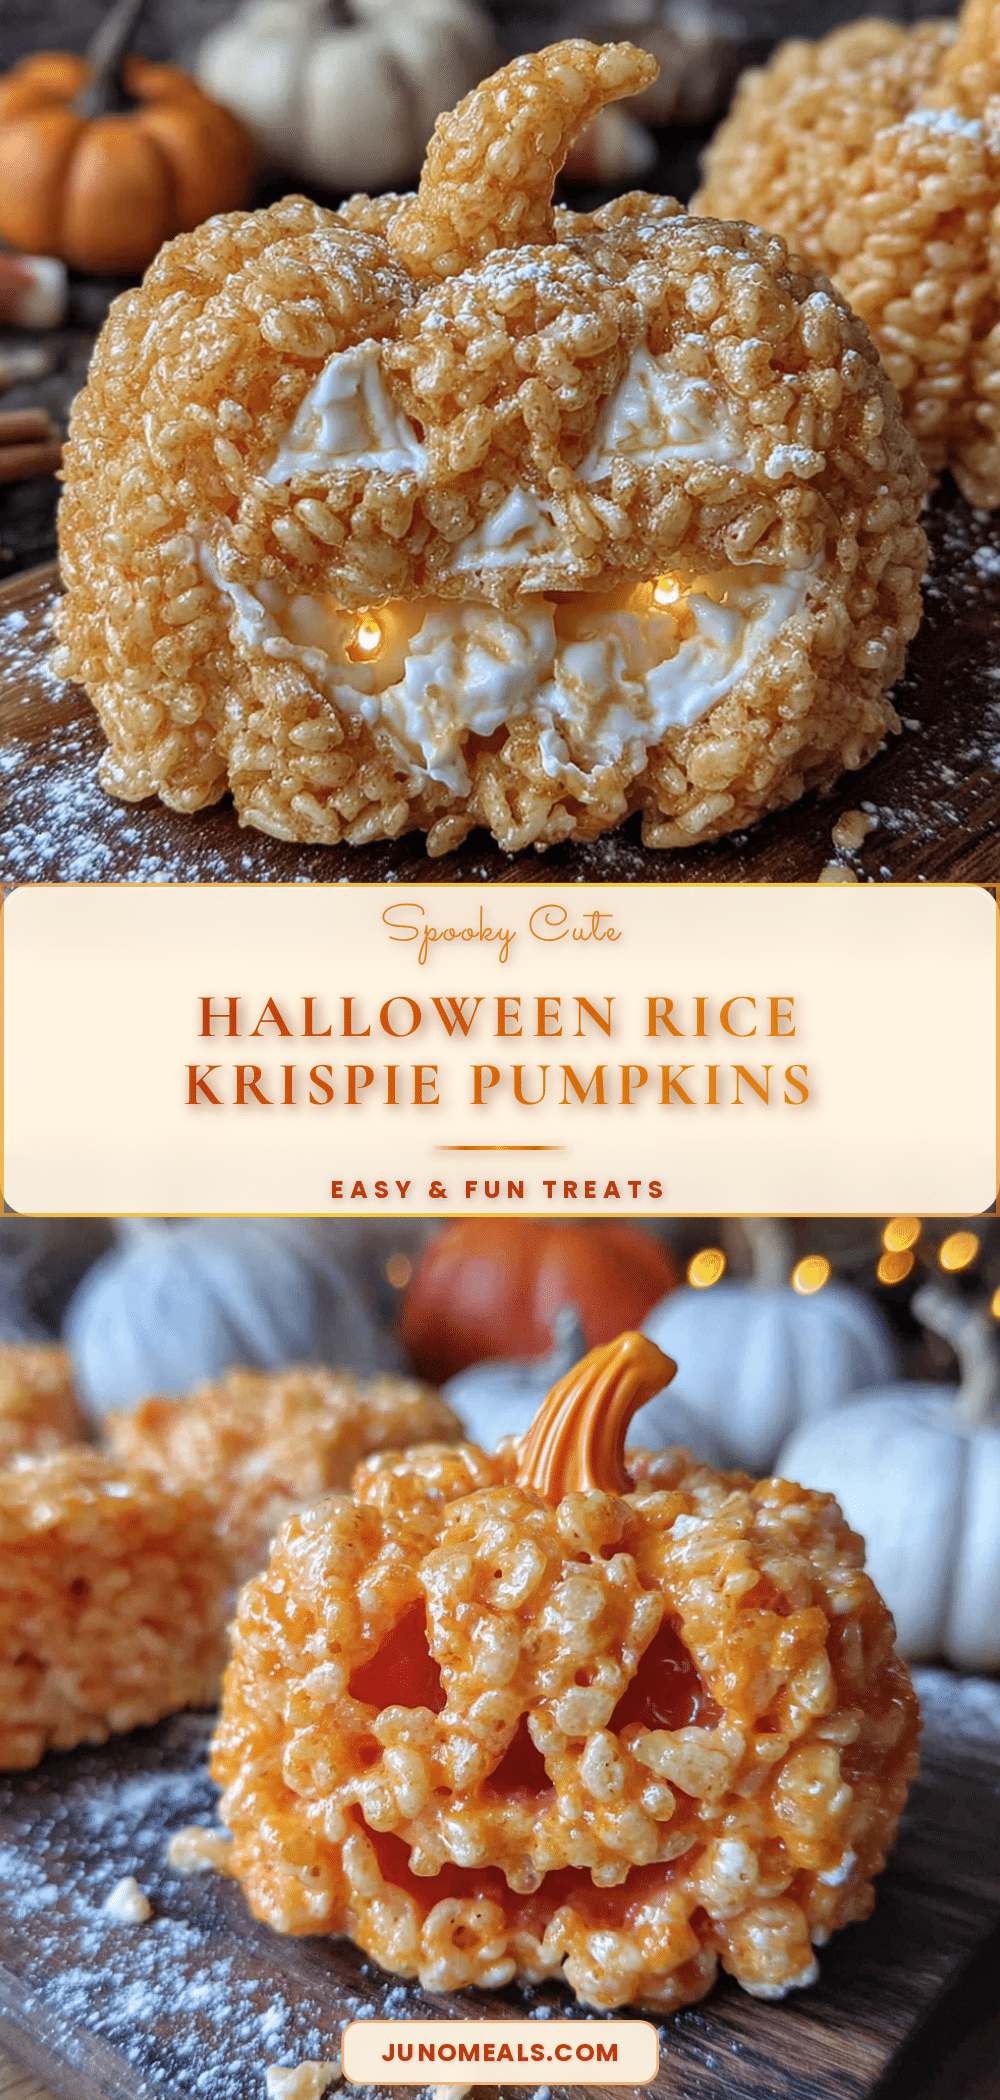
Easy Halloween Rice Krispie Jack-O-Lantern Treats Recipe
These easy Halloween Rice Krispie Jack-O-Lantern treats are simple, fun, and delicious. Made with just a few pantry ingredients, they are perfect for school parties, Halloween dessert tables, or a fun family activity.
- Prep Time: 10 minutes
- Cook Time: 15 minutes
- Total Time: 25 minutes
- Yield: 12 servings 1x
- Category: Dessert
- Cuisine: American
Ingredients
- 6 cups Rice Krispies cereal
- 4 cups mini marshmallows (or 40 large marshmallows)
- 3 tablespoons unsalted butter
- 1/2 teaspoon vanilla extract
- Orange gel food coloring
- Candy eyes
- Candy corn or black licorice (for the mouth)
- Green sour punch straws or green fruit leather (for the stem)
Instructions
- Prep your pan. Line a 9×13 inch baking pan with parchment paper, leaving a couple of inches of overhang on two opposite sides. Lightly grease the parchment paper with a little butter or non-stick spray.
- Melt the butter. In a large pot or Dutch oven, melt the 3 tablespoons of unsalted butter over medium-low heat. Stir it occasionally so it doesn’t burn. You want it fully melted and just starting to bubble.
- Add the marshmallows. Pour in the 4 cups of mini marshmallows. Stir constantly with your wooden spoon or silicone spatula until the marshmallows are completely melted and smooth. This should take about 3-4 minutes.
- Add the vanilla and food coloring. Remove the pot from the heat. Stir in the 1/2 teaspoon of vanilla extract. Then, add your orange gel food coloring. Start with a small amount—about 1/4 teaspoon—and add more until you reach your desired shade of orange. Stir until the color is evenly distributed.
- Mix in the cereal. Pour the 6 cups of Rice Krispies cereal into the pot. Gently fold the cereal into the marshmallow mixture until every piece is coated. Be careful not to crush the cereal too much.
- Press into the pan. Transfer the mixture into your prepared baking pan. Using a piece of parchment paper or wax paper (lightly greased), press the mixture down into an even, firm layer.
- Cool completely. Let the treats cool in the pan at room temperature for at least 30 minutes. They need to be fully set before you cut them. If you are in a hurry, you can pop them in the refrigerator for 15 minutes.
- Cut into rounds. Once cooled, lift the block of treats out of the pan using the parchment overhang. Place it on a cutting board. Use a round cookie cutter (about 2.5 to 3 inches in diameter) to cut out circles. If you don’t have a round cutter, you can use a sharp knife to cut them into squares or rectangles.
- Shape the jack-o-lanterns. Gently roll each circle between your palms to form a smooth ball. Don’t squeeze too hard.
- Add the faces. Press two candy eyes into each ball. For the mouth, use a small piece of candy corn or black licorice. You can make a happy smile, a scary grin, or a surprised ‘O’ shape.
- Add the stem. Gently press a piece of green sour punch straw or a rolled piece of green fruit leather into the top of each ball to form the stem.
- Serve or store. Your Easy Halloween Rice Krispie Jack-O-Lantern Treats are ready to go! Serve them immediately or store them in an airtight container.
Notes
Don’t overheat the marshmallows or they will become hard. Use gel food coloring for best results. Grease your hands and tools to prevent sticking. Work quickly as the mixture sets up fast. Let treats cool completely before cutting. Make extra as they are popular.
Nutrition
- Serving Size: 1 treat
- Calories: 200
- Sugar: 18
- Sodium: 150
- Fat: 7
- Saturated Fat: 4
- Carbohydrates: 38
- Protein: 2
Keywords: Halloween treats, Rice Krispie treats, jack-o-lantern, easy Halloween recipe, no-bake dessert, kid-friendly, party treats


