Sunday evening, the kitchen is finally quiet after a weekend of chaos, and I’m standing in front of the stove with a stack of tortillas and a bowl of seasoned turkey meat. This is my moment. Not the fancy dinner party kind of moment, but the practical, forward-thinking kind that future-me will thank present-me for. I’ve been making these Easy Freezer-Friendly Turkey and Black Bean Burritos for years now, and honestly, they’ve become my secret weapon against those weeknights when cooking feels like the last thing I want to do.
The first time I made a batch of freezer burritos, I was skeptical. Would they really taste good after a month in the deep freeze? Would the tortillas turn into a soggy mess? I had my doubts, but I was desperate for a solution to our takeout habit. The result surprised me. These burritos came out of the microwave tasting just as good as the day I made them, maybe even better because the flavors had time to get cozy together.
What I love about this recipe is that it’s not fussy. You don’t need any special skills or expensive ingredients. It’s just good, honest food that you can prep in an afternoon and enjoy for weeks. The turkey keeps it lighter than traditional beef burritos, and the black beans add that hearty texture that makes you forget you’re eating something healthy. This is the kind of recipe that proves you don’t have to choose between convenience and quality.
Why You’ll Love This Recipe
Let me tell you why these burritos have earned a permanent spot in my freezer rotation. I’ve tested this recipe more times than I can count, tweaking the seasoning, adjusting the cooking time, and figuring out the best way to wrap them so they freeze beautifully. This is the version that works every single time.
- Batch Cooking Dream: Make a dozen burritos in one go and you’ve got lunches or dinners sorted for weeks. It’s meal prep at its most satisfying.
- Budget-Friendly: Ground turkey and canned black beans are wallet-friendly staples. You get a filling, protein-packed meal without breaking the bank.
- Customizable to Your Taste: Spice it up, keep it mild, add extra veggies, or swap the cheese. These burritos adapt to whatever you’re craving.
- Perfect for Busy Nights: When you’re tired, hungry, and tempted to order pizza, having a homemade burrito in the freezer feels like a lifesaver.
- Kid-Approved: My nieces devour these. The familiar burrito shape and mild flavor make them a hit with even the pickiest eaters.
What sets this recipe apart is the balance of flavors. The turkey is seasoned just right, not too spicy, not too bland. The black beans add creaminess, and the cheese brings it all together. I’ve tried other freezer burrito recipes, but this one holds up the best. The tortillas don’t get soggy, the filling stays moist, and every bite tastes fresh. It’s not just another version; it’s the one I keep coming back to.
What Ingredients You Will Need
This recipe uses simple, wholesome ingredients that you probably already have in your kitchen. No fancy grocery store runs required. I’ve kept the ingredient list straightforward because that’s the whole point of a freezer-friendly meal.
- Ground turkey (1 lb) – I prefer 93% lean for the best balance of flavor and moisture. Too lean and the filling gets dry.
- Black beans (1 can, drained and rinsed) – Canned is perfectly fine here. Just make sure to rinse them well to remove excess sodium.
- Onion (1 medium, diced) – Yellow or white onion works great. Adds a savory base to the filling.
- Garlic (3 cloves, minced) – Fresh garlic gives the best flavor, but jarred minced garlic works in a pinch.
- Bell pepper (1 medium, diced) – Any color works. I use red for a touch of sweetness.
- Canned diced tomatoes with green chilies (1 can, 10 oz) – This adds moisture and a little kick. Rotel is my go-to brand.
- Chili powder (1 tablespoon) – The backbone of the seasoning. Use a good quality brand like McCormick or Spice Islands.
- Cumin (1 teaspoon) – Adds that warm, earthy flavor that makes burritos taste authentic.
- Smoked paprika (1 teaspoon) – This is my secret ingredient. It adds a subtle smokiness that elevates the whole dish.
- Salt and pepper (to taste) – Don’t skip the salt. It brings all the flavors together.
- Shredded cheddar or Mexican blend cheese (2 cups) – Pre-shredded is fine, but freshly shredded melts better.
- Large flour tortillas (10-12 count) – Look for burrito-sized tortillas. I like Mission or Guerrero brands.
- Cooked rice (2 cups) – Leftover rice works perfectly. White, brown, or cilantro lime rice all work.
- Sour cream or Greek yogurt (optional, for serving) – Adds a cool, creamy element.
For substitutions, you can use ground chicken or beef instead of turkey. If you want a vegetarian version, double the black beans and add some corn. Use dairy-free cheese and omit the sour cream for a vegan option. I’ve tried using whole wheat tortillas, and they work fine, just make sure they’re pliable enough to roll without cracking.
Equipment Needed
You don’t need a fancy kitchen to make these burritos. Here’s what you’ll need:
- Large skillet or frying pan – For cooking the turkey and vegetables. A non-stick pan makes cleanup easier.
- Cutting board and sharp knife – For dicing the onion and bell pepper.
- Wooden spoon or spatula – For breaking up the turkey as it cooks.
- Mixing bowl – To combine all the filling ingredients.
- Baking sheet – For freezing the assembled burritos before wrapping.
- Parchment paper or wax paper – To separate burritos during freezing.
- Freezer-safe bags or containers – For long-term storage. I prefer quart-sized freezer bags.
- Paper towels – For warming tortillas. A damp paper towel keeps them pliable.
If you don’t have a large skillet, a Dutch oven works just as well. For wrapping, you can use aluminum foil instead of parchment paper, but I find parchment prevents sticking better. I bought a set of reusable silicone freezer bags last year, and they’ve been worth every penny. No more single-use plastic waste.
Preparation Method
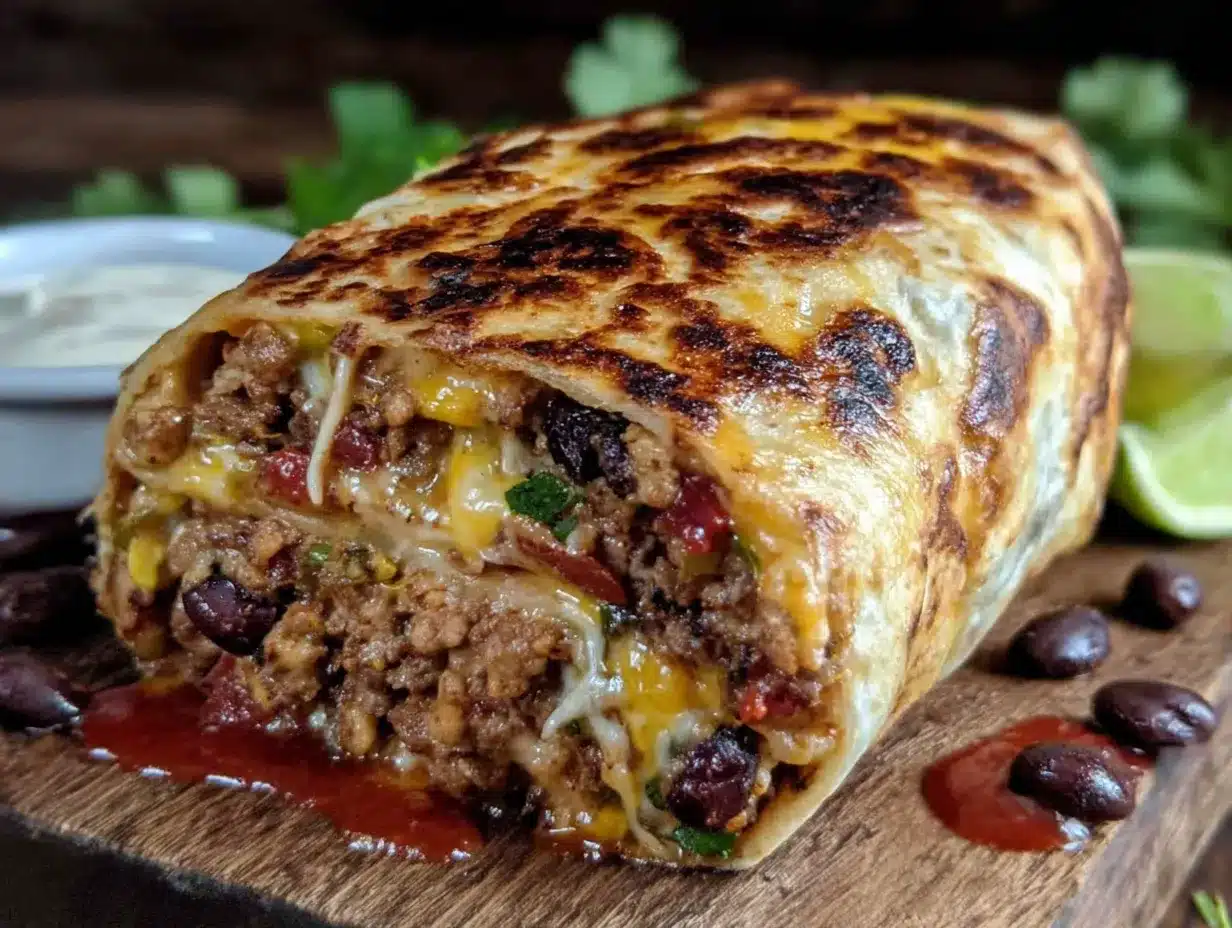
Making these burritos is straightforward, but there are a few tricks I’ve learned along the way that make the process smoother. Follow these steps, and you’ll have a freezer full of delicious burritos in no time.
- Cook the turkey – Heat a large skillet over medium-high heat. Add the ground turkey and cook, breaking it up with a wooden spoon, until no longer pink (about 6-8 minutes). Don’t drain the fat completely; a little moisture helps the filling stay juicy.
- Sauté the vegetables – Add the diced onion and bell pepper to the skillet with the turkey. Cook for 3-4 minutes until the vegetables start to soften. Add the minced garlic and cook for another 30 seconds until fragrant. Your kitchen will smell amazing at this point.
- Add the tomatoes and beans – Stir in the can of diced tomatoes with green chilies and the drained black beans. Let everything simmer together for 5 minutes, allowing the liquid to reduce slightly. This step is crucial for preventing soggy burritos later.
- Season the filling – Sprinkle in the chili powder, cumin, smoked paprika, salt, and pepper. Stir well to combine. Taste and adjust seasoning. I usually add a pinch more salt at this stage because flavors dull during freezing.
- Add the rice – Fold in the cooked rice. Stir until everything is evenly distributed. Remove the skillet from heat and let the filling cool for about 10 minutes. You don’t want it piping hot when you assemble the burritos, or the tortillas will get steamy and tear.
- Prepare your workspace – Lay out your tortillas on a clean surface. Place a sheet of parchment paper on a baking sheet. Have your shredded cheese ready. This assembly line setup makes the process go much faster.
- Assemble the burritos – Take one tortilla and place about 1/2 cup of filling in the center, leaving a 2-inch border on each side. Sprinkle a generous handful of cheese on top. Fold the sides inward, then fold the bottom flap over the filling, tucking it tightly. Roll the burrito away from you, keeping it snug but not too tight.
- Flash freeze the burritos – Place each assembled burrito seam-side down on the parchment-lined baking sheet. Make sure they’re not touching each other. Pop the baking sheet in the freezer for 1-2 hours, or until the burritos are firm to the touch. This step prevents them from sticking together when you bag them.
- Wrap and store – Once the burritos are frozen solid, wrap each one individually in parchment paper or plastic wrap. Place them in a freezer-safe bag, squeeze out as much air as possible, and seal. Label the bag with the date and contents. They’ll keep for up to 3 months.
A few notes from my experience: If the filling seems too wet, let it simmer a few minutes longer. Wet filling leads to soggy tortillas. Also, don’t overfill the burritos. It’s tempting to stuff them, but they’ll be impossible to roll and might burst during reheating. Trust me, I learned this the hard way.
Cooking Tips & Techniques
After making countless batches of these burritos, I’ve picked up some tricks that make a real difference. Let me share them with you.
Don’t skip the cooling step. I know it’s tempting to assemble everything while it’s hot, but letting the filling cool to room temperature prevents steam from building up inside the tortillas. Steam turns into ice crystals during freezing, and that leads to a soggy mess when you reheat. Patience pays off here.
Warm your tortillas. Cold tortillas crack and tear when you try to roll them. Wrap a stack of tortillas in damp paper towels and microwave for 30-45 seconds. They’ll become pliable and easy to work with. This one step saved me so much frustration.
Use the right wrapping technique. When rolling, keep it tight but not too tight. You want the filling snug inside without the tortilla splitting. Imagine you’re wrapping a gift, not squeezing a stress ball. A tight roll also prevents the filling from leaking out during reheating.
Label everything. Frozen burritos all look the same. I learned this when I accidentally grabbed a spicy chorizo burrito thinking it was a mild turkey one. Now I always write the date, contents, and reheating instructions on the bag. Future-you will appreciate it.
Spread them out during flash freezing. If burritos touch while freezing, they’ll fuse together into one giant burrito blob. Give them space on the baking sheet. Once they’re individually frozen, you can stack them however you want.
One mistake I made early on was using low-fat cheese. It doesn’t melt as well and can turn rubbery after freezing. Stick with full-fat cheese for the best texture. Another lesson: don’t skip the rice. Rice absorbs excess moisture and gives the filling a better structure. Without it, the burritos can become a soupy mess.
Variations & Adaptations
The beauty of this recipe is how easily it adapts to different tastes and dietary needs. Here are some variations I’ve tried and loved.
Spicy Southwest Burritos – Add a diced jalapeño along with the bell pepper, and stir in a teaspoon of chipotle powder. Use pepper jack cheese instead of cheddar. The smokey heat takes these burritos to another level.
Vegetarian Black Bean and Sweet Potato Burritos – Skip the turkey entirely. Roast a diced sweet potato with olive oil and cumin until tender, then mix it with the black beans, onions, and peppers. The sweetness of the potato balances the savory spices perfectly.
Low-Carb Lettuce Wrap Burritos – For a lighter version, skip the tortilla and serve the filling in large lettuce cups. Butter lettuce or romaine hearts work well. Top with avocado and salsa for a fresh, crunchy meal.
Breakfast Burritos – Swap the rice for scrambled eggs and add some crispy hash browns. These are fantastic for busy mornings. Just reheat and go.
Cheesy Enchilada Style – Instead of freezing them as burritos, place the rolled tortillas in a baking dish, top with enchilada sauce and extra cheese, and bake at 375°F for 20 minutes. It’s a completely different meal with the same filling.
I once made a batch with leftover cilantro lime rice from a taco night, and it was the best version I’ve ever made. Don’t be afraid to experiment with whatever you have on hand. That’s how the best recipes are born.
Serving & Storage Suggestions
These burritos are designed for convenience, but that doesn’t mean you can’t make them feel special when you serve them.
Serving temperature – Reheat until the center is piping hot, about 165°F. I usually microwave one for 2-3 minutes, flipping halfway through. For a crispier tortilla, finish it in a dry skillet for a minute on each side.
What to serve with them – A dollop of sour cream or Greek yogurt, a spoonful of fresh salsa, and some sliced avocado turn a simple burrito into a full meal. I also love serving them with a side of Mexican rice or a simple green salad dressed with lime juice.
Storage instructions – Keep frozen burritos in a sealed freezer bag for up to 3 months. For best quality, use them within 2 months. I’ve kept some for 4 months before, and they were still good, just slightly less flavorful.
Reheating methods – Microwave is the fastest, but the tortilla can get chewy. For better results, thaw a burrito in the fridge overnight, then reheat in a 350°F oven for 15 minutes. Air fryer fans, try 375°F for 8-10 minutes for a crispy exterior.
How flavors develop – Honestly, these burritos taste even better after a week or two in the freezer. The spices have time to meld together, and the flavors become more cohesive. It’s one of those rare cases where frozen food beats fresh.
Nutritional Information & Benefits
These burritos are packed with protein and fiber, making them a satisfying meal that keeps you full for hours. Here’s an estimated breakdown per burrito (based on 12 servings):
| Nutrient | Amount |
|---|---|
| Calories | 380 |
| Protein | 25g |
| Carbohydrates | 38g |
| Fiber | 8g |
| Fat | 14g |
| Saturated Fat | 6g |
| Sodium | 620mg |
Ground turkey is a lean protein source that supports muscle health and keeps you satisfied. Black beans are rich in fiber and plant-based protein, which aids digestion and stabilizes blood sugar. The bell peppers add a healthy dose of vitamin C, and the tomatoes provide lycopene, an antioxidant linked to heart health.
This recipe is naturally gluten-free if you use corn tortillas instead of flour. For a lower-carb option, serve the filling in lettuce wraps or over a bed of greens. The cheese adds calcium, but you can reduce the amount or use a dairy-free alternative if needed.
I love that these burritos let me eat well without spending hours in the kitchen every day. They’re a practical way to prioritize nutrition even on the busiest weeks.
Conclusion
These Easy Freezer-Friendly Turkey and Black Bean Burritos have genuinely changed how I approach busy weeknights. Instead of reaching for the takeout menu or settling for a sad bowl of cereal, I grab a homemade burrito that tastes like I actually put effort into dinner. And the best part? I didn’t have to do anything that day except press a few buttons on the microwave.
I encourage you to make a batch this weekend. Customize the filling to match your family’s preferences, double the recipe if you have freezer space, and enjoy the peace of mind that comes with having a stash of ready-to-eat meals. These burritos are forgiving, flexible, and always delicious.
If you try this recipe, I’d love to hear how it goes. Drop a comment below with your favorite variation or any questions you have. And if you’re looking for more meal prep inspiration, check out our collection of easy freezer-friendly recipes on the blog. Happy cooking, friends!
Frequently Asked Questions
Can I use ground beef instead of turkey?
Absolutely. Ground beef works perfectly in this recipe. Just drain any excess fat after cooking to prevent the filling from becoming greasy. I’ve used both, and they’re equally delicious.
How long do these burritos last in the freezer?
Properly stored in a sealed freezer bag, these burritos stay fresh for up to 3 months. For the best flavor and texture, I recommend eating them within 2 months. After that, they’re still safe to eat but might lose some quality.
Can I freeze the burritos without cheese?
Yes, you can skip the cheese or add it after reheating. The cheese adds richness, but the burritos are still tasty without it. If you’re dairy-free, this is an easy adjustment to make.
What’s the best way to reheat a frozen burrito?
For the quickest method, microwave on high for 2-3 minutes, flipping halfway. For a crispier tortilla, thaw overnight in the fridge and reheat in a 350°F oven for 15 minutes. The air fryer at 375°F for 8-10 minutes also gives great results.
Can I make these burritos in advance for a party?
Definitely. Assemble and freeze the burritos up to a month ahead. On the day of your party, thaw them in the fridge and reheat in the oven. They’re perfect for casual gatherings where you want to spend time with guests instead of being stuck in the kitchen.
Pin This Recipe!
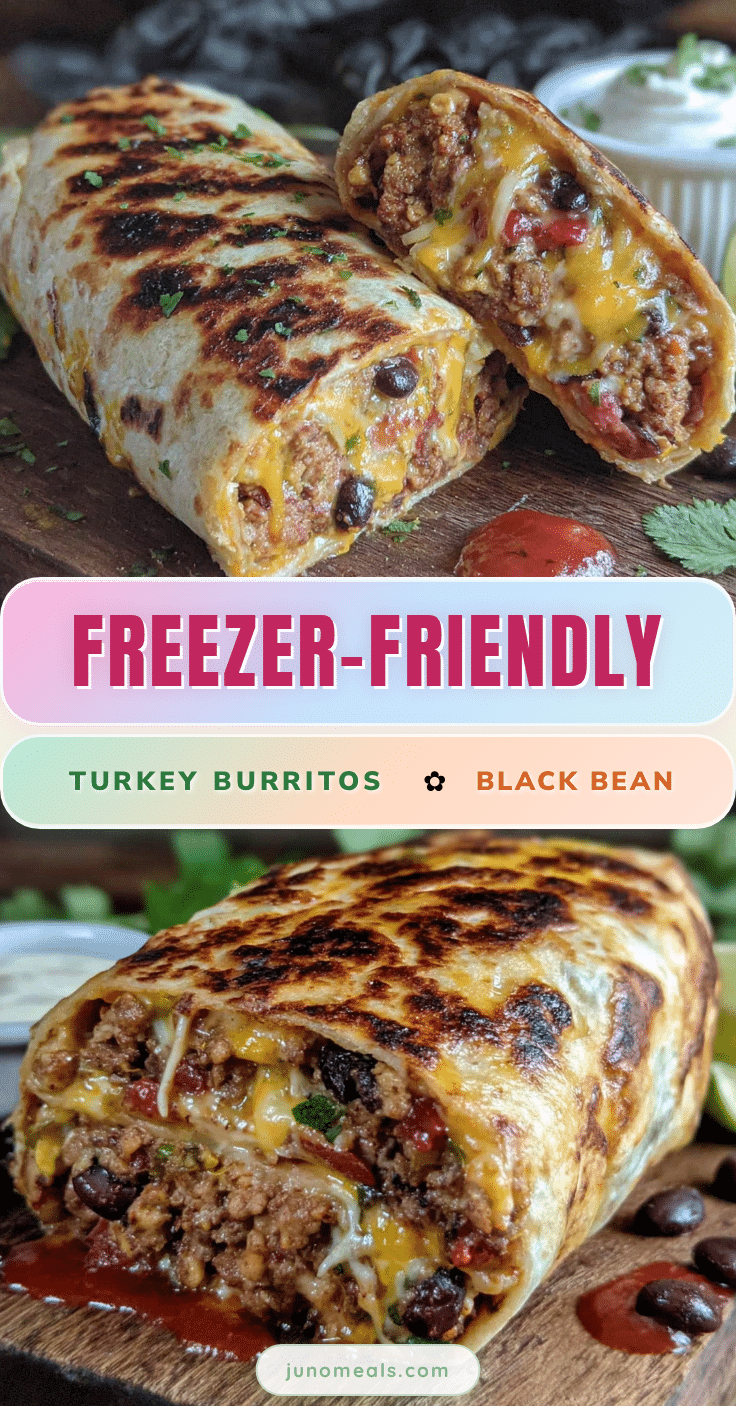
Easy Freezer-Friendly Turkey and Black Bean Burritos

These freezer-friendly turkey and black bean burritos are the perfect make-ahead meal for busy weeknights. Packed with seasoned ground turkey, black beans, rice, and cheese, they reheat beautifully and taste just as good as the day you made them.
- Prep Time: 20 minutes
- Cook Time: 20 minutes
- Total Time: 40 minutes (plus 1-2 hours freezing time)
- Yield: 10-12 servings 1x
- Category: Main Course
- Cuisine: Mexican-American
Ingredients
- 1 lb ground turkey (93% lean)
- 1 can black beans, drained and rinsed
- 1 medium onion, diced
- 3 cloves garlic, minced
- 1 medium bell pepper, diced
- 1 can (10 oz) diced tomatoes with green chilies
- 1 tablespoon chili powder
- 1 teaspoon cumin
- 1 teaspoon smoked paprika
- Salt and pepper to taste
- 2 cups shredded cheddar or Mexican blend cheese
- 10–12 large flour tortillas (burrito-sized)
- 2 cups cooked rice (white, brown, or cilantro lime)
- Sour cream or Greek yogurt (optional, for serving)
Instructions
- Cook the turkey: Heat a large skillet over medium-high heat. Add the ground turkey and cook, breaking it up with a wooden spoon, until no longer pink (about 6-8 minutes). Do not drain all the fat.
- Sauté the vegetables: Add the diced onion and bell pepper to the skillet with the turkey. Cook for 3-4 minutes until softened. Add the minced garlic and cook for 30 seconds until fragrant.
- Add the tomatoes and beans: Stir in the diced tomatoes with green chilies and the drained black beans. Let simmer for 5 minutes, allowing the liquid to reduce slightly.
- Season the filling: Sprinkle in the chili powder, cumin, smoked paprika, salt, and pepper. Stir well. Taste and adjust seasoning.
- Add the rice: Fold in the cooked rice until evenly distributed. Remove from heat and let the filling cool for about 10 minutes.
- Prepare your workspace: Lay out tortillas on a clean surface. Place a sheet of parchment paper on a baking sheet. Have shredded cheese ready.
- Assemble the burritos: Place about 1/2 cup of filling in the center of each tortilla, leaving a 2-inch border. Sprinkle cheese on top. Fold the sides inward, then fold the bottom flap over the filling, tucking tightly. Roll the burrito away from you, keeping it snug.
- Flash freeze: Place assembled burritos seam-side down on the parchment-lined baking sheet, not touching. Freeze for 1-2 hours until firm.
- Wrap and store: Wrap each frozen burrito individually in parchment paper or plastic wrap. Place in a freezer-safe bag, squeeze out air, seal, and label with date. Store for up to 3 months.
Notes
Let the filling cool before assembling to prevent soggy tortillas. Warm tortillas in damp paper towels for 30-45 seconds to make them pliable. Do not overfill burritos. For best results, use full-fat cheese. Burritos taste even better after a week or two in the freezer as flavors meld.
Nutrition
- Serving Size: 1 burrito
- Calories: 380
- Sugar: 3
- Sodium: 620
- Fat: 14
- Saturated Fat: 6
- Carbohydrates: 38
- Fiber: 8
- Protein: 25
Keywords: freezer burritos, turkey burritos, black bean burritos, meal prep, freezer-friendly, make-ahead, healthy burritos, easy dinner


