My neighbor, an older woman named Clara who keeps her garden like a secret masterpiece, watched me one October afternoon as I was trying to scrape burnt pumpkin puree off a baking sheet. I had been at it for an hour, trying to make gluten-free donuts from scratch, and the kitchen looked like a disaster zone. She didn’t say anything at first. Then she just handed me a paper napkin with a recipe written in pencil on it, said “try this,” and went back to her roses.
I almost didn’t try it. Honestly, I had tried so many gluten-free baked goods that tasted like cardboard or fell apart the second you looked at them. But Clara’s donuts? They were soft, spiced just right, and actually stayed together. No crumbling, no weird aftertaste. I kept making them, tweaking little things here and there, until they became my go-to fall treat. You know that feeling when you finally find a recipe that just works? This is that recipe.
These easy baked gluten-free pumpkin donuts are the kind of thing you can whip up on a busy Tuesday night when you’re craving something cozy but don’t want to spend hours in the kitchen. They’re not fried, so no messy oil or splatters. Just mix, bake, and eat. I’ve made them for my kids’ school bake sales, for Thanksgiving brunch, and honestly, for myself on a random Wednesday when I needed a little comfort. The best part? You probably already have most of the ingredients in your pantry.
So whether you’re new to gluten-free baking or you’ve been at it for years, these donuts are going to become your new favorite fall staple. They’re forgiving, they’re fast, and they taste like autumn in every single bite.
Why You’ll Love This Recipe
Let me tell you why these donuts have earned a permanent spot in my recipe rotation. I’ve tested this recipe at least a dozen times, tweaking the flour blend, adjusting the spice ratio, and even trying different pumpkin brands. Every single time, they came out delicious. That’s the kind of reliability you need in a recipe.
- Quick & Easy: These come together in under 30 minutes. From mixing to eating, you’re looking at about 25 minutes total. Perfect for those weeknights when you need a treat but don’t have hours to spare.
- Simple Ingredients: No fancy grocery trips needed. You likely have gluten-free flour, pumpkin puree, eggs, and basic spices in your kitchen right now. I use canned pumpkin for convenience, and it works beautifully.
- Perfect for Fall Gatherings: Great for Halloween parties, Thanksgiving brunch, or just a cozy weekend morning. They’re a crowd-pleaser that even non-gluten-free eaters will devour.
- Crowd-Pleaser: Every time I bring these to a gathering, people ask for the recipe. They can’t believe they’re gluten-free. The texture is that good.
- Unbelievably Delicious: The combination of pumpkin, cinnamon, nutmeg, and a touch of vanilla creates this warm, comforting flavor that just screams autumn. And the texture? Soft, tender, with a slight crust on the outside from the cinnamon-sugar coating.
What makes these different from other gluten-free pumpkin donut recipes? It’s the flour blend. I use a mix of almond flour and a good quality gluten-free all-purpose flour blend. This gives them a structure that doesn’t crumble, and a moistness that lasts for days. Plus, the cinnamon-sugar coating adds that perfect sweet crunch.
This recipe isn’t just good—it’s the kind that makes you close your eyes after the first bite. It’s comfort food reimagined for anyone who needs to eat gluten-free, but still wants that soul-soothing satisfaction of a warm, spiced donut.
What Ingredients You Will Need
This recipe uses simple, wholesome ingredients to deliver bold flavor and satisfying texture without the fuss. Most of these are pantry staples, especially if you already bake gluten-free.
- Gluten-free all-purpose flour (1 cup / 120g) — I recommend Bob’s Red Mill 1-to-1 Baking Flour or King Arthur Measure for Measure. Both have xanthan gum already added, which helps with structure. If your blend doesn’t have it, add 1/2 teaspoon xanthan gum separately.
- Almond flour (1/2 cup / 56g) — This adds moisture and a tender crumb. I use finely ground almond flour, not almond meal. It makes a big difference in texture.
- Pumpkin puree (3/4 cup / 170g) — Make sure it’s 100% pure pumpkin, not pumpkin pie filling. I use Libby’s canned pumpkin. It’s consistent and reliable. If you’re using homemade pumpkin puree, drain off any excess liquid first.
- Granulated sugar (1/2 cup / 100g) — Regular white sugar works great. You can also use coconut sugar for a less refined option, but the donuts will be a bit darker.
- Brown sugar (1/4 cup / 50g, packed) — Adds depth and moisture. I use light brown sugar, but dark brown works too for a richer flavor.
- Large eggs (2, room temperature) — Room temperature eggs incorporate better into the batter. If you’re in a hurry, place them in a bowl of warm water for 5 minutes.
- Vegetable oil (1/4 cup / 60ml) — Keeps the donuts moist. You can use melted coconut oil or avocado oil instead. I’ve used both, and they work equally well.
- Vanilla extract (1 teaspoon) — Adds warmth and rounds out the pumpkin flavor. Use pure vanilla extract for best results.
- Pumpkin pie spice (2 teaspoons) — If you don’t have it, make your own: 1 teaspoon cinnamon, 1/2 teaspoon nutmeg, 1/4 teaspoon ginger, 1/4 teaspoon cloves. I actually prefer making my own blend because I can adjust the ratios.
- Baking powder (1 1/2 teaspoons) — Make sure it’s fresh. Old baking powder won’t give you that nice rise.
- Baking soda (1/2 teaspoon) — Helps the donuts get that perfect golden color.
- Salt (1/4 teaspoon) — Enhances all the flavors. I use fine sea salt.
- For the coating: Melted butter (3 tablespoons / 42g) — Use dairy-free butter if needed. Cinnamon-sugar mix (1/4 cup sugar + 1 teaspoon cinnamon).
You can substitute the almond flour with more gluten-free all-purpose flour, but the texture will be slightly denser. I’ve tried it, and they’re still good, just not as tender.
Equipment Needed
You don’t need a lot of fancy equipment for these donuts. Here’s what I use:
- Donut pan (6-cavity or 12-cavity) — This is essential. I have a Wilton non-stick donut pan that I’ve used for years. It costs about $10 and is worth every penny. If you don’t have one, you can bake these as muffins instead, just adjust the time to 15-18 minutes.
- Mixing bowls (medium and large) — Any bowls you have will work. I use glass bowls because they’re easy to clean.
- Whisk — For mixing the dry ingredients. A fork works in a pinch.
- Spatula — For folding the batter together. I prefer a silicone spatula because it doesn’t scratch my bowls.
- Piping bag or zip-top bag — For filling the donut pan without making a mess. I usually use a quart-size zip-top bag with the corner snipped off. It’s easier than trying to spoon the batter in.
- Cooling rack — Lets the donuts cool evenly so they don’t get soggy on the bottom.
- Pastry brush — For brushing the melted butter on the donuts. A small silicone brush works great.
If you don’t have a donut pan, you can absolutely make these as donut holes using a mini muffin pan. Bake for 8-10 minutes instead. I’ve done this when I couldn’t find my donut pan, and they were just as delicious.
Preparation Method
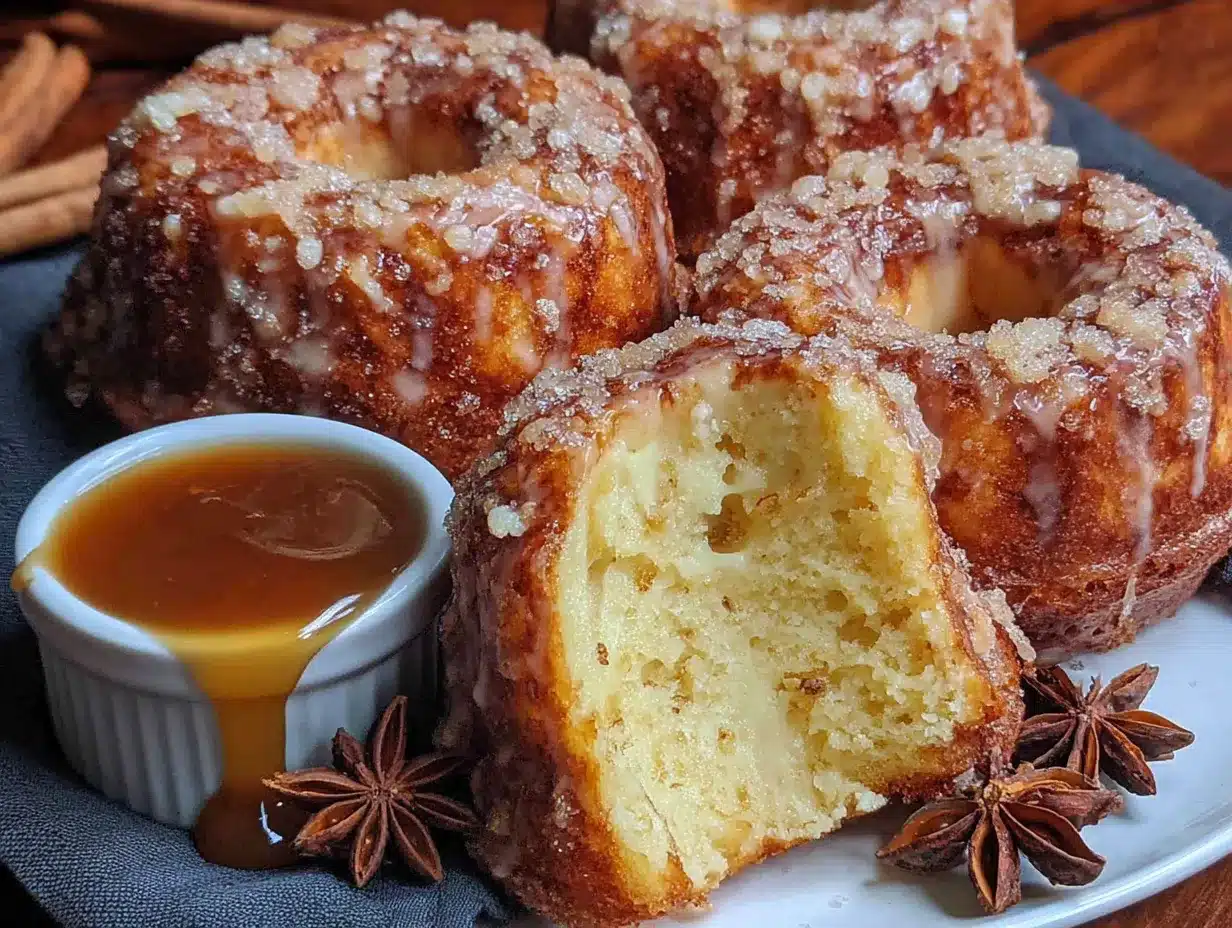
Let me walk you through this step by step. Trust me, it’s easier than you think.
- Preheat your oven to 350°F (175°C). Spray your donut pan with non-stick cooking spray. I use a spray that has flour in it for extra insurance. Set the pan aside.
- In a large bowl, whisk together the dry ingredients: gluten-free all-purpose flour, almond flour, sugar, brown sugar, pumpkin pie spice, baking powder, baking soda, and salt. Make sure there are no lumps. The brown sugar can be clumpy, so break it up with your fingers if needed.
- In a medium bowl, whisk together the wet ingredients: pumpkin puree, eggs, vegetable oil, and vanilla extract. Whisk until smooth and well combined. It should look like a thick, orange-colored mixture.
- Pour the wet ingredients into the dry ingredients. Use a spatula to fold everything together. Don’t overmix! Just stir until no streaks of flour remain. A few small lumps are okay. Overmixing will make the donuts tough.
- Transfer the batter to a piping bag or zip-top bag. If using a zip-top bag, snip off about 1/2 inch from one corner. Pipe the batter into the donut pan, filling each cavity about 2/3 full. Don’t overfill, or the donuts will spread and lose their hole.
- Bake for 10-12 minutes. The donuts are done when they spring back when lightly touched and a toothpick inserted into the thickest part comes out clean. My oven runs hot, so I check at 10 minutes. You’ll know they’re ready when the kitchen smells like pumpkin spice heaven.
- Let the donuts cool in the pan for 5 minutes. This is important. If you try to remove them too soon, they might fall apart. After 5 minutes, gently transfer them to a cooling rack.
- While the donuts are still warm, prepare the coating. Melt the butter in a small bowl. In another small bowl, mix the sugar and cinnamon together. Brush each donut with melted butter, then dip it into the cinnamon-sugar mixture. Make sure to coat both sides. I like to do this while the donuts are still warm so the coating sticks better.
- Let the coated donuts cool completely on the rack. The coating will set as they cool, creating that perfect sweet crust.
One thing I learned the hard way: don’t skip the 5-minute cooling time in the pan. I was impatient once and tried to flip them out immediately. Let’s just say I had a plate of pumpkin crumbs instead of donuts. Patience pays off here.
Cooking Tips & Techniques
After making these donuts more times than I can count, I’ve picked up a few tricks that make a real difference.
Don’t overmix the batter. This is the number one mistake people make with gluten-free baking. Gluten-free flours don’t have gluten, so you can’t overwork them in the same way, but you can still make the donuts tough by mixing too much. Just fold until combined. A few lumps are fine.
Use room temperature ingredients. Cold eggs and cold pumpkin puree can make the batter seize up. Take them out of the fridge about 30 minutes before you start. If you forget, place the eggs in a bowl of warm water for 5 minutes, and microwave the pumpkin puree for about 10 seconds.
Check your baking powder. I once used an old can of baking powder, and my donuts came out flat and dense. To test if yours is still active, drop a teaspoon into a cup of hot water. If it fizzes vigorously, it’s good. If not, buy a new can.
Pipe the batter, don’t spoon it. Trust me on this. Spooning the batter into the donut pan is messy and uneven. A piping bag or zip-top bag gives you so much more control. Plus, it’s faster.
Don’t overfill the cavities. Fill them about 2/3 full. If you fill them to the top, the donuts will spread and the hole will close up. You’ll end up with pumpkin cookies instead of donuts. Not the worst thing in the world, but not what we’re going for.
Cool completely before storing. If you store warm donuts in a container, the steam will make them soggy. Let them cool completely on a rack first. I learned this the hard way when I packed some up for a friend and they turned into a sticky mess by the time she got them.
Variations & Adaptations
One of the best things about this recipe is how adaptable it is. Here are some variations I’ve tried and loved.
Vegan version: Replace the eggs with flax eggs (2 tablespoons ground flaxseed mixed with 6 tablespoons water, let sit for 5 minutes). Use melted coconut oil instead of butter for the coating, and use a dairy-free butter alternative. I’ve made this version for my vegan friend, and she said they were the best donuts she’d had in years.
Chocolate pumpkin donuts: Add 2 tablespoons of cocoa powder to the dry ingredients and reduce the gluten-free flour by 2 tablespoons. The chocolate and pumpkin combination is surprisingly good. I made these for a Halloween party and they disappeared in minutes.
Maple glaze instead of cinnamon sugar: Mix 1 cup powdered sugar with 2 tablespoons maple syrup and 1 tablespoon milk (dairy or nondairy). Drizzle over the cooled donuts instead of the cinnamon-sugar coating. This gives them a more decadent, bakery-style feel.
Savory pumpkin donuts: Reduce the sugar to 1/4 cup, omit the cinnamon-sugar coating, and add 1/2 teaspoon black pepper and 1/4 teaspoon cayenne pepper. Brush with melted butter and sprinkle with flaky sea salt. These are surprisingly good with a bowl of soup.
Gluten-free dairy-free version: Use dairy-free butter or coconut oil in the batter. For the coating, use melted coconut oil instead of butter. The texture will be slightly different, but still delicious.
My personal favorite variation is adding a handful of chopped pecans to the batter. The crunch is amazing, and it makes the donuts feel even more like a fall treat.
Serving & Storage Suggestions
These donuts are best served warm, right after you’ve coated them. The cinnamon-sugar coating is still a little melty, and the inside is soft and tender. That’s when they’re at their peak.
If you’re serving them at a gathering, arrange them on a pretty plate or a cake stand. They look beautiful with a dusting of extra cinnamon on top. For a brunch spread, serve them alongside a pumpkin spice latte or a hot apple cider. They also pair wonderfully with a cup of chai tea.
For storage, place the cooled donuts in an airtight container at room temperature. They’ll stay good for up to 3 days. Don’t refrigerate them, as that will dry them out. If you live in a humid climate, you might want to add a paper towel to the container to absorb excess moisture.
You can also freeze these donuts. Place them in a single layer on a baking sheet and freeze for 1 hour. Then transfer them to a freezer-safe bag or container. They’ll keep for up to 3 months. To thaw, leave them at room temperature for about 30 minutes, or microwave for 10-15 seconds. The texture won’t be quite as perfect as fresh, but they’re still really good.
One thing I love about these donuts is that the flavors actually develop over time. Day-old donuts have a deeper, more mellow pumpkin spice flavor. So if you can resist eating them all immediately, they’re even better the next day.
Nutritional Information & Benefits
Here’s the approximate nutritional breakdown for one donut (based on a recipe that makes 6 donuts):
- Calories: 280
- Total Fat: 14g
- Saturated Fat: 4g
- Cholesterol: 65mg
- Sodium: 220mg
- Total Carbohydrates: 36g
- Dietary Fiber: 3g
- Sugars: 20g
- Protein: 5g
These numbers will vary depending on your specific ingredients and the size of your donuts. If you use coconut sugar and reduce the coating, you can lower the sugar content.
Pumpkin is packed with vitamin A, which is great for your eyes and immune system. It’s also a good source of fiber, which helps with digestion. The almond flour adds healthy fats and protein, making these donuts more satisfying than your average baked good.
These donuts are naturally gluten-free, making them a great option for anyone with celiac disease or gluten sensitivity. They can also be made dairy-free and vegan with the substitutions I mentioned earlier. They do contain nuts (almond flour) and eggs, so they’re not suitable for those with those allergies.
I personally love that I can enjoy a treat like this without feeling guilty. It’s comfort food that actually has some nutritional value. Not bad for a donut, right?
Conclusion
These easy baked gluten-free pumpkin donuts have become a fall tradition in my house. Every time the leaves start turning and the air gets crisp, I know it’s time to pull out my donut pan and get baking. They’re quick enough for a busy weeknight, special enough for a holiday brunch, and forgiving enough for beginner bakers.
I love that this recipe came from a simple conversation with my neighbor Clara. It reminds me that the best recipes often come from unexpected places. She didn’t teach me in a formal way; she just handed me a napkin with a recipe and trusted me to figure it out. That’s the kind of kitchen exchange I love.
I encourage you to make these your own. Add your favorite spices, try different coatings, or throw in some chocolate chips. The beauty of this recipe is that it’s a starting point. You can customize it based on what you have in your pantry and what you’re craving.
Have you tried these donuts? I’d love to hear how they turned out for you. Leave a comment below and let me know if you added any fun twists. And if you share a photo on social media, tag me so I can see your creation. Happy baking, friends!
Frequently Asked Questions
Can I make these donuts without a donut pan?
Absolutely! You can bake the batter in a mini muffin pan to make donut holes. Just fill the cavities about 2/3 full and bake for 8-10 minutes. You can also bake them in a regular muffin tin, but you’ll need to adjust the time to 15-18 minutes.
Why did my donuts turn out dry?
Dry donuts usually mean you either overbaked them or used too much flour. Make sure to measure your flour correctly by spooning it into the measuring cup and leveling it off. Also, check your oven temperature with an oven thermometer, as many ovens run hot.
Can I use fresh pumpkin instead of canned?
Yes, but you’ll need to drain it well. Fresh pumpkin puree has more water than canned. Place the puree in a cheesecloth-lined strainer and let it drain for about 30 minutes. Squeeze out any excess liquid before using. Otherwise, your donuts might be too wet.
How do I make these donuts nut-free?
Replace the almond flour with an equal amount of gluten-free all-purpose flour. The texture will be slightly different—a bit denser and less tender—but they’ll still be delicious. You can also try using oat flour if you tolerate oats.
Can I double this recipe?
Absolutely! This recipe doubles beautifully. Just make sure you have two donut pans, or bake in batches. The batter can sit at room temperature for about 30 minutes while you bake the first batch. If you’re baking in batches, let the pan cool completely before greasing and filling it again.
Pin This Recipe!
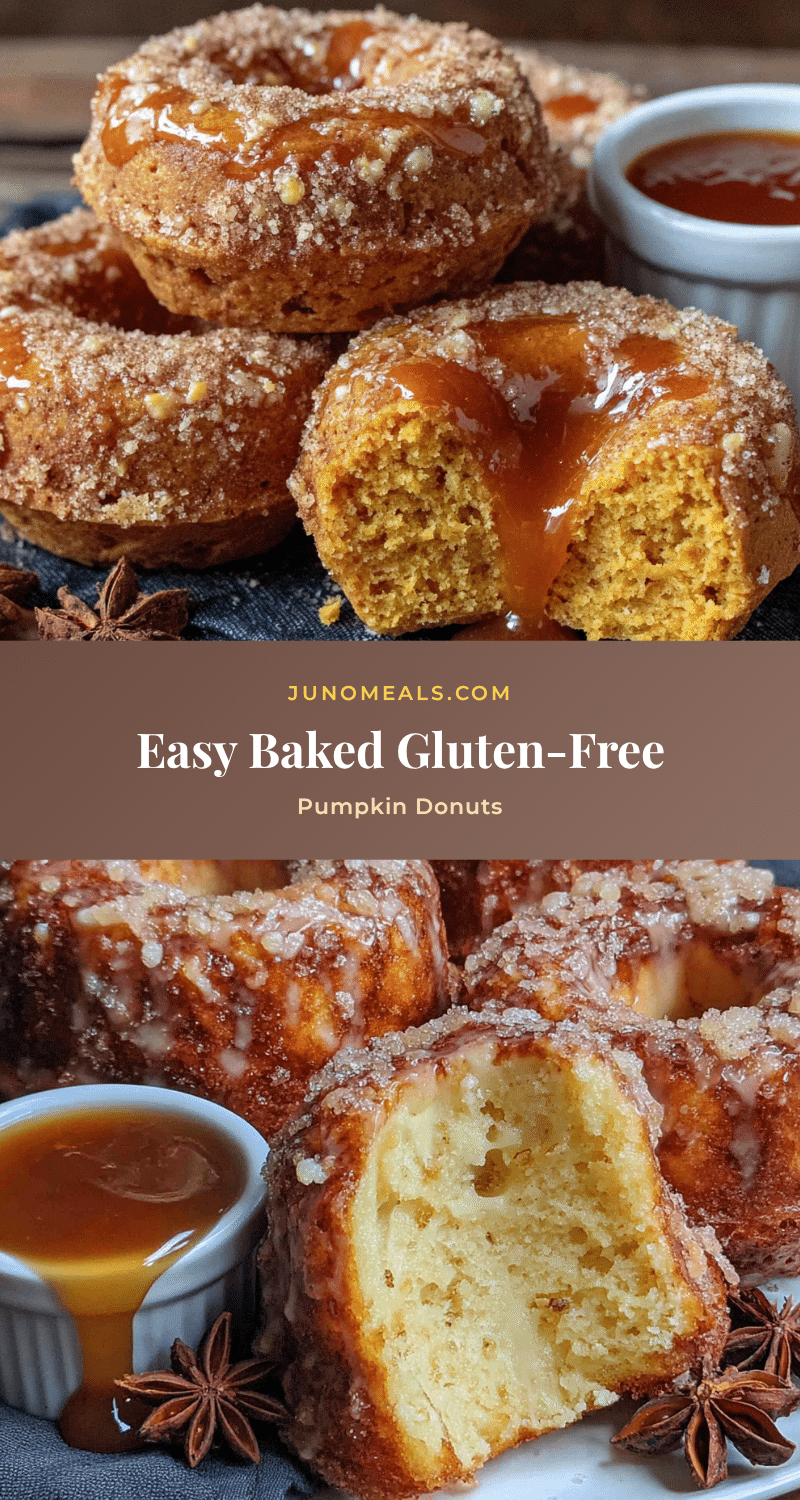
Easy Baked Gluten-Free Pumpkin Donuts Best Fall Treat
These easy baked gluten-free pumpkin donuts are soft, spiced just right, and actually stay together. They’re the kind of thing you can whip up on a busy Tuesday night when you’re craving something cozy but don’t want to spend hours in the kitchen.
- Prep Time: 15 minutes
- Cook Time: 12 minutes
- Total Time: 27 minutes
- Yield: 6 servings 1x
- Category: Dessert
- Cuisine: American
Ingredients
- 1 cup (120g) gluten-free all-purpose flour (e.g., Bob’s Red Mill 1-to-1 Baking Flour or King Arthur Measure for Measure)
- 1/2 cup (56g) almond flour (finely ground)
- 3/4 cup (170g) pumpkin puree (100% pure pumpkin, not pumpkin pie filling)
- 1/2 cup (100g) granulated sugar
- 1/4 cup (50g) brown sugar, packed
- 2 large eggs, room temperature
- 1/4 cup (60ml) vegetable oil (or melted coconut oil or avocado oil)
- 1 teaspoon vanilla extract
- 2 teaspoons pumpkin pie spice (or homemade: 1 tsp cinnamon, 1/2 tsp nutmeg, 1/4 tsp ginger, 1/4 tsp cloves)
- 1 1/2 teaspoons baking powder
- 1/2 teaspoon baking soda
- 1/4 teaspoon salt
- For the coating: 3 tablespoons (42g) melted butter (or dairy-free butter), 1/4 cup sugar mixed with 1 teaspoon cinnamon
Instructions
- Preheat your oven to 350°F (175°C). Spray your donut pan with non-stick cooking spray.
- In a large bowl, whisk together the dry ingredients: gluten-free all-purpose flour, almond flour, granulated sugar, brown sugar, pumpkin pie spice, baking powder, baking soda, and salt.
- In a medium bowl, whisk together the wet ingredients: pumpkin puree, eggs, vegetable oil, and vanilla extract until smooth.
- Pour the wet ingredients into the dry ingredients. Use a spatula to fold together until just combined; do not overmix.
- Transfer the batter to a piping bag or zip-top bag. Snip off about 1/2 inch from one corner. Pipe the batter into the donut pan, filling each cavity about 2/3 full.
- Bake for 10-12 minutes, until the donuts spring back when lightly touched and a toothpick inserted into the thickest part comes out clean.
- Let the donuts cool in the pan for 5 minutes, then gently transfer them to a cooling rack.
- While the donuts are still warm, melt the butter in a small bowl. In another small bowl, mix the sugar and cinnamon together. Brush each donut with melted butter, then dip into the cinnamon-sugar mixture, coating both sides.
- Let the coated donuts cool completely on the rack.
Notes
Don’t overmix the batter. Use room temperature ingredients. Check your baking powder for freshness. Pipe the batter, don’t spoon it. Don’t overfill the cavities. Cool completely before storing. For vegan version: replace eggs with flax eggs (2 tbsp ground flaxseed + 6 tbsp water), use melted coconut oil instead of butter for coating. For nut-free: replace almond flour with equal amount gluten-free all-purpose flour. For chocolate pumpkin: add 2 tbsp cocoa powder and reduce gluten-free flour by 2 tbsp. For maple glaze: mix 1 cup powdered sugar with 2 tbsp maple syrup and 1 tbsp milk. For savory: reduce sugar to 1/4 cup, omit cinnamon-sugar coating, add 1/2 tsp black pepper and 1/4 tsp cayenne pepper, brush with melted butter and sprinkle with flaky sea salt.
Nutrition
- Serving Size: 1 donut
- Calories: 280
- Sugar: 20
- Sodium: 220
- Fat: 14
- Saturated Fat: 4
- Carbohydrates: 36
- Fiber: 3
- Protein: 5
Keywords: gluten-free, pumpkin, donuts, baked, fall, easy, dairy-free option, vegan option


