Three times in one week I made these apple cinnamon muffins, and by the third batch I finally stopped measuring the cinnamon with a spoon and started doing it by heart. The first batch came out too dry—I’d overmixed the batter, a classic rookie mistake even for someone who’s been baking for years. The second batch? Perfect crumb, but the apple pieces sank to the bottom like little fruity anchors. By batch three, I had it dialed in: toss those diced apples in a tablespoon of flour before folding them in, and suddenly everything clicked.
You see, I wasn’t just testing a recipe. I was trying to solve a very specific problem—what do you pack for a preschooler who suddenly decides she hates everything? My three-year-old had entered what I call the “crunchy-on-the-outside, soft-on-the-inside” phase. Crackers were fine. Bread was suspect. But muffins? Muffins were neutral territory. And if I could sneak some fruit and whole grains into that neutral territory without her launching an investigation? That was the real win.
These aren’t fancy bakery muffins. They’re not loaded with streusel or glaze or anything that screams “look at me.” They’re simple, honest muffins with soft crumbs, tender apple bits, and just enough cinnamon to make the kitchen smell like a fall afternoon in October. The sweetness comes mostly from the apples themselves, plus a little maple syrup because refined sugar feels unnecessary here. They hold together well in tiny hands, they freeze beautifully, and they somehow taste better on day two—if they last that long.
What I love most about this recipe is that it taught me something about patience. Not every good thing needs to be complicated. Sometimes the recipe that works is the one you make three times in a week, adjusting tiny things each time, until it feels like second nature. These muffins became that for me. I hope they become that for you too.
Why You’ll Love This Recipe
Let me tell you why these apple cinnamon muffins have earned a permanent spot in our weekly rotation—and why I think they’ll earn one in yours too.
- Truly Preschool-Friendly: These muffins are soft enough for little jaws to manage but sturdy enough to hold their shape when tiny fingers squish them. No sticky mess, no crumbling disasters.
- Naturally Sweetened: The sweetness comes from ripe apples and a touch of maple syrup or honey. No refined sugar here, which means you can feel good about serving them for breakfast, snack, or even dessert.
- Simple Ingredients: You probably have everything in your pantry right now. Whole wheat pastry flour, oats, cinnamon, apples, eggs, butter—that’s basically it. No weird specialty items.
- Freezer-Friendly: Make a double batch on Sunday and you’ve got snacks for two weeks. They thaw in minutes and taste just as fresh as the day you baked them.
- Customizable: Swap the apples for pears, add raisins or chopped walnuts (if your preschooler tolerates texture), or throw in a handful of shredded zucchini—the base is forgiving enough to handle whatever you’ve got.
- Kitchen-Safe for Little Helpers: This is the kind of recipe you can actually make with your preschooler without losing your mind. Simple steps, no hot liquids, and lots of things to stir, pour, and sprinkle.
I’ve tested this recipe with my own picky eater, with my neighbor’s kids who “don’t like muffins,” and even with a playdate group of four sugar-crazed three-year-olds. Every single time, the muffins disappeared. That’s not luck—that’s a recipe that works because it was built for real life, not for a food magazine photoshoot.
What Ingredients You Will Need
This recipe uses simple, wholesome ingredients that work together to create a muffin that’s tender, flavorful, and just sweet enough. Nothing fancy here—just smart choices that make these muffins work for both kids and adults.
- 1 ½ cups whole wheat pastry flour (or all-purpose flour if that’s what you have—whole wheat pastry flour gives a softer texture than regular whole wheat)
- ½ cup rolled oats (old-fashioned oats, not instant—they add texture and fiber without making the muffins heavy)
- 1 teaspoon baking powder
- ½ teaspoon baking soda
- 1 ½ teaspoons ground cinnamon (I use Saigon cinnamon for its bolder flavor, but any cinnamon works)
- ¼ teaspoon ground nutmeg (freshly grated if you have it—it makes a subtle but noticeable difference)
- ¼ teaspoon salt
- 2 large eggs, room temperature
- ⅓ cup maple syrup (or honey—maple syrup gives a milder sweetness that lets the apple flavor shine)
- ⅓ cup unsalted butter, melted and slightly cooled (or coconut oil for a dairy-free version)
- ½ cup plain Greek yogurt (full-fat or 2%—this is the secret to moist, tender muffins that stay soft for days)
- 1 teaspoon vanilla extract
- 1 ½ cups finely diced apples (about 2 medium apples—I prefer Honeycrisp or Fuji for sweetness, but Granny Smith works if you like a tangier muffin)
- 1 tablespoon all-purpose flour (for tossing with the diced apples—this little trick prevents them from sinking to the bottom)
Ingredient Notes & Tips: When choosing apples for baking, look for firm apples that hold their shape during cooking. Honeycrisp, Fuji, Gala, and Braeburn are all excellent choices. If you only have soft apples like McIntosh, they’ll break down more during baking, which isn’t necessarily bad—it just creates a more uniform apple flavor throughout the muffin rather than distinct apple chunks.
For the yogurt, I recommend full-fat Greek yogurt for the best texture, but 2% works fine too. Avoid nonfat yogurt—it can make the muffins slightly drier. If you’re dairy-free, use a thick coconut yogurt or a dairy-free sour cream alternative.
The rolled oats are non-negotiable in my opinion—they add a lovely texture and help these muffins feel more substantial. But if you’re out of oats, you can substitute an equal amount of flour. The texture will be slightly different, but the muffins will still be delicious.
Equipment Needed
You don’t need a professional bakery setup for these muffins. Here’s what you’ll actually use:
- 12-cup standard muffin tin (nonstick or lined with paper liners—I prefer parchment liners because they never stick)
- Two mixing bowls (one medium, one large)
- Whisk (for combining dry ingredients)
- Rubber spatula (for folding—gentler than a spoon and less likely to overmix)
- Box grater or knife (for dicing the apples—I actually prefer a knife for small, even cubes, but a box grater works if you want finer apple pieces)
- Measuring cups and spoons
- Cooling rack (essential for preventing soggy bottoms—if you don’t have one, a wire oven rack works in a pinch)
- Ice cream scoop or ¼-cup measure (for evenly portioning the batter—this is my favorite tip for uniform muffins)
If you’re baking with a preschooler, I recommend letting them handle the stirring and scooping while you handle the measuring and the hot oven. My daughter loves using the ice cream scoop to portion the batter—it feels like a special job, and it keeps her engaged without getting too close to anything hot.
Preparation Method
Let me walk you through this step by step. Trust me—if you follow these instructions, you’ll get perfect muffins every single time.
- Preheat your oven to 375°F (190°C). Line a 12-cup muffin tin with paper liners or lightly grease the cups with butter or cooking spray. I prefer parchment liners because they peel off cleanly, but any liner works.
- Dice your apples into small, even cubes—about ¼-inch pieces. You want them small enough that they distribute evenly through the batter but large enough that you can actually taste them. Place the diced apples in a small bowl, toss them with 1 tablespoon of all-purpose flour, and set aside. This flour coating is the trick that keeps your apples from sinking to the bottom of the muffins during baking.
- In a medium bowl, whisk together the dry ingredients: 1 ½ cups whole wheat pastry flour, ½ cup rolled oats, 1 teaspoon baking powder, ½ teaspoon baking soda, 1 ½ teaspoons cinnamon, ¼ teaspoon nutmeg, and ¼ teaspoon salt. Whisk until everything is evenly distributed—about 15 seconds of vigorous whisking.
- In a large bowl, whisk together the wet ingredients: 2 eggs, ⅓ cup maple syrup, ⅓ cup melted butter (slightly cooled), ½ cup Greek yogurt, and 1 teaspoon vanilla extract. Whisk until smooth and well-combined—about 30 seconds. The mixture should look creamy and pale yellow.
- Pour the dry ingredients into the wet ingredients. Use a rubber spatula to fold them together gently. Stir only until you see no more streaks of flour—about 10 to 12 strokes. A few small lumps are perfectly fine. Overmixing at this stage will make your muffins tough, so resist the urge to keep stirring.
- Gently fold in the floured apple pieces. Use the spatula to fold them in with just a few more strokes. The batter will be thick and slightly lumpy—that’s exactly what you want.
- Divide the batter evenly among the 12 muffin cups. I use a ¼-cup ice cream scoop for this—it gives perfectly even portions and keeps the mess to a minimum. Each cup should be about three-quarters full.
- Bake for 16 to 18 minutes, or until a toothpick inserted into the center of a muffin comes out clean or with just a few moist crumbs. The tops should be golden brown and spring back when lightly touched. My oven runs hot, so I check at 15 minutes and go from there.
- Let the muffins cool in the pan for 5 minutes, then transfer them to a wire cooling rack to cool completely. This 5-minute rest in the pan is important—it allows the muffins to set properly without becoming soggy on the bottom.
- Enjoy warm or at room temperature. These muffins are absolutely divine fresh from the oven with a pat of butter melting into the warm crumb. But honestly? They’re even better the next day, after the flavors have had time to meld.
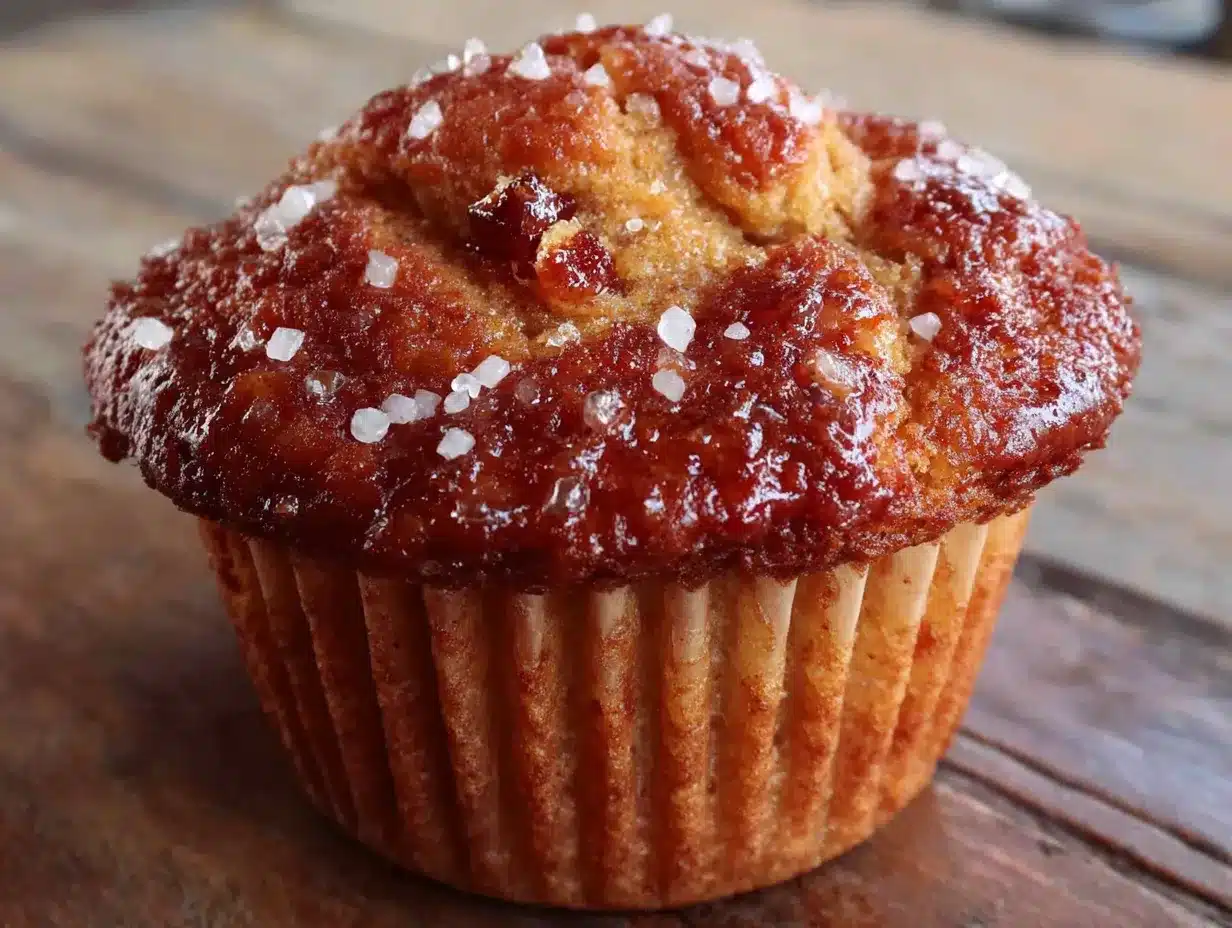
Visual Cue Check: Your batter should be thick enough to hold its shape when scooped—not runny like pancake batter. When you fold in the apples, you should see them evenly distributed throughout the batter, not clustered in one spot. The finished muffins should be domed on top, golden brown, and fragrant with cinnamon and baked apples.
Cooking Tips & Techniques
I’ve made this recipe more times than I can count, and I’ve learned a few things along the way. Here are the tips that make the biggest difference:
Don’t Overmix the Batter—This is the number one mistake I see with muffin recipes. Mix until the flour just disappears, then stop. A few lumps are your friends. Overmixing develops gluten, which gives you tough, rubbery muffins instead of tender, fluffy ones. I learned this the hard way with my first batch—they came out so dense my daughter refused to eat them.
Flour Your Fruit—I already mentioned this, but it bears repeating. Tossing your diced apples in a tablespoon of flour before folding them into the batter prevents them from sinking to the bottom of the muffins during baking. It’s a small step that makes a huge difference in the final texture and appearance.
Room Temperature Ingredients Matter—Cold eggs and cold yogurt will seize up your melted butter, creating lumps in your batter. Let your eggs and yogurt sit on the counter for 20 to 30 minutes before you start baking. If you forget (which I do, constantly), place the eggs in a bowl of warm water for 5 minutes—that brings them to room temperature quickly.
Use a Cookie Scoop for Even Portions—This isn’t just about aesthetics. Evenly sized muffins bake evenly. A ¼-cup scoop gives you perfectly uniform portions every time. Plus, it’s way less messy than trying to pour batter into those tiny cups.
Let Them Cool Properly—I know it’s tempting to dig in immediately, but letting the muffins rest in the pan for 5 minutes before transferring them to a wire rack is crucial. This allows the structure to set and prevents the bottoms from steaming and becoming soggy.
Check for Doneness Early—Every oven runs differently. Start checking your muffins at the 15-minute mark, even if the recipe says 18 minutes. A toothpick inserted in the center should come out clean or with just a few moist crumbs attached. If the toothpick is wet with batter, give them another 2 minutes and check again.
Variations & Adaptations
One of the things I love most about this recipe is how adaptable it is. Here are some variations I’ve tried and loved:
Gluten-Free Version: Substitute the whole wheat pastry flour with a good 1:1 gluten-free baking flour blend (I recommend Bob’s Red Mill or King Arthur). Add ½ teaspoon of xanthan gum if your blend doesn’t already include it. The texture will be slightly more delicate, but still delicious.
Dairy-Free Version: Use melted coconut oil or a neutral vegetable oil instead of butter, and substitute the Greek yogurt with a thick dairy-free yogurt or unsweetened applesauce. The muffins will be slightly less tender but still very good.
Vegan Version: Replace the eggs with two flax eggs (2 tablespoons ground flaxseed mixed with 6 tablespoons water, let sit for 5 minutes until gelled). Use maple syrup instead of honey, and follow the dairy-free substitutions above. The texture will be a bit denser, but the flavor is still wonderful.
Seasonal Variations: In the fall, add ¼ teaspoon of ground ginger and a pinch of cloves alongside the cinnamon and nutmeg. In the summer, swap the apples for diced peaches or nectarines—just reduce the maple syrup to ¼ cup since stone fruits are sweeter.
Add-In Options: Fold in ½ cup of raisins, dried cranberries, or chopped walnuts (if your preschooler tolerates nuts). For a sweeter muffin, add ¼ cup of chocolate chips—my daughter calls these “apple chocolate chip surprise muffins” and they’re a huge hit.
Mini Muffin Version: Use a mini muffin tin and bake for 10 to 12 minutes instead of 16 to 18. These are perfect for little hands and great for lunchboxes. You’ll get about 24 mini muffins from this recipe.
Serving & Storage Suggestions
These muffins are versatile enough to work for breakfast, snack time, or even a light dessert. Here’s how I like to serve and store them:
Serving Temperature: These muffins are delicious at room temperature, but they’re absolutely magical warm. Pop one in the microwave for 10 to 15 seconds, then split it open and add a pat of butter. The butter melts into the warm crumb, and the cinnamon aroma fills the kitchen. It’s pure comfort.
Presentation Ideas: For a preschool snack, I cut the muffins in half and arrange them on a plate with apple slices and a small cup of yogurt for dipping. For a brunch spread, I arrange them on a wooden board with fresh fruit, cheese, and a pitcher of cold milk or hot coffee.
Complementary Dishes: These muffins pair beautifully with a warm cup of tea or coffee for adults, or a glass of cold milk for kids. They also work well alongside a simple egg scramble or a bowl of yogurt and fruit for a complete breakfast.
Storage Instructions: Store leftover muffins in an airtight container at room temperature for up to 3 days. If your kitchen is warm or humid, store them in the refrigerator—they’ll keep for up to 5 days. To maintain their soft texture, place a paper towel at the bottom of the container and another on top of the muffins to absorb excess moisture.
Freezer Instructions: These muffins freeze beautifully. Let them cool completely, then place them in a single layer in a freezer-safe bag or container. They’ll keep for up to 3 months. To thaw, simply leave them at room temperature for 30 minutes, or microwave for 20 to 30 seconds. I like to freeze them in individual portions so I can grab one at a time for lunchboxes.
Flavor Development: Interestingly, these muffins taste even better on day two. The flavors have time to meld, and the texture becomes even more tender. If you can resist eating them all on day one, you’re in for a treat on day two.
Nutritional Information & Benefits
Here’s the approximate nutritional breakdown for one muffin (based on 12 muffins using the standard recipe):
- Calories: 185
- Total Fat: 8g
- Saturated Fat: 4.5g
- Cholesterol: 45mg
- Sodium: 180mg
- Total Carbohydrates: 26g
- Dietary Fiber: 3g
- Sugars: 12g (including natural sugars from apples and maple syrup)
- Protein: 5g
Health Benefits: These muffins pack a surprising nutritional punch. The whole wheat pastry flour and rolled oats provide complex carbohydrates and fiber, which help keep little tummies full and energized. The apples contribute vitamin C and additional fiber, while the Greek yogurt adds protein and calcium. The cinnamon isn’t just for flavor—it has anti-inflammatory properties and can help regulate blood sugar levels.
Dietary Considerations: This recipe is naturally nut-free (if you skip the walnuts), and can easily be made gluten-free, dairy-free, or vegan with the substitutions I mentioned earlier. It’s also free of refined sugar, making it a great option for families who are mindful of their sugar intake.
Allergen Note: This recipe contains wheat (gluten), eggs, and dairy. Please adjust accordingly for your family’s dietary needs.
I love that I can serve these muffins to my daughter without any guilt. They’re a snack that actually nourishes her body, and she eats them with the same enthusiasm she’d show for a cookie. That’s a win in my book.
Conclusion
These easy apple cinnamon muffins have become a staple in our kitchen for good reason. They’re simple enough to make on a busy weekday morning, wholesome enough to feel good about serving, and delicious enough that even the pickiest eaters ask for seconds. Whether you’re packing lunchboxes, planning a playdate snack, or just looking for a comforting treat to enjoy with your morning coffee, these muffins deliver.
What I love most about this recipe is that it’s not just about the muffins themselves—it’s about the ritual of making them. The way the cinnamon fills your kitchen, the way your little one’s face lights up when they help stir the batter, the way a warm muffin can turn a tough morning into a good one. That’s real food. That’s what cooking is supposed to feel like.
I’d love to hear how these turn out for you. Did your kids love them? Did you try a variation that worked especially well? Drop a comment below and let me know—I read every single one, and your feedback helps me create better recipes for this community. And if you’re looking for more preschool-friendly treats, check out my mini lemon blueberry cheesecakes—they’re another huge hit in our house!
Happy baking, friends. May your muffins be tender, your apples stay suspended, and your kitchen smell like cinnamon and warmth.
Frequently Asked Questions
Can I use all-purpose flour instead of whole wheat pastry flour?
Absolutely. All-purpose flour works perfectly in this recipe. The muffins will be slightly less hearty and a bit more tender, but they’ll still be delicious. If you’re using all-purpose flour, you don’t need to make any other adjustments to the recipe.
Can I use frozen apples instead of fresh?
I don’t recommend using frozen apples for this recipe. Frozen apples release a lot of moisture as they thaw, which can make your batter too wet and result in gummy muffins. If you only have frozen apples on hand, thaw them completely, drain off any excess liquid, and pat them dry with paper towels before dicing and flouring them.
How do I know when the muffins are done baking?
The best way to test for doneness is the toothpick test. Insert a toothpick into the center of a muffin—if it comes out clean or with just a few moist crumbs attached, the muffins are done. You can also gently press the top of a muffin; if it springs back, it’s baked through. And of course, the tops should be golden brown and the kitchen should smell like cinnamon and baked apples.
Can I make these muffins sugar-free?
This recipe is already free of refined sugar—the sweetness comes entirely from the apples and maple syrup (or honey). If you want to reduce the sweetness further, you can cut the maple syrup to ¼ cup, but keep in mind that the muffins will be less moist and slightly less sweet. You could also try using a sugar-free maple syrup alternative, though I haven’t tested that myself.
Why did my apples sink to the bottom of the muffins?
This is the most common issue with fruit muffins, and it happens for a few reasons. First, make sure you’re tossing your diced apples in flour before folding them into the batter—this creates friction that helps them stay suspended. Second, make sure your batter is thick enough; if it’s too thin, the apples will sink. Finally, don’t overmix the batter, as this can break down the structure that holds the apples in place. If you follow the recipe as written, your apples should stay beautifully distributed throughout the muffins.
Pin This Recipe!
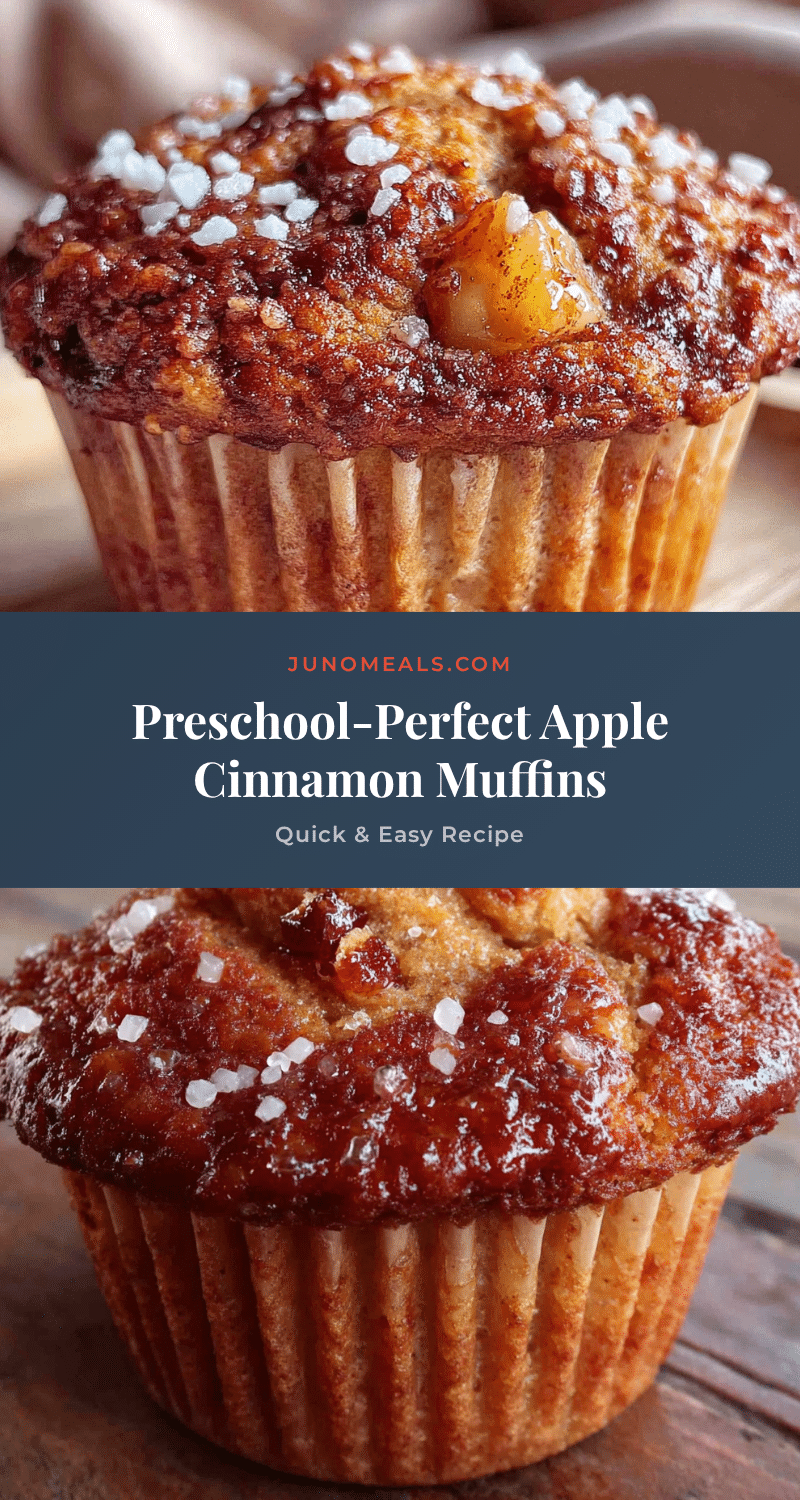
Easy Apple Cinnamon Muffins: Best Preschool Snack

These easy apple cinnamon muffins are soft, naturally sweetened, and perfect for preschool snacks. Made with whole wheat pastry flour, oats, and tender apple bits, they’re a wholesome treat that even picky eaters love.
- Prep Time: 15 minutes
- Cook Time: 18 minutes
- Total Time: 33 minutes
- Yield: 12 muffins 1x
- Category: Snack
- Cuisine: American
Ingredients
- 1 ½ cups whole wheat pastry flour (or all-purpose flour)
- ½ cup rolled oats (old-fashioned, not instant)
- 1 teaspoon baking powder
- ½ teaspoon baking soda
- 1 ½ teaspoons ground cinnamon (preferably Saigon cinnamon)
- ¼ teaspoon ground nutmeg (freshly grated if possible)
- ¼ teaspoon salt
- 2 large eggs, room temperature
- ⅓ cup maple syrup (or honey)
- ⅓ cup unsalted butter, melted and slightly cooled (or coconut oil for dairy-free)
- ½ cup plain Greek yogurt (full-fat or 2%; avoid nonfat)
- 1 teaspoon vanilla extract
- 1 ½ cups finely diced apples (about 2 medium apples; Honeycrisp, Fuji, or Granny Smith recommended)
- 1 tablespoon all-purpose flour (for tossing with apples)
Instructions
- Preheat your oven to 375°F (190°C). Line a 12-cup muffin tin with paper liners or lightly grease the cups.
- Dice apples into small, even cubes (about ¼-inch pieces). Toss with 1 tablespoon all-purpose flour in a small bowl and set aside.
- In a medium bowl, whisk together dry ingredients: whole wheat pastry flour, rolled oats, baking powder, baking soda, cinnamon, nutmeg, and salt.
- In a large bowl, whisk together wet ingredients: eggs, maple syrup, melted butter, Greek yogurt, and vanilla extract until smooth and creamy.
- Pour dry ingredients into wet ingredients. Fold gently with a rubber spatula until just combined (about 10-12 strokes). Do not overmix; a few lumps are fine.
- Gently fold in the floured apple pieces with a few more strokes. Batter will be thick and slightly lumpy.
- Divide batter evenly among 12 muffin cups (about ¾ full each). Use a ¼-cup ice cream scoop for even portions.
- Bake for 16-18 minutes, or until a toothpick inserted into the center comes out clean or with a few moist crumbs. Tops should be golden brown and spring back when touched.
- Let muffins cool in the pan for 5 minutes, then transfer to a wire rack to cool completely.
- Enjoy warm or at room temperature. Muffins are even better the next day.
Notes
For best results, use room temperature eggs and yogurt. Tossing apples in flour prevents sinking. Do not overmix batter. Muffins freeze well for up to 3 months. For mini muffins, bake 10-12 minutes.
Nutrition
- Serving Size: 1 muffin
- Calories: 185
- Sugar: 12
- Sodium: 180
- Fat: 8
- Saturated Fat: 4.5
- Carbohydrates: 26
- Fiber: 3
- Protein: 5
Keywords: apple cinnamon muffins, preschool snack, healthy muffins, naturally sweetened, whole wheat muffins, easy muffin recipe


