I was supposed to be making a pumpkin roll. Let me just put that out there right now. It was a Thursday afternoon, the kids were at school, and I had this vision of a perfectly swirled, cream cheese-filled log of autumn goodness. I’d even watched three videos the night before, convinced I had it down. I got the pumpkin cake baked, flipped it onto a kitchen towel dusted with powdered sugar, and started rolling it up while it was still warm—just like the experts said. That’s when the towel got stuck. Not a little stuck. I mean, bonded to the cake. I peeled and peeled, and chunks of pumpkin cake came off with the fabric. I stood there holding what looked like a crime scene in my kitchen, and honestly, I almost cried. I had a bowl of leftover pumpkin pudding cooling on the counter, a package of Oreos in the pantry, and zero desire to start over. So I grabbed some little cups, layered the pudding with crushed cookies, and shoved a few candy pumpkins on top. My neighbor came over later, took one bite, and asked for the recipe. I didn’t have the heart to tell her it was born from a failed pastry.
Maybe you’ve been there—standing over a ruined dessert, wondering how something so simple went so wrong. I mean, it’s pumpkin pudding. It’s not complicated. But that day, it taught me something. Sometimes the best recipes aren’t the ones you plan. They’re the ones you scramble to fix. These Light & Easy Pumpkin Patch Pudding Cups with Oreo Dirt are exactly that—a happy accident that turned into my most-requested fall dessert. They take ten minutes to throw together, they look adorable sitting on a table, and they taste like autumn in a cup without weighing you down. No rolling, no baking stress, no towels involved. Just creamy, spiced pudding, crunchy chocolate dirt, and a little pumpkin patch scene on top. It’s the kind of recipe that makes you look like you tried way harder than you actually did.
I’ve made these pudding cups for Thanksgiving, for classroom parties, and for random Tuesday nights when I needed something sweet. Every single time, someone asks how I made the “dirt” so realistic. I just smile and say it’s a secret. (It’s Oreos.) And honestly, that’s why this recipe stuck with me. It’s not fancy. It’s not fussy. It’s just a good, honest dessert that makes people happy. If you’re looking for something that feels special but takes zero effort, you’re in the right place.
Why You’ll Love This Recipe
I’ve tested a lot of pumpkin desserts over the years, and most of them fall into one of two camps: they’re either too heavy or too much work. These pudding cups hit the sweet spot. They’re light enough that you don’t feel like you need a nap after eating one, but they’re still rich and satisfying. Here’s why I keep coming back to them:
- 10 Minutes, No Baking: This is the kind of recipe you can make while dinner is in the oven or while you’re on a phone call. No oven required, no complicated steps. Just mix, layer, and chill.
- Simple Ingredients: You probably already have most of what you need. Pumpkin puree, pudding mix, milk, Oreos, and a few pantry spices. No fancy trips to a specialty store.
- Perfect for Fall Gatherings: Whether it’s a Halloween party, a Friendsgiving, or just a cozy weekend treat, these cups fit right in. They’re portable, individual-sized, and everyone loves the presentation.
- Crowd-Pleaser for All Ages: Kids think the Oreo dirt is hilarious. Adults appreciate that it’s not overly sweet. I’ve served these to picky eaters and dessert snobs, and they disappear every time.
- Surprisingly Light: Most pumpkin desserts are loaded with butter and cream cheese. This one uses instant pudding made with milk, so it’s creamy without being heavy. You can even use low-fat milk or a dairy-free alternative and it still works.
What makes this recipe different from all the other pumpkin pudding cups out there? It’s the texture, honestly. I spent a while figuring out the right ratio of pudding to Oreo crumbs so you get that creamy-meets-crunchy bite every single time. The pumpkin flavor is there, but it’s not overpowering. And the “dirt” isn’t just crushed cookies—it’s layered in a way that actually looks like soil. I’ve tried versions where the crumbs get soggy, and I figured out that you need to add a thin layer of crushed Oreos right on top of the pudding before it sets. That keeps them crunchy. It’s a small thing, but it makes a big difference.
Honestly, this recipe is comfort food reimagined. It’s got all the cozy flavors of fall—pumpkin, cinnamon, nutmeg—but it’s faster, lighter, and way less stressful than baking a pie. Perfect for impressing guests without breaking a sweat, or for turning a regular weeknight into something a little more memorable.
What Ingredients You Will Need
This recipe uses simple, wholesome ingredients to deliver that classic pumpkin spice flavor with a creamy, indulgent texture. Most of these are pantry staples, especially if you do any fall baking. Here’s what you’ll need and why each one matters:
For the Pumpkin Pudding
- 1 box (3.4 oz) instant vanilla pudding mix – This is the base. I’ve tried this with cheesecake-flavored pudding too, and it’s amazing. But vanilla lets the pumpkin shine. I recommend Jell-O brand for consistency, but store brands work fine.
- 1 cup cold milk – Whole milk gives the creamiest result, but 2% works well too. For a dairy-free version, use unsweetened oat milk or almond milk. Just know it might be slightly thinner.
- ¾ cup pumpkin puree – Make sure you’re using pure pumpkin puree, not pumpkin pie filling. The pie filling has sugar and spices already added, and it will throw off the sweetness. I like Libby’s, but any 100% pure pumpkin works.
- 1 teaspoon pumpkin pie spice – You can buy this pre-mixed or make your own with cinnamon, nutmeg, ginger, and cloves. I actually prefer making my own because I like extra cinnamon.
- ½ teaspoon vanilla extract – Pure vanilla extract adds depth. Imitation vanilla works in a pinch, but the flavor is noticeably less rich.
- 2 tablespoons powdered sugar (optional) – I only add this if my pumpkin puree tastes a little flat or if I want the pudding slightly sweeter. Taste your mixture before adding it—you might not need it.
For the Oreo Dirt & Topping
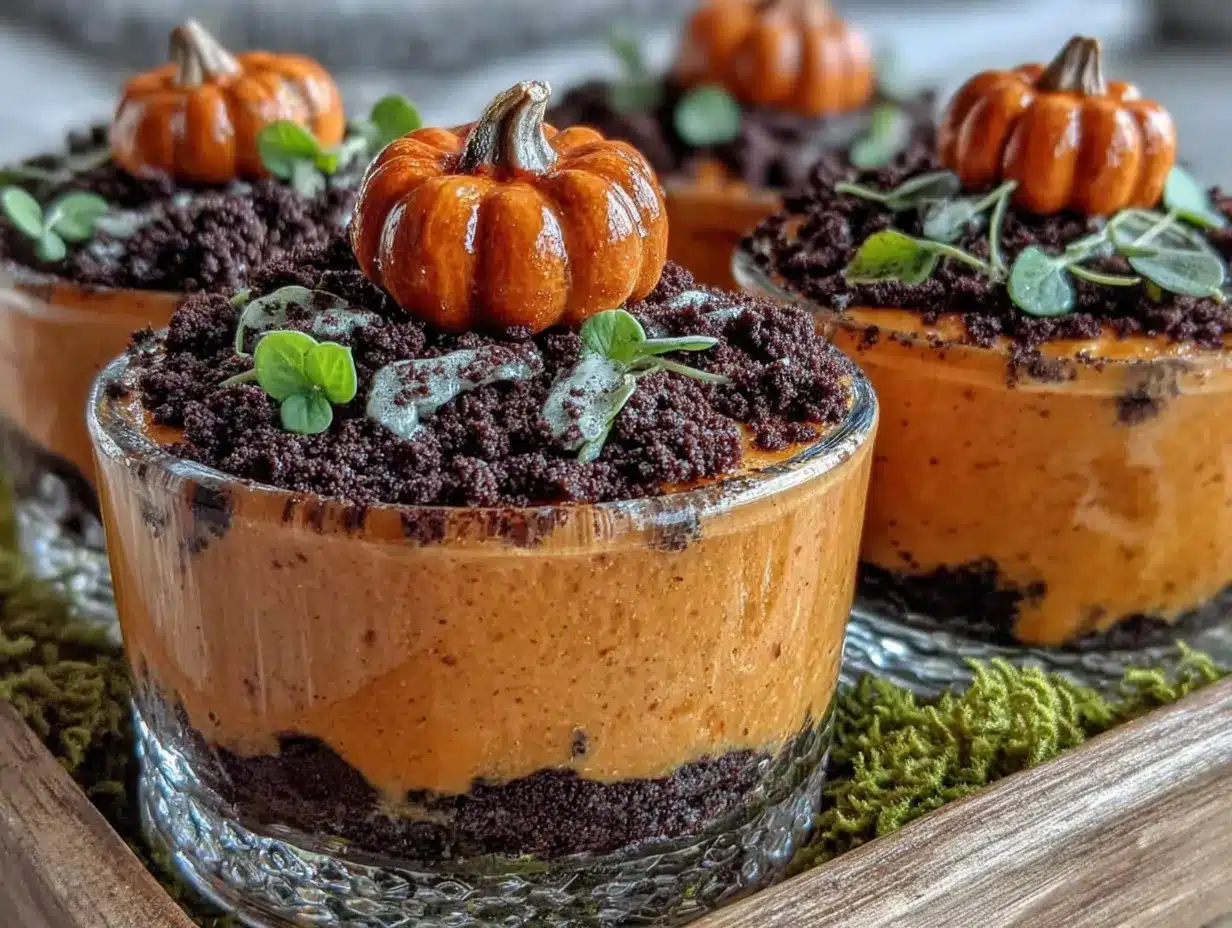
- 12 Oreo cookies – Regular Oreos work best. Double Stuf is fine, but they have more cream filling, which makes the “dirt” a little greasier. I’ve used generic chocolate sandwich cookies too, and they’re totally fine.
- 2 tablespoons melted butter (optional) – If you want your dirt to have a slightly clumpy, soil-like texture, mix the crushed Oreos with a little melted butter. If you’re keeping it lighter, skip this.
- 6-8 candy pumpkins or gummy worms – These are purely for decoration, but they make the “pumpkin patch” theme come to life. I use the little candy pumpkins you find at Halloween. Gummy worms are fun for a more playful look.
- Whipped topping (optional) – A dollop of Cool Whip or homemade whipped cream on top adds a nice cloud-like layer before the dirt. Not necessary, but pretty.
Ingredient Selection Tips
I’ve learned a few things the hard way. First, make sure your pumpkin puree is at room temperature before mixing it into the pudding. Cold puree can make the pudding seize up or turn lumpy. Second, crush your Oreos in a zip-top bag with a rolling pin for uneven, soil-like pieces. If you use a food processor, you’ll get a fine powder that looks more like cocoa powder than dirt. You want some texture—little chunks that look like pebbles. And finally, if you’re making these ahead of time, wait to add the candy pumpkins until right before serving. They can get sticky and bleed color into the whipped topping if they sit too long.
Equipment Needed
You don’t need anything fancy for these pudding cups, which is honestly my favorite part. Here’s what you’ll need:
- Medium mixing bowl – For whisking the pudding. Any bowl works, but a wide one makes whisking easier.
- Whisk – A balloon whisk is best for incorporating the pudding mix without lumps.
- Measuring cups and spoons – For precise measurements. I’ve eyeballed the pumpkin before and regretted it—too much makes the pudding grainy.
- 6 small cups or jars – I use 6-ounce mason jars or small dessert cups. Clear cups are best so you can see the layers. Shot glasses work for mini versions at parties.
- Zip-top bag and rolling pin (or food processor) – For crushing the Oreos. I prefer the bag method because it’s less cleanup and gives you more control over the texture.
- Spatula – For scraping every last bit of pudding into the cups. Waste not, want not.
- Small offset spatula or spoon – For smoothing the pudding layers.
I bought a set of 6-ounce glass jars from a craft store for a few dollars, and they’ve become my go-to for desserts like this. They’re reusable, dishwasher-safe, and they make the pudding cups look like something from a fancy bakery. If you don’t have jars, small plastic cups or even wine glasses work. Just make sure they’re clear so the layers show.
Preparation Method
Let me walk you through this step by step. I’ve made these so many times that I’ve got the timing down to a science. Here’s how to get perfect layers every time.
- Make the pumpkin pudding. In a medium mixing bowl, whisk together the instant vanilla pudding mix and 1 cup of cold milk. Whisk for about 2 minutes until it starts to thicken. Don’t walk away—it sets up fast. Once it’s thick and smooth, add ¾ cup of pumpkin puree, 1 teaspoon of pumpkin pie spice, and ½ teaspoon of vanilla extract. Whisk again until everything is fully combined and the color is a consistent pale orange. If you want it sweeter, add the optional powdered sugar now. The mixture should be thick but spoonable. Set it aside for a minute.
- Crush the Oreos. Place 12 Oreo cookies in a zip-top bag. Seal it, squeezing out as much air as you can. Use a rolling pin to crush the cookies into uneven pieces—some fine crumbs, some small chunks. You want it to look like real dirt, not sand. If you’re using the optional melted butter, pour it into the bag, seal it again, and massage it into the crumbs until evenly distributed. This step adds richness and helps the crumbs clump slightly, which looks more natural.
- Layer the cups. Grab your 6 clear cups or jars. Start with a layer of Oreo dirt at the bottom of each cup—about 1 to 2 tablespoons. This creates a crunchy base. Then spoon the pumpkin pudding on top, filling each cup about halfway. Use the back of a spoon or a small offset spatula to smooth the pudding into an even layer. Tap the cup gently on the counter to settle the pudding and remove any air pockets.
- Add the second dirt layer. Sprinkle another layer of Oreo crumbs on top of the pudding. This is the “dirt” that will be visible, so make it generous—about 1 to 2 tablespoons per cup. Don’t press it down. Leave it loose so it looks like freshly turned soil. If you want a whipped cream layer, add a dollop of whipped topping between the pudding and the top dirt layer. I do this sometimes for extra creaminess, but it’s optional.
- Decorate and chill. Gently place a candy pumpkin or two on top of each cup, pressing them slightly into the Oreo dirt. If you’re using gummy worms, let them poke out like they’re crawling out of the dirt. Cover the cups with plastic wrap or lids and refrigerate for at least 30 minutes. The pudding needs time to fully set. If you’re in a hurry, 15 minutes in the freezer works, but don’t forget them—they’ll freeze solid.
- Serve cold. These are best enjoyed straight from the fridge. The contrast between the cold, creamy pudding and the crunchy Oreo dirt is the whole point. If you’ve let them sit out too long, pop them back in the fridge for 10 minutes before serving.
One thing I learned the hard way: don’t skip the chilling step. I was impatient once and served them after only 10 minutes. The pudding was still loose, and the Oreo crumbs sank into it, creating a muddy mess. It still tasted good, but it looked like, well, actual mud. Give them time to set, and you’ll get those clean, beautiful layers that make people think you’re a pro.
Cooking Tips & Techniques
After making these pudding cups probably a dozen times, I’ve picked up a few tricks that make the process smoother and the results better. Here’s what I wish someone had told me:
Use cold milk straight from the fridge. Instant pudding needs cold liquid to set properly. If your milk is even slightly warm, the pudding will stay runny. I’ve made that mistake on a hot summer day when I left the milk out too long. Not pretty.
Taste your pumpkin puree before mixing. Not all canned pumpkin is created equal. Some brands are more watery, some are more bitter. Taste it plain first. If it’s bland, add an extra pinch of salt to the pudding mixture. Salt brings out the sweetness of the pumpkin and the spices.
Don’t overmix the pudding. Once the pudding mix is dissolved, stop whisking. Overmixing can break down the starches and prevent the pudding from setting properly. You want it smooth, not beaten within an inch of its life.
Crush Oreos in batches. If you’re making a double batch, crush the cookies in two separate bags. One big bag is hard to crush evenly, and you’ll end up with giant chunks that don’t look like dirt. Small batches give you more control.
Use a piping bag for the pudding if you want perfect layers. I know it sounds extra, but spooning pudding into cups can get messy. A piping bag (or even a zip-top bag with the corner snipped off) lets you fill each cup cleanly without dripping on the sides. Your layers will look so much sharper.
Make the dirt ahead of time. You can crush the Oreos and store them in an airtight container at room temperature for up to a week. This is great if you’re prepping for a party. Just don’t add the melted butter until you’re ready to assemble, or the crumbs will clump into hard chunks.
One more thing—don’t skip the spices. I know pumpkin pie spice is a common ingredient, but I’ve tried these with just cinnamon, and they’re not the same. The blend of cinnamon, nutmeg, ginger, and cloves is what makes it taste like fall. If you don’t have pumpkin pie spice, mix ½ teaspoon cinnamon, ¼ teaspoon nutmeg, ¼ teaspoon ginger, and a pinch of cloves. That’s your homemade version.
Variations & Adaptations
One of the best things about this recipe is how easy it is to change up. I’ve experimented with all kinds of twists, and here are some of my favorites:
Make it gluten-free. Use gluten-free chocolate sandwich cookies instead of regular Oreos. Most grocery stores carry a gluten-free version now. The rest of the ingredients are naturally gluten-free, so this swap is simple.
Make it dairy-free. Use a dairy-free milk like oat or coconut milk for the pudding, and skip the melted butter in the Oreo crumbs. Use dairy-free whipped topping if you want that extra layer. I’ve tried this with oat milk, and it’s surprisingly creamy.
Try different cookie bases. I’ve made these with crushed graham crackers, ginger snaps, and even shortbread cookies. Ginger snaps are especially good because they add a spicy kick that complements the pumpkin. Just crush them the same way you would Oreos.
Change the pudding flavor. Butterscotch or cheesecake instant pudding both work beautifully with pumpkin. Butterscotch adds a caramel-like sweetness that’s really cozy. Cheesecake flavor makes it taste almost like pumpkin cheesecake in a cup.
Add a layer of pie filling. For extra pumpkin flavor, spread a thin layer of canned pumpkin pie filling (not puree) between the pudding and the Oreo dirt. It adds sweetness and a slightly different texture.
Make it boozy for adults. Add a splash of bourbon or dark rum to the pumpkin pudding before layering. About 1 tablespoon is enough to add warmth without overpowering the pumpkin. I did this for a Friendsgiving once, and it was a hit.
Seasonal variations. In the fall, stick with pumpkin. But in the summer, swap the pumpkin puree for strawberry puree and use vanilla pudding. Top with crushed graham crackers for a strawberry shortcake vibe. The method is the same—just change the flavor profile.
Serving & Storage Suggestions
These pudding cups are best served cold, straight from the fridge. The contrast between the chilled pudding and the crunchy Oreo topping is what makes them so satisfying. I like to serve them in clear jars so everyone can see the layers. It’s a simple presentation, but it looks impressive.
For a party, set up a “pumpkin patch” dessert bar. Arrange the cups on a tray with extra candy pumpkins, gummy worms, and maybe some mini fake leaves scattered around. It’s adorable and makes for great photos. If you’re serving these after a heavy meal, they’re light enough that people won’t feel stuffed.
Storage is easy. Cover each cup with plastic wrap or a lid and keep them in the refrigerator for up to 3 days. The pudding will stay creamy, and the Oreo crumbs will remain crunchy for the first 2 days. By day 3, the crumbs might soften a bit, but they’re still delicious. I don’t recommend freezing these—the pudding gets watery when thawed.
If you’re making them ahead of time for a party, assemble the cups the night before but wait to add the candy pumpkins and gummy worms until just before serving. The candies can get sticky and bleed color into the whipped topping if they sit too long. I learned this the hard way when I made them 2 days early and the pumpkins turned into little orange puddles.
Flavor-wise, these actually get better after a few hours in the fridge. The spices meld with the pumpkin and the pudding, and everything becomes more cohesive. So don’t be afraid to make them a day ahead. Just keep the toppings separate until the last minute.
Nutritional Information & Benefits
I’m not a nutritionist, but I’ve done my best to estimate the values for one serving (based on 6 servings, using whole milk and regular Oreos). Here’s what you’re looking at:
- Calories: Approximately 220-250 per cup
- Fat: 8-10g
- Carbohydrates: 35-40g
- Protein: 4-5g
- Fiber: 2-3g
- Sugar: 22-28g
These numbers will vary based on your milk choice and whether you add whipped topping. Using skim milk and light Cool Whip can cut the calories by about 50 per serving.
From a health perspective, pumpkin puree is a great source of vitamin A and fiber. It’s low in calories and adds natural sweetness, which means you can use less sugar overall. The spices—cinnamon, nutmeg, ginger—have anti-inflammatory properties, so there’s a tiny wellness boost in every bite. I like to think of these as a dessert that does a little good while still tasting indulgent.
If you’re watching your sugar intake, you can use sugar-free vanilla pudding mix and skip the powdered sugar. The pumpkin and spices add enough flavor that you won’t miss the extra sweetness. And for a lower-carb option, use unsweetened almond milk and sugar-free pudding. The texture will be slightly thinner, but the taste is still great.
Allergen note: This recipe contains dairy (milk, butter) and wheat (Oreos). It can be adapted to be gluten-free and dairy-free as mentioned in the variations section.
Conclusion
These Light & Easy Pumpkin Patch Pudding Cups with Oreo Dirt are proof that you don’t need a complicated recipe to make something memorable. They came from a failed pumpkin roll, a moment of frustration, and a willingness to just try something different. And honestly? I’m glad that towel got stuck. Because these little cups are easier, faster, and honestly more fun than that roll ever would have been.
I love how versatile they are. You can dress them up for a holiday party or keep them simple for a weekday treat. You can swap ingredients based on what you have in your pantry. And they always, always get compliments. There’s something about that Oreo dirt that makes people smile—maybe it’s the nostalgia, maybe it’s the surprise of finding creamy pumpkin underneath. Either way, it works.
I’d love to hear how yours turn out. Did you add gummy worms? Try a different cookie? Forget to chill them and end up with soup? (Been there.) Drop a comment below and let me know. And if you’re looking for more easy fall desserts, check out my no-bake pumpkin cheesecake jars or these baked apple cider donut holes. Both are just as simple and just as good. Happy fall, and happy pudding making!
Frequently Asked Questions
Can I use homemade pumpkin pudding instead of instant?
Absolutely. If you want to make pudding from scratch, use a stovetop recipe with milk, sugar, cornstarch, egg yolks, and pumpkin puree. Just let it cool completely before layering. Instant pudding is faster, but homemade has a richer flavor.
How far in advance can I make these pudding cups?
You can make them up to 3 days ahead. Assemble the cups, cover them tightly, and store them in the fridge. Add the candy decorations right before serving to keep them from getting sticky or bleeding color.
Can I use homemade whipped cream instead of Cool Whip?
Yes, and it’s delicious. Whip ½ cup of heavy cream with 1 tablespoon of powdered sugar until soft peaks form. Dollop it on top of the pudding before adding the Oreo dirt. It’s richer and more natural-tasting than store-bought.
Why is my pudding runny?
There are a few reasons. Your milk might have been too warm, you might have overmixed the pudding, or you didn’t let it set long enough. Make sure your milk is cold, whisk just until combined, and chill the cups for at least 30 minutes. If it’s still runny after that, add a little more pudding mix next time.
Can I make these in a large dish instead of individual cups?
Sure. Use a 9×9-inch baking dish or a trifle bowl. Layer the Oreo crumbs, pudding, more crumbs, and toppings just like you would in cups. Scoop it into bowls when serving. The presentation isn’t as cute, but it’s easier for a crowd.
Pin This Recipe!
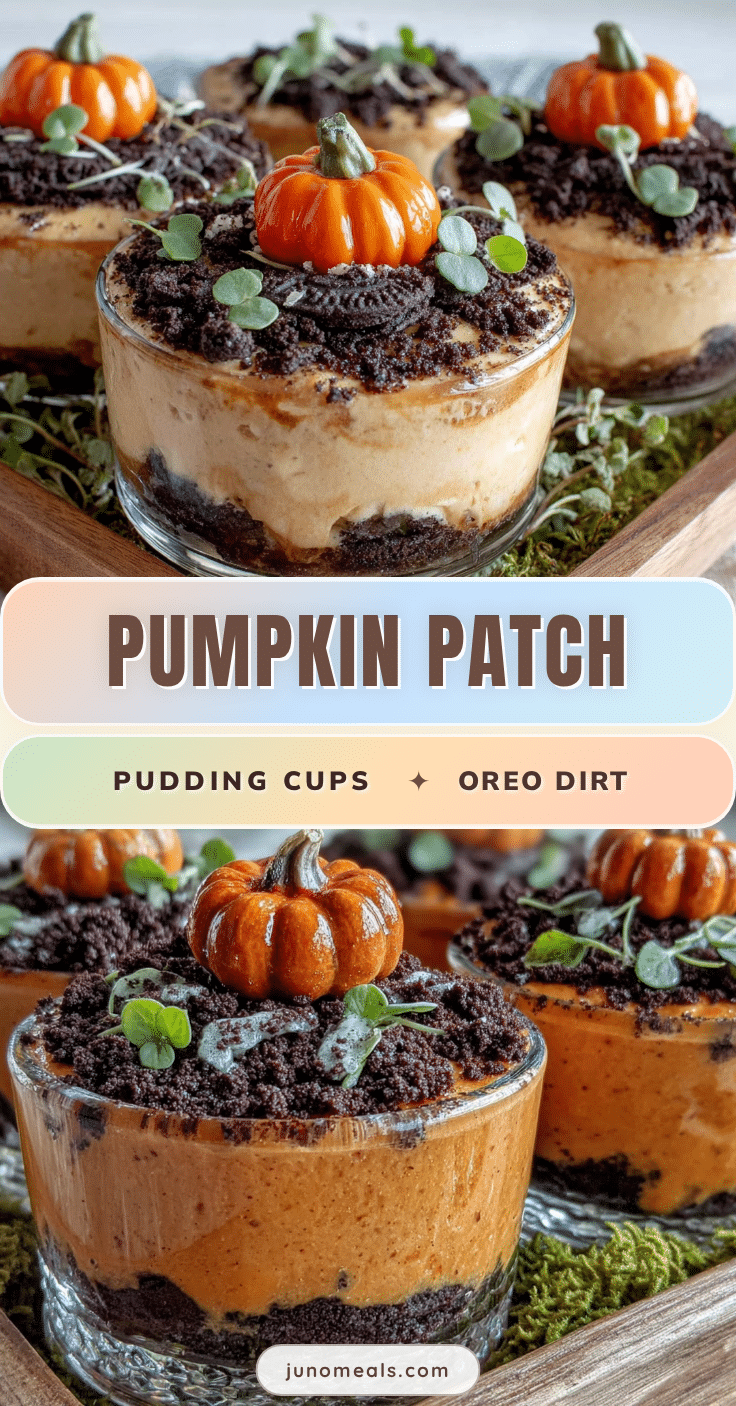
Easy 10-Min Pumpkin Patch Pudding Cups with Oreo Dirt

These no-bake pumpkin pudding cups with Oreo dirt are a quick and easy fall dessert that comes together in just 10 minutes. Creamy pumpkin pudding layered with crunchy chocolate cookie crumbs and topped with candy pumpkins creates an adorable pumpkin patch presentation that’s perfect for Halloween, Thanksgiving, or any autumn gathering.
- Prep Time: 10 minutes
- Cook Time: 0 minutes
- Total Time: 40 minutes (includes 30 minutes chilling)
- Yield: 6 servings 1x
- Category: Dessert
- Cuisine: American
Ingredients
- 1 box (3.4 oz) instant vanilla pudding mix
- 1 cup cold milk
- ¾ cup pumpkin puree (100% pure, not pie filling)
- 1 teaspoon pumpkin pie spice
- ½ teaspoon vanilla extract
- 2 tablespoons powdered sugar (optional)
- 12 Oreo cookies (regular, not Double Stuf)
- 2 tablespoons melted butter (optional, for clumpy dirt texture)
- 6–8 candy pumpkins or gummy worms (for decoration)
- Whipped topping (optional, for extra creaminess)
Instructions
- In a medium mixing bowl, whisk together the instant vanilla pudding mix and 1 cup of cold milk for about 2 minutes until it starts to thicken. Add ¾ cup pumpkin puree, 1 teaspoon pumpkin pie spice, and ½ teaspoon vanilla extract. Whisk until fully combined and the color is a consistent pale orange. If desired, add optional powdered sugar for extra sweetness. Set aside.
- Place 12 Oreo cookies in a zip-top bag, squeeze out excess air, and crush with a rolling pin into uneven pieces (some fine crumbs, some small chunks) to resemble dirt. If using optional melted butter, add it to the bag, seal, and massage into the crumbs until evenly distributed.
- Layer the cups: In 6 clear cups or jars, add about 1-2 tablespoons of Oreo dirt to the bottom as a crunchy base. Spoon pumpkin pudding on top, filling each cup about halfway. Smooth the pudding into an even layer with the back of a spoon or small offset spatula. Tap the cup gently on the counter to settle the pudding.
- Sprinkle another 1-2 tablespoons of Oreo crumbs on top of the pudding for the visible ‘dirt’ layer. Do not press down. If using whipped topping, add a dollop between the pudding and top dirt layer.
- Gently place a candy pumpkin or two on top of each cup, pressing slightly into the Oreo dirt. If using gummy worms, let them poke out as if crawling out of the dirt. Cover cups with plastic wrap or lids and refrigerate for at least 30 minutes (or 15 minutes in the freezer if in a hurry) to allow the pudding to fully set.
- Serve cold straight from the fridge for the best contrast between creamy pudding and crunchy Oreo dirt.
Notes
Use cold milk straight from the fridge for proper pudding setting. Taste pumpkin puree before mixing; add a pinch of salt if bland. Don’t overmix the pudding. Crush Oreos in small batches for even texture. For perfect layers, use a piping bag for the pudding. Make Oreo dirt ahead of time (store in airtight container up to a week, but add melted butter only when ready to assemble). Don’t skip the chilling step to avoid muddy layers. Add candy decorations right before serving to prevent bleeding. These cups can be made up to 3 days ahead; store covered in refrigerator. For gluten-free, use gluten-free chocolate sandwich cookies. For dairy-free, use oat or almond milk and skip the butter. For lower sugar, use sugar-free pudding mix and skip powdered sugar.
Nutrition
- Serving Size: 1 cup
- Calories: 235
- Sugar: 25
- Sodium: 320
- Fat: 9
- Saturated Fat: 4
- Carbohydrates: 37
- Fiber: 2
- Protein: 4
Keywords: pumpkin pudding cups, Oreo dirt dessert, no-bake pumpkin dessert, easy fall dessert, pumpkin patch dessert, Halloween dessert, Thanksgiving dessert, kid-friendly dessert


