There used to be a tiny, dimly lit gastropub on the corner of 7th and Elm called The Rusted Talon that made the most addictive buffalo wings I have ever tasted. When they shuttered their doors two years ago, I honestly felt a little pang of grief. It sounds dramatic, I know, but those wings were a ritual—crispy, almost blackened at the edges, with a sticky-sweet heat that clung to every crevice. After twelve attempts—twelve!—and a few kitchen disasters involving smoke alarms and a very singed dish towel, I finally cracked the code.
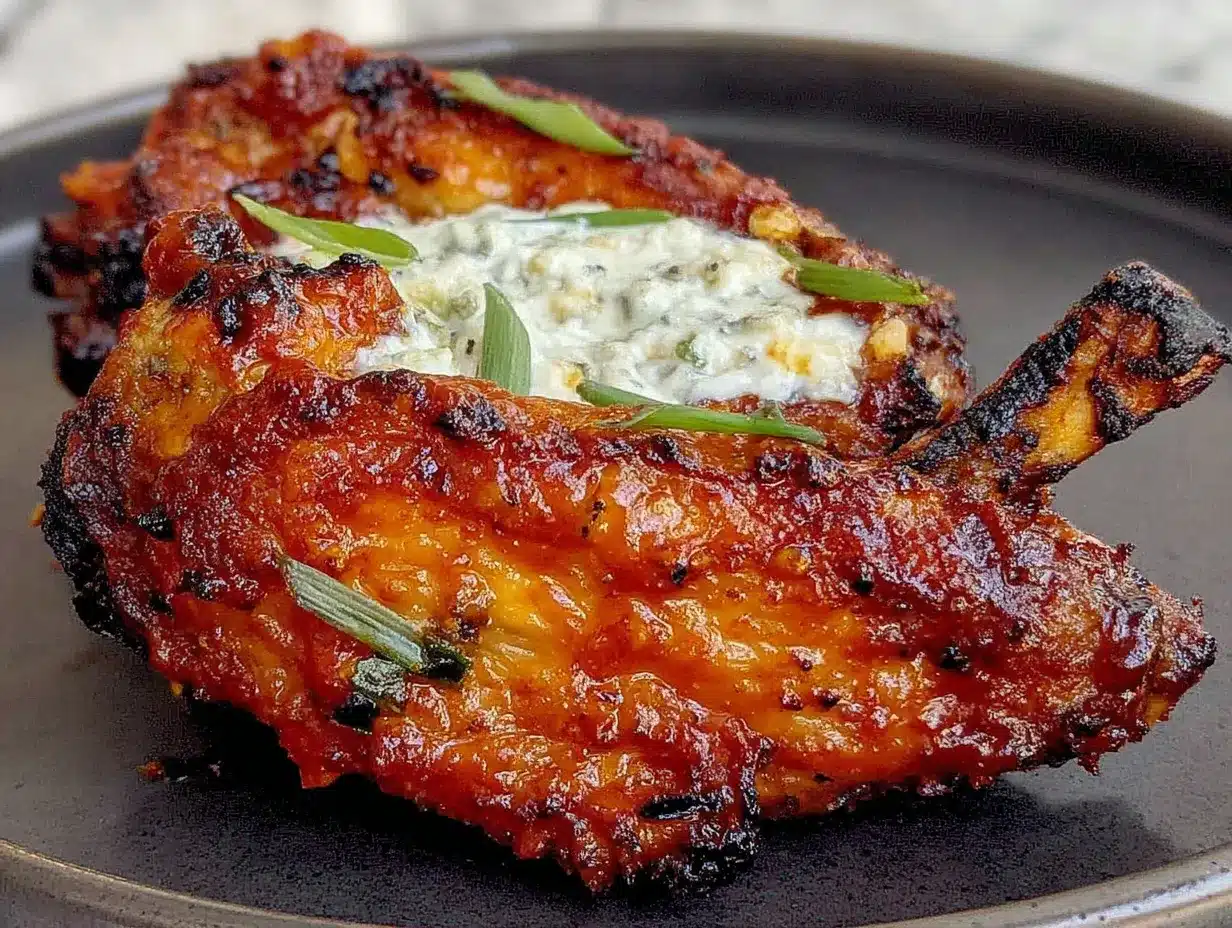
The secret, as it turns out, is a double-dredge technique and a specific cut of the chicken wing. I call these my “Bat Wing” Buffalo Wings because the drumettes are frenched and the flats are split, giving them this dramatic, slightly spooky silhouette that is just perfect for Halloween. Honestly, the first time I pulled a batch out of the oven, I stood there for a solid minute just admiring how they looked. The skin gets shatteringly crisp, the meat stays juicy, and that blue cheese dip? It’s the perfect, tangy counterpoint to all that heat. Let me tell you, this is the recipe that finally let me stop mourning the Rusted Talon.
Maybe you’ve been there—a place that had a dish so good you still think about it years later. This is my tribute to that feeling. These wings aren’t just a snack; they are the centerpiece of a Halloween party, a game-day spread, or a Friday night that just needs something special. They are a little bit of work, but I promise, the payoff is huge. And that first bite? It brings it all back.
Why You’ll Love This Recipe
Let’s be real for a second. There are a million buffalo wing recipes out there. What makes these different? It’s the texture, pure and simple. I spent years testing different methods—baking powder, cornstarch, even a weird technique involving a hair dryer—and this double-dredge method is the one that delivers that “fried” crunch without the deep fryer. It’s a game changer.
- Seriously Crispy: The two-step coating process creates a craggy, ultra-crunchy exterior that stays crisp even after being tossed in the sauce. No soggy wings here!
- Spooky & Fun: The “bat wing” cut is a total showstopper. It’s the perfect conversation starter for any Halloween gathering and makes these feel extra special without being complicated.
- Perfect for a Crowd: This recipe scales up beautifully. You can easily double or triple it for a party, and the wings hold up well in a warm oven while you prep other things.
- Restaurant-Quality at Home: We’re using a classic hot sauce and butter base, but the secret is a touch of honey and Worcestershire sauce. It gives the sauce a depth of flavor that you just don’t get from a bottle.
- That Blue Cheese Dip: This isn’t just any blue cheese dressing. It’s chunky, tangy, and made from scratch with buttermilk and a good quality blue cheese. It’s the perfect, creamy foil to the spicy wings.
This recipe is the one I bring to every potluck and the one my friends request for every game day. It’s the kind of recipe that makes you look like a hero in the kitchen, but it’s actually pretty simple to pull off. You just need a little patience and a willingness to get your hands a bit messy.
What Ingredients You Will Need
This recipe uses a handful of pantry staples to create something truly special. The quality of your hot sauce and blue cheese will make a difference, so don’t skimp on those two key players. Here is everything you need to get started.
For the Chicken Wings:
- 2 lbs (about 900g) chicken wings, separated into drumettes and flats
- 1 tablespoon (15g) baking powder (NOT baking soda)
- 1 teaspoon (5g) kosher salt
- 1 teaspoon (2g) garlic powder
- 1/2 teaspoon (1g) black pepper
For the Buffalo Sauce:
- 1/2 cup (120ml) Frank’s RedHot Original Cayenne Pepper Sauce (my go-to for the best flavor)
- 1/4 cup (60g) unsalted butter, cut into cubes
- 1 tablespoon (15ml) honey (balances the heat beautifully)
- 1 teaspoon (5ml) Worcestershire sauce
- 1/2 teaspoon (1g) garlic powder
For the Chunky Blue Cheese Dip:
- 1/2 cup (120g) sour cream
- 1/4 cup (60ml) buttermilk
- 4 oz (115g) good quality blue cheese, crumbled (I love Point Reyes or Roquefort)
- 1 tablespoon (15ml) fresh lemon juice
- 1/2 teaspoon (1g) kosher salt
- 1/4 teaspoon (0.5g) black pepper
- 1 tablespoon (4g) fresh chives, chopped (for garnish)
For the Bat Wing Cut (Optional but Recommended):
- Kitchen shears or a sharp knife
The baking powder is the non-negotiable secret here. It raises the pH of the skin and helps it dry out, which is what creates that incredible crispiness. If you use baking soda, you will get a metallic taste, so stick with baking powder. For the blue cheese, look for a wedge that you can crumble yourself—the pre-crumbled stuff often has anti-caking agents that prevent it from melting into the dip properly.
Equipment Needed
You don’t need a lot of fancy gadgets for this recipe, but a few key tools will make the process much smoother. I’ve learned the hard way that a good pair of kitchen shears is worth its weight in gold for this bat wing cut.
- Baking Sheet: A large, rimmed baking sheet is essential for holding all the wings in a single layer. I recommend lining it with foil or parchment paper for easy cleanup.
- Wire Rack: This is the real MVP. Placing a wire rack inside your baking sheet allows air to circulate all around the wings, ensuring they get crispy on the bottom too. It’s a total game-changer.
- Kitchen Shears: For cutting the wings into the “bat wing” shape, a sturdy pair of kitchen shears is much easier and safer than a knife. They give you way more control.
- Large Mixing Bowls: You’ll need one for drying and coating the wings, and another for tossing them in the sauce.
- Small Saucepan: For melting the butter and simmering the buffalo sauce.
- Paper Towels: The most important tool for patting the chicken wings bone-dry. This step cannot be skipped.
If you don’t have a wire rack, you can try flipping the wings halfway through cooking, but the bottom won’t get quite as crispy. It will still work, just not perfect. And honestly, a cheap pair of kitchen shears from any grocery store will do the job just fine for the bat wing cut.
Preparation Method
Alright, let’s get into it. This process is broken down into a few key stages. The most important thing is to be patient with the drying and coating steps. Trust me, it’s worth it.
- Prep the Bat Wings: Start by patting your chicken wings bone-dry with paper towels. This is crucial. Any moisture will steam the skin and prevent it from getting crispy. Now, for the bat wing look: Take a drumette and use your kitchen shears to cut the meat and skin away from the thin end of the bone, pushing it down to create a little “handle.” For the flats, cut through the joint between the two bones to separate them. You’ll have two pieces, each with a single bone. This gives them that spooky, bat-like shape.
- The Dry Brine: In a large bowl, whisk together the baking powder, salt, garlic powder, and black pepper. Add the prepared wings and toss them with your hands until every piece is evenly coated. Don’t be shy—really get in there. This mixture is what will give you that shatteringly crisp crust.
- The Rest (This is Key): Place the coated wings on the wire rack set over your baking sheet, making sure they are in a single layer and not touching. Now, put the whole thing in the refrigerator, uncovered, for at least 2 hours. I know, it’s a long time, but this step is non-negotiable. The air in the fridge dries out the skin even further, which is the real secret to the ultimate crispiness. You can even do this the night before for an even better result.
- Bake to Perfection: When you’re ready to cook, preheat your oven to 425°F (220°C). Take the wings straight from the fridge and place them in the oven. Bake for 25 minutes, then flip each wing over with tongs. Bake for another 20-25 minutes, until the skin is deep golden brown and very crispy. The internal temperature of the meat should reach 165°F (74°C).
- Make the Buffalo Sauce: While the wings are baking, make the sauce. In a small saucepan over medium-low heat, combine the hot sauce, butter cubes, honey, Worcestershire sauce, and garlic powder. Stir frequently until the butter is melted and the sauce is smooth. Do not let it boil. Once combined, reduce the heat to the lowest setting to keep it warm.
- Make the Blue Cheese Dip: In a small bowl, combine the sour cream, buttermilk, half of the crumbled blue cheese, lemon juice, salt, and pepper. Stir until combined. Gently fold in the remaining blue cheese crumbles and the chopped chives. Taste and adjust seasoning. Cover and refrigerate until ready to serve. This dip is even better after an hour or two in the fridge.
- Toss and Serve: Once the wings are done, let them rest for 2 minutes on the rack. Then, transfer them to a large bowl. Pour the warm buffalo sauce over the wings and toss vigorously with a spatula or tongs until every wing is completely coated. Serve immediately with the chunky blue cheese dip and extra celery and carrot sticks.
A quick note on the tossing: Don’t let the wings sit in the sauce for too long before serving, or they will start to lose their crispiness. Toss them right before you’re ready to put them on the table.
Cooking Tips & Techniques
After making these wings more times than I can count, I have a few tricks up my sleeve that will help you nail it on the first try. I’ve made every mistake in the book so you don’t have to.
The Drying Mistake: My first few batches were a disaster because I didn’t pat the wings dry enough. Seriously, use three or four paper towels and really press them into the skin. Any leftover moisture is the enemy of crispiness. The fridge rest is your best friend here—don’t skip it even if you are in a rush.
The Baking Powder Issue: I once grabbed baking soda by accident. The wings came out of the oven with a weird, grayish tint and a distinctly metallic taste. It was a total loss. Always double-check that you are using baking powder, not baking soda. They are not the same thing.
The Even Cooking Trick: For the most even cooking, make sure your wings are all roughly the same size. If you have some that are much larger than others, they will cook at different rates. I try to buy a pack of all drumettes or all flats, but if you get a mix, just keep an eye on the smaller pieces and pull them out a few minutes early if needed.
The Sauce Timing: Don’t toss the wings in the sauce while they are still piping hot from the oven. Let them rest on the rack for those 2 minutes. This allows some of the surface steam to escape, so the sauce adheres better and the crust stays crunchier. It’s a small detail, but it makes a real difference.
Make-Ahead Tip: You can do the dry brine and fridge rest up to 24 hours in advance. This makes party prep a breeze. You can also make the blue cheese dip a day ahead—the flavors actually get better as they meld together in the fridge.
Variations & Adaptations
One of the best things about this recipe is how easily it adapts to different tastes and dietary needs. I’ve played around with it quite a bit, and here are some of my favorite variations.
Spicy Honey Garlic Wings: For a sweeter, stickier version, swap the buffalo sauce base for 1/2 cup of honey, 1/4 cup of soy sauce, and 4 minced garlic cloves. Simmer it until it thickens slightly, then toss with the crispy wings. It’s a completely different vibe, but just as addictive.
Smoky Chipotle Wings: If you want a deeper, smokier heat, blend 2 chipotle peppers in adobo sauce into your buffalo sauce before adding the butter. It adds an incredible smoky complexity that pairs beautifully with the blue cheese dip. This is my personal favorite variation for a cozy fall night.
Grilled Bat Wings: You can absolutely make these on the grill for a summer cookout. Follow the same dry brine and fridge rest steps. Then, grill the wings over medium-high indirect heat (around 375°F) for 30-40 minutes, flipping once, until they are cooked through and crispy. Toss them in the sauce right off the grill.
Gluten-Free Adaptation: This recipe is naturally gluten-free as written, as long as you check your hot sauce and Worcestershire sauce labels. Some brands use malt vinegar (which contains gluten), so just look for a certified gluten-free option. The baking powder method gives you a crispy crust without any flour at all.
Air Fryer Method: For smaller batches, the air fryer works like a dream. Cook the prepared wings at 400°F (200°C) for 12-15 minutes, shaking the basket halfway through. They get incredibly crispy in a fraction of the time. Just don’t overcrowd the basket—work in batches if needed.
Serving & Storage Suggestions
These wings are best served hot and fresh, right after they’ve been tossed in the sauce. The contrast between the hot, crispy wing and the cold, creamy dip is what makes this dish so special.
Serving Ideas: Pile the wings high on a large platter. Serve the blue cheese dip in a small bowl nestled in the center, surrounded by celery sticks, carrot sticks, and maybe some extra blue cheese crumbles and chives on top. For a full spread, pair them with my crispy garlic chicken for an all-out poultry feast, or serve alongside a simple coleslaw to cut through the richness. They are also fantastic with a cold beer or a crisp, dry cider.
Storage: If you have leftovers (which is rare in my house!), store the wings and the blue cheese dip separately. Place the wings in an airtight container in the refrigerator for up to 3 days. The dip will last for about a week.
Reheating: The key to reheating is to restore that crispiness. The microwave will make them soggy, so avoid it at all costs. The best method is to place them on a wire rack over a baking sheet and reheat in a 400°F (200°C) oven for 8-10 minutes. You can also reheat them in the air fryer at 375°F (190°C) for 4-5 minutes. They won’t be quite as good as fresh, but they will still be delicious.
Flavor Development: I’ve found that the blue cheese dip actually improves after a day in the fridge. The flavors meld together and become more complex. So feel free to make that a day ahead of time to save yourself some work on the day of your party.
Nutritional Information & Benefits
Let’s be honest: these are indulgent wings. They are a treat, not a health food. But that doesn’t mean they can’t fit into a balanced diet. Here is a rough estimate of the nutritional information per serving (about 4-5 wings with 2 tablespoons of dip).
| Nutrient | Amount Per Serving |
|---|---|
| Calories | 450-550 |
| Protein | 35g |
| Fat | 35g |
| Carbohydrates | 8g |
| Fiber | 0g |
| Sugar | 5g |
| Sodium | 1200mg |
Chicken wings are a good source of high-quality protein and essential B vitamins, particularly B6 and B12, which are important for energy metabolism. The hot sauce contains capsaicin, which has been shown to have anti-inflammatory properties and can slightly boost metabolism. The blue cheese dip provides calcium and probiotics from the buttermilk and sour cream, but it is also high in saturated fat and sodium. This recipe is naturally low in carbohydrates, making it a great option for those following a keto or low-carb diet. Just be mindful of the portion size and enjoy them as part of a balanced meal with plenty of vegetables on the side.
Conclusion
These Crispy Halloween Bat Wing Buffalo Wings are more than just a recipe—they are an experience. They are the dish I make when I want to impress, when I want to celebrate, or when I just want to treat myself to something truly special. The journey from that closed-down gastropub to my own kitchen was a long one, but I am so glad I stuck with it. Every time I pull a batch of these out of the oven, I feel a little bit of that Rusted Talon magic come back.
I really hope you give these a try. Don’t be intimidated by the bat wing cut—it’s easier than it looks, and the reaction you will get from your guests is totally worth it. Feel free to tweak the spice level, swap the dip, or add your own favorite toppings. Cooking is all about making a recipe your own.
I would love to hear how these turn out for you! Drop a comment below and let me know if you tried the bat wing cut, what sauce variation you used, or just how quickly they disappeared from the plate. And if you share a photo on Pinterest, tag me so I can see your beautiful, spooky creation. Happy cooking, and enjoy every single crispy, saucy bite!
Frequently Asked Questions
Can I use frozen chicken wings for this recipe?
Yes, you can, but you must thaw them completely in the refrigerator first. Then, pat them extremely dry with paper towels. Frozen wings hold a lot of moisture, so the drying step is even more critical. I recommend using fresh wings for the best results.
Why are my wings not crispy?
There are three main culprits: insufficient drying, skipping the fridge rest, or overcrowding the baking sheet. Make sure your wings are bone-dry before coating them, give them at least 2 hours in the fridge uncovered, and always bake them in a single layer with space between each wing.
Can I make the blue cheese dip vegan?
Absolutely! You can substitute the sour cream with a vegan sour cream or a thick cashew cream, and the buttermilk with a mixture of unsweetened plant milk and a teaspoon of lemon juice. Use a vegan blue cheese crumble—there are some good options available now, or you can make your own with soaked cashews and nutritional yeast.
How do I get the sauce to stick better to the wings?
The key is to toss the wings in the sauce while they are still warm, but not piping hot. Let them rest on the rack for 2 minutes after baking. Also, make sure your sauce is warm and emulsified. If it separates, whisk in a tablespoon of cold butter to bring it back together.
Can I prepare these wings for a party ahead of time?
Yes! You can do the dry brine and fridge rest up to 24 hours in advance. You can also bake the wings completely, let them cool, and store them in the fridge. When you are ready to serve, reheat them on a wire rack in a 400°F oven for 8-10 minutes, then toss them in the warm sauce. This makes party prep so much easier.
Pin This Recipe!
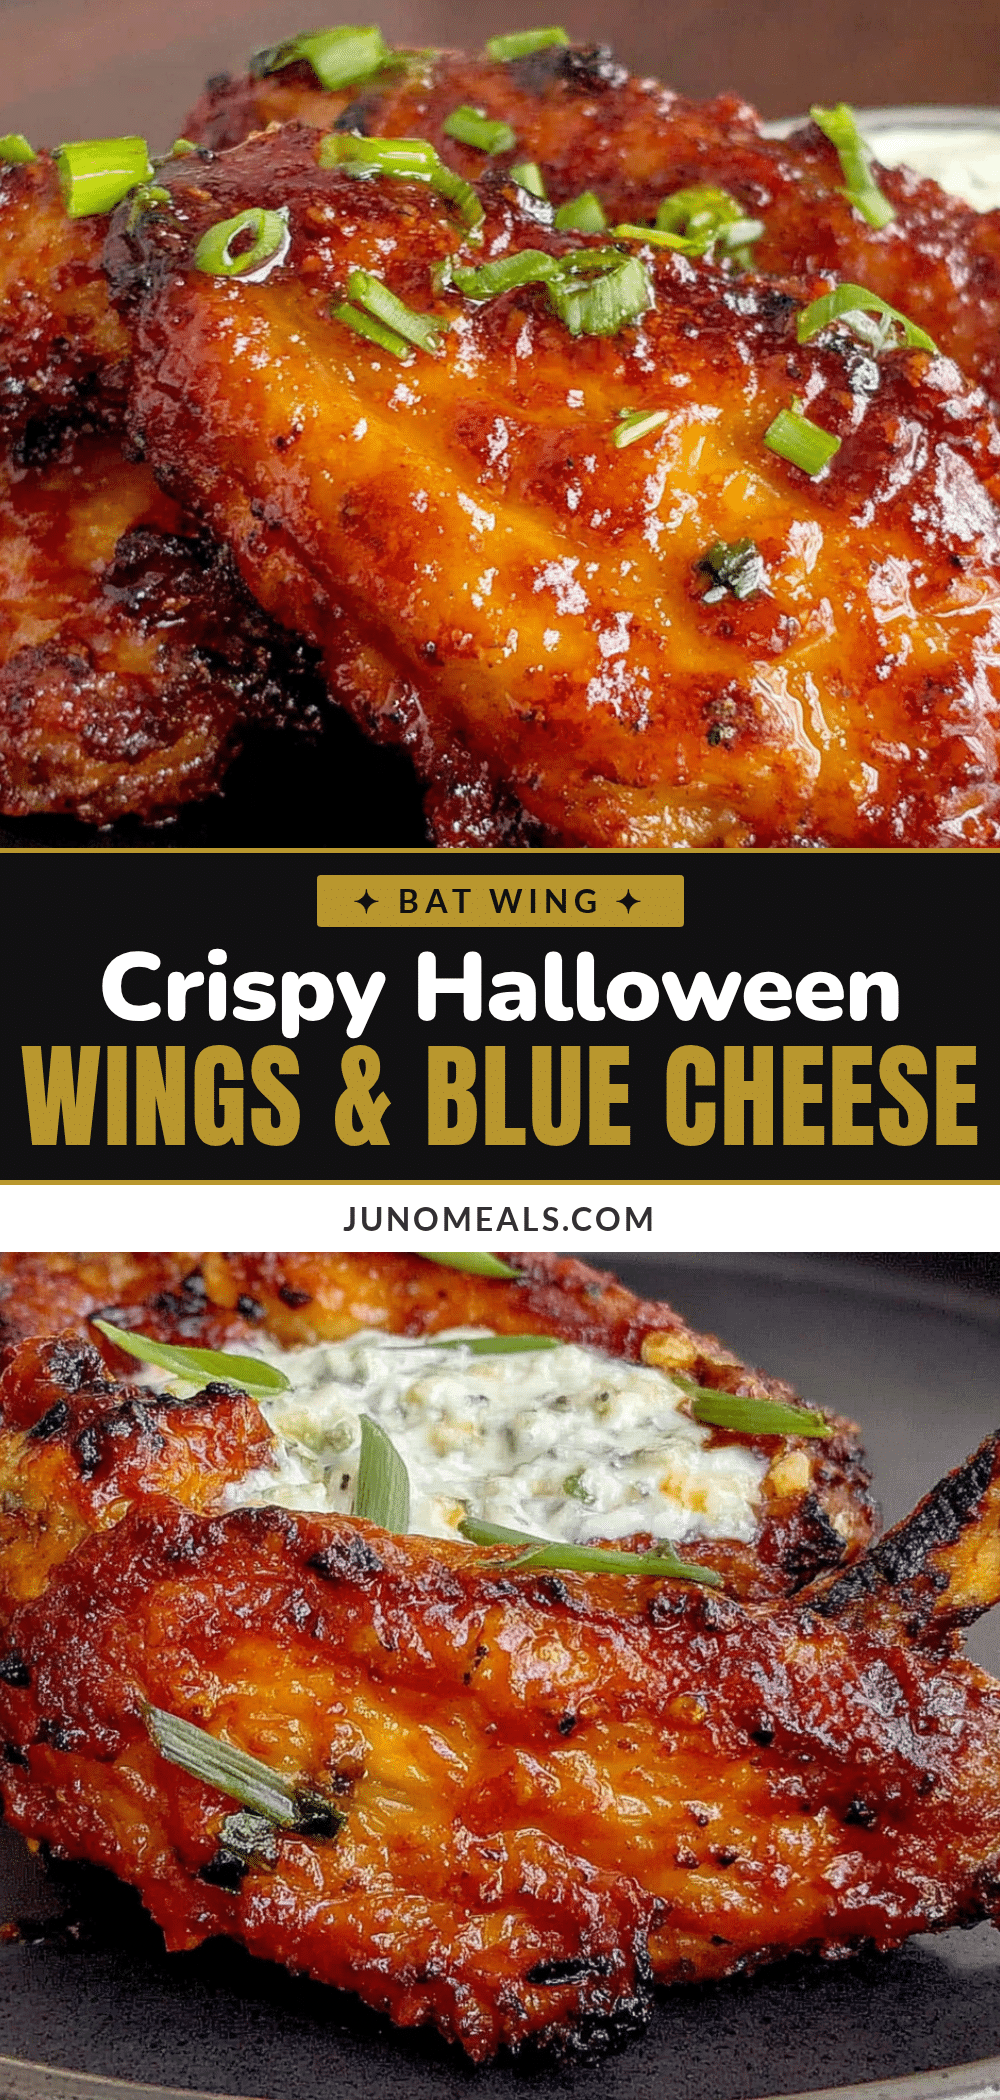
Crispy Bat Wing Buffalo Wings Recipe with Blue Cheese
These crispy, oven-baked buffalo wings feature a dramatic ‘bat wing’ cut perfect for Halloween. A double-dredge technique ensures shatteringly crisp skin, while a homemade chunky blue cheese dip provides the perfect tangy counterpoint.
- Prep Time: 20 minutes
- Cook Time: 45 minutes
- Total Time: 2 hours 5 minutes (includes 2 hours resting time)
- Yield: 4 servings 1x
- Category: Appetizer
- Cuisine: American
Ingredients
- 2 lbs (about 900g) chicken wings, separated into drumettes and flats
- 1 tablespoon (15g) baking powder (NOT baking soda)
- 1 teaspoon (5g) kosher salt
- 1 teaspoon (2g) garlic powder
- 1/2 teaspoon (1g) black pepper
- 1/2 cup (120ml) Frank’s RedHot Original Cayenne Pepper Sauce
- 1/4 cup (60g) unsalted butter, cut into cubes
- 1 tablespoon (15ml) honey
- 1 teaspoon (5ml) Worcestershire sauce
- 1/2 teaspoon (1g) garlic powder
- 1/2 cup (120g) sour cream
- 1/4 cup (60ml) buttermilk
- 4 oz (115g) good quality blue cheese, crumbled
- 1 tablespoon (15ml) fresh lemon juice
- 1/2 teaspoon (1g) kosher salt
- 1/4 teaspoon (0.5g) black pepper
- 1 tablespoon (4g) fresh chives, chopped (for garnish)
Instructions
- Prep the Bat Wings: Pat chicken wings bone-dry with paper towels. For drumettes, cut meat and skin away from the thin end of the bone, pushing down to create a ‘handle.’ For flats, cut through the joint between the two bones to separate them into two pieces, each with a single bone.
- The Dry Brine: In a large bowl, whisk together baking powder, salt, garlic powder, and black pepper. Add wings and toss until evenly coated.
- The Rest: Place coated wings on a wire rack set over a baking sheet in a single layer. Refrigerate uncovered for at least 2 hours (up to 24 hours).
- Bake: Preheat oven to 425°F (220°C). Bake wings for 25 minutes, flip, then bake another 20-25 minutes until deep golden brown and crispy (internal temperature 165°F/74°C).
- Make the Buffalo Sauce: In a small saucepan over medium-low heat, combine hot sauce, butter, honey, Worcestershire sauce, and garlic powder. Stir until butter melts and sauce is smooth. Keep warm.
- Make the Blue Cheese Dip: In a small bowl, combine sour cream, buttermilk, half the blue cheese, lemon juice, salt, and pepper. Stir, then gently fold in remaining blue cheese and chives. Refrigerate until ready to serve.
- Toss and Serve: Let baked wings rest on rack for 2 minutes. Transfer to a large bowl, pour warm buffalo sauce over, and toss until coated. Serve immediately with blue cheese dip and celery/carrot sticks.
Notes
The double-dredge technique and fridge rest are essential for maximum crispiness. Do not substitute baking soda for baking powder. For best results, use fresh wings and pat them extremely dry. The blue cheese dip improves after a day in the fridge.
Nutrition
- Serving Size: 4-5 wings with 2 tab
- Calories: 500
- Sugar: 5
- Sodium: 1200
- Fat: 35
- Saturated Fat: 12
- Carbohydrates: 8
- Protein: 35
Keywords: buffalo wings, crispy wings, bat wings, Halloween wings, blue cheese dip, game day appetizer, oven baked wings


