I burned the bottom of a pumpkin cheesecake three Thanksgivings in a row before I finally admitted the problem wasn’t the recipe—it was me.
There I was, standing in my tiny kitchen at 11 PM, pulling out another cracked, slightly scorched cheesecake from a water bath that had leaked (again), and I just thought—why am I doing this to myself?
The filling was always perfect. The flavor was spot on. But the baking part? We were not friends. So I did something that felt almost wrong at the time: I took the oven completely out of the equation.
These creamy no-bake pumpkin cheesecake bars with gingersnap crust were born from that moment of surrender, and honestly? They’re better than any baked version I ever made. The texture is silkier, the gingersnap crust stays perfectly crunchy, and the pumpkin flavor feels brighter without the oven drying it out. Plus, you can make them in under 30 minutes of active time—no water baths, no cracked tops, no burned bottoms.
I brought a batch to that same Thanksgiving the following year, and my sister-in-law (who had politely chewed through my previous attempts) asked for the recipe before the pie was even cut. That’s when I knew this no-bake version wasn’t just a backup plan—it was the real deal.
Why You’ll Love These No-Bake Pumpkin Cheesecake Bars
Let me tell you why these bars have become my most-requested fall dessert, even over traditional pumpkin pie.
- No oven required. This is the big one. Your oven stays free for turkey, rolls, or literally anything else. No water baths, no temperature anxiety, no checking every five minutes.
- That gingersnap crust. Honestly, the crust might be my favorite part. The warm spices from the gingersnaps—ginger, cloves, molasses—pair so perfectly with the creamy pumpkin filling. It’s like they were made for each other.
- Make-ahead friendly. These bars need at least 4 hours to set, which means you can make them the day before and just pull them out when you’re ready to serve. Less stress, more enjoying your own party.
- Perfect texture. The filling sets up firm but stays incredibly creamy—almost mousse-like. No gelatin necessary, just cream cheese and heavy cream doing their thing.
- Crowd-pleaser guaranteed. I’ve served these at everything from casual potlucks to fancy dinner parties, and they disappear fast. Even people who “don’t like pumpkin desserts” have asked for seconds.
These bars are different because they skip the fuss without skipping the flavor. You get all the richness of a classic pumpkin cheesecake with a fraction of the work. And that gingersnap crust? It adds a spicy crunch that a regular graham cracker crust just can’t touch.
What Ingredients You Will Need
This recipe uses simple, straightforward ingredients to create something that tastes way more complicated than it is. Most of these are pantry staples come fall, but I’ll walk you through each one so you know exactly what to look for.
For the Gingersnap Crust
- 2 cups gingersnap cookie crumbs (about 8 ounces, or roughly 40 cookies)—I prefer Nabisco or Anna’s brand for consistent texture. You can crush them in a food processor or by hand in a zip-top bag with a rolling pin.
- 6 tablespoons unsalted butter, melted—This binds the crumbs and adds richness. Salted butter works too, just skip the added salt in the crust.
- 2 tablespoons granulated sugar—Just a little extra sweetness to balance the spicy gingersnaps.
- Pinch of salt—Enhances all the flavors and keeps the crust from tasting flat.
For the Pumpkin Cheesecake Filling
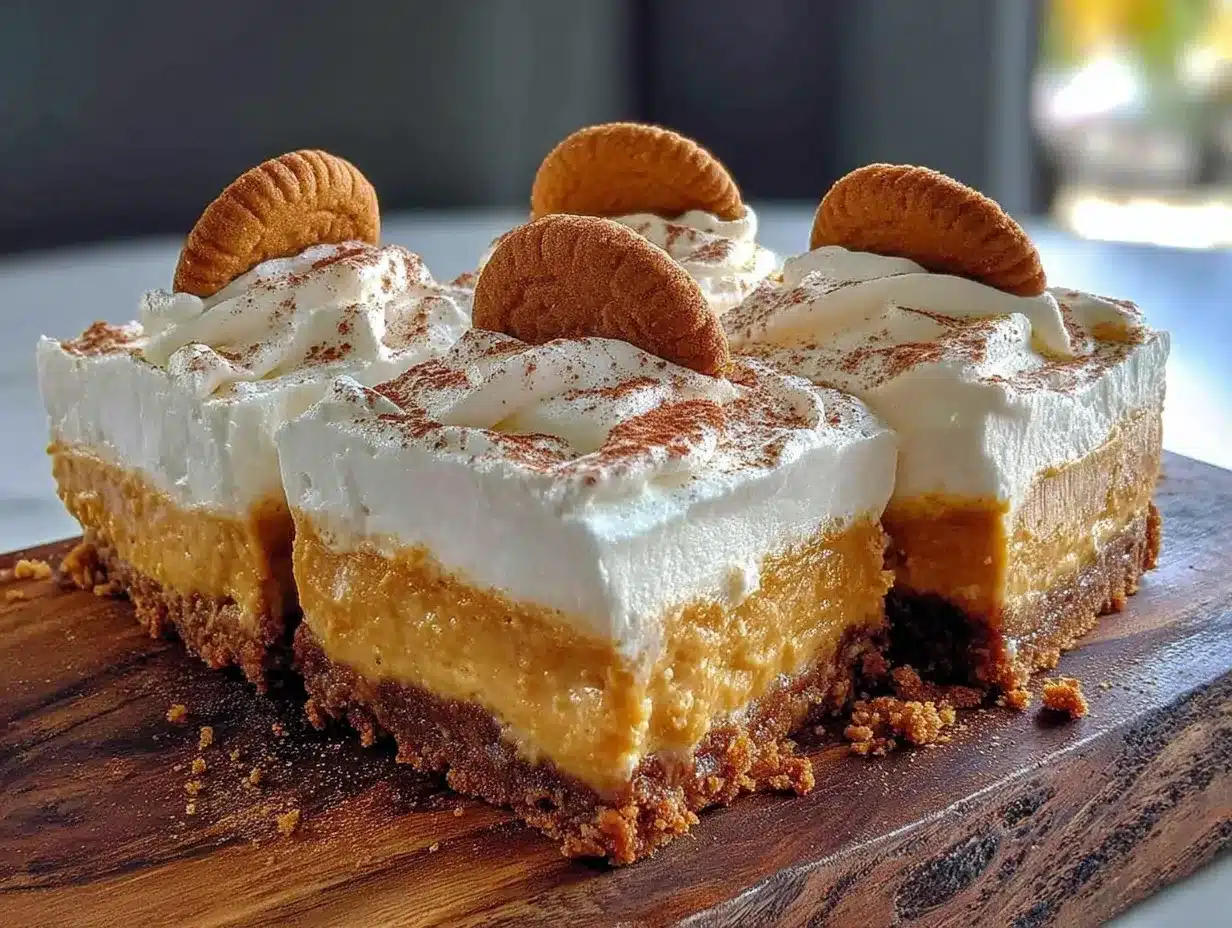
- 16 ounces cream cheese, softened to room temperature—Full-fat is crucial here for the creamiest texture. Low-fat cream cheese can make the filling grainy. Let it sit out for at least an hour before starting.
- 1 cup pumpkin puree (not pumpkin pie filling)—Make sure you grab the 100% pure pumpkin. Libby’s is my go-to brand because it’s consistently thick and not watery.
- ¾ cup packed light brown sugar—Adds depth and a slight molasses note that complements the pumpkin and spices.
- ½ cup granulated sugar—For sweetness that doesn’t overpower the other flavors.
- 1 teaspoon vanilla extract—Pure vanilla, not imitation, for the best flavor.
- 1 ½ teaspoons pumpkin pie spice—Or make your own blend: ½ teaspoon cinnamon, ¼ teaspoon ginger, ¼ teaspoon nutmeg, ⅛ teaspoon cloves, and a pinch of allspice.
- 1 teaspoon ground cinnamon—Extra cinnamon because pumpkin and cinnamon are best friends.
- ¼ teaspoon salt—Brings everything into balance.
- 1 cup heavy cream, cold—This gets whipped and folded in to create that light, mousse-like texture without gelatin.
For the Topping (Optional but Recommended)
- ½ cup heavy cream—For whipped cream topping.
- 2 tablespoons powdered sugar—Sweetens the whipped cream without grittiness.
- ¼ teaspoon vanilla extract—Because vanilla makes everything better.
- Extra gingersnap crumbs or candied pecans—For garnish and crunch.
If you’re dairy-free, you can substitute the cream cheese with a good-quality vegan cream cheese (I like Miyoko’s) and use coconut cream instead of heavy cream. Just know the texture will be slightly different—still delicious, just a bit denser.
Equipment Needed
You don’t need anything fancy here, which is part of the beauty of this recipe.
- 9×9-inch square baking pan—This gives you perfectly portioned bars. An 8×8 works too, but your bars will be slightly thicker and may need an extra 30 minutes to set.
- Parchment paper—Line your pan with two overlapping strips, leaving overhang on all sides. This makes lifting the bars out so much easier—trust me on this one.
- Food processor or zip-top bag and rolling pin—For crushing the gingersnaps. I prefer the food processor for even crumbs, but the bag method works fine if you don’t mind a little arm workout.
- Electric hand mixer or stand mixer—You need something to whip the cream and beat the cream cheese smoothly. A whisk and some serious arm strength could work, but I wouldn’t recommend it.
- Medium and large mixing bowls—One for the crust mixture, one for the filling.
- Rubber spatula—For folding the whipped cream into the filling without deflating it.
- Measuring cups and spoons—Standard kitchen staples.
If you don’t have a food processor, just put the gingersnaps in a sturdy zip-top bag and go at them with a rolling pin or even a heavy skillet. It’s a little messy but very satisfying.
Preparation Method
Let’s walk through this step by step. I’ve made these bars at least two dozen times, so I’ll share all the little tricks I’ve picked up along the way.
Step 1: Prepare Your Pan
Line your 9×9-inch pan with parchment paper, leaving about 2 inches of overhang on two opposite sides. This creates little handles that let you lift the whole block of cheesecake bars out cleanly. Lightly grease the parchment with a tiny bit of butter or non-stick spray—just enough so nothing sticks.
Step 2: Make the Gingersnap Crust
Pulse the gingersnap cookies in your food processor until you have fine, even crumbs. You should end up with about 2 cups. If you’re using the bag method, crush them until no large pieces remain—some smaller chunks are okay, but aim for mostly fine crumbs.
Transfer the crumbs to a medium bowl, add the melted butter, sugar, and salt, and stir with a fork until everything is evenly moistened. It should look like wet sand and hold together when you squeeze a handful.
Press the mixture firmly and evenly into the bottom of your prepared pan. I use the flat bottom of a measuring cup to really pack it down—this prevents the crust from crumbling when you cut the bars later. Pop the pan in the refrigerator while you make the filling.
Step 3: Beat the Cream Cheese Base
In a large bowl, beat the softened cream cheese with an electric mixer on medium speed until completely smooth—about 2 minutes. Scrape down the sides and the bottom of the bowl with a rubber spatula. Lumps here will stay lumps, so take your time.
Add both sugars and beat for another 2 minutes until the mixture is light and fluffy. Then add the pumpkin puree, vanilla, pumpkin pie spice, cinnamon, and salt. Beat on medium-low until everything is combined and smooth. Scrape the bowl again—I can’t stress this enough, getting the bottom of the bowl is key.
Step 4: Whip the Cream
In a separate medium bowl (chill it for 10 minutes in the fridge if you remember), pour the cold heavy cream. Beat with clean beaters on medium-high speed until soft peaks form—this usually takes about 3-4 minutes. You’re looking for peaks that hold their shape but droop slightly at the tips. Don’t over-whip, or you’ll end up with butter.
Step 5: Fold Everything Together
Here’s where the magic happens. Add about one-third of the whipped cream to the pumpkin-cream cheese mixture and fold it in gently with your rubber spatula. This lightens the mixture and makes it easier to incorporate the rest without deflating it.
Add the remaining whipped cream and fold until just combined. You want to see no more white streaks, but don’t overmix. The filling should look smooth, airy, and a beautiful pale orange color. It will be thick but spoonable—like a very fluffy mousse.
Step 6: Assemble and Chill
Remove the pan with the crust from the refrigerator. Spoon the filling over the crust and spread it evenly with an offset spatula or the back of a spoon. Give the pan a few gentle taps on the counter to release any air bubbles.
Cover the pan with plastic wrap and refrigerate for at least 6 hours, but overnight is better. The bars need this time to set up properly—if you rush it, they’ll be too soft to cut cleanly. I know it’s hard to wait, but it’s worth it.
Step 7: Slice and Serve
When you’re ready to serve, use the parchment overhang to lift the entire block out of the pan and onto a cutting board. Use a sharp chef’s knife to slice into 9 or 16 bars, wiping the blade clean between cuts for the neatest edges. For the cleanest slices, run the knife under hot water and dry it before each cut.
If you’re adding whipped cream topping, whip the cream with powdered sugar and vanilla until stiff peaks form, then pipe or dollop onto each bar just before serving. Sprinkle with extra gingersnap crumbs or candied pecans for that Pinterest-worthy finish.
Cooking Tips & Techniques
After making these bars more times than I can count, here are the things I wish someone had told me from the start.
Room temperature cream cheese is non-negotiable. I learned this the hard way when I tried to rush and ended up with lumpy filling. Cold cream cheese doesn’t blend smoothly, and those lumps won’t disappear no matter how long you beat. Let it sit on the counter for at least an hour, or cut it into cubes and microwave at 50% power for 10-second intervals if you’re in a hurry.
Don’t skip the parchment paper. I know it seems like an extra step, but trying to cut these bars directly from the pan without parchment is a recipe for disaster. The parchment handles make lifting the whole block out so much easier, and you get much cleaner slices.
Press that crust firmly. A loose crust will crumble when you cut the bars. Use the flat bottom of a measuring cup or a glass to really pack it down. The crust should feel solid, not sandy.
Patience with chilling. I once tried to cut these after only 4 hours because I was impatient, and it was a mess. The bars were still too soft and the slices looked more like blobs than bars. Give them the full 6 hours minimum, or overnight if you can. The texture is so much better after a full night in the fridge.
Whip the cream to soft peaks, not stiff. If you over-whip the cream, it can separate and make the filling grainy. Stop as soon as the cream holds soft, droopy peaks. It will continue to thicken slightly as you fold it into the pumpkin mixture.
Variations & Adaptations
One of the best things about this recipe is how easy it is to tweak. Here are some variations I’ve tried and loved.
Gluten-Free Version
Use gluten-free gingersnap cookies for the crust. Many brands make them, or you can use gluten-free graham crackers with added ginger and cinnamon. The rest of the filling is naturally gluten-free, so this swap is simple.
Dairy-Free Version
Substitute the cream cheese with a high-quality vegan cream cheese (I’ve had good luck with Miyoko’s and Kite Hill). Use full-fat coconut cream (the solid part from a can of coconut milk) instead of heavy cream—whip it chilled just like regular cream. The texture will be slightly denser but still delicious.
Pumpkin Spice Latte Twist
Add 1 tablespoon of instant espresso powder dissolved in 1 teaspoon of hot water to the filling along with the pumpkin. The coffee flavor enhances the pumpkin and spices without screaming “coffee.” I made this version for a friend who’s obsessed with PSLs and she said it was the best dessert I’ve ever made.
Chocolate Swirl Variation
Melt 4 ounces of dark chocolate and let it cool slightly. After spreading the filling in the pan, dollop the melted chocolate on top and swirl it with a knife. The chocolate and gingersnap combination is incredible.
Individual Mini Cheesecakes
Press the crust into a muffin tin lined with paper liners, then divide the filling among the cups. Chill for 4 hours and you have perfectly portioned individual desserts—great for parties. You might also enjoy these mini lemon blueberry cheesecakes for another no-bake option.
Serving & Storage Suggestions
These bars are best served cold, straight from the refrigerator. The filling is firm but creamy at this temperature, and the crust stays perfectly crunchy. If you let them sit at room temperature for more than 20 minutes, the filling will start to soften and the crust may get soggy.
For presentation, I like to arrange the bars on a platter with a dollop of whipped cream on each one and a light dusting of cinnamon or pumpkin pie spice. A few whole gingersnap cookies tucked around the edges add a nice visual touch.
These bars pair beautifully with hot coffee, spiced chai, or a glass of cold milk. If you’re serving them after a big meal, they’re light enough that people won’t feel stuffed but satisfying enough to end the meal on a high note.
Storage: Keep the bars in an airtight container in the refrigerator for up to 5 days. The crust will soften slightly after day 2, but the flavor actually improves as the spices meld together. I honestly think they taste even better on day two.
Freezing: These bars freeze beautifully. Once they’re fully set, cut them into bars and place them on a baking sheet in the freezer for 1 hour. Then transfer the frozen bars to a freezer-safe container with parchment paper between layers. They’ll keep for up to 3 months. Thaw in the refrigerator overnight before serving—add the whipped cream after thawing.
Nutritional Information & Benefits
Here’s the approximate nutritional breakdown for one bar (based on 16 servings):
- Calories: 285
- Fat: 19g
- Carbohydrates: 26g
- Protein: 4g
- Fiber: 1g
- Sugar: 18g
While these are definitely a treat, there are some nutritional bright spots. Pumpkin is packed with vitamin A (over 200% of your daily needs in one cup), which supports eye health and immune function. The ginger in the crust has anti-inflammatory properties, and the cream cheese provides a decent amount of calcium.
For a lighter version, you can reduce the crust butter to 4 tablespoons and use Neufchâtel cheese (⅓ less fat cream cheese) instead of full-fat. The texture will be slightly less rich but still very good.
These bars are vegetarian and can be made gluten-free and dairy-free with the substitutions mentioned above. They contain dairy, gluten (unless modified), and eggs are not used in this recipe.
Conclusion
These creamy no-bake pumpkin cheesecake bars with gingersnap crust have become my go-to fall dessert for a reason—they deliver all the cozy pumpkin flavor you crave without any of the baking stress. The gingersnap crust adds a spicy crunch that makes every bite interesting, and the filling is so silky and rich that no one will believe it didn’t come from an oven.
Whether you’re bringing them to a Friendsgiving, serving them after Thanksgiving dinner, or just treating yourself on a crisp autumn evening, these bars are guaranteed to impress. And the best part? You get to skip the water bath, the cracked tops, and the oven timer anxiety.
I’d love to hear how these turn out for you—drop a comment below and let me know if you tried any variations, or tag me in your photos if you share them online. And if you’re looking for more easy dessert inspiration, check out our full collection of recipes for more no-fuss treats that taste like you spent hours in the kitchen.
Happy no-baking, friends—your oven will thank you.
Frequently Asked Questions
Can I use pumpkin pie filling instead of pumpkin puree?
No, please don’t. Pumpkin pie filling is already sweetened and spiced, which will throw off the sugar and spice balance of this recipe. Stick with 100% pure pumpkin puree for the best results.
How long do these bars need to set?
At least 6 hours in the refrigerator, but overnight is ideal. The longer they sit, the firmer and cleaner they’ll cut. I always recommend making them the day before you plan to serve them.
Can I use a different cookie for the crust?
Absolutely. Graham crackers with added ginger and cinnamon work well, or try speculoos cookies for a similar spiced flavor. Vanilla wafers or shortbread cookies will give you a milder, less spicy crust.
Why is my filling lumpy?
This usually happens when the cream cheese isn’t fully softened before mixing. Make sure it’s at room temperature (about 70°F) and beat it until completely smooth before adding other ingredients. If you still see lumps, try warming the bowl slightly or beating a bit longer.
Can I make these into a full-sized cheesecake instead of bars?
Yes! Press the crust into a 9-inch springform pan and double the filling recipe. Chill for at least 8 hours or overnight. The texture will be slightly different because of the larger volume, but it works beautifully for a no-bake cheesecake presentation.
Pin This Recipe!
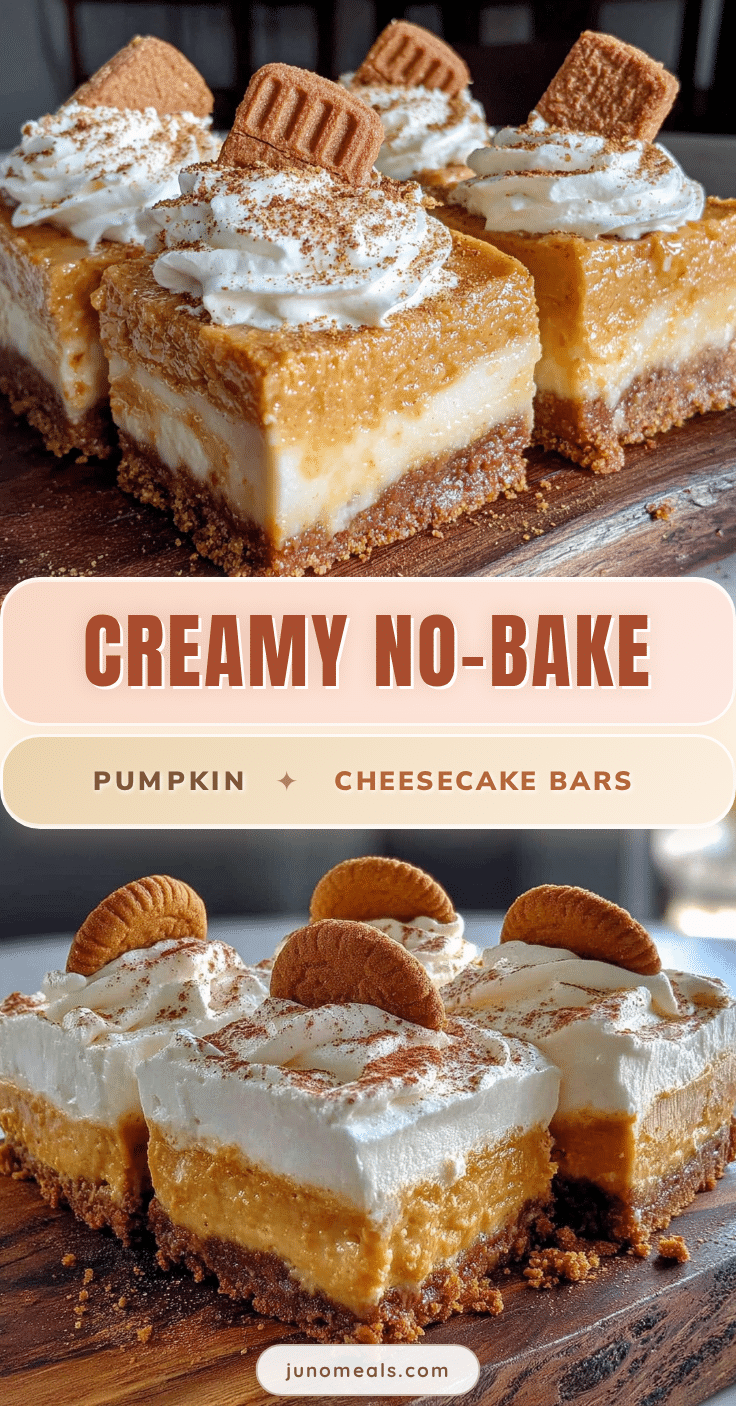
Creamy No-Bake Pumpkin Cheesecake Bars with Gingersnap Crust
These creamy no-bake pumpkin cheesecake bars with gingersnap crust deliver all the cozy pumpkin flavor without any baking stress. The gingersnap crust adds a spicy crunch, and the filling is silky and rich—no oven required.
- Prep Time: 30 minutes
- Cook Time: 0 minutes
- Total Time: 6 hours 30 minutes (includes chilling time)
- Yield: 16 servings 1x
- Category: Dessert
- Cuisine: American
Ingredients
- 2 cups gingersnap cookie crumbs (about 8 ounces or roughly 40 cookies)
- 6 tablespoons unsalted butter, melted
- 2 tablespoons granulated sugar
- Pinch of salt
- 16 ounces cream cheese, softened to room temperature
- 1 cup pumpkin puree (not pumpkin pie filling)
- ¾ cup packed light brown sugar
- ½ cup granulated sugar
- 1 teaspoon vanilla extract
- 1 ½ teaspoons pumpkin pie spice
- 1 teaspoon ground cinnamon
- ¼ teaspoon salt
- 1 cup heavy cream, cold
- ½ cup heavy cream (for topping)
- 2 tablespoons powdered sugar (for topping)
- ¼ teaspoon vanilla extract (for topping)
- Extra gingersnap crumbs or candied pecans (for garnish)
Instructions
- Line a 9×9-inch baking pan with parchment paper, leaving about 2 inches of overhang on two opposite sides. Lightly grease the parchment.
- Pulse gingersnap cookies in a food processor until fine crumbs form. Transfer to a medium bowl, add melted butter, sugar, and salt, and stir until evenly moistened. Press firmly into the bottom of the prepared pan using a flat-bottomed measuring cup. Refrigerate while making the filling.
- In a large bowl, beat softened cream cheese with an electric mixer on medium speed until completely smooth, about 2 minutes. Scrape down sides and bottom of bowl.
- Add both sugars and beat for 2 minutes until light and fluffy. Add pumpkin puree, vanilla, pumpkin pie spice, cinnamon, and salt. Beat on medium-low until combined and smooth. Scrape bowl again.
- In a separate chilled medium bowl, beat cold heavy cream on medium-high speed until soft peaks form, about 3-4 minutes.
- Fold one-third of the whipped cream into the pumpkin-cream cheese mixture to lighten it. Then fold in the remaining whipped cream until just combined and no white streaks remain.
- Remove pan with crust from refrigerator. Spoon filling over crust and spread evenly. Tap pan gently on counter to release air bubbles.
- Cover with plastic wrap and refrigerate for at least 6 hours, preferably overnight.
- When ready to serve, use parchment overhang to lift the block out of the pan onto a cutting board. Slice into 9 or 16 bars using a sharp knife, wiping blade clean between cuts.
- For topping, whip ½ cup heavy cream with powdered sugar and vanilla until stiff peaks form. Pipe or dollop onto each bar just before serving. Sprinkle with extra gingersnap crumbs or candied pecans.
Notes
Room temperature cream cheese is essential for a smooth filling. Press the crust firmly to prevent crumbling. Chill for at least 6 hours, preferably overnight, for clean slices. Bars can be stored in an airtight container in the refrigerator for up to 5 days or frozen for up to 3 months.
Nutrition
- Serving Size: 1 bar
- Calories: 285
- Sugar: 18
- Sodium: 220
- Fat: 19
- Saturated Fat: 11
- Carbohydrates: 26
- Fiber: 1
- Protein: 4
Keywords: no-bake pumpkin cheesecake bars, gingersnap crust, pumpkin dessert, fall dessert, Thanksgiving dessert, no-bake cheesecake, pumpkin cheesecake bars


