It was 11:47 PM on a random Wednesday, and I had a very specific, almost aggressive craving for mashed potatoes. The kind you get after a long day, where only something creamy, buttery, and carb-heavy will do. But I opened the fridge, and reality hit—no potatoes. Just a lone head of cauliflower, some garlic, and a half-empty carton of heavy cream. I stood there, door open, cold air spilling out, and thought, “Well, this is either going to be a disaster or the best thing I’ve made all week.”
Honestly, I almost closed the door and ordered takeout. But something about the quiet hour and the challenge of it kept me standing there. I grabbed the cauliflower, tossed a few garlic cloves in foil, and decided to roast everything until it was soft and sweet. I figured if I could just get the texture right—really creamy, not watery or sad—it might actually work. And let me tell you, when I finally blended it all together with butter and cream, I took one bite and actually laughed out loud. It was that good.
I’ve made this Creamy Low-Carb Roasted Garlic Cauliflower Mashed Potatoes at least twice a month ever since. It’s become my go-to for nights when I want something comforting but don’t want to feel weighed down afterward. Maybe you’ve been there too—wanting that cozy, mashed potato feeling without the carb crash. This recipe is exactly that. It’s rich, velvety, and honestly, I sometimes prefer it to the real thing now. The roasted garlic makes it feel indulgent, and the cauliflower just soaks up all that buttery goodness. It’s a happy accident that turned into a staple.
Why You’ll Love This Recipe
Let me tell you why this recipe has earned a permanent spot in my weekly rotation. It’s not just another cauliflower mash—it’s the one that actually delivers on flavor and texture. I’ve tested this dozens of times, tweaking the roasting time, the butter ratio, even the blending method, and this version is hands-down the best.
- Quick & Easy: Comes together in about 40 minutes, most of which is hands-off roasting time. Perfect for busy weeknights or when that comfort food craving hits hard.
- Simple Ingredients: No fancy grocery trips needed. Cauliflower, garlic, butter, cream, and basic seasonings—that’s it. You probably have everything right now.
- Perfect for Holiday Dinners: This dish holds its own on any Thanksgiving or Christmas table. Even the potato purists at my family gatherings have asked for seconds.
- Crowd-Pleaser: I’ve served this to kids, keto friends, and skeptical in-laws. Everyone loves it. The roasted garlic does all the heavy lifting.
- Unbelievably Delicious: The texture is what gets me every time—silky smooth, never grainy or watery. It tastes indulgent but leaves you feeling light.
What makes this recipe different from all the others? It’s the roasting method. Most recipes just boil the cauliflower, which leaves it waterlogged and bland. By roasting it, you concentrate the natural sweetness and get that caramelized depth that makes it taste almost nutty. Plus, the roasted garlic blends in so smoothly, you get that sweet, mellow garlic flavor in every bite without any sharpness. This isn’t just a substitute—it’s a genuinely delicious dish that stands on its own.
I mean, the first time I made this for a dinner party, I didn’t even tell anyone it was cauliflower until after they’d finished their plates. They just assumed I’d made the creamiest mashed potatoes they’d ever had. That’s the kind of recipe this is—it makes you feel good about eating well, without sacrificing any of the comfort.
What Ingredients You Will Need
This recipe uses simple, wholesome ingredients that work together to create something truly creamy and satisfying. Most of these are pantry staples, and the few fresh items are easy to find at any grocery store.
- 1 large head of cauliflower (about 2 pounds or 900g), cut into florets — Look for a firm, white head with tight florets and no brown spots. The fresher the cauliflower, the sweeter and more tender the mash will be.
- 1 whole head of garlic — This is non-negotiable for the best flavor. Roasting the whole head transforms the cloves into sweet, buttery, spreadable goodness. I like using fresh local garlic when it’s in season for a milder, sweeter result.
- 3 tablespoons unsalted butter (adds richness and that silky mouthfeel) — I recommend Kerrygold or any European-style butter for its higher fat content and creamier taste. You can use salted butter, just reduce the added salt later.
- 1/4 cup heavy cream (use full-fat for best texture) — This gives the mash its luxurious consistency. For a dairy-free option, full-fat canned coconut cream works surprisingly well here.
- 1/2 teaspoon salt (plus more to taste) — I prefer fine sea salt for even seasoning. Kosher salt works too, but you may need a bit more.
- 1/4 teaspoon black pepper (freshly ground is best) — Adds a subtle warmth that balances the sweetness of the roasted garlic.
- 1 tablespoon olive oil (for roasting the cauliflower) — Helps the florets caramelize without drying out. Avocado oil is a great substitute with a higher smoke point.
- Fresh chives or parsley for garnish (optional, but nice for color) — Adds a fresh pop of green and a mild oniony flavor that complements the creamy mash.
For the best results, I recommend roasting the garlic and cauliflower together on the same sheet pan. The garlic will need about 40 minutes, while the cauliflower takes around 30, so just add the cauliflower halfway through. This saves time and lets the flavors meld beautifully.
If you’re looking to cut down on prep, you can buy pre-cut cauliflower florets from the produce section. Just make sure they’re fresh and not pre-steamed, which can make them too soft and watery for roasting.
Equipment Needed
You don’t need a fancy kitchen to make this recipe work. Here’s what I use, along with some honest notes on what actually matters.
- Large baking sheet — A rimmed sheet pan works best to catch any garlic butter drips. I use a half-sheet pan (18×13 inches) for even roasting without overcrowding.
- Aluminum foil — For wrapping the garlic head. This traps steam and lets the cloves soften perfectly without burning. You can use parchment paper, but foil holds its shape better.
- Food processor or high-speed blender — This is the key to that silky smooth texture. I’ve tried using a potato masher and it just doesn’t get creamy enough—you’ll end up with chunky, uneven mash. A food processor is my go-to because it gives you more control over the texture. If you’re using a blender, let the mixture cool slightly first and work in batches to avoid a hot mess explosion.
- Sharp knife and cutting board — For cutting the cauliflower into even florets. A good chef’s knife makes this job so much easier and safer.
- Garlic press or small knife — Actually, you won’t need a press here since the roasted garlic will be soft enough to squeeze out of its skin by hand. Just use your fingers—it’s oddly satisfying.
- Measuring cups and spoons — For accuracy, especially with the cream and butter. Eyeballing it can lead to a mash that’s too thin or too thick.
- Rubber spatula — For scraping every last bit of that creamy goodness out of the food processor. Trust me, you won’t want to waste any.
If you don’t have a food processor, an immersion blender with a tall cup works well too. Just be patient and blend until completely smooth, stopping to scrape down the sides. A potato ricer is another option if you want an extra-luxurious texture, but it’s more work and not necessary for this recipe.
Preparation Method
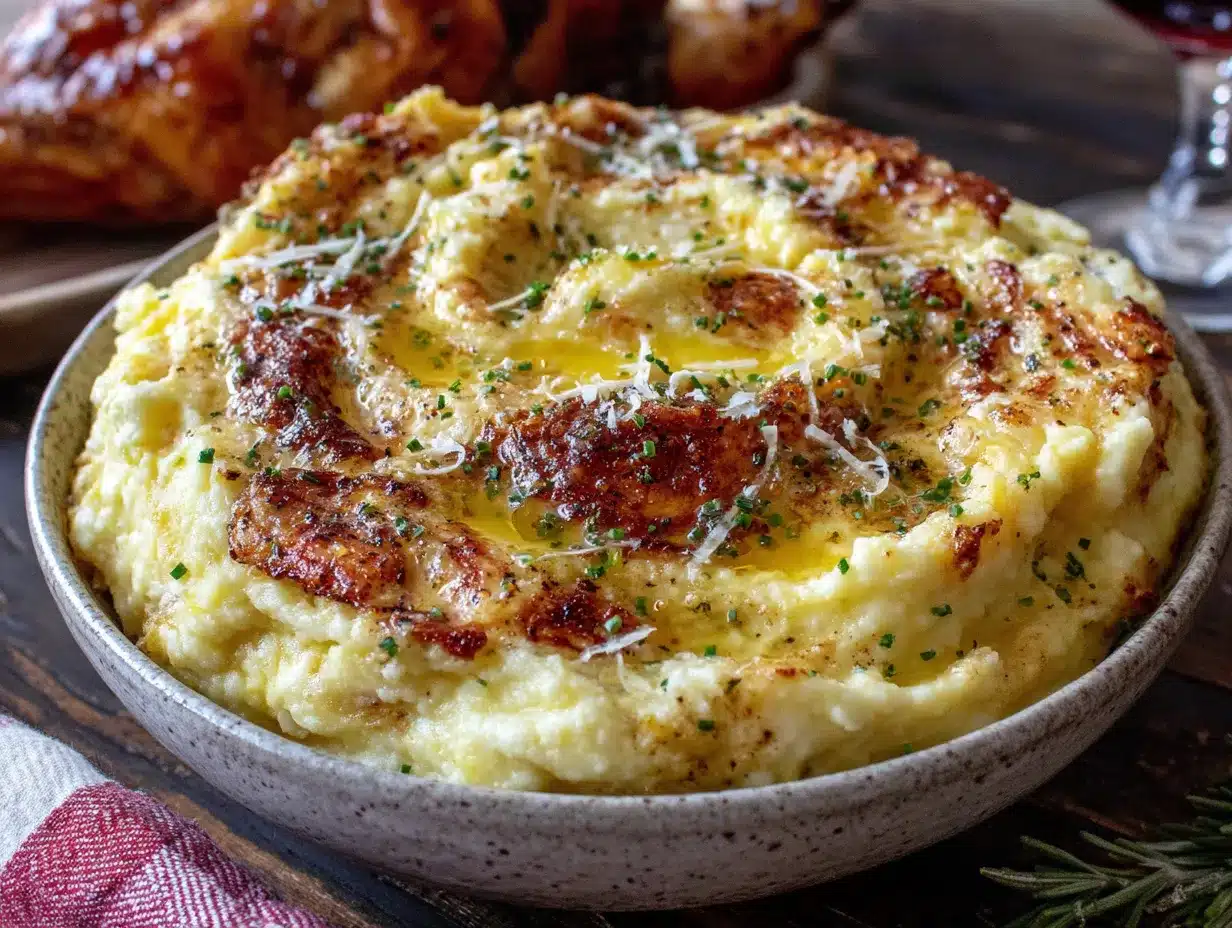
Let me walk you through this step by step. I’ve made this so many times that I’ve got it down to a science, and I’ll share all the little tricks I’ve learned along the way.
- Preheat your oven to 400°F (200°C). This temperature is perfect for roasting—hot enough to caramelize the cauliflower without burning the garlic. While the oven heats, line your baking sheet with parchment paper for easy cleanup.
- Prepare the garlic. Cut about 1/4 inch off the top of the garlic head to expose the cloves. Drizzle with 1 teaspoon of olive oil, wrap tightly in aluminum foil, and place on the baking sheet. Roast for 40 minutes total. The garlic is done when the cloves are golden brown, soft, and easily pierced with a knife.
- Prepare the cauliflower. Cut the cauliflower into evenly sized florets—about 1 to 1.5 inches each. This ensures they roast evenly. Toss the florets with the remaining olive oil, 1/4 teaspoon salt, and a pinch of pepper. Spread them in a single layer on the baking sheet around the wrapped garlic.
- Roast the cauliflower. Place the baking sheet in the oven after the garlic has been roasting for 10 minutes (so the cauliflower roasts for about 30 minutes total). Flip the florets halfway through for even browning. They should be tender when pierced with a fork and have golden-brown edges. Don’t let them get too dark, or they’ll taste bitter.
- Cool slightly. Remove the baking sheet from the oven. Let the cauliflower cool for 5 minutes, and let the garlic cool until you can handle it safely—about 10 minutes. This step is important because blending hot cauliflower can create steam that makes the mash watery.
- Squeeze the garlic. Once the garlic is cool enough to touch, squeeze the bottom of each clove to release the soft, roasted flesh into a small bowl. Discard the skins. Mash the garlic with a fork until it forms a smooth paste. This ensures it blends evenly into the cauliflower.
- Blend the cauliflower and garlic. Transfer the roasted cauliflower and garlic paste to a food processor. Add the butter, heavy cream, remaining 1/4 teaspoon salt, and pepper. Pulse a few times to break up the cauliflower, then process continuously for about 30 seconds until completely smooth. Scrape down the sides with a rubber spatula and process for another 15 seconds.
- Adjust the consistency. If the mash is too thick, add warm cream or milk one tablespoon at a time, pulsing after each addition. If it’s too thin, return it to a saucepan and simmer over low heat, stirring constantly, until it thickens slightly—about 2-3 minutes.
- Taste and adjust seasoning. This is where you make it your own. Add more salt, pepper, or even a pinch of garlic powder if you want a stronger garlic flavor. I sometimes add a tiny splash of white wine vinegar to brighten it up.
- Serve immediately. Transfer the mash to a warm serving bowl. Garnish with fresh chives or parsley, a pat of butter, and an extra crack of black pepper. The texture is best right after blending, while it’s still warm and fluffy.
One thing I learned the hard way: don’t over-process the cauliflower. It can turn gummy if you blend it too long, especially if it’s still hot. Stop as soon as it’s smooth and creamy. Your food processor will thank you, and so will your taste buds.
Cooking Tips & Techniques
Over the years, I’ve made just about every mistake you can with cauliflower mash. Here’s what I’ve learned so you don’t have to repeat my failures.
Don’t skip the roasting step. I know it’s tempting to boil the cauliflower to save time—I’ve been there. But boiling adds water that makes the mash thin and flavorless. Roasting concentrates the natural sugars and gives you that deep, nutty flavor that makes this dish taste indulgent. Trust me, the extra 30 minutes are worth it.
Dry your cauliflower after roasting. Even roasted cauliflower can release some moisture. After it cools slightly, I pat the florets gently with a clean kitchen towel before blending. This simple step prevents a watery mash and ensures that creamy, thick texture you’re after.
Warm your cream and butter. Cold dairy will seize up the cauliflower and make it grainy. I microwave the cream and butter together for about 20 seconds before adding them to the food processor. It blends in much more smoothly and keeps the mash warm.
Season in layers. Add salt at every stage—when roasting the cauliflower, when blending, and again at the end. This builds depth of flavor that you can’t get from just seasoning at the end. I learned this from a chef friend, and it’s made a huge difference in all my cooking.
Use a food processor, not a blender. I know I said this before, but it’s worth repeating. A blender can make the mash too smooth and almost gluey, especially if you overfill it. A food processor gives you more control and a better texture. If you only have a blender, work in small batches and pulse, don’t run it continuously.
Watch your timing. This dish is best served right after making it. If you need to make it ahead, undercook the cauliflower slightly and reheat gently with a splash of cream. The mash will thicken as it sits, so you might need to thin it out when reheating.
I once tried to double this recipe for a big family dinner and crammed everything into one food processor batch. It was a disaster—half of it came out lumpy, the other half was over-processed. Now I always work in batches if I’m making a larger quantity. It takes a few extra minutes, but the texture is consistently perfect.
Variations & Adaptations
One of the best things about this recipe is how flexible it is. Here are some of my favorite variations that I’ve tested and loved.
Dairy-Free Version: Swap the butter for vegan butter or coconut oil, and use full-fat canned coconut cream instead of heavy cream. The coconut flavor is subtle and actually complements the roasted garlic beautifully. I’ve made this for dairy-free friends and they couldn’t tell the difference.
Cheesy Roasted Garlic Cauliflower Mash: Add 1/2 cup of grated Parmesan cheese and 1/4 cup of shredded sharp cheddar to the food processor along with the other ingredients. The cheese melts into the mash and adds a savory, umami richness that’s absolutely addictive. Just reduce the salt slightly since cheese is already salty.
Herb-Infused Version: Toss the cauliflower with fresh rosemary or thyme sprigs before roasting. Remove the herb sprigs before blending, then stir in a tablespoon of fresh chopped herbs at the end. The roasted herb flavor infuses the cauliflower without being overpowering.
Spicy Kick: Add 1/4 teaspoon of cayenne pepper or a pinch of red pepper flakes along with the seasonings. The heat cuts through the creaminess and adds a nice warmth. I love this version with grilled chicken or roasted pork.
Loaded Baked Potato Style: Top the finished mash with crispy bacon bits, shredded cheddar, chopped green onions, and a dollop of sour cream. It turns this low-carb side into a full-on comfort food experience that’s still way lighter than the original.
I once tried a version with roasted parsnips mixed in with the cauliflower. It added a natural sweetness that was lovely, but it also made the mash a bit starchier. If you want to experiment, replace about 1/4 of the cauliflower with roasted parsnips or turnips for a different flavor profile. Just keep the ratio mostly cauliflower to maintain that light texture.
Serving & Storage Suggestions
This dish is incredibly versatile and works for so many occasions. Here’s how I like to serve and store it.
Serving Temperature: Serve this mash hot, straight from the food processor. It cools down faster than regular mashed potatoes, so I warm my serving bowl with hot water before drying it and adding the mash. This keeps it warm for at least 20 minutes at the table.
Presentation: Spoon the mash into a shallow bowl and create a swirl on top with the back of a spoon. Add a pat of butter in the center, a sprinkle of fresh chives, and a crack of black pepper. It looks elegant without any extra effort.
Complementary Dishes: This pairs beautifully with roasted chicken, grilled steak, or pan-seared salmon. I also love it as a base for sautéed mushrooms or a rich beef stew. For a lighter meal, serve it alongside a crisp green salad with lemon vinaigrette.
Beverage Pairings: A crisp Sauvignon Blanc or a light Pinot Noir works well with the garlic and cream. For non-alcoholic options, sparkling water with lemon or a warm cup of herbal tea balances the richness.
Storage: Store leftovers in an airtight container in the refrigerator for up to 4 days. The mash will thicken as it sits, so don’t be alarmed. To reheat, place it in a saucepan over low heat, stirring frequently, and add a splash of warm cream or milk to restore the creamy texture. You can also microwave it in 30-second intervals, stirring between each.
Freezing: This mash freezes surprisingly well. Portion it into freezer-safe bags or containers, removing as much air as possible. Freeze for up to 3 months. Thaw overnight in the refrigerator, then reheat gently on the stovetop. The texture might be slightly less smooth after freezing, but it’s still delicious.
One thing I’ve noticed: the flavors actually meld and deepen after a day in the fridge. Leftovers often taste even better than the fresh version, especially the garlic notes. So don’t be afraid to make this ahead for a dinner party—just reheat it gently and it’ll be amazing.
Nutritional Information & Benefits
For those keeping track, here’s the estimated nutritional breakdown per serving (about 1 cup, based on 4 servings total):
| Nutrient | Amount per Serving |
|---|---|
| Calories | 185 |
| Total Fat | 15g |
| Saturated Fat | 9g |
| Cholesterol | 40mg |
| Sodium | 380mg |
| Total Carbohydrates | 10g |
| Dietary Fiber | 4g |
| Sugars | 4g |
| Protein | 4g |
This recipe is naturally low-carb, with only 6g net carbs per serving, making it perfect for keto, low-carb, or diabetic-friendly diets. It’s also gluten-free and can be made dairy-free with simple substitutions.
The health benefits go beyond just the low carb count. Cauliflower is packed with vitamin C, vitamin K, and fiber, which supports digestive health and keeps you feeling full. Roasted garlic is known for its anti-inflammatory properties and immune-boosting compounds. Plus, using healthy fats like butter and cream helps your body absorb the fat-soluble vitamins from the vegetables.
I personally love that this dish lets me enjoy a comforting, creamy side dish without the blood sugar spike that comes from regular mashed potatoes. It’s a win-win for anyone who wants to eat well without feeling deprived.
Conclusion
This Creamy Low-Carb Roasted Garlic Cauliflower Mashed Potatoes has honestly become one of my most-requested recipes. It started as a late-night experiment born from a craving and an empty fridge, and it’s turned into a dish I genuinely look forward to making. It proves that eating well doesn’t mean giving up comfort—it just means finding smarter, more delicious ways to get there.
I hope you give this recipe a try, whether you’re looking for a healthier side dish for holiday dinners, a quick weeknight comfort food, or just a way to use up that cauliflower sitting in your fridge. Don’t be afraid to customize it with your favorite herbs, cheeses, or spice blends. That’s the beauty of a simple recipe like this—it’s a canvas for your own creativity.
If you make this, I’d love to hear how it turns out. Drop a comment below and let me know your favorite variation, or tag me in your photos if you share them online. And if you have any questions about the recipe, just ask—I’m always happy to help fellow home cooks get that perfect, creamy texture. Happy cooking, friends!
Frequently Asked Questions
Can I use frozen cauliflower instead of fresh?
You can, but I don’t recommend it for this recipe. Frozen cauliflower releases a lot of water when thawed, which can make your mash watery and less flavorful. If you’re in a pinch, thaw the frozen cauliflower completely, pat it very dry with paper towels, and roast it at 425°F for about 25 minutes to evaporate as much moisture as possible.
How do I prevent my cauliflower mash from being watery?
The key is roasting instead of boiling, and patting the cauliflower dry after roasting. Also, make sure your garlic is fully roasted and not releasing excess moisture. If your mash does turn out watery, return it to a saucepan and simmer over medium heat, stirring constantly, until it thickens. This usually takes about 3-5 minutes.
Can I make this recipe ahead of time?
Absolutely! You can prepare the mash up to 2 days in advance. Store it in an airtight container in the refrigerator. When you’re ready to serve, reheat it gently on the stovetop over low heat, adding a splash of warm cream or milk to restore the creamy texture. You can also reheat it in the microwave in 30-second intervals, stirring between each.
What can I use instead of heavy cream?
Full-fat coconut cream is my favorite dairy-free alternative—it adds richness without a strong coconut flavor. You can also use whole milk with an extra tablespoon of butter for a lighter version, or cream cheese for an even thicker, tangier mash. Just avoid skim milk or plant-based milks like almond milk, which can make the mash too thin.
How do I get the smoothest texture possible?
Use a food processor and process until completely smooth, scraping down the sides as needed. Make sure your cauliflower is very tender before blending—it should easily break apart with a fork. Also, add your warm cream and butter gradually while the machine is running. For an ultra-smooth texture, you can pass the finished mash through a fine-mesh sieve, but I find that step unnecessary for home cooking.
Pin This Recipe!
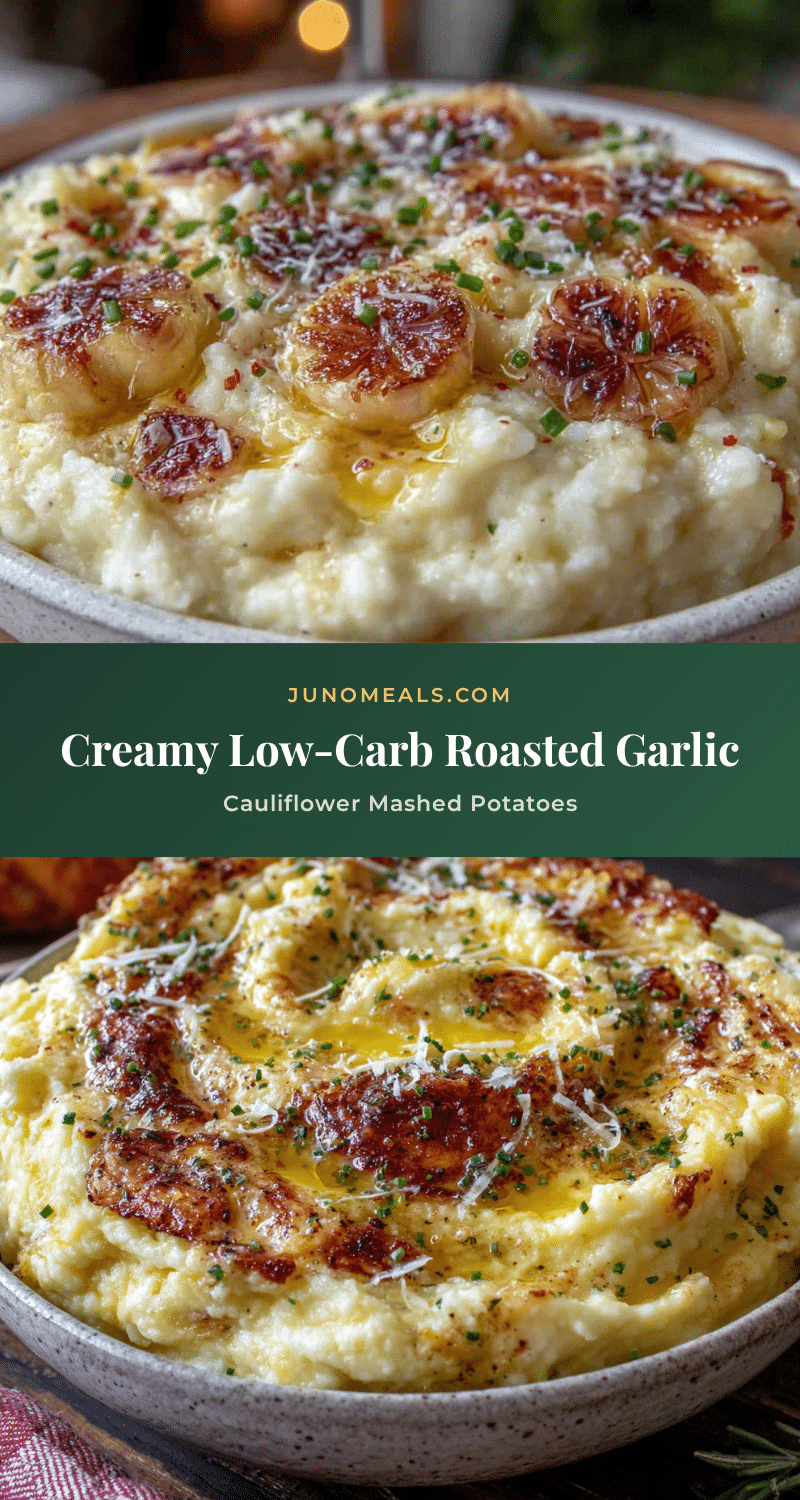
Creamy Low-Carb Roasted Garlic Cauliflower Mashed Potatoes

A rich, velvety low-carb alternative to mashed potatoes made with roasted cauliflower and garlic. Perfect for weeknight comfort or holiday dinners, this creamy mash is naturally gluten-free and keto-friendly.
- Prep Time: 10 minutes
- Cook Time: 40 minutes
- Total Time: 50 minutes
- Yield: 4 servings 1x
- Category: Side Dish
- Cuisine: American
Ingredients
- 1 large head of cauliflower (about 2 pounds or 900g), cut into florets
- 1 whole head of garlic
- 3 tablespoons unsalted butter
- 1/4 cup heavy cream
- 1/2 teaspoon salt (plus more to taste)
- 1/4 teaspoon black pepper (freshly ground)
- 1 tablespoon olive oil
- Fresh chives or parsley for garnish (optional)
Instructions
- Preheat your oven to 400°F (200°C). Line a baking sheet with parchment paper.
- Cut about 1/4 inch off the top of the garlic head to expose the cloves. Drizzle with 1 teaspoon of olive oil, wrap tightly in aluminum foil, and place on the baking sheet. Roast for 40 minutes total.
- Cut the cauliflower into evenly sized florets (about 1 to 1.5 inches each). Toss with remaining olive oil, 1/4 teaspoon salt, and a pinch of pepper. Spread in a single layer on the baking sheet around the wrapped garlic.
- Place the baking sheet in the oven after the garlic has been roasting for 10 minutes (so the cauliflower roasts for about 30 minutes total). Flip the florets halfway through. They should be tender and golden-brown.
- Remove from oven. Let cauliflower cool for 5 minutes, and garlic cool until safe to handle (about 10 minutes).
- Squeeze the bottom of each garlic clove to release the soft flesh into a small bowl. Discard skins. Mash garlic with a fork into a smooth paste.
- Transfer roasted cauliflower and garlic paste to a food processor. Add butter, heavy cream, remaining 1/4 teaspoon salt, and pepper. Pulse a few times, then process continuously for about 30 seconds until smooth. Scrape down sides and process another 15 seconds.
- Adjust consistency if needed: if too thick, add warm cream or milk 1 tablespoon at a time; if too thin, simmer in a saucepan over low heat for 2-3 minutes.
- Taste and adjust seasoning. Serve immediately, garnished with fresh chives or parsley, a pat of butter, and extra black pepper.
Notes
Don’t skip roasting—boiling makes the mash watery. Pat cauliflower dry after roasting to avoid excess moisture. Warm cream and butter before adding for smoother blending. Season in layers for best flavor. Best served immediately; leftovers keep in fridge for up to 4 days or freeze for up to 3 months.
Nutrition
- Serving Size: 1 cup
- Calories: 185
- Sugar: 4
- Sodium: 380
- Fat: 15
- Saturated Fat: 9
- Carbohydrates: 10
- Fiber: 4
- Protein: 4
Keywords: low-carb, keto, cauliflower mash, roasted garlic, gluten-free, healthy side dish, comfort food


