I was standing in the spice aisle of my local grocery store last October when it hit me—that unmistakable scent of cinnamon and nutmeg wafting from the bulk bin section. And suddenly I was seven years old at my neighbor Mrs. Kowalski’s kitchen table, watching her pull a pan of the most beautiful orange-and-swirl bars from her ancient oven. The way the cream cheese ribbon danced through the pumpkin batter looked like magic to my little eyes. She’d let me lick the spatula, and I remember thinking this was the best day ever. Mrs. Kowalski moved to Arizona years ago, and I never got her recipe. So I’ve spent the last few autumns trying to recreate that exact feeling—not just the taste, but the warmth of that tiny kitchen with the chipped yellow tiles and the way she hummed while she baked. These cozy cream cheese swirl pumpkin bars are my best attempt yet.
Maybe you’ve been there too, you know? That moment when a random smell or sight yanks you right back to a specific memory you didn’t even realize you’d stored away. It’s funny how food does that. I mean, honestly, I didn’t set out to make a perfect pumpkin bar. I just wanted that feeling again—the cozy, safe, everything’s-going-to-be-okay feeling that only a really good baked good can give you.
The first batch I made was a disaster. Too much pumpkin puree, and the cream cheese just sank to the bottom like a sad little puddle. But I kept at it, because some recipes are worth the trouble. And let me tell you, when I finally got it right—when I pulled those bars out of the oven and saw that perfect swirl staring back at me—I almost cried. It wasn’t just about the recipe. It was about finally catching that memory I’d been chasing.
Why You’ll Love This Recipe
These cozy cream cheese swirl pumpkin bars aren’t just another fall dessert. They’re the kind of recipe that makes you slow down and breathe a little deeper. I’ve tested this version at least seven times—my family is tired of pumpkin bars, honestly—and I can say with confidence that this is the one.
- Quick & Easy: From start to finish, these bars come together in about 45 minutes. That’s less time than it takes to watch a sitcom, and you end up with something way more satisfying.
- Simple Ingredients: You probably already have most of these in your pantry. No weird specialty items or expensive extracts. Just good, honest baking staples.
- Perfect for Cozy Evenings: These bars were made for cold weather, rainy afternoons, or days when you just need a little comfort. They’re the edible equivalent of a soft blanket.
- Crowd-Pleaser: I brought these to a potluck last month, and three people asked for the recipe before I’d even finished my coffee. Kids love them. Adults love them. Even my picky uncle who “doesn’t do pumpkin” ate two.
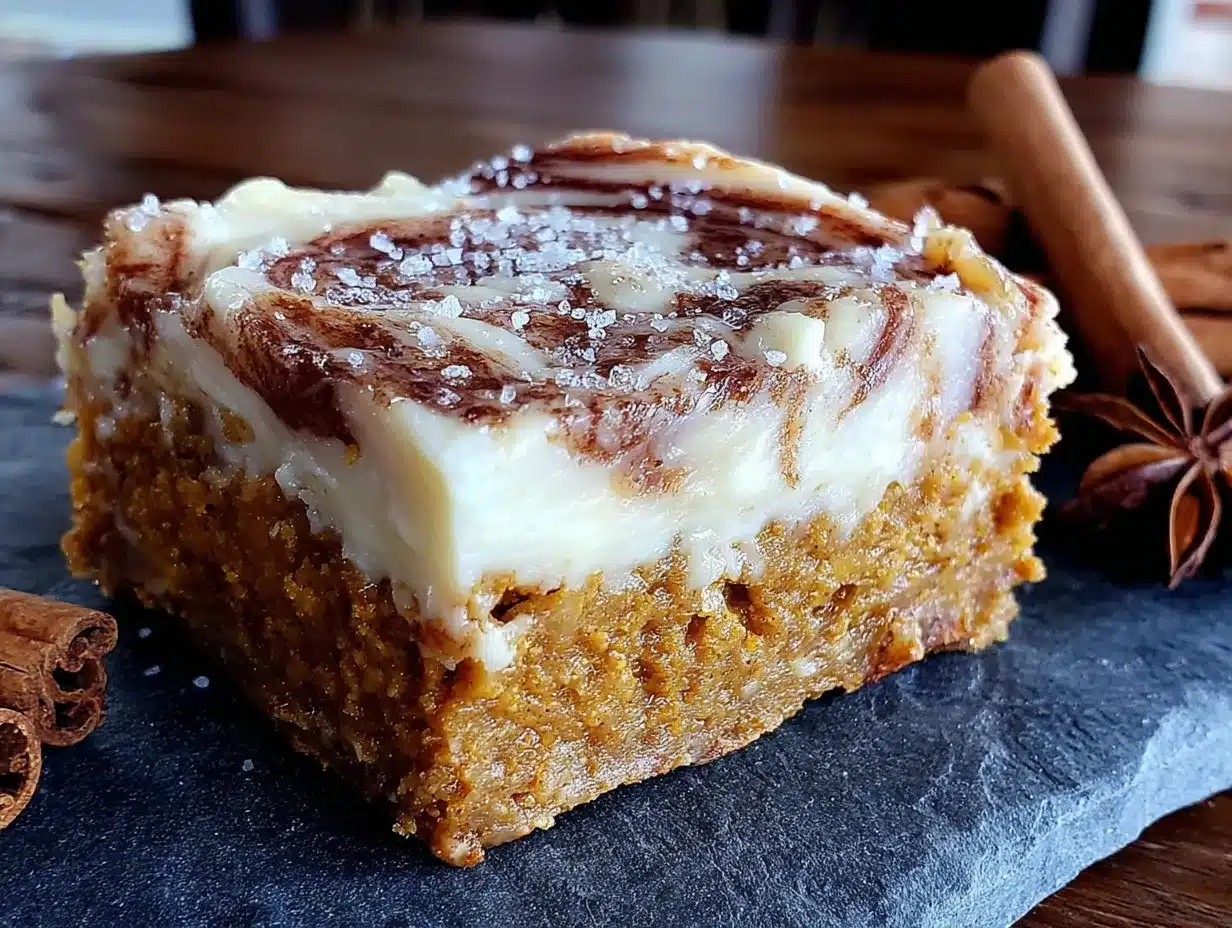
- Unbelievably Delicious: The texture is where these bars really shine. The pumpkin layer is moist and tender, almost like a cross between a cake and a brownie. And that cream cheese swirl? It adds this tangy, creamy richness that cuts through the sweetness perfectly.
What makes this recipe different from the dozens of other pumpkin bar recipes out there is the technique. Instead of just dumping everything in one bowl, I’ve figured out the exact order and temperature that gives you that beautiful, distinct swirl without the cream cheese sinking or blending into the pumpkin. It’s a small thing, but it makes a huge difference.
This is the kind of dessert that makes you close your eyes after the first bite. I’m not exaggerating. The combination of warm pumpkin spices, velvety cream cheese, and that tender crumb is just pure comfort. It’s perfect for impressing guests without any stress, or for turning a quiet Tuesday evening into something a little more special.
What Ingredients You Will Need
This recipe uses simple, wholesome ingredients that work together to create something truly special. Most of these are pantry staples, which means you can whip up a batch whenever the craving strikes without a last-minute grocery run.
For the Pumpkin Layer
- 1 ¾ cups all-purpose flour (spooned and leveled—don’t scoop straight from the bag or you’ll end up with too much)
- 1 teaspoon baking powder
- 1 teaspoon baking soda
- ½ teaspoon salt
- 2 teaspoons ground cinnamon (I prefer McCormick for its consistent warmth)
- 1 teaspoon ground ginger
- ½ teaspoon ground nutmeg (freshly grated if you have it—it makes a difference)
- ¼ teaspoon ground cloves
- 1 cup granulated sugar
- ½ cup packed brown sugar (light or dark both work; dark gives a deeper flavor)
- ½ cup vegetable oil (or melted coconut oil for a subtle hint of tropical flavor)
- 3 large eggs, room temperature (cold eggs can make the batter seize up)
- 1 ½ cups pumpkin puree (not pumpkin pie filling—make sure you grab the plain stuff)
- 1 teaspoon vanilla extract
For the Cream Cheese Swirl
- 8 ounces cream cheese, softened to room temperature (the full-fat block kind, not the spreadable tub)
- ¼ cup granulated sugar
- 1 large egg yolk (save the white for another use, or just toss it)
- ½ teaspoon vanilla extract
The cream cheese is really the star of the swirl, so don’t skimp on quality here. I’ve tried this with reduced-fat cream cheese, and honestly, it just doesn’t have the same creamy texture. Philadelphia is my go-to brand because it’s consistently smooth and tangy without being too dense.
For the pumpkin puree, I always reach for Libby’s. It’s thicker and less watery than some store brands, which means your bars won’t turn out soggy. If you’re using a different brand and the puree looks a bit runny, pat it dry with a paper towel before adding it to the batter.
If you need a dairy-free option, use a plant-based cream cheese block (not the spreadable kind) and make sure it’s softened properly. The texture won’t be quite as luxurious, but it still works beautifully.
Equipment Needed
You don’t need a fancy kitchen to make these bars. Here’s what you’ll need:
- 9×13-inch baking pan — Metal or glass both work, but metal gives you slightly crisper edges. I use a Nordic Ware aluminum pan and love how evenly it bakes.
- Parchment paper — This is non-negotiable for easy removal. Leave some overhang on the long sides so you can lift the whole slab out like a giant bar.
- Two mixing bowls — One medium, one large. Nothing fancy needed.
- Whisk and spatula — A good silicone spatula makes scraping the bowl so much easier.
- Electric hand mixer or stand mixer — You can do this by hand if you’re determined, but a mixer makes the cream cheese swirl much smoother. I’ve definitely burned out my arm whisking cream cheese before—learn from my mistake.
- Measuring cups and spoons — Accurate measurements matter in baking.
- Small offset spatula or butter knife — For creating that beautiful swirl pattern.
If you don’t have an offset spatula, a regular butter knife works just fine. And if you’re using a glass pan, reduce the oven temperature by 25°F to prevent over-browning on the edges.
Preparation Method
Alright, let’s get to the good part. I’ve broken this down into clear steps so you don’t miss anything. Trust me, following the order matters here.
- Preheat your oven to 350°F (175°C). Line your 9×13-inch baking pan with parchment paper, leaving a couple inches of overhang on the long sides. Lightly spray the parchment with non-stick cooking spray—just a quick spritz so nothing sticks.
- Make the pumpkin batter. In a medium bowl, whisk together the flour, baking powder, baking soda, salt, cinnamon, ginger, nutmeg, and cloves. Set this aside for a moment. In a large bowl, whisk together the granulated sugar, brown sugar, and vegetable oil until well combined. Add the eggs one at a time, whisking well after each addition. Stir in the pumpkin puree and vanilla extract until everything is smooth and uniform. It should look like a thick, glossy orange batter.
- Combine wet and dry ingredients. Gradually add the dry ingredients to the wet ingredients, stirring gently with a spatula. Mix just until you no longer see streaks of flour—overmixing will make the bars tough. The batter will be thick and slightly fluffy. Pour it into your prepared pan and spread it into an even layer using your spatula.
- Make the cream cheese swirl. In your now-empty medium bowl, beat the softened cream cheese with an electric mixer on medium speed until it’s smooth and creamy—about 2 minutes. Add the sugar and beat until combined, then add the egg yolk and vanilla extract. Continue beating until the mixture is completely smooth with no lumps. Scrape down the sides of the bowl at least once to make sure everything is incorporated.
- Create the swirls. Drop spoonfuls of the cream cheese mixture all over the top of the pumpkin batter. I usually do about 8 to 10 dollops spaced evenly apart. Using a butter knife or small offset spatula, gently swirl the cream cheese into the pumpkin batter. Here’s the trick: don’t over-swirl. You want distinct ribbons of cream cheese, not a muddy orange mess. I like to do figure-eight motions, dragging the knife through the batter just a few times. Think of it like you’re drawing a snake through the pan—smooth, gentle curves.
- Bake. Place the pan in the preheated oven and bake for 30 to 35 minutes. The edges should look set and slightly golden, and the center should be just barely jiggly when you gently shake the pan. A toothpick inserted into the pumpkin part (not the cream cheese) should come out with a few moist crumbs attached. If it comes out clean, you’ve overbaked it a bit.
- Cool completely. This is the hardest part, I know. Let the bars cool in the pan on a wire rack for at least 1 hour. Then, using the parchment overhang, lift the whole slab out and transfer it to a cutting board. Let it cool completely—another 30 minutes at least—before slicing. Warm bars are delicious, but they fall apart when you cut them. Cold bars give you those clean, beautiful slices.
A quick note: if you notice your cream cheese mixture is lumpy when you start swirling, it means your cream cheese wasn’t soft enough. Next time, let it sit on the counter for an extra 30 minutes. For now, just do your best with the swirl—it’ll still taste amazing even if it’s not Instagram-perfect.
Cooking Tips & Techniques
I’ve made this recipe enough times to know where things can go wrong. Here are the lessons I learned the hard way so you don’t have to.
Room temperature ingredients matter. I know, I know—every recipe says this, and sometimes you just want to bake without waiting. But cold cream cheese won’t blend smoothly, and cold eggs can make the batter seize up. Pull everything out of the fridge about an hour before you start. Set a timer on your phone so you don’t forget and end up rushing.
Don’t overmix the batter. I did this on my second attempt, and the bars came out dense and almost rubbery. Mix just until the flour disappears. A few tiny lumps are totally fine—they’ll bake out. Overmixing develops the gluten too much, and that’s what makes baked goods tough instead of tender.
The swirl technique is all about restraint. My first few batches looked like a muddy mess because I kept swirling and swirling, trying to get that perfect pattern. Less is more. Three or four gentle passes with your knife are enough. You want distinct ribbons of cream cheese, not a completely blended mixture.
Watch your oven like a hawk. Oven temperatures vary wildly. My old oven ran hot and would burn the edges before the center was done. I learned to rotate the pan halfway through baking. Also, if the top is browning too quickly, tent it loosely with aluminum foil for the last 10 minutes.
Let them cool completely before slicing. I cannot stress this enough. I’ve cut into warm bars and watched them crumble into a delicious but ugly pile. Patience pays off. If you’re in a hurry, pop the whole slab in the fridge for 20 minutes after it’s cooled to room temperature. Cold bars slice like a dream.
Variations & Adaptations
One of the best things about this recipe is how adaptable it is. Here are some variations I’ve tried and loved.
Gluten-Free Version: Substitute the all-purpose flour with a 1:1 gluten-free baking flour blend. I’ve had good results with King Arthur’s Measure for Measure. The texture is slightly more delicate, so let the bars cool completely before slicing. Don’t use almond flour or coconut flour unless you’re experienced with them—they behave very differently.
Spice It Up: If you love a warm, spicy kick, add a pinch of cayenne pepper or a teaspoon of pumpkin pie spice blend. I tried this last Thanksgiving and it added this lovely depth that everyone noticed but couldn’t quite place. It’s subtle but memorable.
Chocolate Lover’s Twist: Fold ½ cup of dark chocolate chips into the pumpkin batter before adding the cream cheese swirl. The chocolate pairs surprisingly well with the pumpkin and cream cheese. I did this on a whim one rainy Sunday, and it was honestly life-changing.
Vegan Adaptation: Use a flax egg (1 tablespoon ground flaxseed mixed with 3 tablespoons water, let sit for 5 minutes) for each egg, and use a vegan cream cheese block. The texture won’t be quite as rich, but the flavor is still wonderful. I’ve made this for a vegan friend’s birthday, and she asked for the recipe immediately.
Mini Version: Make these as muffin-top bars in a mini muffin pan. Reduce the baking time to about 18 to 20 minutes. Perfect for parties or when you want a smaller portion. Just line the muffin cups with parchment squares for easy removal.
Serving & Storage Suggestions
These bars are incredibly versatile when it comes to serving. Here’s how I like to enjoy them.
At Room Temperature: This is how I serve them most often. The texture is perfectly tender, and the flavors are at their best. Just let them sit out for about 15 minutes after coming out of the fridge.
Warm with Ice Cream: Pop a bar in the microwave for about 10 seconds and serve it with a scoop of vanilla bean ice cream. The warm pumpkin and cold cream combination is pure heaven. I did this on a particularly rough Tuesday, and it fixed everything.
With Coffee or Tea: These bars are fantastic alongside a hot cup of coffee or chai tea. The spices complement the warmth of the drink perfectly. It’s my go-to afternoon pick-me-up.
Storage: Store the bars in an airtight container in the refrigerator for up to 5 days. I actually think they taste better on day two—the flavors have time to meld together. Just make sure they’re completely cool before you store them, or condensation will make them soggy.
Freezing: These freeze beautifully. Wrap individual bars tightly in plastic wrap, then place them in a freezer-safe bag. They’ll keep for up to 3 months. To thaw, just leave them on the counter for about an hour, or microwave for 15 seconds. I always keep a stash in my freezer for unexpected cravings or last-minute guests.
Reheating: If you prefer them warm, microwave a single bar for about 10 to 15 seconds. For a whole pan, reheat in a 300°F oven for about 10 minutes. Don’t overheat, or the cream cheese can separate.
Nutritional Information & Benefits
While these bars are definitely a treat, they do have some redeeming qualities. Here’s a rough estimate per bar (based on 16 servings):
| Nutrient | Amount per Bar |
|---|---|
| Calories | 285 |
| Total Fat | 14g |
| Saturated Fat | 5g |
| Cholesterol | 65mg |
| Sodium | 210mg |
| Total Carbohydrates | 36g |
| Dietary Fiber | 2g |
| Sugars | 22g |
| Protein | 4g |
| Vitamin A | 85% DV |
The pumpkin provides a solid dose of vitamin A, which is great for eye health and immune function. The cream cheese adds calcium and protein, though it also brings the fat content up a bit. If you’re watching your sugar intake, you can reduce the granulated sugar to ¾ cup without affecting the texture too much—the brown sugar adds enough sweetness.
These bars are not gluten-free or vegan in their standard form, but as I mentioned earlier, both adaptations work well. They do contain dairy, eggs, and gluten, so keep that in mind if you’re baking for someone with allergies.
Honestly, I don’t make these bars for their nutritional profile. I make them because they make me feel good. And sometimes, that’s just as important as what’s on a nutrition label.
Conclusion
These cozy cream cheese swirl pumpkin bars are more than just a recipe—they’re a little piece of comfort you can bake whenever you need it. Whether you’re chasing a memory like I was, or just looking for a delicious fall dessert to share with the people you love, these bars deliver every single time.
The best part? You can make them your own. Add chocolate chips, swap the spices, or double the cream cheese swirl—whatever feels right to you. That’s the beauty of baking. It’s personal. It’s forgiving. And it always, always tastes better when you make it with love.
I’d love to hear how these turn out for you. Did you try a variation? Did the swirl come out perfect on your first try? (If so, I’m a little jealous.) Drop a comment below and let me know. And if you share a photo on Pinterest, tag me—I want to see your beautiful bars!
Now go preheat that oven. Your cozy evening awaits.
Frequently Asked Questions
Can I use canned pumpkin pie filling instead of pumpkin puree?
No, please don’t. Pumpkin pie filling is already sweetened and spiced, which will throw off the balance of this recipe. Stick with plain pumpkin puree for the best results. If you accidentally grab the wrong can, just save it for making a quick pie later.
Why did my cream cheese swirl sink to the bottom?
This usually happens for two reasons: either the cream cheese mixture was too thin (maybe the cream cheese wasn’t fully softened, or you added too much egg yolk), or you over-swirled it. Next time, make sure your cream cheese is at room temperature and only swirl a few times with gentle strokes.
Can I make these bars ahead of time?
Absolutely! In fact, I think they taste even better the next day. Bake them, let them cool completely, and store them in the refrigerator. They’ll keep for up to 5 days. Just bring them to room temperature before serving, or warm them slightly in the microwave.
Can I use a different pan size?
You can use an 8×8-inch pan, but the baking time will increase significantly—probably around 45 to 50 minutes. The bars will also be much thicker. If you use a larger pan, the bars will be thinner and bake faster. Just keep an eye on them and test for doneness with a toothpick.
My cream cheese mixture was lumpy. What went wrong?
Your cream cheese wasn’t soft enough. It needs to be at room temperature—about 65°F to 70°F. If you’re in a hurry, you can microwave it in 10-second bursts, but be careful not to melt it. Lumpy cream cheese will still taste fine, but it won’t swirl as smoothly into the batter.
Pin This Recipe!
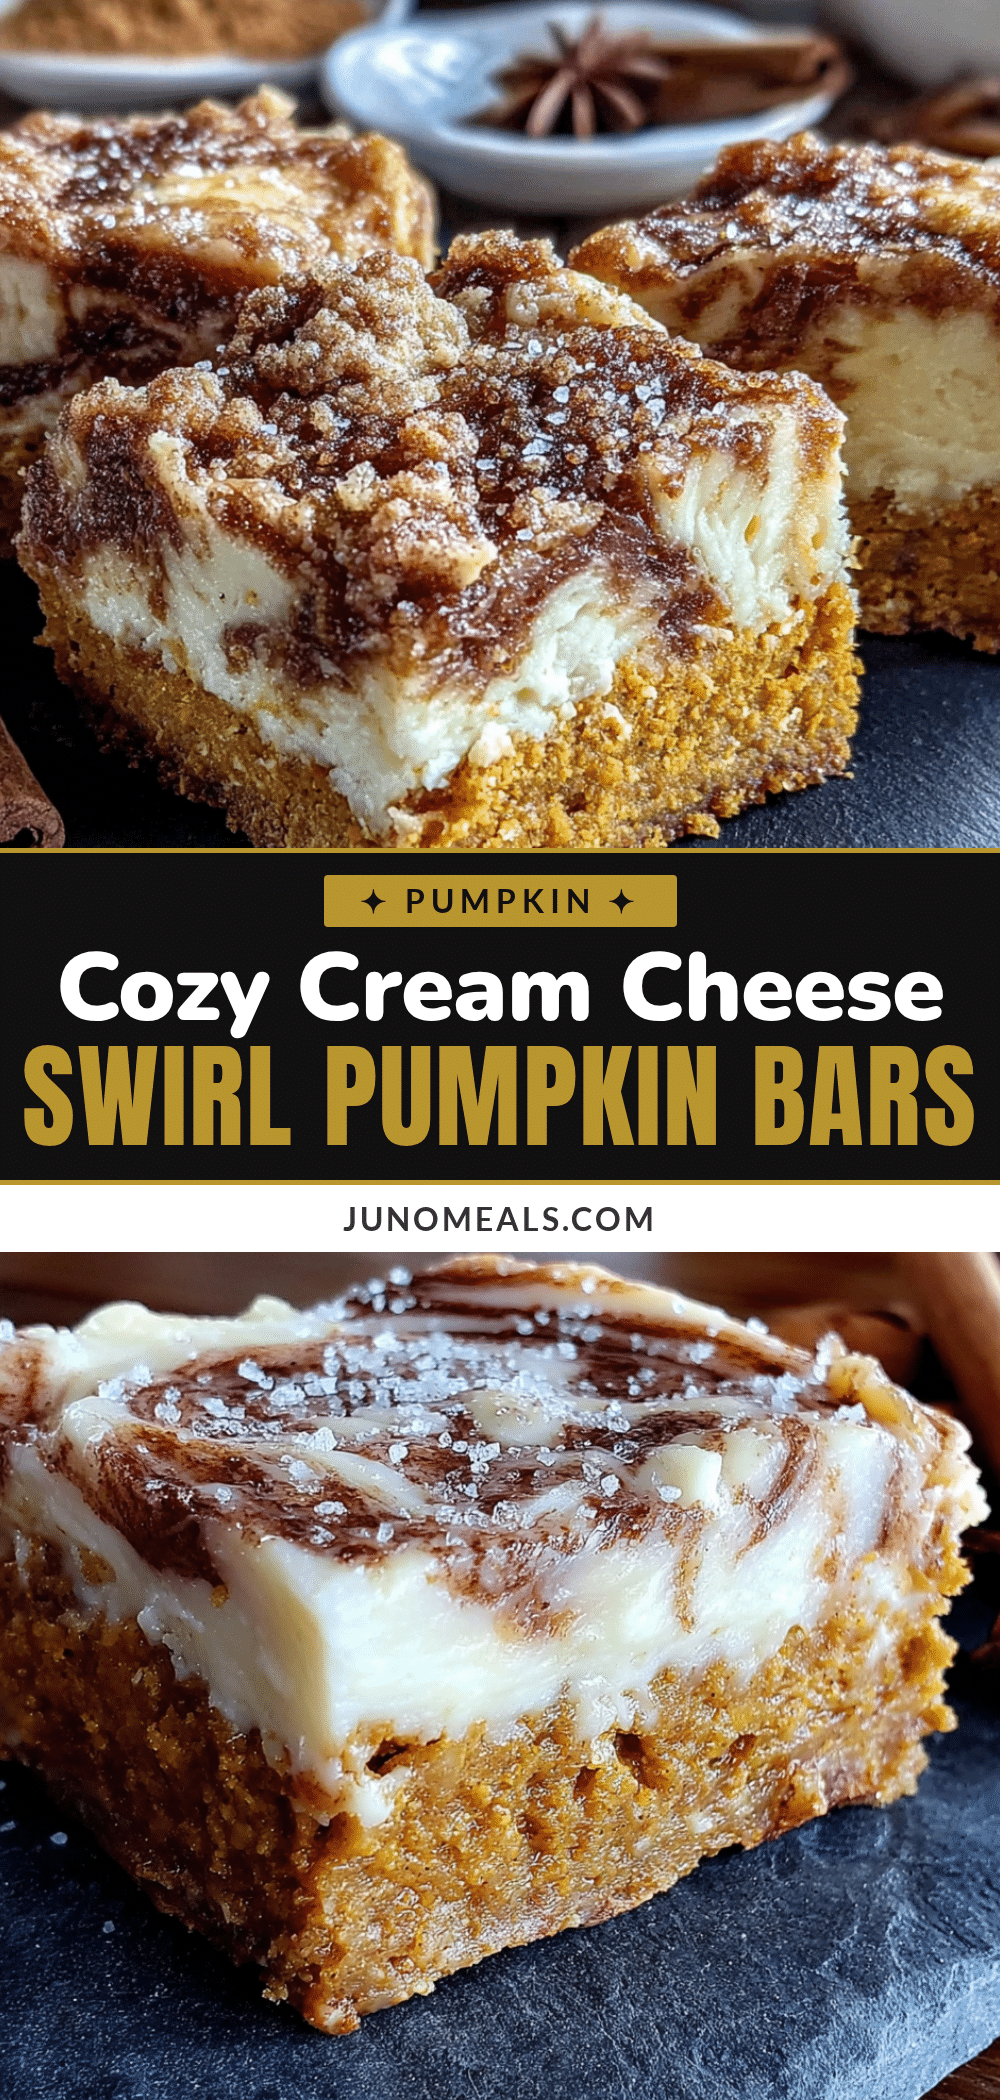
Cozy Cream Cheese Swirl Pumpkin Bars – Easy Fall Dessert
These cozy cream cheese swirl pumpkin bars are the perfect fall dessert, combining a moist, tender pumpkin layer with a tangy cream cheese swirl. Quick and easy to make, they’re a crowd-pleaser that brings comfort and warmth to any occasion.
- Prep Time: 15 minutes
- Cook Time: 30-35 minutes
- Total Time: 45 minutes
- Yield: 16 servings 1x
- Category: Dessert
- Cuisine: American
Ingredients
- 1 ¾ cups all-purpose flour (spooned and leveled)
- 1 teaspoon baking powder
- 1 teaspoon baking soda
- ½ teaspoon salt
- 2 teaspoons ground cinnamon
- 1 teaspoon ground ginger
- ½ teaspoon ground nutmeg (freshly grated if possible)
- ¼ teaspoon ground cloves
- 1 cup granulated sugar
- ½ cup packed brown sugar (light or dark)
- ½ cup vegetable oil (or melted coconut oil)
- 3 large eggs, room temperature
- 1 ½ cups pumpkin puree (not pumpkin pie filling)
- 1 teaspoon vanilla extract
- 8 ounces cream cheese, softened to room temperature (full-fat block)
- ¼ cup granulated sugar (for cream cheese swirl)
- 1 large egg yolk (for cream cheese swirl)
- ½ teaspoon vanilla extract (for cream cheese swirl)
Instructions
- Preheat your oven to 350°F (175°C). Line a 9×13-inch baking pan with parchment paper, leaving overhang on the long sides. Lightly spray the parchment with non-stick cooking spray.
- Make the pumpkin batter: In a medium bowl, whisk together flour, baking powder, baking soda, salt, cinnamon, ginger, nutmeg, and cloves. Set aside.
- In a large bowl, whisk together granulated sugar, brown sugar, and vegetable oil until well combined. Add eggs one at a time, whisking well after each. Stir in pumpkin puree and vanilla extract until smooth.
- Gradually add dry ingredients to wet ingredients, stirring gently with a spatula until just combined. Do not overmix. Pour batter into prepared pan and spread evenly.
- Make the cream cheese swirl: In a medium bowl, beat softened cream cheese with an electric mixer on medium speed until smooth (about 2 minutes). Add ¼ cup sugar and beat until combined, then add egg yolk and ½ teaspoon vanilla extract. Beat until completely smooth.
- Drop spoonfuls of cream cheese mixture (8-10 dollops) over the pumpkin batter. Using a butter knife or offset spatula, gently swirl the cream cheese into the batter with figure-eight motions. Do not over-swirl.
- Bake for 30-35 minutes, until edges are set and slightly golden, and center is just barely jiggly. A toothpick inserted into the pumpkin part should come out with a few moist crumbs.
- Cool in the pan on a wire rack for at least 1 hour. Using parchment overhang, lift the slab out and transfer to a cutting board. Cool completely (another 30 minutes) before slicing.
Notes
Room temperature ingredients are crucial for best results. Do not overmix the batter or over-swirl the cream cheese. Let bars cool completely before slicing for clean cuts. For glass pan, reduce oven temperature by 25°F. Bars can be stored in refrigerator for up to 5 days or frozen for up to 3 months.
Nutrition
- Serving Size: 1 bar
- Calories: 285
- Sugar: 22
- Sodium: 210
- Fat: 14
- Saturated Fat: 5
- Carbohydrates: 36
- Fiber: 2
- Protein: 4
Keywords: pumpkin bars, cream cheese swirl, fall dessert, pumpkin dessert, easy pumpkin recipe, cream cheese pumpkin bars


