The bananas on my counter had gone from spotty to downright alarming. Three of them, practically black, sitting there like they were daring me to do something about it. I had a sink full of dishes, no clean mixer attachments, and a serious craving for something warm and sweet. The last thing I wanted was to drag out the stand mixer, wash a million bowls, and make a whole production out of it. So I did what any reasonable person would do — I grabbed a single bowl, a fork, and decided to see if I could make this work without all the fuss.
That first loaf came out of the oven lopsided and a little cracked on top, but the smell — that incredible banana bread smell filling up the whole kitchen — told me I was onto something. I cut a slice while it was still warm, and honestly, it was the best banana bread I had made in months. It was tender, perfectly moist, and had that slightly caramelized edge that only really ripe bananas can give you. I wasn’t trying to reinvent the wheel here. I just wanted banana bread without the cleanup headache.
This classic one-bowl banana bread (no mixer needed) has become my go-to for exactly that reason. It is the kind of recipe that sticks because it works every single time, no matter how lazy I am feeling. No electric mixer, no separate bowls for wet and dry ingredients, no complicated steps. Just a fork, a bowl, and about ten minutes of hands-on time before the oven does the rest. If you have ever stood in your kitchen staring at overripe bananas and wondered what to do, this is your sign. Trust me on this one.
Why You Will Love This Recipe
Listen, I have tested more banana bread recipes than I care to admit. Some were too dry. Some were too dense. Some required so much equipment that I felt like I was prepping for a cooking show. This one is different. It is the recipe I keep coming back to, and here is why it is going to become your favorite too.
- No Mixer Required: You do not need a stand mixer, hand mixer, or any fancy gadget. A fork and a sturdy spoon are all you need. This is perfect for mornings when you just want to bake without the noise.
- One Bowl, Minimal Mess: Everything comes together in a single bowl. That means less time washing dishes and more time eating warm banana bread. It is a game-changer for lazy bakers like me.
- Perfectly Moist Every Time: The ratio of bananas to butter to flour is carefully balanced so you get that tender, melt-in-your-mouth texture without any dry spots. It is the kind of moist that makes you close your eyes after the first bite.
- Simple Pantry Ingredients: You probably already have everything you need. Butter, sugar, eggs, flour, baking soda, salt, and those sad bananas sitting on your counter. No special trips to the store required.
- Endlessly Customizable: Throw in chocolate chips, walnuts, or blueberries. Swap the butter for oil. Make it gluten-free. This recipe is forgiving enough to handle whatever you throw at it.
- Foolproof for Beginners: If you have never baked banana bread before, this is the recipe to start with. The instructions are straightforward, and the margin for error is surprisingly wide. Even a slightly over-mixed batter still turns out delicious.
This is not just another banana bread recipe. It is the one that makes you feel like a confident baker, even on days when you are just winging it. It is comfort food at its simplest and best.
What Ingredients You Will Need
This recipe uses simple, humble ingredients that come together to create something truly special. Nothing fancy here — just the good stuff that you probably already have in your kitchen. Here is what you will need and why each ingredient matters.
For the Banana Bread
- 3 large ripe bananas, mashed (about 1 ½ cups): The riper, the better. You want bananas that are heavily spotted or even completely black. They are sweeter and easier to mash, which means more flavor and moisture in your bread. If your bananas are not quite ripe enough, you can speed things up by baking them at 300°F for 15 minutes until they soften.
- ⅓ cup unsalted butter, melted (75g): Melted butter gives the bread a rich, tender crumb. I use unsalted so I can control the salt level, but salted butter works fine too — just reduce the added salt to ¼ teaspoon. Let the butter cool slightly before mixing so you do not scramble the eggs.
- ¾ cup granulated sugar (150g): White sugar keeps the bread light and sweet. You can swap in brown sugar for a deeper, more caramel-like flavor, but the texture will be slightly denser. I have used both and honestly love them equally for different moods.
- 1 large egg, room temperature: The egg binds everything together and adds structure. Room temperature egg mixes more evenly into the melted butter, so take it out of the fridge about 20 minutes before you start baking.
- 1 teaspoon vanilla extract: Pure vanilla extract adds warmth and depth. Imitation vanilla works in a pinch, but the real stuff makes a noticeable difference. I am a fan of Nielsen-Massey for its rich flavor.
- 1 ½ cups all-purpose flour (190g): Regular all-purpose flour gives the bread a soft, cake-like texture. For a whole wheat version, substitute up to half the flour with whole wheat pastry flour — it adds a nice nuttiness without making the bread too heavy.
- 1 teaspoon baking soda: This is the only leavening agent you need. Baking soda reacts with the acidity in the bananas to help the bread rise. Make sure it is fresh — if it does not fizz when mixed with vinegar, it is time to buy a new box.
- ½ teaspoon salt: Salt balances the sweetness and enhances all the other flavors. I use fine sea salt for even distribution. Skip this only if you are using salted butter.
Optional Add-Ins
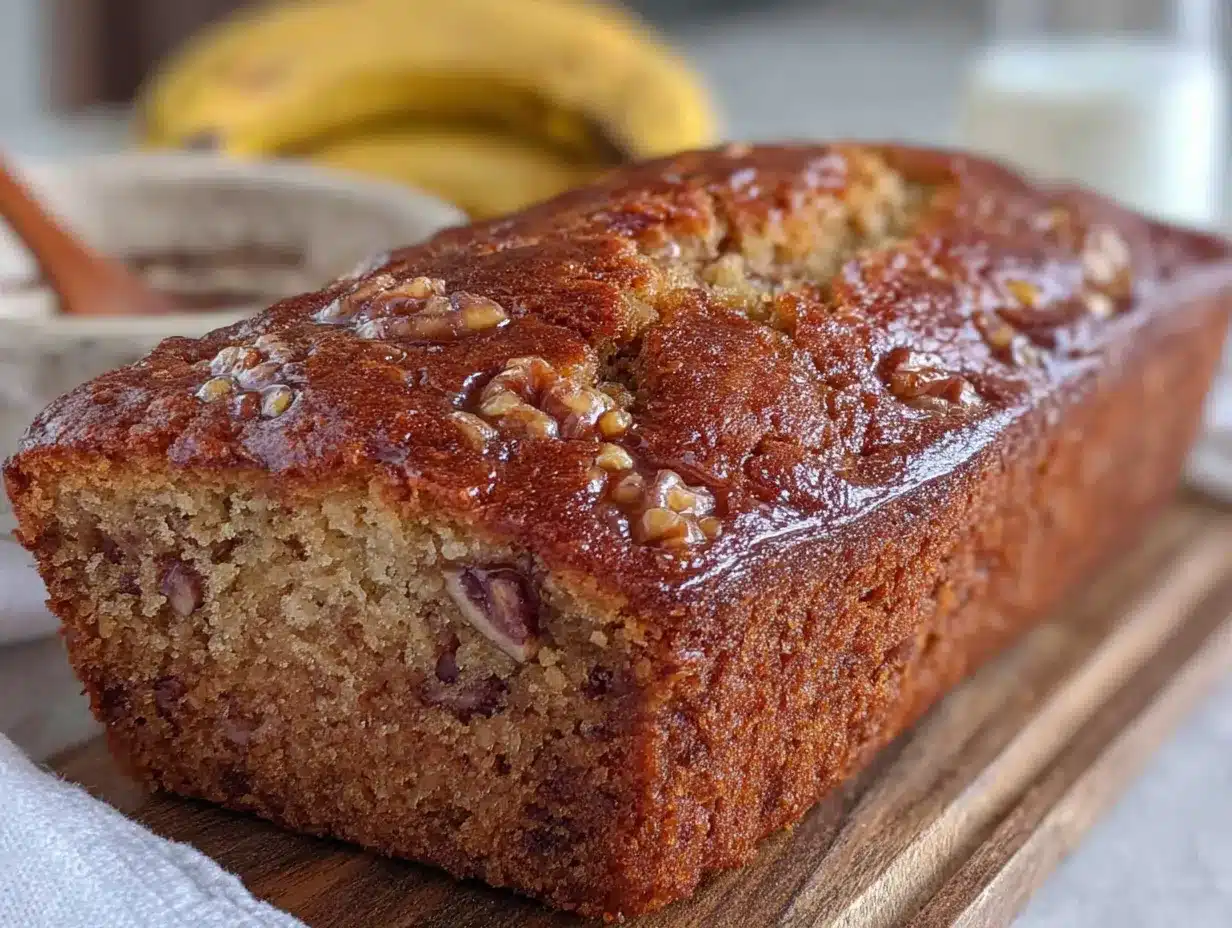
- ½ cup chopped walnuts or pecans (60g): For crunch and nutty flavor. Toast them lightly in a dry pan for a few minutes before adding to the batter — it makes a world of difference.
- ½ cup chocolate chips (90g): Semi-sweet or dark chocolate chips add little pockets of melty goodness. I prefer Ghirardelli 60% cacao chips for the perfect balance of sweet and bitter.
- ½ cup fresh or frozen blueberries (75g): Toss them in a tablespoon of flour before folding into the batter to prevent them from sinking to the bottom.
Equipment Needed
One of the best things about this recipe is how little equipment it requires. You do not need a fancy kitchen full of gadgets to make a great loaf of banana bread. Here is what you will actually need.
- One large mixing bowl: Any bowl will do, but a wide, deep bowl makes it easier to mash the bananas and mix everything without splattering. I use a standard ceramic mixing bowl that I have had for years.
- A fork or potato masher: A fork works perfectly for mashing bananas, but a potato masher is faster if you have one. Either way, you want the bananas broken down with a few small lumps remaining for texture.
- A wooden spoon or rubber spatula: For mixing the batter. A rubber spatula is great for scraping down the sides of the bowl, but a wooden spoon gets the job done just fine.
- A 9×5-inch loaf pan (23×13 cm): This is the standard size for banana bread. If you use an 8×4-inch pan, your loaf will be taller and可能需要 bake for an extra 5-10 minutes. Grease it well with butter or non-stick spray, or line it with parchment paper for easy removal.
- Measuring cups and spoons: For accuracy. I recommend using the spoon-and-level method for flour — spoon it into the measuring cup and level it off with a knife. Scooping directly from the bag can pack the flour and make your bread dry.
- Cooling rack: A wire rack allows air to circulate around the loaf so it cools evenly and does not get soggy on the bottom. If you do not have one, you can use the inverted loaf pan lid or just let it cool in the pan for 10 minutes before turning out onto a cutting board.
That is it. No mixer, no sifter, no fancy gadgets. Just simple tools that every kitchen has. I love recipes that do not require me to dig through cabinets looking for equipment I barely use.
Preparation Method
This is where the magic happens. Follow these steps, and you will have a perfect loaf of banana bread in about an hour. Take your time, read through each step before starting, and trust the process. It is easier than you think.
- Preheat your oven to 350°F (175°C). Position the rack in the center of the oven. Grease your 9×5-inch loaf pan with butter or non-stick spray, or line it with parchment paper leaving a slight overhang on the long sides for easy lifting. Set it aside.
- Mash the bananas in your mixing bowl. Peel the three ripe bananas and place them in the bowl. Use a fork or potato masher to mash them until they are mostly smooth with a few small lumps remaining. You want some texture here — completely smooth puree can make the bread a bit dense. Aim for a consistency similar to chunky applesauce.
- Add the melted butter and sugar. Pour the cooled melted butter and the granulated sugar into the bowl with the mashed bananas. Stir with your wooden spoon or spatula until everything is well combined. The mixture will look a little grainy from the sugar, and that is totally fine. Do not worry if it seems thin at this point.
- Mix in the egg and vanilla. Crack the room-temperature egg into the bowl and add the vanilla extract. Stir until the egg is fully incorporated and the batter looks smooth and glossy. Make sure to scrape the bottom of the bowl to catch any streaks of egg that might be hiding there.
- Add the dry ingredients. Sprinkle the flour, baking soda, and salt over the wet mixture. Do not dump them all in one pile — spreading them out helps the baking soda distribute evenly. Stir gently with your spoon or spatula, using a folding motion. Mix just until you no longer see streaks of flour. A few small lumps are okay. Over-mixing at this stage will develop the gluten and make your bread tough, so stop as soon as it comes together.
- Fold in any add-ins (optional). If you are using chocolate chips, nuts, or blueberries, gently fold them into the batter now. Use no more than about 10 strokes to distribute them evenly. If you are adding blueberries, remember to toss them in a tablespoon of flour first to keep them from sinking.
- Pour the batter into the prepared loaf pan. Scrape every last bit of batter into the pan using your spatula. Spread it evenly with the back of a spoon or by gently tilting the pan. The batter should reach about ¾ of the way up the sides of the pan.
- Bake for 55-65 minutes. Place the pan in the preheated oven and bake until the top is golden brown and a toothpick inserted into the center comes out clean or with a few moist crumbs. Start checking at 50 minutes if your oven runs hot. The bread should also feel springy to the touch when you gently press the center.
- Cool in the pan for 10 minutes. Remove the loaf from the oven and set it on a wire rack or your stovetop. Let it cool in the pan for exactly 10 minutes. This allows the bread to set so it does not fall apart when you remove it.
- Transfer to a wire rack to cool completely. Run a butter knife around the edges of the pan to loosen the bread if needed. Lift it out using the parchment overhang or carefully invert it onto the rack. Let it cool completely before slicing — about 1 hour. I know it is tempting to cut into it while it is warm, but the texture is much better when it has had time to fully set.
One quick note: if your loaf is browning too quickly on top but is not done in the center, tent it loosely with aluminum foil for the last 15-20 minutes of baking. This prevents the top from burning while the inside finishes cooking.
Cooking Tips & Techniques
After making this banana bread more times than I can count, I have picked up a few tricks that make a real difference. Here are the tips I wish someone had told me when I first started baking.
Use a kitchen scale for accuracy. Measuring flour by volume can be inconsistent — one cup can weigh anywhere from 120 to 150 grams depending on how you scoop. A digital scale eliminates the guesswork and ensures your bread turns out perfect every time. I use a simple OXO scale that cost about twenty bucks and it has saved me from countless baking disasters.
Do not over-mix the batter. This is the most common mistake I see. Once you add the flour, mix just until it disappears. Over-mixing develops gluten, which makes the bread dense and tough instead of tender and soft. A few small lumps are your friends here. I learned this the hard way after making a loaf that was so tough I could have used it as a doorstop.
Let your bananas get really, really ripe. I am talking black skins, soft to the touch, almost liquid inside. That is when they are at their sweetest and most flavorful. If your bananas are not there yet, you can speed things up by placing them on a baking sheet in a 300°F oven for 15-20 minutes until they soften and darken. Let them cool before mashing.
Room temperature ingredients matter. Cold eggs can seize the melted butter and create a lumpy batter. Take your egg out of the fridge about 20 minutes before you start. If you forget, place it in a bowl of warm water for 5 minutes. Same goes for the butter — melted is fine, but let it cool slightly so it does not cook the egg.
Check for doneness with a toothpick, not just time. Ovens vary wildly. My old oven would bake this bread in exactly 55 minutes, but my new one takes a full 65. The toothpick test is your best friend. Insert a wooden skewer or toothpick into the center of the loaf. If it comes out clean or with a few moist crumbs, it is done. If it is wet with batter, give it another 5 minutes.
Let it cool completely before slicing. I know, I know — warm banana bread is irresistible. But slicing too early will give you a gummy, crumbly mess. The bread continues to set as it cools, and the texture improves dramatically. If you absolutely cannot wait, slice off the end piece (the heel) while it is still warm and save the rest for later. That way you get the best of both worlds.
Variations & Adaptations
This banana bread recipe is wonderfully flexible. Over the years, I have tried countless variations, and here are some of my favorites. Feel free to experiment and make it your own.
Chocolate Chip Banana Bread
Fold ½ cup of semi-sweet chocolate chips into the batter right before pouring it into the pan. The chocolate melts into little pockets of richness that pair beautifully with the banana flavor. I have also used dark chocolate chunks for a more intense chocolate hit. This is my go-to when I need a little extra comfort.
Vegan Banana Bread
Replace the butter with ⅓ cup of melted coconut oil or vegetable oil. Substitute the egg with a flax egg (1 tablespoon ground flaxseed mixed with 3 tablespoons water, let sit for 5 minutes until thickened). Use dairy-free chocolate chips if you want to add them. The texture is slightly denser but still incredibly moist and delicious. I have made this version for vegan friends and they always ask for the recipe.
Gluten-Free Banana Bread
Swap the all-purpose flour with a 1:1 gluten-free baking flour blend that contains xanthan gum. I recommend Bob’s Red Mill 1-to-1 Baking Flour for the best results. The bread will be a bit more delicate, so let it cool completely before slicing. This version is perfect for anyone with gluten sensitivities.
Nutty Banana Bread
Fold ½ cup of toasted walnuts or pecans into the batter. Toasting the nuts first brings out their natural oils and adds a deeper, nuttier flavor. I usually toast them in a dry skillet over medium heat for 3-4 minutes, stirring frequently, until they smell fragrant. Let them cool before adding to the batter.
Blueberry Banana Bread
Gently fold ½ cup of fresh or frozen blueberries into the batter. Toss them in a tablespoon of flour first to prevent them from sinking to the bottom. The burst of tart blueberries against the sweet banana bread is a match made in heaven. I love making this version in the summer when blueberries are at their peak.
Spiced Banana Bread
Add 1 teaspoon of ground cinnamon, ½ teaspoon of ground nutmeg, and ¼ teaspoon of ground cloves to the flour mixture. This gives the bread a warm, aromatic flavor that is perfect for fall and winter. Sometimes I add a pinch of cardamom for an extra layer of complexity.
Serving & Storage Suggestions
Banana bread is one of those rare treats that is delicious in so many different ways. Here is how I like to serve and store mine.
Serving: I love this banana bread served slightly warm with a generous pat of salted butter melting into the slice. It is also fantastic toasted — just pop a slice in the toaster or under the broiler for a minute or two until the edges are golden and crisp. For a more indulgent treat, spread a layer of cream cheese frosting or a drizzle of honey on top. It pairs beautifully with a hot cup of coffee or a cold glass of milk.
Storage: Once the loaf has cooled completely, wrap it tightly in plastic wrap or aluminum foil and store it at room temperature for up to 4 days. I find that the flavors actually improve after the first day as the banana flavor deepens. Do not store it in the refrigerator — the cold air will dry it out and make it stale faster.
Freezing: Banana bread freezes beautifully. Wrap the cooled loaf tightly in plastic wrap, then in a layer of aluminum foil, and place it in a freezer-safe bag. It will keep for up to 3 months. When you are ready to enjoy it, thaw it overnight in the refrigerator or on the counter for a few hours. You can also freeze individual slices for quick grab-and-go snacks — just wrap each slice in plastic wrap and pop them in a freezer bag.
Reheating: For that fresh-from-the-oven taste, reheat slices in a 300°F oven for 5-7 minutes or in the microwave for 15-20 seconds. Toasting is my favorite method because it gives the edges a lovely crunch while keeping the inside soft and tender.
Flavor development: Honestly, this banana bread tastes even better on day two. The moisture distributes more evenly, and the banana flavor becomes more pronounced. If you can resist eating it all on day one, you are in for a real treat on day two.
Nutritional Information & Benefits
While banana bread is definitely a treat, it does have some redeeming qualities. Here is a rough breakdown of the nutritional information per slice (based on 10 slices, without add-ins).
| Nutrient | Amount Per Slice |
|---|---|
| Calories | 245 |
| Total Fat | 9g |
| Saturated Fat | 5g |
| Cholesterol | 40mg |
| Sodium | 260mg |
| Total Carbohydrates | 38g |
| Dietary Fiber | 2g |
| Sugars | 20g |
| Protein | 4g |
Health benefits: Bananas are a great source of potassium, which supports heart health and muscle function. They also contain vitamin B6 and vitamin C. The fiber from the bananas and flour helps with digestion and keeps you feeling full longer. If you use whole wheat flour or add nuts, you will get even more fiber and healthy fats.
Dietary considerations: This recipe is vegetarian. For a vegan version, use the substitutions listed in the variations section. For a gluten-free version, use a 1:1 gluten-free flour blend. It is not low-carb or keto-friendly due to the bananas and sugar, but it is a wonderful occasional indulgence.
Allergens: This recipe contains wheat (gluten), dairy (butter), and eggs. If you have allergies, please check the variations section for suitable substitutions. Always read labels on any add-ins to ensure they are free from cross-contamination.
I believe in balance — enjoying treats like this banana bread while also eating plenty of whole foods. It is not about deprivation; it is about savoring the good stuff when you have it.
Conclusion
This classic one-bowl banana bread is proof that you do not need fancy equipment or complicated techniques to make something truly delicious. It is the recipe I turn to when I want comfort without the fuss, and it has never let me down. The smell of it baking fills the house with warmth, and the first bite — tender, sweet, and perfectly moist — is always worth the wait.
I hope you give this recipe a try and make it your own. Throw in some chocolate chips if that is your thing. Add a handful of walnuts for crunch. Swap the sugar for brown sugar if you want a deeper flavor. The beauty of this bread is that it adapts to whatever you have on hand and whatever you are craving.
If you make this banana bread, I would love to hear about it. Leave a comment below and let me know how it turned out, what add-ins you used, or if you have any questions. Share your photos on social media and tag me — I love seeing your creations. And if you are looking for more simple, delicious recipes, check out our collection of easy bakes and desserts. Happy baking, friends!
Frequently Asked Questions
Can I use frozen bananas for this recipe?
Absolutely! Frozen bananas are perfect for banana bread. Thaw them completely at room temperature or in the microwave, then drain off any excess liquid before mashing. They will be very soft and almost liquid, which makes them even easier to mash. The flavor is just as good, if not better, than fresh bananas.
Why did my banana bread sink in the middle?
A sunken middle usually means the bread was underbaked. Make sure your oven is fully preheated and bake until a toothpick inserted in the center comes out clean. Another common cause is opening the oven door too often during baking, which lets out heat and causes the bread to collapse. Try to resist peeking until the last 10 minutes of baking.
Can I make this into muffins instead of a loaf?
Yes, this batter works great for muffins. Grease a 12-cup muffin tin or line it with paper liners. Fill each cup about ¾ full. Bake at 350°F (175°C) for 18-22 minutes, or until a toothpick inserted into the center of a muffin comes out clean. You will get about 12 muffins. They are perfect for grab-and-go breakfasts or snacks.
How do I know when my bananas are ripe enough?
Look for bananas with plenty of brown spots or completely black skins. They should feel soft when gently squeezed. If they are still yellow with green tips, they are not sweet enough yet. You can speed up ripening by placing them in a paper bag with an apple or by baking them in a 300°F oven for 15-20 minutes until they soften and darken.
Can I reduce the sugar in this recipe?
Yes, you can reduce the sugar to ½ cup (100g) without significantly affecting the texture. The bread will be less sweet, but the natural sweetness from the ripe bananas will still shine through. If you reduce it further, the bread may be a bit drier and less tender. I do not recommend going below ⅓ cup (65g).
If you enjoyed this recipe, you might also love our mini lemon blueberry cheesecakes — they are another one-bowl wonder that is perfect for when you want something special without the hassle.
Pin This Recipe!
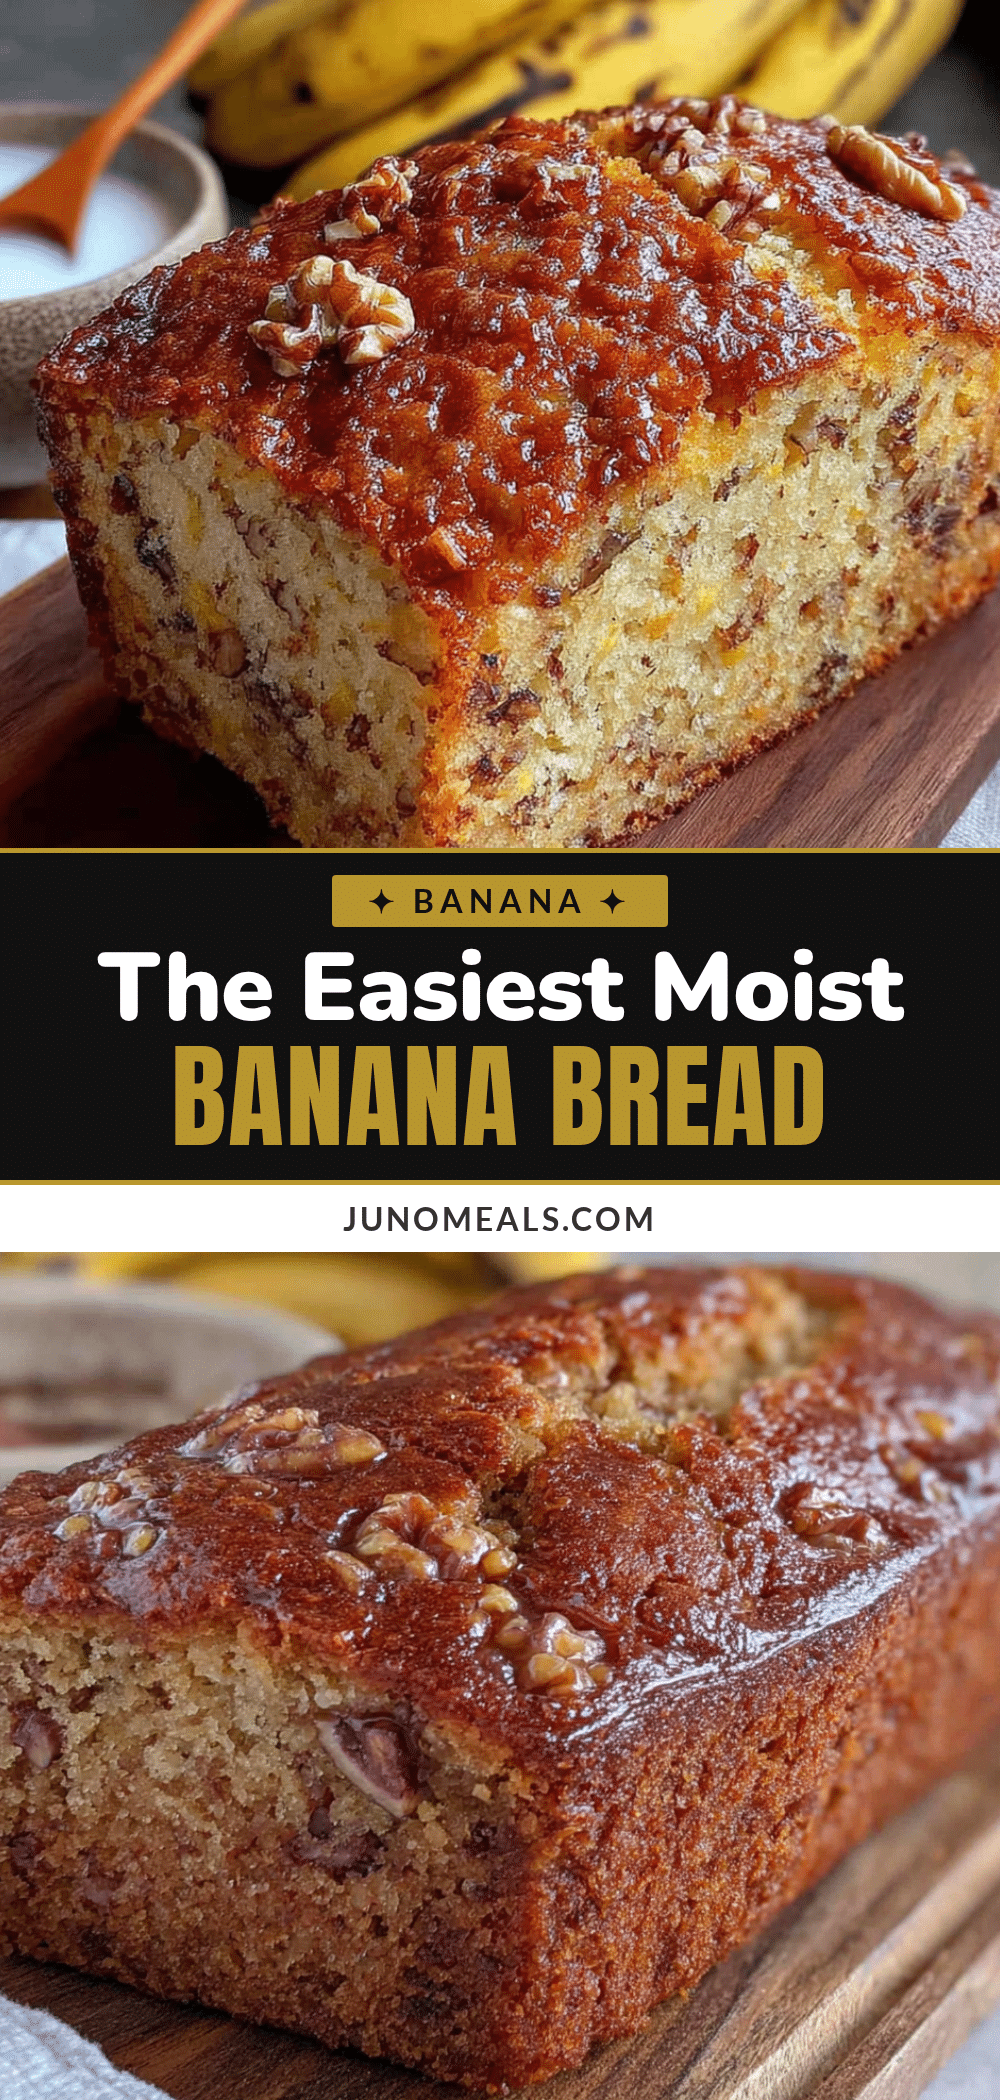
Classic One-Bowl Banana Bread: Easy, No Mixer Needed
This classic one-bowl banana bread requires no mixer and minimal cleanup. It’s perfectly moist, tender, and made with simple pantry ingredients—the ultimate comfort food for lazy bakers.
- Prep Time: 10 minutes
- Cook Time: 55-65 minutes
- Total Time: 1 hour 10 minutes
- Yield: 10 servings 1x
- Category: Dessert
- Cuisine: American
Ingredients
- 3 large ripe bananas, mashed (about 1 ½ cups)
- ⅓ cup unsalted butter, melted (75g)
- ¾ cup granulated sugar (150g)
- 1 large egg, room temperature
- 1 teaspoon vanilla extract
- 1 ½ cups all-purpose flour (190g)
- 1 teaspoon baking soda
- ½ teaspoon salt
- ½ cup chopped walnuts or pecans (60g) (optional)
- ½ cup chocolate chips (90g) (optional)
- ½ cup fresh or frozen blueberries (75g) (optional)
Instructions
- Preheat your oven to 350°F (175°C). Position the rack in the center of the oven. Grease your 9×5-inch loaf pan with butter or non-stick spray, or line it with parchment paper leaving a slight overhang on the long sides for easy lifting. Set it aside.
- Mash the bananas in your mixing bowl. Peel the three ripe bananas and place them in the bowl. Use a fork or potato masher to mash them until they are mostly smooth with a few small lumps remaining. Aim for a consistency similar to chunky applesauce.
- Add the melted butter and sugar. Pour the cooled melted butter and the granulated sugar into the bowl with the mashed bananas. Stir with your wooden spoon or spatula until everything is well combined.
- Mix in the egg and vanilla. Crack the room-temperature egg into the bowl and add the vanilla extract. Stir until the egg is fully incorporated and the batter looks smooth and glossy.
- Add the dry ingredients. Sprinkle the flour, baking soda, and salt over the wet mixture. Stir gently with your spoon or spatula, using a folding motion. Mix just until you no longer see streaks of flour. A few small lumps are okay.
- Fold in any add-ins (optional). If you are using chocolate chips, nuts, or blueberries, gently fold them into the batter now. Use no more than about 10 strokes to distribute them evenly.
- Pour the batter into the prepared loaf pan. Scrape every last bit of batter into the pan using your spatula. Spread it evenly with the back of a spoon or by gently tilting the pan.
- Bake for 55-65 minutes. Place the pan in the preheated oven and bake until the top is golden brown and a toothpick inserted into the center comes out clean or with a few moist crumbs. Start checking at 50 minutes if your oven runs hot.
- Cool in the pan for 10 minutes. Remove the loaf from the oven and set it on a wire rack or your stovetop. Let it cool in the pan for exactly 10 minutes.
- Transfer to a wire rack to cool completely. Run a butter knife around the edges of the pan to loosen the bread if needed. Lift it out using the parchment overhang or carefully invert it onto the rack. Let it cool completely before slicing—about 1 hour.
Notes
If your loaf is browning too quickly on top but is not done in the center, tent it loosely with aluminum foil for the last 15-20 minutes of baking. This prevents the top from burning while the inside finishes cooking. For best results, use a kitchen scale for accuracy and let your bananas get really, really ripe. Do not over-mix the batter. Let the bread cool completely before slicing for best texture.
Nutrition
- Serving Size: 1 slice
- Calories: 245
- Sugar: 20
- Sodium: 260
- Fat: 9
- Saturated Fat: 5
- Carbohydrates: 38
- Fiber: 2
- Protein: 4
Keywords: banana bread, one-bowl banana bread, easy banana bread, no mixer banana bread, classic banana bread, moist banana bread


