The neighborhood spring block party was in twelve hours and I’d completely forgotten. I mean, completely. I woke up to a text that said “Don’t forget dessert for 30!” and felt that cold panic you get when you realize you’re the person who shows up empty-handed. Everyone else would be bringing their A-game—elaborate layer cakes, homemade pies, those fancy French pastries that take three days. I had a stick of butter, some sprinkles I bought for a kid’s craft project last year, and about forty-five minutes before I had to leave. Let me tell you, I was already mentally preparing my apology speech. But then I spotted that jar of rainbow sprinkles and remembered a recipe I’d been meaning to try. I threw these birthday cake blondies together in a complete frenzy—half measuring, half praying—and walked to the party feeling like a fraud carrying a foil-covered pan. You know that feeling when you’re hoping people just politely take one bite and move on? Yeah. The pan was empty in twenty minutes. Someone actually asked me whose bakery I used. I just smiled and said nothing, honestly a little embarrassed that the simplest thing I’d ever made stole the show from all those multi-step masterpieces. That’s the thing about these birthday cake blondies—they’re the underdog that wins every time, and I’ve been making them for every spring celebration since.
Why You’ll Love This Recipe
These birthday cake blondies aren’t just another dessert recipe. They’re the kind of thing that makes you look like you tried way harder than you actually did. I’ve tested this batch at least seven times to get the texture just right—chewy edges, soft center, and that perfect pop of color from the sprinkles. Here’s why I think you’ll fall for them too:
- Quick & Easy: From start to oven in under 15 minutes. No mixer needed, no complicated steps. Just a bowl, a spatula, and some elbow grease.
- Simple Ingredients: You probably have everything except maybe the sprinkles. Butter, sugar, eggs, flour, vanilla—all pantry staples that don’t require a special trip.
- Perfect for Spring Celebrations: Birthdays, bridal showers, Easter brunch, Mother’s Day, or just Tuesday. The sprinkles make them feel festive without being fussy.
- Crowd-Pleaser: Kids love the rainbow bits, adults love the buttery vanilla flavor. I’ve never seen anyone take one bite and walk away.
- Unbelievably Delicious: The texture is what gets me every time. That crackly top, the soft middle, the way the butter and vanilla come together like a hug in dessert form.
What makes these birthday cake blondies different from every other version out there? It’s the technique. Most blondie recipes turn out cakey or dry, but I figured out that using melted butter and a specific resting time gives you that dense, fudgy texture that actually tastes like birthday cake batter. Not the cake—the batter. You know what I mean. Plus, I add just a touch of almond extract alongside the vanilla, which gives them that classic bakery birthday cake flavor without being overpowering. It’s the secret that makes people ask for the recipe every single time.
Honestly, this recipe is the kind that makes you close your eyes after the first bite. It’s comfort food reimagined—faster, simpler, but with the same soul-soothing satisfaction. Perfect for impressing guests without stress, or turning a regular spring afternoon into something memorable.
What Ingredients You Will Need
This recipe uses simple, wholesome ingredients to deliver bold flavor and satisfying texture without the fuss. Most of these are probably already sitting in your pantry or fridge right now.
For the Blondies
- Unsalted butter, melted – ½ cup (1 stick / 113g). I use Kerrygold for the richest flavor, but any good unsalted butter works. Melting it instead of creaming it gives that dense, fudgy texture we’re after.
- Light brown sugar, packed – 1 cup (200g). This is non-negotiable for me. Brown sugar adds moisture and that subtle molasses flavor that makes blondies taste like caramelized heaven.
- Granulated sugar – ¼ cup (50g). Just enough to balance the brown sugar and help create that crackly top.
- Large egg – 1, at room temperature. If you forgot to take it out early, place it in warm water for 5 minutes. Cold eggs can make the butter seize up.
- Egg yolk – 1 extra yolk. This is my secret weapon for extra chewiness and richness. Save the white for an omelet later.
- Vanilla extract – 2 teaspoons. Pure vanilla, not imitation. Trust me on this one—it makes a difference in the depth of flavor.
- Almond extract – ½ teaspoon. This is the birthday cake magic. It gives that unmistakable bakery flavor without tasting like almonds.
- All-purpose flour – 1 cup (120g). Spoon and level it—don’t scoop straight from the bag or you’ll end up with dry blondies.
- Salt – ½ teaspoon. I use fine sea salt. It balances the sweetness and makes the vanilla pop.
- Baking powder – ½ teaspoon. Just enough for a tiny bit of lift without making them cakey.
- Rainbow sprinkles – ½ cup (about 80g). Use the long, skinny jimmies-style sprinkles, not the round nonpareils. The round ones bleed color into the batter and turn everything gray. Learned that one the hard way.
For the Optional Glaze
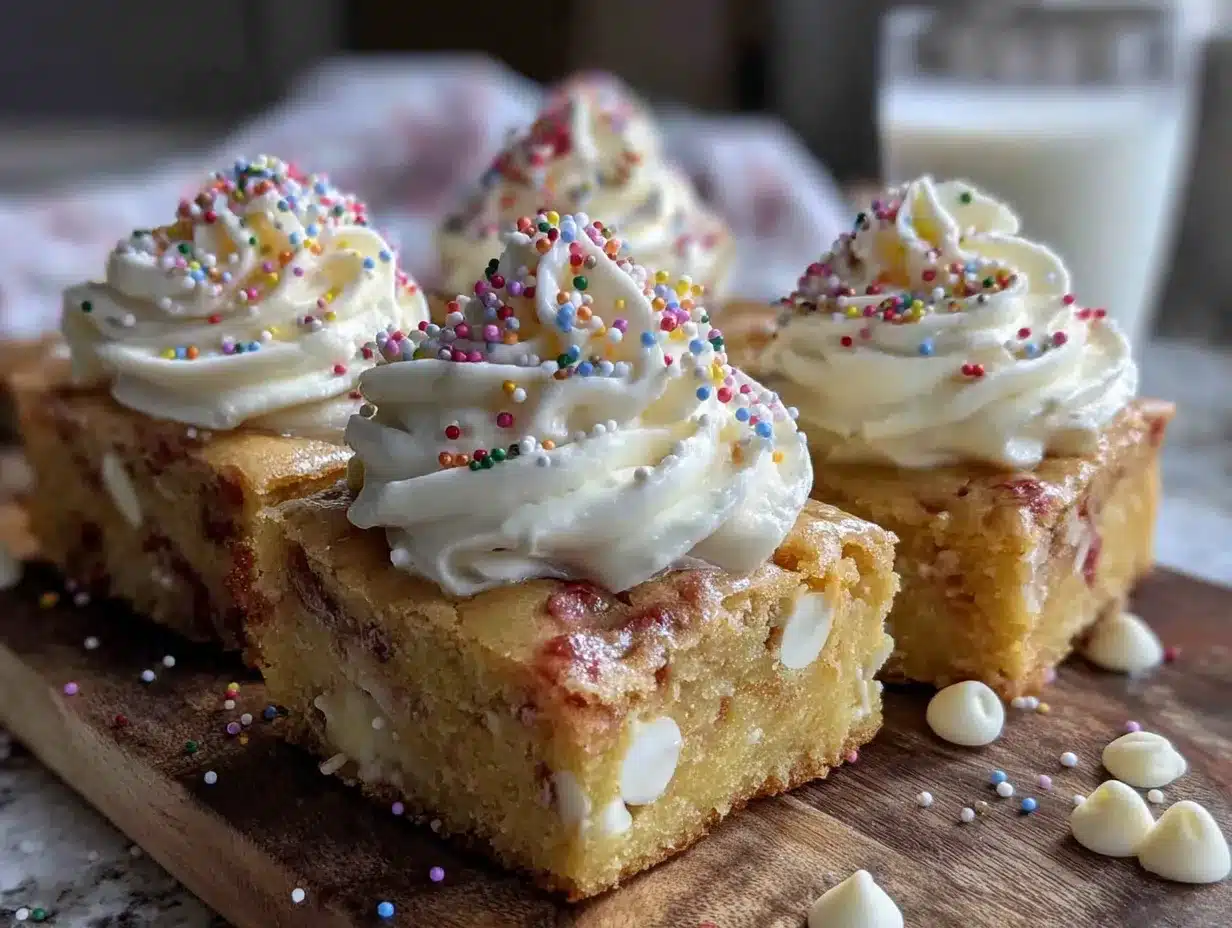
- Powdered sugar – ½ cup (60g)
- Milk or heavy cream – 2-3 tablespoons, plus more as needed
- Vanilla extract – ½ teaspoon
- Extra sprinkles – for topping, because more is more
If you’re making these gluten-free, swap the all-purpose flour for a good 1:1 gluten-free baking blend. I’ve had great results with King Arthur Measure for Measure. For a dairy-free version, use melted coconut oil or vegan butter instead of regular butter. Just note that coconut oil will add a slight coconut flavor, which actually pairs beautifully with the vanilla and almond extracts.
Equipment Needed
You don’t need a fancy kitchen to make these birthday cake blondies. Here’s what I use every time:
- 8×8-inch baking pan – This is the perfect size for thick, fudgy blondies. A 9×9 will work too, but they’ll be thinner and bake faster, so check them at 18 minutes.
- Mixing bowls – One large, one medium. I prefer glass or stainless steel because they don’t hold onto odors.
- Whisk – For combining the wet ingredients smoothly.
- Rubber spatula – For folding in the sprinkles gently. A wooden spoon works too, but be careful not to overmix.
- Parchment paper – This is my number one tip. Line the pan with parchment, leaving overhang on two sides. It makes lifting the blondies out so much easier—no scraping, no broken edges.
- Measuring cups and spoons – For accuracy. I cannot stress this enough: measuring by weight is more reliable, but cups work if you’re careful.
- Cooling rack – Helps the blondies cool evenly and prevents soggy bottoms.
If you don’t have parchment paper, you can grease the pan thoroughly with butter and dust it with flour. Just tap out the excess. I used to do that before I discovered the parchment trick, and it works fine—just a bit more cleanup.
Preparation Method
Let’s make these birthday cake blondies. I promise this is the easiest celebration dessert you’ll ever make.
- Preheat your oven to 350°F (175°C). Position the rack in the center of the oven. While it’s heating, line your 8×8 pan with parchment paper, leaving about 2 inches of overhang on two opposite sides. This creates handles for lifting the blondies out later.
- Melt the butter. In a medium microwave-safe bowl, melt the ½ cup of butter in 30-second bursts, stirring in between. You want it fully melted but not hot—just warm to the touch. If it’s too hot, let it sit for a minute. Hot butter can cook the egg when you add it, and nobody wants scrambled egg blondies.
- Mix in the sugars. Add both the brown sugar and granulated sugar to the warm melted butter. Whisk vigorously for about 30 seconds until the mixture looks thick and glossy. This step is important—it helps dissolve the sugar and creates that crackly top we’re after. You’ll notice the mixture starts to smell amazing already.
- Add the egg, egg yolk, and extracts. Let the butter-sugar mixture cool for about a minute (you don’t want it hot), then whisk in the whole egg and the extra yolk. Add the 2 teaspoons vanilla and ½ teaspoon almond extract. Whisk until everything is smooth and well combined. The batter should look pale and slightly thick at this point.
- Fold in the dry ingredients. In a separate small bowl, whisk together the flour, salt, and baking powder. Add this to the wet mixture and fold gently with your rubber spatula. Stop as soon as you no longer see streaks of flour. Overmixing at this stage develops gluten and makes the blondies tough instead of tender.
- Add the sprinkles. Here’s the moment of truth. Gently fold in the ½ cup of rainbow sprinkles using just a few strokes. Don’t overmix or the colors will start to bleed. The batter will be thick and slightly sticky—that’s exactly what you want.
- Transfer to the pan. Scrape the batter into your prepared pan and spread it evenly using the spatula. It will be thick, so take your time. Wet the spatula slightly if the batter is sticking to it. The batter should be about 1 inch thick in the pan.
- Bake for 22-25 minutes. Place the pan on the center rack and bake until the edges are golden brown and the top looks set and slightly crackly. The center should still look a tiny bit soft—a toothpick inserted near the center should come out with a few moist crumbs, not wet batter. I usually check at 22 minutes and go from there. Every oven runs differently, so trust your eyes more than the timer.
- Cool completely in the pan. This is the hardest part, I know. Place the pan on a cooling rack and let the blondies cool for at least 1 hour before lifting them out. They continue to set as they cool, so cutting them too early will give you a gooey mess. If you’re adding the glaze, wait until they’re fully cool.
- Make the glaze (optional but recommended). In a small bowl, whisk together ½ cup powdered sugar, 2 tablespoons milk or cream, and ½ teaspoon vanilla. Add another tablespoon of liquid if needed to reach a drizzling consistency. Drizzle over the cooled blondies and top with extra sprinkles while the glaze is still wet. Let the glaze set for about 15 minutes before cutting.
- Cut and serve. Use the parchment handles to lift the entire block of blondies onto a cutting board. Use a sharp knife to cut into 16 squares. Wipe the knife clean between cuts for neat edges. I like to cut them into slightly larger pieces for parties—9 generous squares instead of 16 smaller ones.
Cooking Tips & Techniques
I’ve made these birthday cake blondies more times than I can count, and I’ve definitely learned a few things along the way. Let me save you from my mistakes.
Don’t overbake. This is the number one mistake people make with blondies. They look underdone in the center when they’re actually perfect. Remember, they continue to bake from residual heat after you pull them out. I’ve pulled blondies that looked slightly too soft in the middle, and after cooling, they were absolutely perfect. Overbaked blondies turn into dry, crumbly disappointment. When in doubt, take them out a minute early.
Use the right sprinkles. I cannot stress this enough. Those little round ball sprinkles (nonpareils) will turn your batter into a sad gray mess. The color bleeds immediately. Stick with the long, skinny rainbow jimmies. They hold their shape and color during baking. I learned this lesson when I made a batch for my niece’s birthday and ended up with grayish-brown blondies. They still tasted fine, but they looked like a science experiment.
Room temperature ingredients matter. Cold egg straight from the fridge can make the melted butter seize up and create a lumpy batter. If you forgot to set it out, place the egg in a bowl of warm water for 5 minutes. Same goes for the extra yolk. Room temperature ingredients blend together more smoothly and create a better texture.
Let them cool completely. I know, I know. The smell is intoxicating and you want to dive in immediately. But cutting warm blondies is like cutting warm brownies—you’ll get a crumbly mess. Patience pays off here. I usually make them the night before I need them and let them cool overnight. They actually taste better the next day anyway, as the flavors have time to meld together.
Line your pan properly. Take the extra two minutes to cut parchment paper with overhang. It makes a world of difference when you’re trying to lift the entire batch out cleanly. I used to struggle with greasing and flouring, and I’d always end up with broken corners. Parchment paper changed my blondie game forever.
Variations & Adaptations
One of the best things about these birthday cake blondies is how versatile they are. Here are some ways I’ve adapted them for different occasions and dietary needs:
Chocolate Chip Birthday Blondies: Fold in ½ cup of white chocolate chips or milk chocolate chips along with the sprinkles. The melted chocolate pockets add another layer of richness. I made this version for a friend’s baby shower and it was gone before the main course was served.
Lemon Birthday Blondies: Replace the almond extract with 1 tablespoon of fresh lemon zest and 1 teaspoon of lemon extract. The bright citrus flavor is perfect for spring and summer. Top with a lemon glaze instead of vanilla. My neighbor tried this version and now requests it for every barbecue.
Gluten-Free Version: Swap the all-purpose flour with a 1:1 gluten-free baking blend that contains xanthan gum. I’ve tested this with King Arthur Measure for Measure and Bob’s Red Mill 1:1, and both work beautifully. The texture is slightly more delicate, so let them cool completely before cutting.
Vegan Birthday Blondies: Use melted coconut oil or vegan butter instead of dairy butter. Replace the egg and extra yolk with a flax egg (1 tablespoon ground flaxseed mixed with 3 tablespoons water, let sit for 5 minutes) and an additional ¼ cup of applesauce. The texture will be a bit more cake-like, but still delicious. I made these for a vegan potluck and nobody guessed they were dairy-free.
Funfetti Layer Cake Blondies: For an over-the-top celebration, bake the blondies, let them cool, then spread a layer of cream cheese frosting on top. Add extra sprinkles and cut into bars. This turns them into something that feels like a birthday cake but without all the layering and fuss.
Serving & Storage Suggestions
These birthday cake blondies are incredibly versatile when it comes to serving. Here’s how I handle them:
Serving Temperature: I prefer them at room temperature—that’s when the texture is at its best—chewy, soft, and perfectly dense. If you’ve refrigerated them, let them sit out for about 20 minutes before serving. For an extra treat, warm them in the microwave for 10 seconds and serve with a scoop of vanilla ice cream. The warm blondie with cold ice cream is a match made in dessert heaven.
Presentation Ideas: For parties, I arrange them on a cake stand or wooden board. A dusting of powdered sugar and a few extra sprinkles on top makes them look extra festive. For individual servings, cut them into squares and place each one in a mini cupcake liner. It makes them feel special and keeps your fingers clean.
Storage Instructions: Store leftover blondies in an airtight container at room temperature for up to 4 days. Place a piece of bread in the container to keep them soft—the bread absorbs excess moisture and the blondies stay chewy. Replace the bread every other day if they last that long. In my house, they rarely make it past day two.
Freezer Instructions: These blondies freeze beautifully. Wrap individual squares tightly in plastic wrap, then place them in a freezer-safe bag or container. They’ll keep for up to 3 months. To thaw, leave them at room temperature for about 30 minutes, or microwave for 15-20 seconds. I always keep a stash in the freezer for unexpected guests or sudden cravings.
Flavor Development: Here’s something I’ve noticed: these blondies actually taste better the next day. The flavors have time to meld together, and the texture becomes even more fudgy. So if you’re planning ahead, make them a day in advance. Your future self will thank you.
Nutritional Information & Benefits
Let’s be honest—these birthday cake blondies are a treat, not a health food. But here’s what you should know if you’re keeping track:
Estimated Nutrition (per blondie, based on 16 servings):
- Calories: 195
- Fat: 9g
- Saturated Fat: 5g
- Carbohydrates: 27g
- Sugar: 19g
- Protein: 2g
- Sodium: 95mg
Health Highlights: The butter and eggs provide a small amount of vitamin A and protein. The brown sugar contains trace minerals like calcium and potassium, though honestly, we’re not pretending these are a vitamin source. What I will say is that these blondies are made from real, recognizable ingredients—no preservatives, no artificial flavors, no weird stabilizers. That’s something I feel good about when I’m sharing them with my family.
Dietary Considerations: These blondies contain gluten, dairy, and eggs. For gluten-free or vegan options, check the variations section above. They are nut-free as written, making them safe for school parties and nut-free events. If you’re watching your sugar intake, you can reduce the granulated sugar to 2 tablespoons, but know that it will affect the texture slightly.
My Personal Perspective: I believe in balance. These birthday cake blondies are a celebration dessert—they’re meant to be enjoyed without guilt. One blondie with a glass of milk or a cup of coffee is a perfectly reasonable treat. Life is too short to skip dessert, especially when it’s this good.
Conclusion
These birthday cake blondies have become my go-to celebration dessert for a reason. They’re quick enough for a last-minute gathering, impressive enough for a party, and simple enough that anyone can make them—even on a chaotic morning when you’ve completely forgotten about the block party. The combination of buttery vanilla flavor, chewy texture, and rainbow sprinkles is pure happiness in bar form.
I love that this recipe doesn’t take itself too seriously. It’s fun, it’s colorful, and it always brings smiles. Whether you’re making them for a birthday, a spring brunch, or just because it’s Tuesday, these blondies deliver exactly what you need: a little bit of celebration without a lot of stress.
I’d love to hear how yours turn out! Did you try any of the variations? Did you add something unexpected that worked? Drop a comment below and share your creation. Don’t forget to pin this recipe for later and share it with someone who needs a little celebration in their life. Happy baking, friends—you’ve got this!
Frequently Asked Questions
Can I use salted butter instead of unsalted?
Yes, you can. Just reduce the added salt to ¼ teaspoon to avoid making the blondies too salty. I personally prefer unsalted because it gives me more control over the flavor, but salted butter works in a pinch.
Why did my sprinkles bleed color into the batter?
This usually happens when you use the wrong type of sprinkles. Stick with long, skinny rainbow jimmies instead of round nonpareils. Also, fold the sprinkles in gently with just a few strokes—overmixing can cause the colors to bleed. If your batter starts turning gray, you’ve mixed too much.
Can I double this recipe?
Absolutely. Double all the ingredients and bake in a 9×13-inch pan. Increase the baking time to about 28-32 minutes, checking for doneness with a toothpick. You’ll get about 24 blondies from a double batch, which is perfect for larger parties.
How do I know when the blondies are done baking?
The edges should be golden brown and the top should look set and slightly crackly. The center will still look a tiny bit soft—that’s normal. Insert a toothpick near the center; it should come out with a few moist crumbs, not wet batter. Remember, they continue to bake as they cool, so it’s better to underbake slightly than overbake.
Can I make these ahead of time for a party?
Yes, and I actually recommend it. These blondies taste even better the next day after the flavors have had time to meld. Bake them up to 24 hours in advance, cool completely, and store in an airtight container at room temperature. Add the glaze just before serving for the best presentation.
Pin This Recipe!
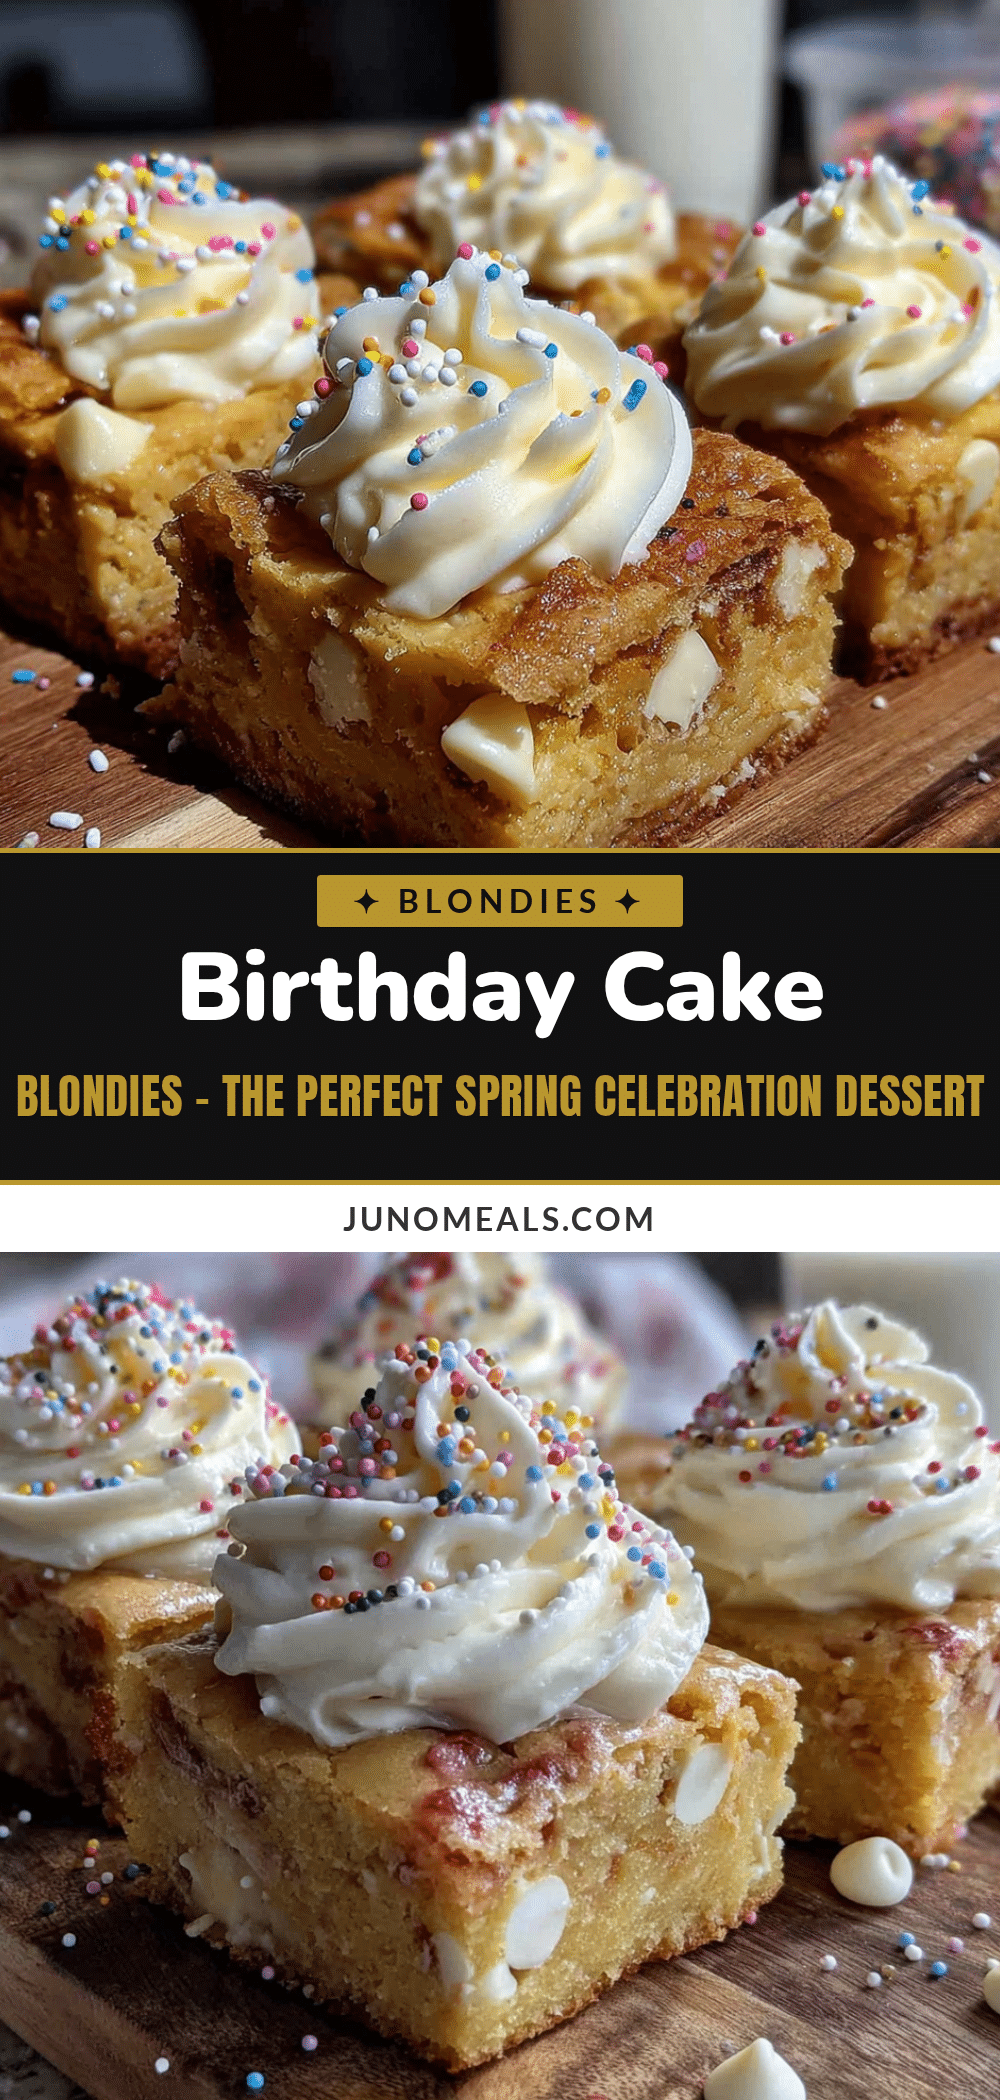
Birthday Cake Blondies – The Perfect Spring Celebration Dessert
These birthday cake blondies are quick, easy, and perfect for spring celebrations. With chewy edges, a soft center, and rainbow sprinkles, they taste like birthday cake batter in bar form.
- Prep Time: 15 minutes
- Cook Time: 25 minutes
- Total Time: 40 minutes
- Yield: 16 servings 1x
- Category: Dessert
- Cuisine: American
Ingredients
- ½ cup (1 stick / 113g) unsalted butter, melted
- 1 cup (200g) light brown sugar, packed
- ¼ cup (50g) granulated sugar
- 1 large egg, at room temperature
- 1 extra egg yolk, at room temperature
- 2 teaspoons pure vanilla extract
- ½ teaspoon almond extract
- 1 cup (120g) all-purpose flour, spooned and leveled
- ½ teaspoon fine sea salt
- ½ teaspoon baking powder
- ½ cup (about 80g) rainbow sprinkles (jimmies-style)
- For the optional glaze:
- ½ cup (60g) powdered sugar
- 2–3 tablespoons milk or heavy cream
- ½ teaspoon vanilla extract
- Extra sprinkles for topping
Instructions
- Preheat your oven to 350°F (175°C). Position the rack in the center of the oven. Line an 8×8-inch baking pan with parchment paper, leaving about 2 inches of overhang on two opposite sides.
- In a medium microwave-safe bowl, melt the ½ cup of butter in 30-second bursts, stirring in between. Let it cool slightly until just warm to the touch.
- Add both the brown sugar and granulated sugar to the warm melted butter. Whisk vigorously for about 30 seconds until the mixture looks thick and glossy.
- Let the butter-sugar mixture cool for about a minute, then whisk in the whole egg and the extra yolk. Add the 2 teaspoons vanilla and ½ teaspoon almond extract. Whisk until smooth and well combined.
- In a separate small bowl, whisk together the flour, salt, and baking powder. Add this to the wet mixture and fold gently with a rubber spatula until just combined. Do not overmix.
- Gently fold in the ½ cup of rainbow sprinkles using just a few strokes. Do not overmix or the colors will bleed.
- Scrape the batter into the prepared pan and spread it evenly using the spatula. The batter will be thick and slightly sticky.
- Bake for 22-25 minutes, until the edges are golden brown and the top looks set and slightly crackly. The center should still look a tiny bit soft. A toothpick inserted near the center should come out with a few moist crumbs, not wet batter.
- Cool completely in the pan on a cooling rack for at least 1 hour before lifting out.
- For the optional glaze: In a small bowl, whisk together ½ cup powdered sugar, 2 tablespoons milk or cream, and ½ teaspoon vanilla. Add another tablespoon of liquid if needed to reach a drizzling consistency. Drizzle over the cooled blondies and top with extra sprinkles while the glaze is still wet. Let the glaze set for about 15 minutes before cutting.
- Use the parchment handles to lift the entire block of blondies onto a cutting board. Use a sharp knife to cut into 16 squares. Wipe the knife clean between cuts for neat edges.
Notes
Use jimmies-style sprinkles, not nonpareils, to prevent color bleeding. Don’t overbake; blondies continue to set as they cool. For best results, make a day ahead as flavors meld overnight. Store in an airtight container at room temperature for up to 4 days. Freeze individual squares wrapped in plastic wrap for up to 3 months.
Nutrition
- Serving Size: 1 blondie
- Calories: 195
- Sugar: 19
- Sodium: 95
- Fat: 9
- Saturated Fat: 5
- Carbohydrates: 27
- Protein: 2
Keywords: birthday cake blondies, spring dessert, celebration dessert, easy blondies, rainbow sprinkles, funfetti blondies


