This was supposed to be a batch of my grandmother’s famous pumpkin bread. You know, the one she’d mail to me in a coffee can wrapped in foil, and I’d eat it over the sink at midnight like some kind of feral goblin. But last October, I was in a rush. The power had flickered off and on during a storm, my oven was acting temperamental, and I grabbed the wrong measuring cup. Instead of a loaf pan, I dumped the batter onto a parchment-lined sheet tray because I was already late for a dinner party I was hosting. I was sweating, honestly, and my neighbor Dave was knocking on the door asking if I’d seen his cat. I just stood there staring at this flat, sad-looking puddle of pumpkin batter thinking, “Well, that’s ruined.”
I threw it in the oven anyway, cranked the heat up a bit out of spite, and let it bake while I frantically chopped herbs for the main course. Twenty minutes later, the kitchen smelled less like a disaster and more like a cozy autumn bakery. What came out was not pumpkin bread. It was a tray of golden, craggy-edged scones with a texture that was somehow both tender and flaky. I had accidentally created the best thing I’d ever baked. I cut them into triangles, drizzled a quick cinnamon glaze over the top, and brought them to the party. They disappeared in ten minutes. People asked for the recipe, and I had to admit I had no idea what I’d actually done. Maybe you’ve been there—that moment when a mistake in the kitchen turns into a happy little triumph. That’s how these Best Maple Pumpkin Scones with Cinnamon Glaze were born, and I’ve been making them on purpose ever since.
Why You’ll Love This Recipe
Let me tell you, these scones are not your average bakery fare. I’ve tested this recipe about a dozen times since that fateful night, tweaking the flour ratio and the maple syrup amount until it was just right. They’ve become my signature dish for fall gatherings, and here is why you are going to absolutely love them.
- Perfect for Hosting: These scones are a showstopper at any brunch, potluck, or cozy dinner party. They look incredibly impressive on a platter with the glaze drizzled on top, but they come together with minimal fuss. You can prep the dough the night before and bake them fresh when your guests arrive. Nothing says “I’m a confident host” like pulling a tray of warm scones out of the oven.
- Simple Ingredients: You likely have most of these in your pantry already. Canned pumpkin, maple syrup, flour, butter, and spices. No need for a special trip to a gourmet grocery store. I use pure maple syrup (not the pancake kind, trust me on this) and it makes all the difference.
- Crowd-Pleaser: I’ve served these to kids who usually only eat plain bagels and adults who claim they don’t like pumpkin. They get devoured every single time. The combination of the tender, spiced scone with that sweet cinnamon glaze is next-level comfort food.
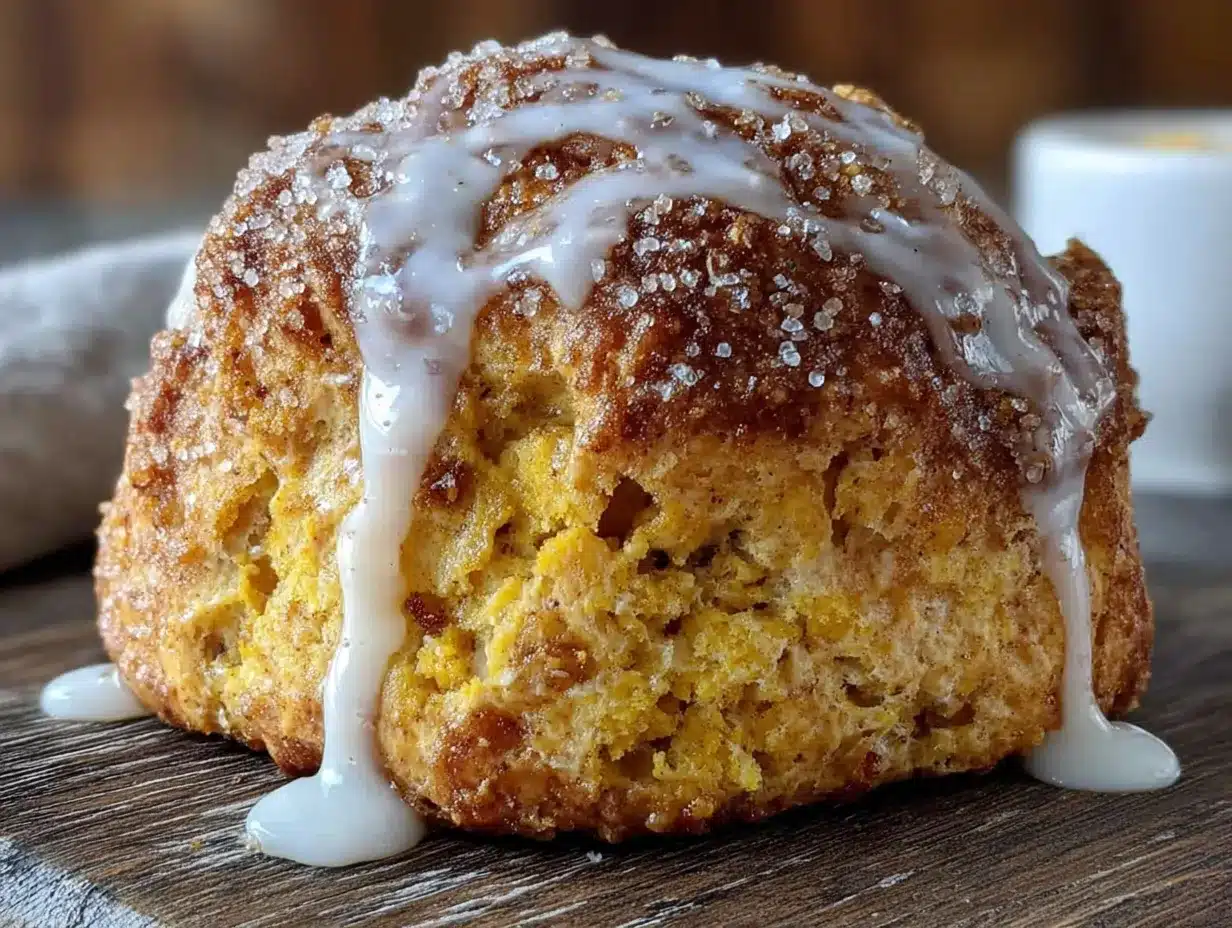
- Unbelievably Delicious: The texture is what gets me. They are soft and almost creamy on the inside from the pumpkin, but they have these gorgeous flaky edges from the cold butter. The maple flavor is warm and subtle, not overpowering, and the glaze adds that perfect crackly sweetness.
This recipe is different from the rest because of a special technique I stumbled upon: using a food processor to cut the cold butter into the dry ingredients. It creates the most perfect, tender crumb without overworking the dough. It is the kind of scone that makes you close your eyes after the first bite. Honestly, it is comfort food reimagined for the fall season, and it is perfect for impressing your friends without stressing yourself out.
What Ingredients You Will Need
This recipe uses simple, wholesome ingredients to deliver big flavor and that perfect scone texture. Most of these are fall pantry staples, which makes them easy to whip up on a whim.
- All-Purpose Flour: 2 cups (250g). This is the base of our scones. I use unbleached all-purpose flour for the best structure. If you want a slightly nuttier flavor, you can substitute 1/2 cup with whole wheat pastry flour.
- Granulated Sugar: 1/3 cup (65g). Just enough to sweeten the scone without making it taste like a cookie.
- Baking Powder: 1 tablespoon. This is crucial for lift. Make sure your baking powder is fresh, or your scones will be dense and flat.
- Spice Mix: 1 teaspoon ground cinnamon, 1/2 teaspoon ground ginger, 1/4 teaspoon ground nutmeg, and 1/4 teaspoon ground cloves. This is my go-to pumpkin spice blend. You can use 2 teaspoons of pre-made pumpkin pie spice if you prefer.
- Salt: 1/2 teaspoon. Don’t skip it—it balances the sweetness and enhances the spices.
- Cold Unsalted Butter: 1/2 cup (113g), cut into small cubes. This is the secret to flaky scones. The butter must be very cold. I pop my cubed butter in the freezer for 10 minutes before I start. I recommend using a high-quality European-style butter like Plugrà for the best flavor.
- Canned Pumpkin Puree: 1/2 cup (120g). Not pumpkin pie filling. Just pure pumpkin. I use Libby’s brand because it has a consistent, thick texture.
- Pure Maple Syrup: 1/4 cup (60ml). This adds a deep, woodsy sweetness that you can’t get from sugar alone. Do not use imitation maple syrup—it will make your scones taste artificial.
- Heavy Cream: 1/4 cup (60ml), plus a little extra for brushing the tops. The fat in the cream makes the scones tender and rich.
- Vanilla Extract: 1 teaspoon. A good quality vanilla rounds out the flavors.
- For the Cinnamon Glaze: 1 cup (120g) powdered sugar, 2-3 tablespoons milk or heavy cream, 1/2 teaspoon ground cinnamon, and 1/4 teaspoon vanilla extract. This glaze is simple but essential. It hardens slightly on top of the warm scones, creating that signature crackly shell.
Equipment Needed
You don’t need a professional bakery setup for these scones, but a few key tools will make your life much easier.
- Food Processor: This is my preferred method for cutting the butter into the flour. It takes about 10 seconds and ensures the butter stays cold. If you don’t have one, you can use a pastry cutter or two forks, but work quickly so the butter doesn’t soften.
- Large Baking Sheet: A rimmed half-sheet pan works best. Line it with parchment paper for easy cleanup.
- Bench Scraper or Sharp Knife: For cutting the dough into triangles. A bench scraper is great because it cuts cleanly without dragging the dough.
- Pastry Brush: For brushing the tops with cream before baking. A silicone brush is easy to clean.
- Cooling Rack: Essential for letting the scones cool evenly so the glaze doesn’t just melt off.
- Mixing Bowls and Whisk: For the glaze.
I bought my food processor for about thirty dollars at a discount store, and it has paid for itself a hundred times over. If you bake scones or pie crusts regularly, it is a worthy investment.
Preparation Method
Alright, let’s get to the good part. This method is straightforward, but there are a few key moments where you need to pay attention. Follow these steps, and you will have perfect scones every time.
- Preheat and Prep: Preheat your oven to 400°F (200°C). Line your baking sheet with parchment paper. This is non-negotiable—the scones will stick to an unlined pan.
- Mix Dry Ingredients: In the bowl of your food processor, combine 2 cups (250g) all-purpose flour, 1/3 cup (65g) granulated sugar, 1 tablespoon baking powder, 1 teaspoon cinnamon, 1/2 teaspoon ginger, 1/4 teaspoon nutmeg, 1/4 teaspoon cloves, and 1/2 teaspoon salt. Pulse 4-5 times to combine everything evenly.
- Cut in the Butter: Scatter your cold, cubed butter over the dry ingredients. Pulse in 1-second bursts about 8-10 times, until the mixture looks like coarse meal with some pea-sized butter pieces remaining. You want to see those little butter flecks—they create steam pockets in the oven that make the scones flaky. Do not over-process or you will have tough scones.
- Combine Wet Ingredients: In a separate small bowl or measuring cup, whisk together 1/2 cup (120g) pumpkin puree, 1/4 cup (60ml) maple syrup, 1/4 cup (60ml) heavy cream, and 1 teaspoon vanilla extract until smooth.
- Bring It Together: Pour the wet mixture over the dry ingredients in the food processor. Pulse just 5-6 times, until the dough starts to clump together. It will look shaggy and not fully combined—that is perfect. Turn the dough out onto a lightly floured surface.
- Shape the Dough: Gently gather the dough into a rough ball. Use your hands to pat it into a 3/4-inch thick circle, about 8 inches in diameter. Don’t knead it or overwork it. If the dough is sticking to your hands, dust them with a little flour. Using a bench scraper or a sharp knife, cut the circle into 8 equal triangles, like you are cutting a pizza.
- Bake: Place the scones on your prepared baking sheet, spacing them about 2 inches apart. Brush the tops and sides with a little extra heavy cream (this helps them brown beautifully). Bake for 14-16 minutes, until the bottoms are golden brown and the tops are lightly firm to the touch. Your kitchen will smell like a dream at this point.
- Cool: Let the scones cool on the baking sheet for 5 minutes, then transfer them to a cooling rack. It is important to let them cool almost completely before glazing, otherwise the glaze will just soak in and disappear.
- Make the Glaze: While the scones cool, whisk together 1 cup (120g) powdered sugar, 2 tablespoons milk or cream, 1/2 teaspoon cinnamon, and 1/4 teaspoon vanilla. Add more milk a teaspoon at a time until you get a thick but pourable consistency. You want it to drizzle slowly off the whisk.
- Glaze and Serve: Drizzle the glaze generously over the cooled scones. Let it set for about 10 minutes before serving. The glaze will harden slightly, creating that beautiful crackly top.
Cooking Tips & Techniques
I have made this recipe more times than I can count, and I have definitely made my share of mistakes. Here is what I have learned so you don’t have to repeat my errors.
- Keep Everything Cold: The single most important tip for flaky scones is keeping your butter and cream cold. If your kitchen is warm, pop the shaped scones in the fridge for 15 minutes before baking. I once forgot to do this on a hot day, and my scones spread into flat, greasy pucks. Not cute.
- Don’t Overmix: When you add the wet ingredients, stop as soon as the dough comes together. Overmixing develops gluten, which makes scones tough and chewy instead of tender. A shaggy dough is a good dough.
- Use a Food Processor for Speed: I used to cut butter into flour by hand with a pastry cutter, and I would always end up with warm, melty butter. The food processor is faster and keeps everything cold. It is a game-changer.
- Brush with Cream, Not Egg: Some recipes call for an egg wash, but I find it makes the tops too dark and shiny. A simple brush of heavy cream gives a beautiful, subtle golden color.
- Check Your Oven Temperature: Ovens run hot or cold. If your scones are browning too fast on the bottom but are still doughy in the middle, your oven might be too hot. I use an inexpensive oven thermometer to make sure my temperature is accurate.
Variations & Adaptations
One of the best things about this recipe is how easily it adapts to different tastes and dietary needs. Here are a few variations I have tried and loved.
- Gluten-Free Version: Substitute the all-purpose flour with a 1:1 gluten-free baking flour blend that contains xanthan gum. I have used Bob’s Red Mill 1-to-1 Baking Flour with great results. The texture will be slightly more delicate, so handle the dough gently.
- Dairy-Free Adaptation: Use cold, solid coconut oil or a plant-based butter stick instead of dairy butter. Replace the heavy cream with full-fat coconut cream or a thick oat milk. The flavor will be slightly different, but still delicious.
- Add Mix-Ins: Fold in 1/2 cup of toasted pecans, chopped crystallized ginger, or dried cranberries after you pulse the wet ingredients. I once added white chocolate chips and a pinch of orange zest, and it was incredible.
- Spice It Up: If you love a strong spice flavor, add a pinch of black pepper or cardamom to the dry ingredients. It gives the scones a warm, complex kick that pairs beautifully with the maple.
- No Food Processor? You can still make these. Whisk the dry ingredients in a large bowl. Use a pastry cutter or two forks to cut the cold butter into the flour until it looks like coarse crumbs. Then stir in the wet ingredients with a spatula until just combined.
Serving & Storage Suggestions
These scones are best served warm, but they are still amazing at room temperature. Here is how I like to serve and store them.
- Serving Temperature: Serve them slightly warm with the glaze set. If you are hosting a brunch, you can reheat them in a 300°F (150°C) oven for 5 minutes before glazing to bring back that fresh-baked feel.
- Presentation Tips: Arrange them on a wooden board or a cake stand. Drizzle the glaze in a zigzag pattern for a pretty, rustic look. I like to sprinkle a little extra cinnamon or some chopped pecans on top of the wet glaze for texture.
- What to Serve Alongside: These scones are perfect with a hot cup of coffee, a chai latte, or a mug of spiced apple cider. For a full brunch spread, pair them with a frittata, fresh fruit salad, and some crispy bacon.
- Storage: Store leftover scones in an airtight container at room temperature for up to 2 days. The glaze will soften slightly, but they will still be delicious.
- Freezing: You can freeze the unbaked scones. Shape them, place them on a baking sheet, and freeze until solid. Then transfer them to a freezer bag. Bake from frozen, adding 2-3 minutes to the baking time. You can also freeze baked, unglazed scones for up to 3 months. Thaw and reheat before glazing.
Nutritional Information & Benefits
While these scones are a treat, they do have some redeeming qualities. Here is the estimated nutritional breakdown for one scone (with glaze).
- Calories: Approximately 320
- Fat: 16g
- Carbohydrates: 42g
- Protein: 4g
- Fiber: 2g
- Sugar: 22g
Pumpkin is packed with Vitamin A and fiber, which is good for your immune system and digestion. The maple syrup provides some antioxidants, and the cinnamon can help regulate blood sugar. Of course, they are still a buttery, sugary pastry, so enjoy them in moderation. I like to think of them as a special occasion breakfast or a delightful afternoon snack that just happens to have a vegetable in it.
Conclusion
These Best Maple Pumpkin Scones with Cinnamon Glaze are more than just a recipe to me. They are a reminder that sometimes the best things in life come from happy accidents. I have made them for Thanksgiving brunch, for sleepy Sunday mornings, and for neighbors who just needed a little pick-me-up. They always deliver that warm, cozy feeling that fall is all about. I hope you give them a try and make them your own. Maybe you will add a different spice, or swap the glaze for a maple one. That is the beauty of baking—it is meant to be played with. I would love to hear how yours turn out. Leave a comment below and tell me about your own kitchen accident that turned into a triumph. Share this recipe with a friend who loves pumpkin, and do not forget to pin it for later. Happy baking, my friend.
Frequently Asked Questions
Can I use fresh pumpkin instead of canned?
Yes, you can, but you need to make sure it is very dry. Fresh pumpkin has a lot of water, which can make your scones soggy. Roast the pumpkin, puree it, and then press it through a cheesecloth or a clean kitchen towel to remove as much liquid as possible. Canned pumpkin is more consistent and easier, so I usually stick with that.
Why did my scones turn out dry?
This usually happens from overmixing the dough or baking them too long. The pumpkin and cream should provide enough moisture, but if you overwork the gluten, the scones will be tough and dry. Also, make sure you are measuring your flour correctly. Spoon it into your measuring cup and level it off, rather than scooping it, which packs the flour and adds too much.
Can I make the dough ahead of time?
Absolutely. You can shape the scones, place them on the baking sheet, cover them tightly with plastic wrap, and refrigerate them overnight. Bake them straight from the fridge the next morning, adding a minute or two to the baking time. This is my favorite trick for hosting brunch without waking up at dawn.
How do I get a thicker glaze?
If your glaze is too runny, add more powdered sugar, one tablespoon at a time, until it reaches your desired consistency. If it is too thick, add a few drops of milk or cream. The glaze should be thick enough to hold its shape on the scone but thin enough to drizzle smoothly from a spoon.
Can I skip the glaze?
You can, but you will be missing out on the best part! The cinnamon glaze adds a sweet, spicy finish that complements the maple flavor perfectly. If you want a less sweet option, you can dust the warm scones with a mixture of cinnamon and powdered sugar instead, or simply serve them with a pat of butter.
Pin This Recipe!

Best Maple Pumpkin Scones with Easy Cinnamon Glaze

These tender, flaky scones are made with pumpkin, maple syrup, and warm spices, then topped with a crackly cinnamon glaze. They’re a happy accident turned signature fall treat, perfect for brunch or cozy gatherings.
- Prep Time: 15 minutes
- Cook Time: 16 minutes
- Total Time: 45 minutes
- Yield: 8 servings 1x
- Category: Breakfast, Brunch, Dessert
- Cuisine: American
Ingredients
- 2 cups (250g) all-purpose flour
- 1/3 cup (65g) granulated sugar
- 1 tablespoon baking powder
- 1 teaspoon ground cinnamon
- 1/2 teaspoon ground ginger
- 1/4 teaspoon ground nutmeg
- 1/4 teaspoon ground cloves
- 1/2 teaspoon salt
- 1/2 cup (113g) cold unsalted butter, cut into small cubes
- 1/2 cup (120g) canned pumpkin puree
- 1/4 cup (60ml) pure maple syrup
- 1/4 cup (60ml) heavy cream, plus extra for brushing
- 1 teaspoon vanilla extract
- For the cinnamon glaze:
- 1 cup (120g) powdered sugar
- 2–3 tablespoons milk or heavy cream
- 1/2 teaspoon ground cinnamon
- 1/4 teaspoon vanilla extract
Instructions
- Preheat oven to 400°F (200°C). Line a baking sheet with parchment paper.
- In a food processor, combine flour, sugar, baking powder, cinnamon, ginger, nutmeg, cloves, and salt. Pulse 4-5 times to combine.
- Scatter cold butter cubes over dry ingredients. Pulse 8-10 times in 1-second bursts until mixture resembles coarse meal with pea-sized butter pieces.
- In a small bowl, whisk together pumpkin puree, maple syrup, heavy cream, and vanilla extract until smooth.
- Pour wet mixture over dry ingredients in food processor. Pulse 5-6 times until dough starts to clump together (it will look shaggy).
- Turn dough out onto a lightly floured surface. Gently gather into a ball and pat into a 3/4-inch thick circle, about 8 inches in diameter. Do not knead.
- Using a bench scraper or sharp knife, cut circle into 8 equal triangles.
- Place scones on prepared baking sheet, spacing 2 inches apart. Brush tops and sides with extra heavy cream.
- Bake for 14-16 minutes until bottoms are golden brown and tops are lightly firm. Cool on baking sheet for 5 minutes, then transfer to a cooling rack.
- While scones cool, make glaze: whisk together powdered sugar, 2 tablespoons milk or cream, cinnamon, and vanilla. Add more milk a teaspoon at a time until thick but pourable.
- Drizzle glaze generously over cooled scones. Let set for 10 minutes before serving.
Notes
Keep butter and cream very cold for flaky scones. Do not overmix dough. For a gluten-free version, use a 1:1 gluten-free baking flour blend. For dairy-free, use cold coconut oil or plant-based butter and full-fat coconut cream. Scones can be frozen unbaked or baked (unglazed).
Nutrition
- Serving Size: 1 scone
- Calories: 320
- Sugar: 22
- Sodium: 280
- Fat: 16
- Saturated Fat: 10
- Carbohydrates: 42
- Fiber: 2
- Protein: 4
Keywords: pumpkin scones, maple scones, cinnamon glaze, fall baking, pumpkin recipe, scone recipe, easy scones


