I wasn’t expecting cooking advice from my accountant, but there I was, sorting through a pile of receipts in his cluttered office, listening to him describe exactly how to make a salted caramel apple crisp. It was the middle of tax season, I was stressed, and he suddenly looked up from my spreadsheets and said, “You know what you need? My wife’s apple crisp. It’s the only thing that gets me through April.” I laughed, thinking he was joking. But then he pulled a crumpled, butter-stained index card from his desk drawer and handed it over like it was a sacred artifact. “Don’t lose this,” he said. “And whatever you do, don’t skip the salted caramel.”
Honestly, I almost forgot about it. I shoved the card into my bag and didn’t look at it again until I was unpacking later that week. But when I finally read through the scribbled notes—handwritten in loopy cursive with little stars next to the “secret” ingredients—I realized this wasn’t just any apple crisp. This was the kind of dessert that makes people close their eyes after the first bite. The kind that gets requested for every potluck, every Thanksgiving, every random Tuesday dinner where you want to impress someone without spending all day in the kitchen.
I’ve tweaked it a little over the years (sorry, accountant guy), but the soul of the recipe is still his wife’s. The oat crumble is perfectly buttery and crisp, the apples stay tender without turning into mush, and the salted caramel—oh, the salted caramel—it weaves through every layer like a sweet, salty ribbon of pure magic. If you’ve been looking for a dessert that feels fancy but comes together with almost no stress, let me tell you, this is it. You might even get a recipe out of your dentist next. You never know where the good stuff comes from.
Why You’ll Love This Recipe
This salted caramel apple crisp isn’t just another fruit dessert. It’s the one I bring to every gathering, and it never fails to steal the show. Here’s why it’s become my go-to for hosting:
- Quick & Easy: Comes together in about 15 minutes of active prep. The oven does the rest. Perfect for when you’re juggling appetizers and a pre-dinner drink.
- Simple Ingredients: You probably already have apples, oats, butter, and sugar in your kitchen. The salted caramel uses pantry staples too—no fancy trips required.
- Perfect for Hosting: This dish is designed to impress a crowd. It scales beautifully for potlucks, dinner parties, or holiday feasts. Plus, you can assemble it hours ahead and bake it when guests arrive.
- Crowd-Pleaser: I’ve served this to kids, grandparents, and foodie friends. Everyone goes back for seconds. The salty-sweet combo is universally loved.
- Unbelievably Delicious: The oat crumble gets golden and crunchy, the apples soften into a jammy filling, and the salted caramel adds a depth that plain apple crisp just can’t touch.
What makes this recipe different from the rest? It’s the caramel. Most apple crisps rely on sugar and cinnamon alone. This one has a homemade salted caramel sauce that gets drizzled between the apple layers and over the top. It bakes into the fruit, creating a rich, buttery sauce that’s absolutely irresistible. I’ve tested this with store-bought caramel, and honestly, it’s not the same. The homemade version is worth the extra three minutes.
This recipe is the kind that makes you look like a hero at your own party. It’s comfort food reimagined—familiar enough to feel nostalgic, but elevated enough to feel special. And when you bring it to the table warm, with the caramel bubbling at the edges and the crumble glistening? People will think you spent hours. Let them wonder.
What Ingredients You Will Need
This recipe uses simple, wholesome ingredients to deliver bold flavor and satisfying texture without the fuss. Most of these are pantry staples, which means you’re probably already halfway there. Here’s everything you’ll need, broken down by component so you can prep like a pro.
For the Apple Filling:
- 6 medium apples (about 2.5 pounds or 1.1 kg), peeled, cored, and sliced into ¼-inch thick wedges. I recommend a mix of tart and sweet apples—Granny Smith and Honeycrisp are my favorites. The tart ones hold their shape, and the sweet ones break down into a natural sauce.
- ¼ cup (50 g) granulated sugar (adds sweetness and helps the apples release their juices)
- 2 tablespoons (15 g) all-purpose flour (thickens the filling so it’s not watery)
- 1 teaspoon ground cinnamon (warming, classic flavor)
- ¼ teaspoon ground nutmeg (optional, but I love the subtle depth it adds)
- 1 tablespoon (15 ml) lemon juice (keeps the apples from browning and brightens the flavor)
For the Oat Crumble Topping:
- 1 cup (90 g) old-fashioned rolled oats (not quick oats—they get mushy. Old-fashioned oats give the best texture)
- ¾ cup (95 g) all-purpose flour
- ½ cup (100 g) packed light brown sugar (adds moisture and a deeper caramel flavor)
- ¼ cup (50 g) granulated sugar
- ½ teaspoon salt (balances the sweetness)
- ½ cup (113 g) unsalted butter, melted (I use salted butter in a pinch and just reduce the added salt slightly)
For the Salted Caramel Sauce:
- ½ cup (100 g) granulated sugar
- 3 tablespoons (42 g) unsalted butter, cut into small pieces
- ¼ cup (60 ml) heavy cream, at room temperature (cold cream can cause the caramel to seize)
- ½ teaspoon flaky sea salt (like Maldon), plus more for finishing
Ingredient Selection Tips: For the best results, use firm apples that won’t turn to mush. I’ve tested this with Fuji and Gala, and while they work, they tend to be softer. If you can find them, Braeburn or Pink Lady apples are fantastic too. For the oats, I recommend Quaker Old-Fashioned or Bob’s Red Mill. For the caramel, use a good-quality heavy cream—it makes a difference in the silkiness.
Substitution Guidance: Gluten-free? Swap the all-purpose flour in both the filling and the crumble with a 1:1 gluten-free baking flour blend. Dairy-free? Use a vegan butter stick (not margarine) and full-fat coconut cream instead of heavy cream. The caramel will be slightly less rich, but still delicious. For a lower-sugar version, reduce the granulated sugar in the filling to 2 tablespoons and use a sugar substitute in the crumble, though the texture will change slightly.
Equipment Needed
You don’t need a fancy kitchen to make this salted caramel apple crisp. Here’s what I use every time:
- 9×13-inch baking dish (or a 3-quart casserole dish). A glass or ceramic dish works best—metal can sometimes react with the apples and caramel. I use a Pyrex dish and it’s never let me down.
- Large mixing bowls (one for the apples, one for the crumble)
- Small saucepan for the caramel (a heavy-bottomed one prevents burning)
- Chef’s knife and cutting board for prepping the apples
- Wooden spoon or silicone spatula for stirring the caramel
- Measuring cups and spoons
- Pastry brush or paper towel for buttering the dish
Budget-Friendly Options: If you don’t have a 9×13 dish, you can use a 10-inch cast-iron skillet. It actually looks gorgeous for serving, and the heat retention is fantastic. For the caramel, a regular non-stick saucepan works fine—just keep an eye on it because it heats up faster. And if you don’t have a pastry brush, just rub a pat of butter around the dish with your fingers. No one’s judging.
Maintenance Tip: After making caramel, soak your saucepan immediately with hot water. Cold water will harden the sugar into a rock-solid mess. Trust me, I learned this the hard way.
Preparation Method
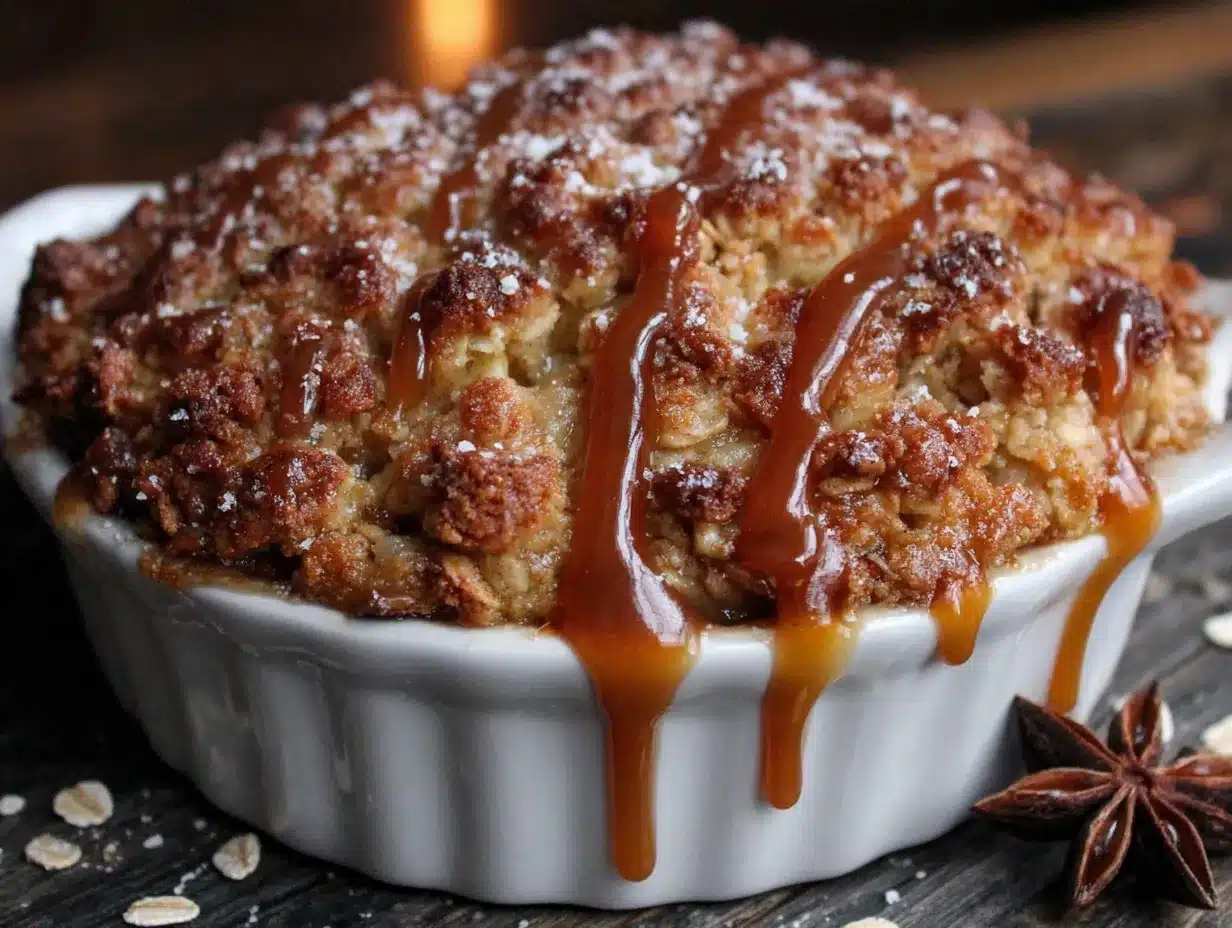
Let’s get cooking. This recipe comes together in about 15 minutes of active work, then the oven does the rest. Here’s exactly how to do it.
- Preheat your oven to 350°F (175°C). Butter a 9×13-inch baking dish generously. This prevents sticking and adds a little extra richness to the edges.
- Make the salted caramel sauce first. In a small, heavy-bottomed saucepan, spread ½ cup (100 g) granulated sugar in an even layer. Cook over medium heat, swirling the pan occasionally (don’t stir with a spoon—it can cause crystallization). The sugar will melt and turn amber. This takes about 5-7 minutes. Watch it carefully—it goes from golden to burnt in seconds. Once it’s a deep amber color, remove it from the heat and immediately whisk in the 3 tablespoons (42 g) butter, piece by piece. The mixture will bubble up—that’s normal. Slowly pour in the ¼ cup (60 ml) heavy cream while whisking constantly. The caramel will smooth out. Stir in ½ teaspoon flaky sea salt. Set aside to cool slightly. It will thicken as it cools.
- Prepare the apple filling. In a large bowl, combine the sliced apples, ¼ cup (50 g) granulated sugar, 2 tablespoons (15 g) flour, 1 teaspoon cinnamon, ¼ teaspoon nutmeg, and 1 tablespoon (15 ml) lemon juice. Toss everything together with your hands or a spatula until the apples are evenly coated. The flour will help thicken the juices as they bake.
- Make the oat crumble. In a separate bowl, whisk together the rolled oats, ¾ cup (95 g) flour, ½ cup (100 g) brown sugar, ¼ cup (50 g) granulated sugar, and ½ teaspoon salt. Pour the ½ cup (113 g) melted butter over the dry ingredients and stir with a fork until the mixture forms clumps. Don’t overmix—you want uneven crumbles for texture. Some small, some larger.
- Assemble the crisp. Spread the apple mixture evenly in the prepared baking dish. Drizzle about half of the salted caramel sauce over the apples—don’t stir it in, just let it pool in spots. Sprinkle the oat crumble evenly over the top. Don’t press it down; leave it loose so it bakes up crispy.
- Bake. Place the dish on a baking sheet (to catch any bubbly caramel drips) and bake for 40-45 minutes, until the filling is bubbling at the edges and the crumble is golden brown. If the top is browning too quickly after 30 minutes, tent it loosely with foil.
- Finish and rest. Remove from the oven and let it cool on a wire rack for at least 15 minutes. This allows the filling to set—if you dig in too soon, it’ll be runny. Drizzle the remaining caramel sauce over the top and sprinkle with a little extra flaky sea salt.
Sensory Cues: When the caramel is ready, it should smell nutty and sweet, like toasted sugar. The apples should look glossy and slightly sticky after tossing. When the crisp is done, you’ll see bubbles of caramel peeking through the crumble at the edges, and the kitchen will smell like a bakery.
Personal Tip: I always make extra caramel sauce. It keeps in the fridge for up to two weeks, and I’ve been known to drizzle it over ice cream, pancakes, or even straight into my coffee. No judgment.
Cooking Tips & Techniques
Over the years, I’ve made this salted caramel apple crisp more times than I can count. Here are the lessons I’ve learned—some the hard way.
Don’t skip the flour in the filling. The first time I made this, I thought, “It’s just fruit, how runny can it be?” Very runny, it turns out. The flour absorbs the apple juices and creates a thick, jammy sauce. Without it, you’ll end up with soup. If you’re gluten-free, use a 1:1 baking blend or even cornstarch (2 tablespoons instead of flour).
Slice your apples evenly. This is one of those details that matters more than you think. If some slices are thick and others are thin, they’ll cook unevenly. Aim for ¼-inch wedges. A mandoline slicer makes this fast, but a sharp knife and patience work just fine.
Watch your caramel like a hawk. Sugar can go from perfectly amber to burnt in about 30 seconds. I always have my butter and cream measured and ready before I start. The moment the sugar reaches a deep copper color, I pull it off the heat and add the butter immediately. If you see smoke, you’ve gone too far—start over. Burnt caramel tastes bitter and will ruin the dish.
Let it rest. I know it’s tempting to serve it straight from the oven, but that first 15-minute rest is crucial. The filling needs time to set, and the crumble needs to firm up. If you serve it too soon, it’ll be a sloppy mess. Use that time to whip some cream or scoop vanilla ice cream.
Multitasking strategy: While the caramel is cooling, prep the apples and crumble. By the time you’re done, the caramel will be thick enough to drizzle. This saves about 10 minutes of total prep time.
One failure I’ll never forget: I once used quick oats because I was out of old-fashioned. The topping turned into a dense, pasty layer—nothing like the crispy crumble I was hoping for. Old-fashioned oats are non-negotiable here. They have the structure to stay crunchy.
Variations & Adaptations
This recipe is wonderfully flexible. Here are some ways to make it your own, depending on who you’re feeding or what you have on hand.
Dietary Variations:
- Gluten-Free: Use a 1:1 gluten-free flour blend in both the filling and the crumble. Certified gluten-free oats are widely available (Bob’s Red Mill makes a great one). The texture is identical—I’ve tested it for a friend with celiac and she couldn’t tell the difference.
- Dairy-Free/Vegan: Swap the butter in the crumble and caramel with a high-quality vegan butter stick (I like Miyoko’s or Earth Balance). Use full-fat coconut cream instead of heavy cream in the caramel. The coconut flavor is very subtle—most people won’t notice.
- Lower Sugar: Reduce the granulated sugar in the filling to 2 tablespoons and use a monk fruit-based brown sugar substitute in the crumble. The caramel will still need real sugar to caramelize, but you can use a sugar-free caramel sauce if you prefer.
Flavor Twists:
- Pear and Ginger: Swap half the apples for ripe but firm Bosc pears. Add 1 teaspoon of grated fresh ginger to the apple mixture. It adds a lovely warmth that pairs beautifully with the caramel.
- Bourbon Caramel: Add 1 tablespoon of bourbon to the caramel sauce after you remove it from the heat. The alcohol mostly cooks off, leaving a smoky, vanilla-like depth. I’ve done this for adult dinner parties and it’s always a hit.
- Nutty Crumble: Add ½ cup (60 g) of chopped pecans or walnuts to the oat crumble. Toast them first in a dry pan for 3-4 minutes for extra flavor. The crunch is amazing.
Seasonal Adaptations: In the fall, use fresh-picked apples from a local orchard. In the summer, try a mix of peaches and apples—it’s bright and unexpected. In winter, add a handful of dried cranberries to the filling for a festive twist.
Personal Variation: I once made this with a mix of Granny Smith and a few leftover plums I had in the fridge. The plums broke down into a tart, jammy layer that was incredible. Don’t be afraid to experiment with what you have.
Serving & Storage Suggestions
This salted caramel apple crisp is best served warm, but it’s still delicious at room temperature. Here’s how to make it shine at your next gathering.
Serving Temperature and Presentation: Let the crisp rest for 15-20 minutes after baking, then serve it while it’s still warm. Spoon it into shallow bowls or onto small plates. Top each serving with a generous scoop of vanilla ice cream or a dollop of lightly sweetened whipped cream. Drizzle any remaining caramel sauce from the dish over the top. A final pinch of flaky sea salt right before serving makes the flavors pop.
What to Serve Alongside: This crisp is rich, so keep the sides simple. A cup of hot coffee or spiced apple cider is perfect. For a full dessert spread, pair it with a simple pound cake or a cheese board with sharp cheddar—apple and cheddar is a classic combo for a reason.
Storage Instructions: Cover the baking dish tightly with foil or plastic wrap and store in the refrigerator for up to 4 days. The crumble will soften over time, but the flavor actually deepens. To reheat, place individual portions in a 350°F (175°C) oven for 10-15 minutes, or microwave for 45-60 seconds. For a crispy topping, reheat in a toaster oven or air fryer at 350°F for 5 minutes.
Freezer Tips: You can freeze the unbaked crisp for up to 3 months. Assemble it in a freezer-safe dish (skip the glass—use a metal or aluminum pan), wrap it tightly in plastic wrap and foil, and freeze. To bake from frozen, add 15-20 minutes to the baking time and cover with foil for the first 30 minutes. You can also freeze the baked crisp for up to 2 months. Thaw overnight in the fridge and reheat as directed.
Flavor Development: Here’s a little secret—this crisp tastes even better the next day. The apples continue to absorb the caramel, and the flavors meld together. If you’re hosting, consider making it a day ahead and reheating before guests arrive. Less stress, more flavor.
Nutritional Information & Benefits
While this is definitely a treat, there are a few redeeming qualities worth noting. Here’s the approximate nutritional breakdown per serving (based on 8 servings):
- Calories: 420
- Fat: 18g
- Carbohydrates: 65g
- Fiber: 5g
- Sugar: 42g
- Protein: 4g
Health Benefits of Key Ingredients: Apples are packed with fiber and vitamin C, and they contain antioxidants that support heart health. Oats are a great source of soluble fiber, which can help lower cholesterol. The cinnamon in this recipe has anti-inflammatory properties and may help regulate blood sugar. And while the caramel is indulgent, the small amount of sea salt provides electrolytes.
Dietary Considerations: This recipe contains gluten and dairy. For gluten-free and dairy-free adaptations, see the Variations section above. It is nut-free as written, but if you add nuts, be sure to label it for guests with allergies.
Personal Wellness Perspective: I believe in enjoying dessert without guilt. This crisp is meant to be shared, savored, and celebrated. One serving with a scoop of ice cream is a beautiful way to end a meal. Balance is key—and this recipe is worth every bite.
Conclusion
This salted caramel apple crisp has become my signature dessert for a reason. It’s the dish I bring when I want to impress without stress, the recipe that gets scribbled down on napkins at parties, and the one my family requests for every holiday. The combination of tender apples, buttery oat crumble, and that silky, salty-sweet caramel is honestly unforgettable.
I hope you make this for your next gathering—whether it’s a casual weeknight dinner with friends or a full-blown Thanksgiving feast. Don’t be afraid to play with the variations, add your own twist, and make it yours. That’s the beauty of a recipe like this—it’s forgiving, flexible, and always delicious.
If you try this recipe, I’d love to hear about it. Leave a comment below and let me know how it turned out, or tag me in your photos on social media. Did you add bourbon? Swap in pears? Forget the caramel and regret it? (Please don’t skip the caramel.) Share your stories—I read every single one.
Now go preheat that oven. Your guests are waiting.
Frequently Asked Questions
Can I use pre-made caramel sauce instead of making it from scratch?
You can, but the texture and flavor won’t be quite the same. Homemade caramel is thicker, richer, and has a deeper flavor that holds up better during baking. If you’re short on time, look for a high-quality jarred caramel sauce (like Trader Joe’s or Stonewall Kitchen) and add a pinch of flaky sea salt.
What are the best apples for apple crisp?
A mix of tart and sweet apples works best. Granny Smith apples hold their shape well and provide a nice tang, while Honeycrisp or Braeburn add sweetness and break down slightly into a natural sauce. Avoid Red Delicious—they turn mushy and bland.
Can I make this ahead of time?
Absolutely. You can assemble the entire crisp (without baking) up to 24 hours in advance. Cover and refrigerate, then bake just before serving. You may need to add 5-10 minutes to the baking time since the dish will be cold. You can also bake it fully, let it cool, and reheat at 350°F for 15-20 minutes.
Why is my oat crumble not crispy?
There are a few possible reasons. First, make sure you’re using old-fashioned rolled oats, not quick oats. Second, don’t overmix the crumble—you want uneven clumps. Third, if your butter was too warm, the crumble can become dense. Use melted butter that’s slightly cooled. Finally, bake the crisp uncovered so the topping can dry out and crisp up.
How do I store leftovers and keep them fresh?
Cover the dish tightly with foil or plastic wrap and refrigerate for up to 4 days. The crumble will soften, but the flavor improves. To re-crisp the topping, reheat individual portions in a toaster oven or air fryer at 350°F for 5-7 minutes. You can also freeze the baked crisp for up to 2 months—just thaw in the fridge overnight before reheating.
Pin This Recipe!

Best Easy Salted Caramel Apple Crisp with Oat Crumble

This salted caramel apple crisp features tender apples, a buttery oat crumble, and a homemade salted caramel sauce that weaves through every layer. It’s quick to prepare, perfect for hosting, and universally loved.
- Prep Time: 15 minutes
- Cook Time: 45 minutes
- Total Time: 1 hour
- Yield: 8 servings 1x
- Category: Dessert
- Cuisine: American
Ingredients
- 6 medium apples (about 2.5 pounds or 1.1 kg), peeled, cored, and sliced into ¼-inch thick wedges
- ¼ cup (50 g) granulated sugar
- 2 tablespoons (15 g) all-purpose flour
- 1 teaspoon ground cinnamon
- ¼ teaspoon ground nutmeg
- 1 tablespoon (15 ml) lemon juice
- 1 cup (90 g) old-fashioned rolled oats
- ¾ cup (95 g) all-purpose flour
- ½ cup (100 g) packed light brown sugar
- ¼ cup (50 g) granulated sugar
- ½ teaspoon salt
- ½ cup (113 g) unsalted butter, melted
- ½ cup (100 g) granulated sugar (for caramel)
- 3 tablespoons (42 g) unsalted butter, cut into small pieces (for caramel)
- ¼ cup (60 ml) heavy cream, at room temperature (for caramel)
- ½ teaspoon flaky sea salt (for caramel), plus more for finishing
Instructions
- Preheat your oven to 350°F (175°C). Butter a 9×13-inch baking dish generously.
- Make the salted caramel sauce first. In a small, heavy-bottomed saucepan, spread ½ cup (100 g) granulated sugar in an even layer. Cook over medium heat, swirling the pan occasionally, until the sugar melts and turns a deep amber color (about 5-7 minutes). Remove from heat and immediately whisk in the 3 tablespoons (42 g) butter, piece by piece. Slowly pour in the ¼ cup (60 ml) heavy cream while whisking constantly. Stir in ½ teaspoon flaky sea salt. Set aside to cool slightly.
- Prepare the apple filling. In a large bowl, combine the sliced apples, ¼ cup (50 g) granulated sugar, 2 tablespoons (15 g) flour, 1 teaspoon cinnamon, ¼ teaspoon nutmeg, and 1 tablespoon (15 ml) lemon juice. Toss until the apples are evenly coated.
- Make the oat crumble. In a separate bowl, whisk together the rolled oats, ¾ cup (95 g) flour, ½ cup (100 g) brown sugar, ¼ cup (50 g) granulated sugar, and ½ teaspoon salt. Pour the ½ cup (113 g) melted butter over the dry ingredients and stir with a fork until the mixture forms clumps.
- Assemble the crisp. Spread the apple mixture evenly in the prepared baking dish. Drizzle about half of the salted caramel sauce over the apples. Sprinkle the oat crumble evenly over the top.
- Bake for 40-45 minutes, until the filling is bubbling at the edges and the crumble is golden brown. If the top is browning too quickly after 30 minutes, tent it loosely with foil.
- Remove from the oven and let it cool on a wire rack for at least 15 minutes. Drizzle the remaining caramel sauce over the top and sprinkle with a little extra flaky sea salt.
Notes
Don’t skip the flour in the filling—it thickens the juices. Slice apples evenly for even cooking. Watch the caramel carefully to avoid burning. Let the crisp rest for 15 minutes before serving to allow the filling to set. Old-fashioned oats are essential for a crispy topping.
Nutrition
- Serving Size: 1 serving
- Calories: 420
- Sugar: 42
- Sodium: 320
- Fat: 18
- Saturated Fat: 11
- Carbohydrates: 65
- Fiber: 5
- Protein: 4
Keywords: apple crisp, salted caramel, oat crumble, easy dessert, fall dessert, apple dessert


