It was 11:47 PM on a Tuesday that had already run me ragged. The kids were finally down, the dishwasher was humming its tired song, and I was standing in front of the open fridge with that specific kind of exhaustion that makes you consider just eating a handful of shredded cheese for dinner. I wanted chicken thighs—the kind with crispy skin and a sauce you want to drink with a spoon. But I didn’t have the energy for the usual multi-pan, multi-step production. I had a single cast-iron skillet, some butter that was getting soft on the counter, and a head of garlic that was starting to sprout just a little. Honestly, that sprouting garlic felt like a sign. I grabbed the chicken thighs from the freezer, ran them under cool water to loosen them up, and decided right then that this meal was happening in one pan or not at all. No flour dredging stations, no separate saucepans, no complicated deglazing rituals. Just butter, garlic, chicken, and a prayer that my family wouldn’t notice I was making it up as I went along. Maybe you’ve been there—staring at dinner ingredients like they’re a puzzle you’re too tired to solve, wishing for something that tastes like you tried but didn’t actually require trying. That night, those garlic butter chicken thighs turned out so good my husband asked for the recipe while still chewing. I told him it was a secret family recipe. The secret? I was too tired to make anything else.
Why You’ll Love This Recipe
Let me tell you why this easy one-pan garlic butter chicken thighs recipe has become my go-to for busy weeknights, last-minute dinner guests, and those nights when you just need a win in the kitchen. I’ve tested this method at least a dozen times, tweaking the butter-to-garlic ratio and the searing time until it was absolutely foolproof. Here’s what makes it special:
- One Pan, Minimal Mess: Everything happens in a single skillet. No piles of dirty dishes, no scrubbing baked-on gunk off multiple pans. Your future self will thank you.
- Pantry-Friendly Ingredients: You likely have butter, garlic, chicken thighs, and a few basic seasonings right now. No fancy grocery runs required.
- Family-Approved Flavor: The garlic butter sauce is rich but not overpowering, so even picky eaters go back for seconds. My kids call it “fancy chicken” and have no idea how simple it is.
- Ready in Under 40 Minutes: From fridge to table in about 35 minutes. That’s faster than takeout in my neighborhood.
- Leftovers That Reheat Beautifully: The thighs stay juicy and the sauce keeps its flavor. I’ve reheated these for lunch two days later and they were still incredible.
What makes this version different from every other garlic butter chicken recipe out there? It’s the technique of searing the skin until it’s shatteringly crisp, then finishing everything in the same pan with a garlic butter sauce that reduces into something almost like a glaze. No cream, no wine, no complicated reductions. Just butter doing what butter does best, with garlic as its trusty sidekick. This isn’t just another chicken recipe—it’s the one that makes you close your eyes after the first bite and forget about the hard day you had.
What Ingredients You Will Need
This recipe relies on simple, honest ingredients that work together to create something far greater than the sum of their parts. I’ve tested this with different brands and cuts, and here’s what I’ve found works best for that perfect balance of crispy skin and saucy goodness.
- Bone-in, skin-on chicken thighs (6-8 pieces, about 2.5-3 pounds total): The bone keeps the meat juicy during cooking, and the skin is non-negotiable for that crispy texture. I prefer thighs from Bell & Evans or a local farm when I can find them—better fat distribution for crisping.
- Unsalted butter (4 tablespoons, or 56 grams): Using unsalted lets you control the salt level. I’ve tried salted butter in a pinch, and it works, but you risk oversalting the sauce. Let the butter come to room temperature so it melts evenly in the pan.
- Fresh garlic cloves (6-8 cloves, smashed or thinly sliced): Don’t you dare use the pre-minced stuff in a jar. Fresh garlic is crucial here—it mellows and sweetens as it cooks in the butter, creating that nutty, aromatic flavor that defines this dish. Smash the cloves with the flat side of your knife for a more subtle garlic presence, or slice them thin if you want little garlic chips in every bite.
- Chicken broth (½ cup, or 120 ml): Use low-sodium broth so you can season to taste. The broth deglazes the pan and becomes the base of your sauce. In a pinch, water with a bouillon cube works, but real broth adds depth.
- Dried thyme (1 teaspoon): Thyme and chicken are a classic pairing. If you have fresh thyme, use 1 tablespoon of leaves stripped from the stems. I’ve also used dried rosemary in a pinch, but thyme is my preference for this dish.
- Paprika (1 teaspoon, sweet or smoked): Paprika adds color and a subtle sweetness. Smoked paprika gives a deeper, almost bacon-like flavor that I personally love. Regular sweet paprika is milder and lets the garlic shine more.
- Salt and black pepper (to taste): Season generously. Chicken thighs can handle a fair amount of salt, and pepper adds a gentle heat that balances the butter.
- Optional garnish: Fresh parsley (2 tablespoons, chopped): A sprinkle of green at the end makes the dish look restaurant-quality. It also adds a fresh, slightly peppery note that cuts through the richness.
For substitutions: If you’re dairy-free, you can use a high-quality vegan butter, though the flavor will be slightly different. Ghee also works beautifully and has a higher smoke point. If you only have boneless, skinless thighs, reduce the cooking time by about 5-7 minutes, but know you’ll miss that crispy skin magic.
Equipment Needed
You don’t need a professional kitchen to make this recipe shine. Here’s what I use, along with some budget-friendly alternatives I’ve tested.
- A large, heavy-bottomed skillet (12-inch, preferably cast iron or stainless steel): Cast iron holds heat beautifully and gives you that perfect sear. I use a Lodge 12-inch skillet that cost me about $25 and has lasted years. If you don’t have cast iron, a heavy stainless steel pan works—just make sure it’s oven-safe if you’re finishing in the oven. Avoid nonstick pans for this recipe; they don’t get hot enough for a proper sear.
- Tongs: For flipping the chicken without piercing the skin. A good pair of spring-loaded tongs is worth the investment. I’ve used cheap ones that bent after a month, so spend a few extra dollars here.
- Meat thermometer: This is non-negotiable for perfectly cooked chicken. An instant-read thermometer takes the guesswork out. I’ve overcooked enough chicken to learn this lesson the hard way.
- Cutting board and chef’s knife: For smashing and slicing garlic. A sharp knife makes this step effortless.
- Measuring spoons and liquid measuring cup: For accuracy. I’ve eyeballed the broth before and ended up with soup instead of sauce.
Preparation Method
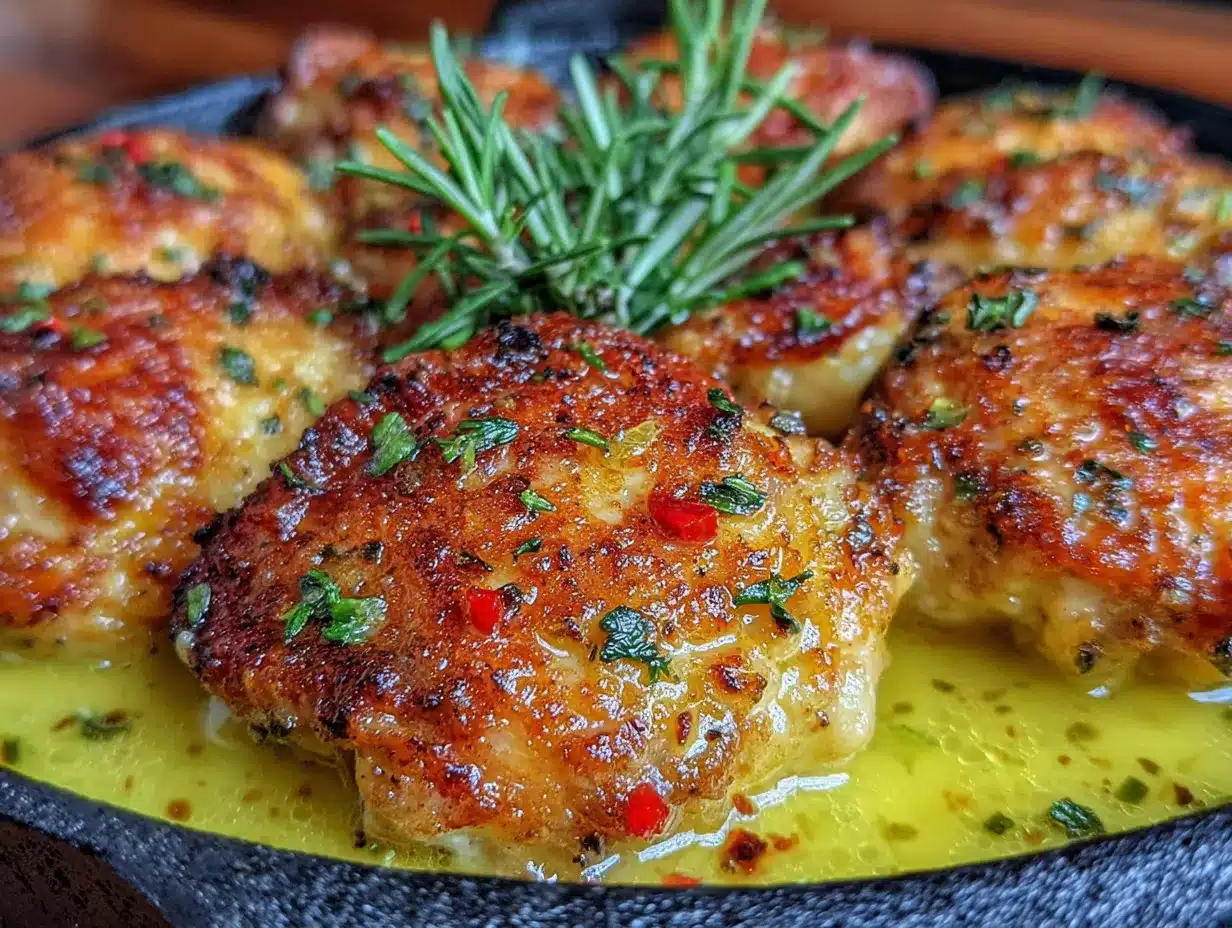
Here’s where the magic happens. Follow these steps, and you’ll have restaurant-quality garlic butter chicken thighs on your table in about 35 minutes.
- Prep the chicken (5 minutes): Pat the chicken thighs dry with paper towels. This is crucial—wet skin won’t crisp up. Season both sides generously with salt, pepper, paprika, and dried thyme. Don’t be shy with the seasoning; some will fall off in the pan. Let the chicken sit at room temperature for 10 minutes while you prep the garlic. This helps it cook more evenly.
- Heat the skillet (2 minutes): Place your skillet over medium-high heat and let it get hot. Add 2 tablespoons of the butter. It should sizzle and foam immediately when it hits the pan. If it browns too quickly, your heat is too high—adjust accordingly.
- Sear the chicken (10-12 minutes): Place the chicken thighs skin-side down in the hot butter. Don’t crowd the pan; work in batches if needed. Let them cook undisturbed for 5-6 minutes. I know it’s tempting to peek, but leave them alone. The skin will release naturally when it’s properly browned. Flip the thighs using tongs and cook for another 4-5 minutes on the other side. The chicken should be deep golden brown with a crispy crust. Transfer the thighs to a plate and set aside.
- Sauté the garlic (1 minute): Reduce the heat to medium-low. Add the remaining 2 tablespoons of butter to the pan. Once melted, add the smashed or sliced garlic. Cook for about 30-60 seconds, stirring constantly, until fragrant. Do not let the garlic burn—it will turn bitter and ruin the sauce. If it starts browning too fast, remove the pan from the heat briefly.
- Deglaze and make the sauce (2 minutes): Pour in the chicken broth, scraping up any browned bits from the bottom of the pan with a wooden spoon. Those bits are pure flavor. Let the broth simmer for 1-2 minutes, reducing slightly. The sauce should look glossy and smell incredible at this point.
- Return the chicken to the pan (5-7 minutes): Nestle the chicken thighs back into the pan, skin-side up. Spoon some of the garlic butter sauce over the tops. Let everything simmer together for 5-7 minutes, basting occasionally, until the chicken is cooked through and the sauce has thickened slightly. The internal temperature should reach 165°F (74°C) when measured at the thickest part of the thigh, away from the bone.
- Rest and serve (5 minutes): Remove the pan from the heat. Let the chicken rest for 5 minutes—this allows the juices to redistribute. Sprinkle with fresh parsley if using, and serve directly from the pan for maximum drama and minimum cleanup.
Cooking Tips & Techniques
I’ve made this recipe more times than I can count, and I’ve learned a few things the hard way. Here’s what I wish someone had told me the first time.
Patience is everything with the sear. The biggest mistake I see is moving the chicken too soon. That skin needs 5-6 minutes of undisturbed contact with hot butter to develop that deep golden crust. I once flipped a thigh after 3 minutes because I got nervous, and the skin tore right off. It still tasted good, but it wasn’t the same. Trust the process and let the pan do its work.
Watch your garlic like a hawk. Garlic goes from fragrant to burnt in about 15 seconds. The moment it starts turning golden, you need to add the broth immediately. I’ve ruined more than a few batches by getting distracted by a kid’s question or a notification on my phone. Set a timer for 45 seconds when you add the garlic to the butter.
Use a meat thermometer. I know, I know, everyone says this. But I’ve been cooking for 15 years and I still misjudge doneness by sight sometimes. A $10 instant-read thermometer will save you from serving dry, overcooked chicken. Aim for 165°F (74°C), but remember the temperature will rise a few degrees while resting.
Don’t skip the resting step. I know you’re hungry, and the smell is driving you crazy. But those 5 minutes of resting are when the juices redistribute throughout the meat. Cut into a thigh too soon, and you’ll watch all that moisture pool on your plate instead of staying in the chicken.
Variations & Adaptations
This recipe is wonderfully flexible. Here are some variations I’ve tried and loved.
- Lemon Herb Version: Add the zest of one lemon and 2 tablespoons of fresh lemon juice to the sauce along with the broth. Swap the dried thyme for a mix of fresh rosemary and oregano. The brightness cuts through the butter richness beautifully. I made this version for a summer dinner party and got three requests for the recipe.
- Spicy Cajun Twist: Replace the paprika with 1-2 teaspoons of Cajun seasoning. Add a pinch of cayenne pepper to the butter when you sauté the garlic. The heat pairs surprisingly well with the creamy garlic butter. My husband, who loves spicy food, requests this version every time.
- Mushroom and Thyme: After removing the seared chicken, add 8 ounces of sliced cremini mushrooms to the pan. Sauté until golden, then add the garlic and proceed as usual. The mushrooms soak up the garlic butter sauce and become little flavor bombs. This turns the dish into a one-pan meal that feels more substantial.
- Dairy-Free Adaptation: Use a high-quality vegan butter or ghee. I’ve tested this with Miyoko’s European Style Cultured Vegan Butter, and while the sauce isn’t as rich, it’s still very good. Add an extra tablespoon of olive oil to help with browning.
- Oven-Finished Method: After searing the chicken and making the sauce, transfer the entire skillet to a 375°F (190°C) oven for 15-20 minutes instead of simmering on the stovetop. This gives you more even cooking and allows you to walk away. Just make sure your skillet is oven-safe (cast iron is perfect for this).
Serving & Storage Suggestions
These garlic butter chicken thighs are versatile enough for a casual Tuesday dinner or a special occasion. Here’s how I serve and store them.
Serving: I love serving these thighs directly from the skillet—it keeps them warm and looks impressive on the table. Spoon the garlic butter sauce over each piece generously. For sides, I recommend something that soaks up that sauce: crusty bread, mashed potatoes, rice, or egg noodles. A simple green salad with a lemony vinaigrette balances the richness. Roasted vegetables like asparagus or green beans also work beautifully. If you’re serving a crowd, double the recipe and use two skillets.
Storage: Let any leftovers cool completely before storing. Place the chicken thighs in an airtight container and pour any remaining sauce over them. They’ll keep in the refrigerator for up to 4 days. The flavors actually deepen overnight, making leftovers almost better than the first meal.
Reheating: The best way to reheat is in a skillet over medium-low heat with a splash of chicken broth or water to loosen the sauce. Cover the pan and let the chicken warm through for 5-7 minutes. The skin won’t be as crispy as day one, but the meat stays juicy. You can also reheat in a 350°F (175°C) oven for 10-12 minutes. Avoid the microwave—it makes the skin rubbery and the sauce separates.
Freezing: These freeze well for up to 3 months. Place cooled chicken and sauce in a freezer-safe container or zip-top bag. Thaw overnight in the refrigerator before reheating. The texture of the sauce may change slightly upon thawing, but a quick whisk while reheating brings it back together.
Nutritional Information & Benefits
Here’s the nutritional breakdown per serving (based on 2 thighs with sauce). Keep in mind these are estimates and will vary based on exact ingredients and portion sizes.
- Calories: Approximately 450-500 per serving
- Protein: 35-40 grams
- Fat: 32-36 grams (mostly from butter and chicken skin)
- Carbohydrates: 2-4 grams (minimal, from garlic and broth)
- Sodium: 600-800 mg (varies based on broth and added salt)
Chicken thighs are rich in protein, B vitamins, and selenium, which supports immune function. The garlic in this recipe contains allicin, a compound linked to heart health and immune support. While this dish is higher in fat than chicken breasts, the fat from chicken thighs and butter provides satiety and helps absorb fat-soluble vitamins. If you’re watching your fat intake, you can remove the skin after cooking (though you’ll miss that crispy texture). This recipe is naturally low-carb and gluten-free, making it suitable for keto and paleo diets. As with any rich dish, portion control is key—two thighs per serving is plenty for most adults.
Conclusion
This easy one-pan garlic butter chicken thighs recipe has become a staple in my kitchen for good reason. It’s the kind of meal that feels special enough for company but simple enough for a Tuesday night when you’re running on empty. The crispy skin, the rich garlic butter sauce, the way it all comes together in one pan with minimal cleanup—it’s everything I want in a family dinner. I love that I can customize it with different herbs or a splash of lemon, and it always delivers. Honestly, I think you’re going to love this one. It’s forgiving, it’s delicious, and it’s proof that you don’t need a dozen ingredients or complicated techniques to make something memorable. Give it a try this week, and let me know how it turns out. Did your kids ask for seconds? Did you add your own twist? Drop a comment below—I read every single one, and I love hearing about your kitchen wins. And if you loved this recipe, share it with a friend who needs an easy dinner win. Happy cooking!
Frequently Asked Questions
Can I use chicken breasts instead of thighs?
Yes, but you’ll need to adjust the cooking time. Boneless, skinless chicken breasts cook faster—about 4-5 minutes per side for searing, then 5-7 minutes simmering in the sauce. Use a meat thermometer to ensure they reach 165°F (74°C) without drying out. Bone-in breasts work too, but they’ll need closer to the same cooking time as thighs.
How do I prevent the garlic from burning?
Lower the heat to medium-low before adding the garlic, and keep it moving in the butter. If the pan is too hot, the garlic will burn within seconds. I like to smash my garlic cloves instead of mincing them when I’m worried about burning—the larger pieces are more forgiving. Have your broth ready to pour in as soon as the garlic becomes fragrant.
Can I make this recipe ahead of time?
Absolutely. You can sear the chicken and make the sauce up to 2 days in advance. Store the chicken and sauce separately in the refrigerator. When you’re ready to serve, reheat the sauce in the skillet, add the chicken, and simmer until warmed through. The skin won’t be as crispy, but the flavor will be just as good. For meal prep, I often double the recipe and freeze half.
What if I don’t have a cast-iron skillet?
No problem. A heavy stainless steel skillet works great—just make sure it’s oven-safe if you plan to finish the dish in the oven. Avoid nonstick pans because they don’t get hot enough for a proper sear. If that’s all you have, increase the heat slightly and expect a lighter crust. You can also use a Dutch oven, which works beautifully for this recipe.
How do I get the skin extra crispy?
Three things matter: dry the skin thoroughly with paper towels before seasoning, don’t move the chicken for the first 5-6 minutes of searing, and use enough butter to coat the pan. I’ve also found that pressing down gently on the thighs with a spatula during the first minute of searing helps ensure even contact with the pan. If the skin still isn’t as crispy as you’d like, finish the chicken under the broiler for 1-2 minutes after cooking.
Pin This Recipe!
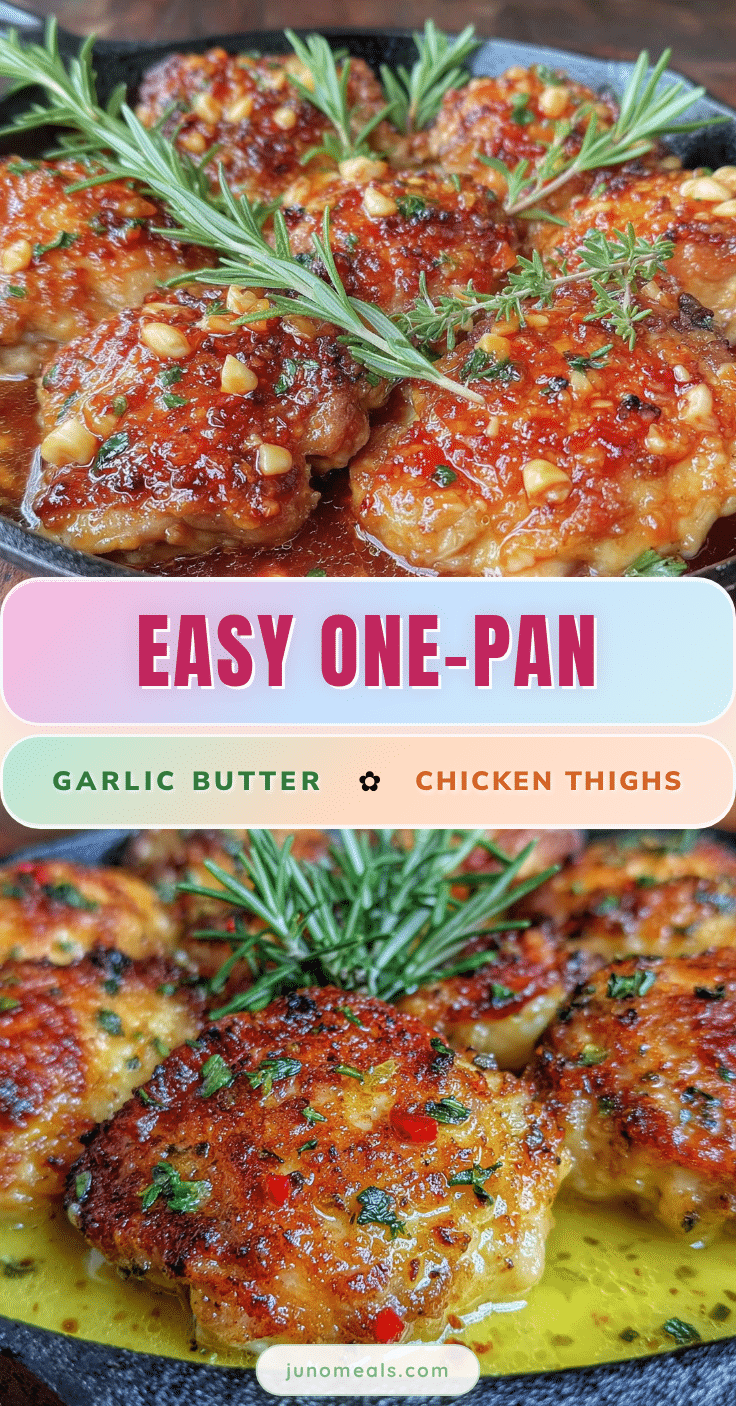
Best Easy One-Pan Garlic Butter Chicken Thighs Recipe

Crispy-skinned chicken thighs cooked in a rich garlic butter sauce, all in one pan. Ready in under 40 minutes, this family-friendly recipe is perfect for busy weeknights and uses simple pantry ingredients.
- Prep Time: 15 minutes
- Cook Time: 20 minutes
- Total Time: 35 minutes
- Yield: 4 servings 1x
- Category: Main Course
- Cuisine: American
Ingredients
- 6–8 bone-in, skin-on chicken thighs (about 2.5–3 pounds total)
- 4 tablespoons unsalted butter (56 grams), room temperature
- 6–8 fresh garlic cloves, smashed or thinly sliced
- ½ cup low-sodium chicken broth (120 ml)
- 1 teaspoon dried thyme
- 1 teaspoon paprika (sweet or smoked)
- Salt and black pepper to taste
- 2 tablespoons fresh parsley, chopped (optional garnish)
Instructions
- Prep the chicken: Pat chicken thighs dry with paper towels. Season both sides generously with salt, pepper, paprika, and dried thyme. Let sit at room temperature for 10 minutes.
- Heat the skillet: Place a large heavy-bottomed skillet (12-inch, cast iron or stainless steel) over medium-high heat. Add 2 tablespoons of butter. It should sizzle and foam immediately.
- Sear the chicken: Place chicken thighs skin-side down in the hot butter. Cook undisturbed for 5-6 minutes until deep golden brown. Flip and cook for another 4-5 minutes. Transfer to a plate and set aside.
- Sauté the garlic: Reduce heat to medium-low. Add remaining 2 tablespoons of butter. Once melted, add garlic and cook for 30-60 seconds, stirring constantly, until fragrant. Do not let it burn.
- Deglaze and make the sauce: Pour in chicken broth, scraping up browned bits from the bottom of the pan. Let simmer for 1-2 minutes until slightly reduced.
- Return the chicken: Nestle chicken thighs back into the pan, skin-side up. Spoon sauce over tops. Simmer for 5-7 minutes, basting occasionally, until internal temperature reaches 165°F (74°C).
- Rest and serve: Remove from heat. Let rest for 5 minutes. Sprinkle with fresh parsley if using. Serve directly from the pan.
Notes
Pat chicken dry thoroughly for crispy skin. Watch garlic carefully to avoid burning. Use a meat thermometer for perfect doneness. Let chicken rest 5 minutes before serving. Leftovers keep in refrigerator for up to 4 days. Reheat in a skillet with a splash of broth for best results.
Nutrition
- Serving Size: 2 chicken thighs wit
- Calories: 475
- Sugar: 1
- Sodium: 700
- Fat: 34
- Saturated Fat: 14
- Carbohydrates: 3
- Protein: 38
Keywords: garlic butter chicken thighs, one-pan chicken, easy chicken recipe, crispy chicken thighs, weeknight dinner, cast iron skillet chicken


