The neighborhood cookie swap was in three days and I’d completely forgotten. Everyone else would be bringing those elaborate, multi-day projects—you know the ones. Layered things with homemade marshmallows, French macarons that required a kitchen scale and a prayer, cookies that looked like they belonged in a bakery window. I had a half-stick of butter, a bag of pecans from last Christmas, and a maple syrup bottle that was dangerously close to empty. Honestly, I almost just bought a tray of store-bought cookies and called it a day. But then my eyes landed on that sad little bag of pecans, and a memory clicked.
My aunt used to make these pecan pie bars that everyone fought over at Thanksgiving. She’d pass the tray around and they’d disappear in minutes. I never got her recipe—she was one of those cooks who measured everything “by feel”—but I remembered the brown butter smell that filled her kitchen. That nutty, almost caramel aroma. So I grabbed that butter, threw it in a pan, and decided to wing it. I figured, worst case, I’d show up with something edible and apologize a lot.
Let me tell you, I was scraping burnt butter off the stove within ten minutes. My kitchen looked like a flour bomb went off. I accidentally used salted butter for the crust because I grabbed the wrong stick from the fridge. It was a mess. I almost gave up twice. But somehow, when those bars came out of the oven—golden, bubbling, smelling like a warm hug—I knew I had something. I cut them into squares, wrapped them in a napkin (fancy, I know), and brought them to the swap feeling like a fraud.
They won. Not just “people liked them” won. I mean, people were asking for the recipe, taking photos, and one woman offered to trade her entire batch of salted caramel brownies for just two more squares. I stood there, flour still in my hair, completely shocked. That’s the thing about this recipe—it doesn’t try to be fancy. It’s just honest, buttery, maple-y goodness that hits every single note a pecan pie lover craves. And now it’s the only thing I bring to gatherings. Maybe you’ve been there—showing up empty-handed and panicking, only to accidentally create something that becomes your signature dish. That’s this bar.
Why You’ll Love These Maple Pecan Pie Bars
Let me be real with you for a second. I’ve tested this recipe at least seven times since that fateful cookie swap. I’ve made it for brunch, for Thanksgiving, for random Tuesday nights when I needed dessert therapy. And every single time, it delivers. Here’s why these bars are different from everything else out there.
- That Brown Butter Crust : The crust isn’t just a vessel for the filling. It’s a buttery, nutty, slightly crispy shortbread that tastes like it took hours of effort. Spoiler: it takes ten minutes of mixing and ten minutes of baking. The brown butter adds this deep, almost toffee-like flavor that plain butter just can’t touch.
- Maple Syrup Instead of Corn Syrup : Most pecan pie recipes rely on corn syrup, which is fine but a little one-note. Maple syrup brings complexity—a woodsy, warm sweetness that pairs perfectly with the toasted pecans. It’s not cloying. It’s sophisticated. And it makes you look like you know what you’re doing.
- No Fussy Pie Crust : I love a good pie, but rolling out dough for a gathering is stressful. These bars have a press-in crust. That’s it. Press, bake, pour, bake again. Less mess, less stress, same incredible result.
- Perfect for Hosting : You can make them a day ahead. Actually, they taste better the next day. So while your guests are oohing and aahing over your “effort,” you’ll be sipping wine in clean jeans. That’s the dream, right?
- Scales Beautifully : Need to feed twenty people? Double the recipe and use a half-sheet pan. Need to feed four? Halve it and use an 8×8 pan. The ratios hold up perfectly, which I can’t say for every dessert.
- Always Gets That Reaction : You know the one. Someone takes a bite, closes their eyes for a second, and lets out a little “mmm.” That’s the sound of a recipe that works. These bars produce that sound every single time.
I’ve brought these to potlucks where people brought gourmet cheesecakes and handmade truffles. My simple little bars still disappear first. It’s not about being fancy. It’s about getting the flavors right. And these? They’re right.
What Ingredients You Will Need
This recipe uses straightforward ingredients, but a few key choices make all the difference. Let me walk you through each one so you know exactly what to look for at the store.
For the Brown Butter Shortbread Crust
- 1 cup (226g) unsalted butter — I use Kerrygold or Challenge. The quality matters here because the butter is the star of the crust. You’ll be browning it, so you want a good, fresh butter with low moisture content. Salted butter works in a pinch, but skip the extra salt in the recipe if you go that route.
- 1/2 cup (100g) granulated sugar — Regular white sugar keeps the crust crisp and tender. Don’t substitute brown sugar here; it adds too much moisture and the crust won’t hold together as well.
- 2 cups (250g) all-purpose flour — Spoon and level your flour. Scooping directly from the bag packs in too much flour and makes the crust dry and crumbly. I learned this the hard way after one particularly sad, sandy crust.
- 1/4 teaspoon salt — Just a pinch to balance the sweetness. If you used salted butter, omit this entirely.
For the Maple Pecan Filling
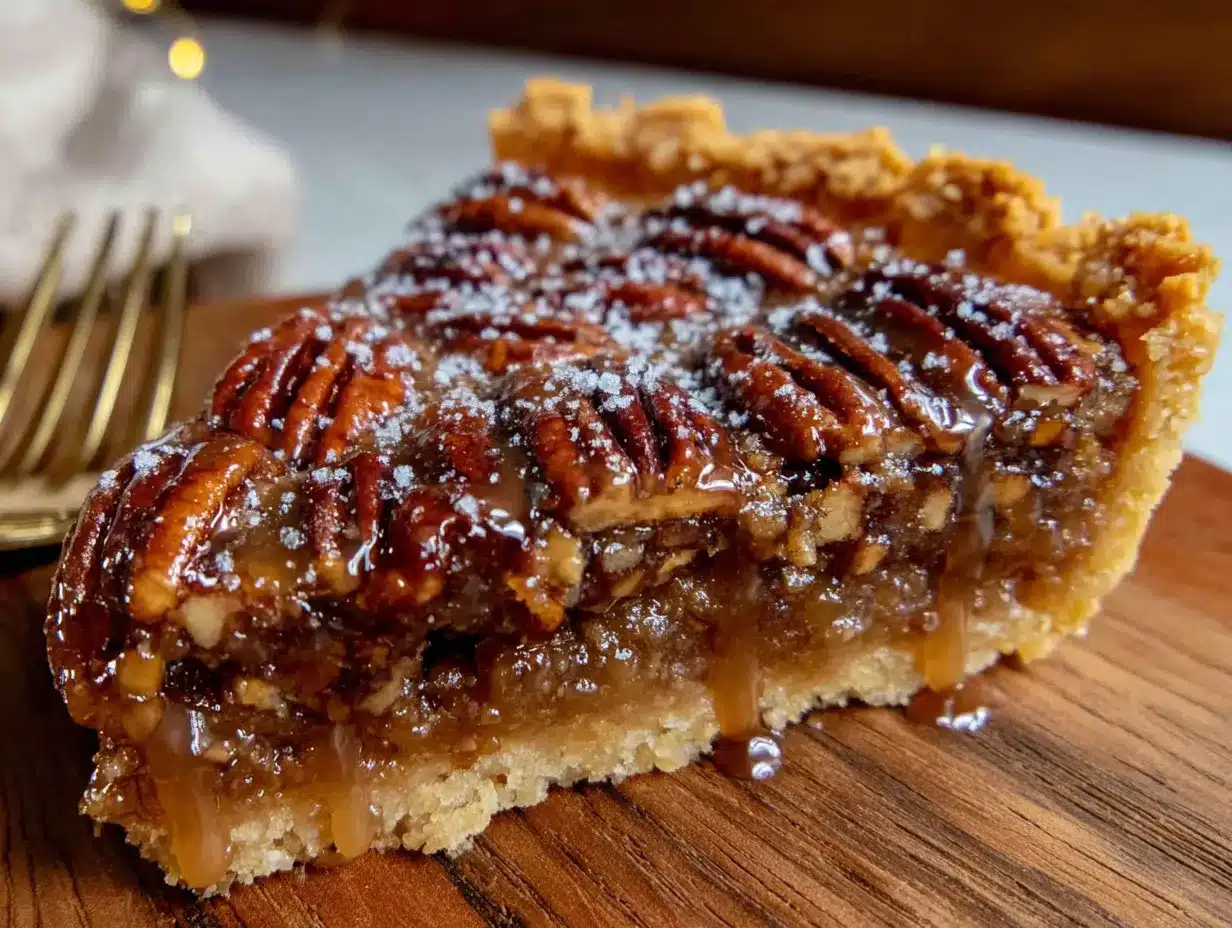
- 3 large eggs — Room temperature is important here. Cold eggs seize up the melted butter and create a lumpy filling. Leave them on the counter for 30 minutes, or place them in a bowl of warm water for 5 minutes in a pinch.
- 1 cup (240ml) pure maple syrup — Do not use pancake syrup. I repeat, do not use pancake syrup. You want real maple syrup—Grade A Dark Amber is my preference for its robust flavor. It costs more, but this is where the recipe gets its soul. I’ve tried it with the cheap stuff and it tastes flat and artificial.
- 1/2 cup (100g) packed light brown sugar — Adds depth and a hint of molasses that plays beautifully with the maple. Dark brown sugar works too, but it’ll push the flavor slightly more toward caramel.
- 1/4 cup (56g) unsalted butter, melted — You’ll brown this separately from the crust butter. Yes, you’re browning butter twice. Trust me, it’s worth it.
- 1 teaspoon vanilla extract — Pure vanilla, not imitation. I like Nielsen-Massey, but any good brand works. The vanilla rounds out the maple flavor and keeps it from being too one-dimensional.
- 1 tablespoon all-purpose flour — This helps set the filling so it’s sliceable but still soft and gooey. Don’t skip it or you’ll end up with a runny mess.
- 1/2 teaspoon salt — Salt is crucial here. It cuts the sweetness and makes the maple flavor pop. I use fine sea salt.
- 2 cups (200g) pecan halves — Toast them first. I know it’s an extra step, but raw pecans in the filling stay a little soft and chewy. Toasted pecans stay crunchy and taste infinitely nuttier. Spread them on a baking sheet at 350°F for 6-8 minutes, watching carefully because they burn fast. Let them cool completely before using.
Substitution Notes: For a gluten-free version, use a 1:1 gluten-free flour blend in both the crust and the filling. I’ve had good results with Bob’s Red Mill. For a dairy-free option, use vegan butter in both the crust and filling—just know the crust will be slightly less crisp. And if you’re out of maple syrup, honey is an acceptable substitute, but the flavor profile shifts significantly. It’s still delicious, just different.
Equipment Needed
You don’t need a fancy kitchen for these bars, but a few specific tools make the process smoother. Here’s what I use every time.
- 9×13-inch baking pan — Metal pans work best for even browning. Glass pans can cause the crust to overbake on the bottom while the filling stays undercooked. I use a Nordic Ware aluminum pan and it’s perfect.
- Parchment paper — Non-negotiable. Line your pan with parchment, leaving overhang on two sides. This lets you lift the entire slab of bars out cleanly for easy cutting. No scraping, no stuck-on crust.
- Light-colored saucepan or skillet — For browning the butter. A light-colored pan lets you see the color change clearly. Dark pans make it hard to tell when the butter is properly browned versus burnt. Trust me on this one.
- Mixing bowls — One medium for the crust, one large for the filling. Nothing fancy.
- Whisk — For the filling. A fork works in a pinch, but a whisk incorporates the eggs more smoothly.
- Pastry blender or fork — For cutting butter into the crust flour. A food processor works too, but I find it overworks the dough. I prefer doing it by hand—it’s more controlled and less cleanup.
- Cooling rack — Essential for letting the bars cool completely before cutting. Warm bars are a gooey disaster. Patience is key here.
- Sharp knife — A chef’s knife or a long serrated knife works best. Wipe the blade clean between cuts for neat, clean edges.
If you don’t have a pastry blender, use two butter knives to cut the butter into the flour. It takes a little longer but works just as well. And if you don’t have a 9×13 pan, an 8×8 pan works for a half-recipe—just adjust the baking times slightly.
Preparation Method
Alright, let’s make these bars. I’ll walk you through each step with the exact timing and visual cues so you know exactly what to look for.
Step 1: Brown the Butter for the Crust
Place 1 cup (226g) unsalted butter in a light-colored saucepan over medium heat. Stir frequently with a rubber spatula or wooden spoon. The butter will melt, then foam, then start to crackle and pop. That’s the water evaporating. Keep stirring. After about 5-7 minutes, the foam will subside and you’ll see golden brown specks forming at the bottom of the pan. The butter will smell nutty and amazing. As soon as it turns a light amber color and the specks are a deep golden brown, remove it from the heat immediately. Pour it into a heatproof bowl to stop the cooking. Do not walk away from browning butter—it goes from perfect to burnt in about 30 seconds. I’ve ruined three batches this way and it’s heartbreaking every time.
Step 2: Make the Crust
Preheat your oven to 350°F (175°C). Line your 9×13-inch pan with parchment paper, leaving overhang on the two long sides. In a medium bowl, whisk together 2 cups (250g) all-purpose flour, 1/2 cup (100g) granulated sugar, and 1/4 teaspoon salt. Pour the warm browned butter over the flour mixture. Stir with a fork until the mixture looks like wet sand and holds together when you squeeze it. Don’t overmix—you just want it evenly moistened. Press the mixture firmly into the bottom of the prepared pan. Use the bottom of a measuring cup to press it down evenly. Bake for 18-20 minutes, until the edges are lightly golden and the center looks set. The crust will still be slightly soft but will firm up as it cools. Set it on a cooling rack while you make the filling.
Step 3: Brown the Butter for the Filling
In that same saucepan (less cleanup!), melt 1/4 cup (56g) unsalted butter over medium heat. Repeat the browning process—stir, watch for the foam and the golden specks. This smaller amount of butter browns faster, about 3-4 minutes. Watch it closely. Pour it into a small bowl and let it cool for a minute or two while you prepare the other ingredients.
Step 4: Make the Maple Filling
In a large bowl, whisk together 3 large eggs until they’re light and frothy, about 30 seconds. Add 1 cup (240ml) pure maple syrup, 1/2 cup (100g) packed light brown sugar, the browned butter from step 3, and 1 teaspoon vanilla extract. Whisk until smooth and well combined. Sprinkle in 1 tablespoon all-purpose flour and 1/2 teaspoon salt. Whisk again until no lumps remain. The mixture should be smooth and slightly thick, like a thin caramel sauce.
Step 5: Assemble and Bake
Spread the toasted pecans evenly over the warm crust. Pour the maple filling over the pecans, making sure it covers them completely. Some pecans will float to the top—that’s fine. Gently tilt the pan to distribute the filling evenly if needed. Place the pan in the oven and bake for 28-32 minutes. The filling should be set around the edges but still slightly jiggly in the center. It will continue to set as it cools. If the top is browning too quickly after 20 minutes, tent loosely with foil. Let the bars cool completely in the pan on a wire rack—this takes about 2 hours. Do not rush this step. Warm bars will fall apart when you cut them. Once cool, refrigerate for at least 1 hour before cutting for the cleanest slices. Lift the bars out using the parchment overhang, place on a cutting board, and cut into squares with a sharp knife. Wipe the knife clean between cuts.
Cooking Tips & Techniques
I’ve made this recipe enough times to know exactly where things can go wrong. Here’s what I’ve learned, sometimes the hard way.
Don’t skip the browning. I know it’s an extra step, but it’s what makes this crust unforgettable. The nutty, caramelized butter flavor is the backbone of the entire dessert. If you’re short on time, you can use melted butter, but honestly, the bars won’t be the same. The brown butter is the secret weapon here.
Watch your oven temperature. Ovens run hot or cold more often than you’d think. I had an oven that ran 25 degrees hot for two years before I figured it out. Use an oven thermometer if you have one. If the crust is browning too fast, lower the temperature by 10-15 degrees. If the filling isn’t setting after 35 minutes, your oven might run cool. Adjust accordingly next time.
Toast your pecans. I mentioned this earlier, but it bears repeating. Raw pecans release moisture during baking, which can make your filling watery and your pecans soggy. Toasted pecans stay crunchy and taste exponentially better. Spread them on a baking sheet and toast at 350°F for 6-8 minutes, shaking the pan halfway through. You’ll smell them when they’re ready. Let them cool completely before using.
Let the bars cool completely. This is the hardest part, I know. The smell filling your kitchen is intoxicating, and every fiber of your being wants to cut into that warm, gooey pan. But warm bars are a disaster. The filling hasn’t fully set, and the crust is still fragile. Let them cool on the counter for 2 hours, then refrigerate for at least 1 hour. I’ve ruined a beautiful batch by cutting too early, and the result was a delicious but ugly mess. Learn from my impatience.
Use a sharp knife. A dull knife drags through the filling and pulls the crust apart. I use a long chef’s knife and wipe it clean with a damp paper towel between each cut. This gives you those clean, bakery-style edges that make people think you’re a professional.
Make them ahead. These bars actually taste better the next day. The flavors meld together, the crust softens slightly (in a good way), and the maple flavor becomes more pronounced. I often make them two days before an event. They store beautifully in the fridge, covered tightly. Just bring them to room temperature before serving for the best texture.
Variations & Adaptations
One of the best things about this recipe is how flexible it is. Here are some variations I’ve tried and loved.
Chocolate Maple Pecan Bars
Melt 1/2 cup (90g) dark chocolate chips and drizzle it over the top of the baked and cooled bars. The bitterness of dark chocolate cuts through the sweetness of the maple filling beautifully. I did this for a friend’s birthday and she called it “the best dessert I’ve ever eaten.” High praise.
Bourbon Maple Pecan Bars
Add 2 tablespoons of good bourbon to the maple filling along with the vanilla. The bourbon adds a smoky warmth that complements the maple and pecans perfectly. Use a bourbon you’d actually drink—the flavor concentrates during baking. I used Maker’s Mark and it was incredible. Just note that the alcohol doesn’t fully cook out, so skip this for kids or anyone avoiding alcohol.
Gluten-Free Version
Substitute the all-purpose flour in both the crust and the filling with a 1:1 gluten-free flour blend. I’ve tested this with Bob’s Red Mill and Cup4Cup, and both work well. The crust will be slightly more crumbly, so press it firmly into the pan. The filling sets the same way. My gluten-free friends devour these and never know the difference.
Vegan Version
Use vegan butter in both the crust and the filling. For the eggs, use 3 tablespoons of aquafaba (the liquid from a can of chickpeas) whisked until frothy, or a commercial egg replacer. The texture will be slightly less rich, but still delicious. I tested this for a vegan potluck and it was gone in fifteen minutes.
Mini Bar Version
Press the crust into a lined 8×8 pan and halve all the ingredients. Bake the crust for 14-16 minutes and the assembled bars for 22-25 minutes. These are perfect for a smaller gathering or when you don’t want a huge pan of dessert staring at you from the fridge (though, honestly, is that really a problem?).
Serving & Storage Suggestions
These bars are incredibly versatile when it comes to serving. Here’s how I like to present them and keep them fresh.
Serving Temperature : I prefer these bars at room temperature. The crust is crisp, the filling is soft and gooey, and the pecans stay crunchy. If they’ve been in the fridge, let them sit on the counter for about 30 minutes before serving. For an extra-special treat, warm individual bars in the microwave for 10-15 seconds and serve with a scoop of vanilla ice cream. The warm-cold contrast is absolutely killer.
Presentation Tips : Cut the bars into neat squares and arrange them on a platter. Dust with a little flaky sea salt right before serving—it makes the maple flavor pop and looks beautiful. For holiday gatherings, I sometimes drizzle a little extra maple syrup over the top and sprinkle with chopped candied pecans. It’s over the top in the best way.
What to Serve Alongside : These bars are rich, so I like to pair them with something light. A dollop of lightly sweetened whipped cream cuts the sweetness. Fresh berries—raspberries or sliced strawberries—add a bright, tart contrast. For a full dessert spread, serve them alongside a dark chocolate tart or a simple vanilla panna cotta. And for drinks? Strong black coffee, hot tea, or a glass of cold milk. A bourbon-spiked coffee is also amazing.
Storage : Store the bars in an airtight container in the refrigerator for up to 5 days. Layer them between sheets of parchment paper to prevent sticking. They actually taste better on day two or three, as the flavors continue to meld. For longer storage, freeze the bars for up to 3 months. Wrap individual bars in plastic wrap, then place them in a freezer bag. Thaw overnight in the refrigerator or at room temperature for about an hour.
Reheating : If you want that just-baked warmth, pop a bar in a 300°F oven for 5-7 minutes, or microwave for 10-15 seconds. Be careful not to overheat, or the filling can become too runny.
Nutritional Information & Benefits
Let’s be honest—these are a treat, not a health food. But here’s the breakdown if you’re curious.
Per bar (based on 24 servings): Approximately 280 calories, 18g fat, 30g carbohydrates, 3g protein, 2g fiber, 18g sugar. These numbers are estimates and will vary based on specific ingredients and portion sizes.
Health Highlights : Pecans are a good source of healthy fats, fiber, and antioxidants. They contain magnesium, which supports heart health and muscle function. Maple syrup provides trace amounts of minerals like zinc and manganese, and it has a lower glycemic index than refined sugar, though it’s still sugar, so enjoy in moderation. The eggs add protein and healthy fats. And the butter? Well, butter makes everything better. I’m not a nutritionist, but I believe in balance—indulge in these bars, savor every bite, and eat your vegetables at dinner.
Dietary Considerations : These bars contain gluten, dairy, eggs, and tree nuts (pecans). For gluten-free, dairy-free, or vegan options, see the variations section above. They are nut-free if you omit the pecans, but honestly, that defeats the purpose. They are not suitable for a low-carb or keto diet due to the sugar content.
Conclusion
These Maple Pecan Pie Bars with Brown Butter Crust have become my go-to for every gathering, every holiday, every time I need to show up with something that says “I tried” without actually trying that hard. They’re the recipe I’ve shared with friends, neighbors, and strangers on the internet. They’re the bars that win cookie swaps and make people close their eyes and smile.
What I love most about this recipe is how forgiving it is. You can overmix the crust a little, underbake the filling a touch, and it still comes out delicious. It’s a recipe that works with you, not against you. And when you bring a pan of these to a dinner party or a potluck, you’ll see that look on people’s faces—the one that says, “Where have you been all my life?”
I’d love to hear how these turn out for you. Did you add bourbon? Drizzle chocolate on top? Forget to toast the pecans and still end up with something amazing? Drop a comment below and let me know. And if you’re looking for another crowd-pleaser, you might like my crispy garlic chicken or this salted caramel chocolate tart. Both are perfect for hosting and disappear just as fast.
Happy baking, friends. Go make something delicious.
Frequently Asked Questions
Can I use dark corn syrup instead of maple syrup?
You can, but the bars won’t have that distinct maple flavor. Dark corn syrup will make them taste more like traditional pecan pie—still delicious, just different. If you’re using corn syrup, I’d add an extra teaspoon of vanilla to round out the flavor.
Why did my crust turn out too crumbly?
This usually happens when the crust isn’t pressed firmly enough into the pan, or when the butter-to-flour ratio is off. Make sure you’re using a full cup of browned butter and pressing the crust down with the bottom of a measuring cup. If it’s still crumbly after baking, try adding an extra tablespoon of melted butter next time.
Can I make these bars ahead of time for a party?
Absolutely. In fact, I recommend it. These bars taste even better the next day. Make them up to two days in advance, store them in the fridge, and bring them to room temperature before serving. They’ll be perfectly set and the flavors will have melded beautifully.
How do I prevent the filling from being too runny?
Make sure your filling is baked until the edges are set and the center is just slightly jiggly. Overbaking can cause the filling to curdle, but underbaking leaves it runny. Also, don’t skip the tablespoon of flour in the filling—it’s the thickener. And let the bars cool completely before cutting. Patience is key.
Can I use a different type of nut?
Walnuts are the best substitute—they have a similar texture and flavor profile. You can also use a mix of pecans and walnuts. Avoid almonds or cashews, as they have different moisture levels and textures. And always toast your nuts first, no matter which kind you use.
Pin This Recipe!
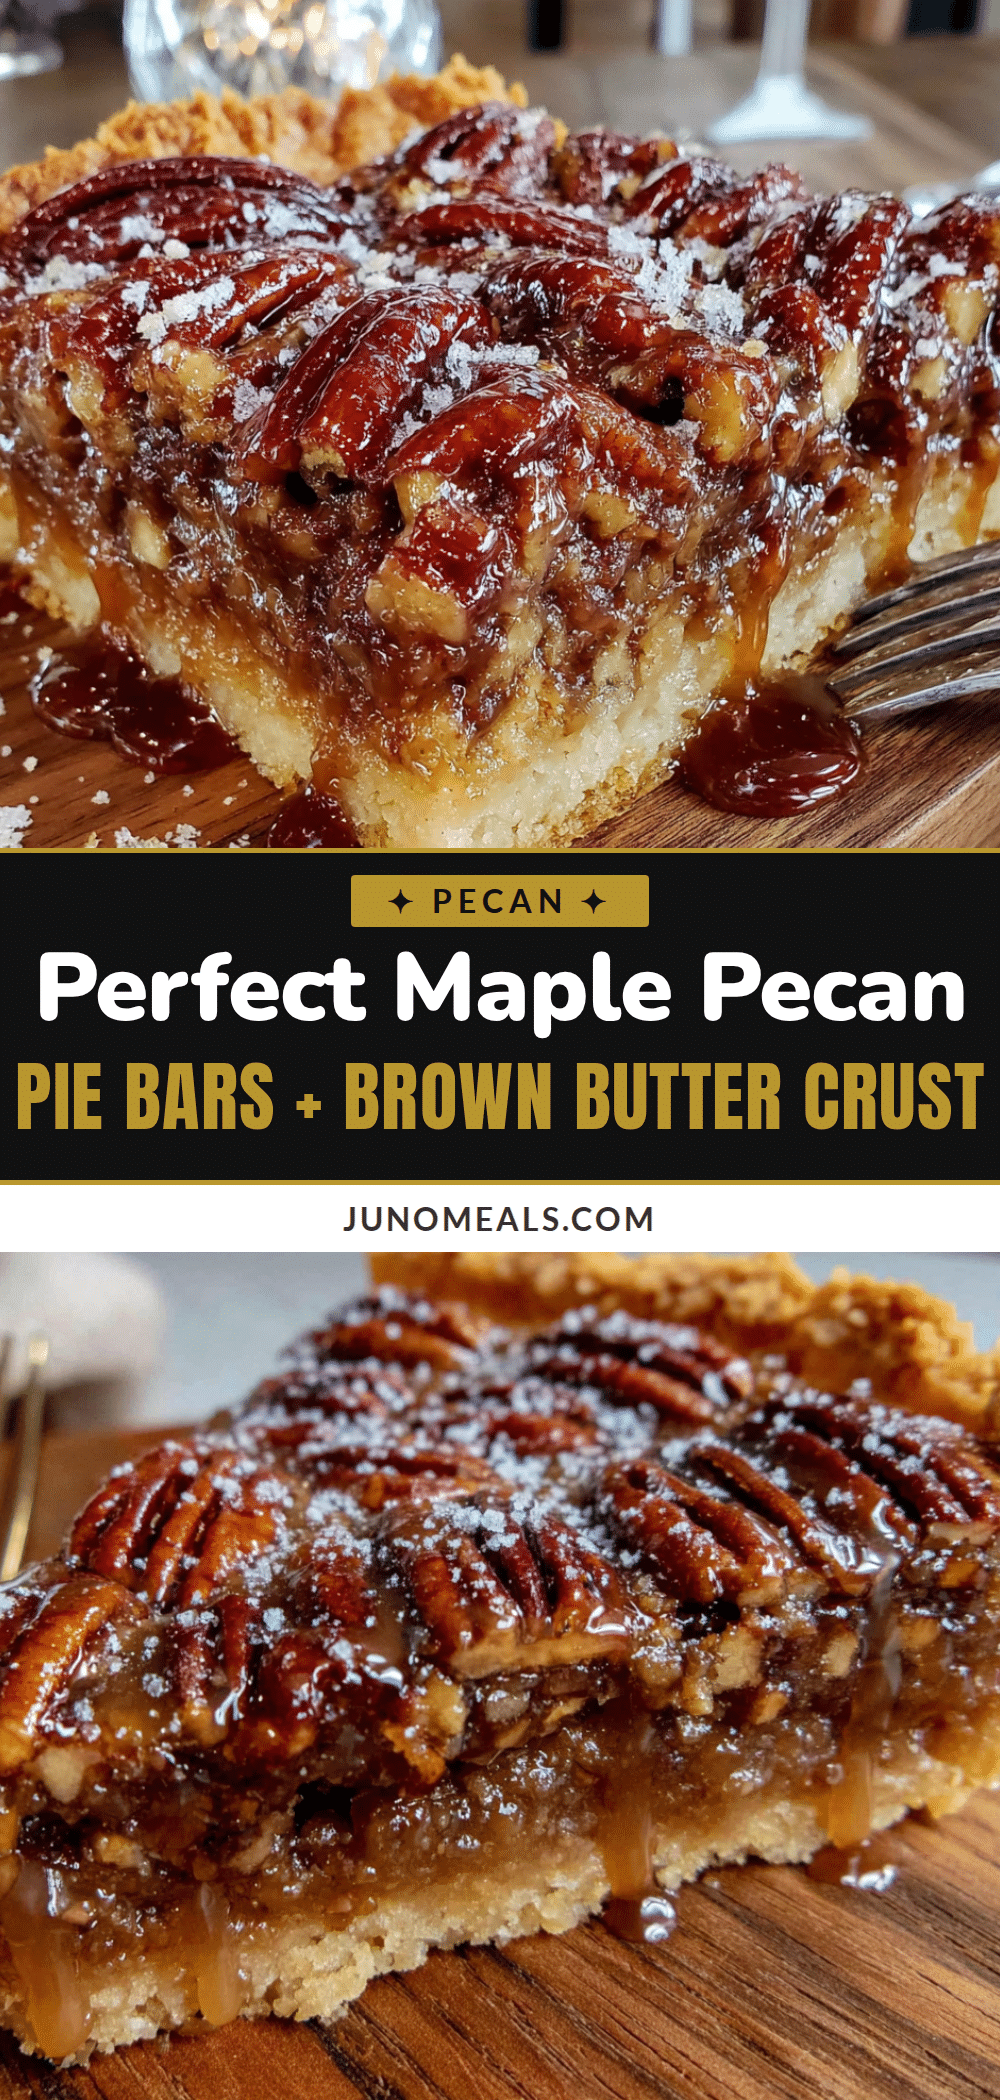
Best Easy Maple Pecan Pie Bars with Brown Butter Crust
These Maple Pecan Pie Bars feature a nutty brown butter shortbread crust and a rich maple-pecan filling. They’re a crowd-pleasing dessert that’s easier than traditional pecan pie and perfect for any gathering.
- Prep Time: 15 minutes
- Cook Time: 30 minutes
- Total Time: 45 minutes
- Yield: 24 servings 1x
- Category: Dessert
- Cuisine: American
Ingredients
- 1 cup (226g) unsalted butter (for crust)
- 1/2 cup (100g) granulated sugar
- 2 cups (250g) all-purpose flour
- 1/4 teaspoon salt
- 3 large eggs, room temperature
- 1 cup (240ml) pure maple syrup
- 1/2 cup (100g) packed light brown sugar
- 1/4 cup (56g) unsalted butter, melted (for filling)
- 1 teaspoon vanilla extract
- 1 tablespoon all-purpose flour
- 1/2 teaspoon salt
- 2 cups (200g) pecan halves, toasted
Instructions
- Brown the butter for the crust: Place 1 cup unsalted butter in a light-colored saucepan over medium heat. Stir frequently until the butter melts, foams, and turns a light amber color with golden brown specks (about 5-7 minutes). Remove from heat immediately and pour into a heatproof bowl.
- Make the crust: Preheat oven to 350°F (175°C). Line a 9×13-inch baking pan with parchment paper, leaving overhang on two sides. In a medium bowl, whisk together flour, granulated sugar, and salt. Pour the warm browned butter over the flour mixture and stir with a fork until it looks like wet sand. Press firmly into the bottom of the prepared pan. Bake for 18-20 minutes until edges are lightly golden. Set on a cooling rack.
- Brown the butter for the filling: In the same saucepan, melt 1/4 cup unsalted butter over medium heat. Stir until it browns (about 3-4 minutes). Pour into a small bowl and let cool slightly.
- Make the maple filling: In a large bowl, whisk eggs until light and frothy (about 30 seconds). Add maple syrup, brown sugar, browned butter, and vanilla extract; whisk until smooth. Sprinkle in flour and salt; whisk until no lumps remain.
- Assemble and bake: Spread toasted pecans evenly over the warm crust. Pour the maple filling over the pecans, covering them completely. Bake for 28-32 minutes until edges are set and center is slightly jiggly. Cool completely in the pan on a wire rack (about 2 hours), then refrigerate for at least 1 hour before cutting. Lift bars out using parchment, cut into squares with a sharp knife, wiping the blade clean between cuts.
Notes
Don’t skip browning the butter—it’s key for flavor. Toast pecans before using. Let bars cool completely before cutting to avoid a gooey mess. Bars taste even better the next day. For gluten-free, use a 1:1 gluten-free flour blend. For dairy-free, use vegan butter. For a bourbon version, add 2 tablespoons bourbon to the filling.
Nutrition
- Serving Size: 1 bar
- Calories: 280
- Sugar: 18
- Sodium: 120
- Fat: 18
- Saturated Fat: 8
- Carbohydrates: 30
- Fiber: 2
- Protein: 3
Keywords: maple pecan pie bars, brown butter crust, pecan bars, maple syrup dessert, easy dessert bars, cookie swap recipe, Thanksgiving dessert


