The church potluck was in four hours and I’d completely forgotten. My mother-in-law, bless her, had called to remind me and I could hear the clatter of her own kitchen in the background—she was already making her famous seven-layer salad. Everyone else would be bringing these elaborate, multi-day preparations. I had a box of Jiffy corn muffin mix, a tub of sour cream, and a block of cheddar cheese staring at me from the fridge. Honestly, I almost just grabbed a bag of chips. But then I remembered this old recipe my aunt used to throw together when she was in a bind. I figured it was better than showing up empty-handed, so I tossed everything in a bowl, poured it into a dish, and crossed my fingers.
The pan came out of the oven looking… well, a little rustic. Golden on top, a bit puffy around the edges. I didn’t even have time to let it cool properly before I wrapped it up and ran out the door. I set it down on the potluck table next to a fancy-looking quinoa salad and a spiral ham that probably took someone all day. I thought mine would get ignored. You know that feeling when you bring something simple and you’re almost embarrassed by it?
But let me tell you what happened. That casserole was gone in twenty minutes. People were going back for seconds, scraping the edges of the dish. Someone asked me for the recipe while I was still holding a plastic fork. I just laughed and said, “It’s the Jiffy one.” That moment stuck with me—not because I won some imaginary potluck contest, but because it reminded me that sometimes the most comforting food doesn’t need a long story or a fancy ingredient list. It just needs to taste like home. And this cozy Jiffy corn casserole with sour cream and cheddar does exactly that.
Why You’ll Love This Recipe
This isn’t just another side dish. This is the kind of recipe that makes you close your eyes after the first bite. It’s comfort food at its finest—creamy, cheesy, slightly sweet, and impossibly easy. Let me break down why this one is different.
- Quick & Easy: From start to finish, this comes together in under 45 minutes. Most of that is baking time. You’re looking at maybe five minutes of actual hands-on work. Perfect for those nights when you need something on the table fast.
- Simple Ingredients: I bet you have most of these in your kitchen right now. No weird specialty items or expensive cheeses. Just pantry staples that come together in a magical way.
- Perfect for Any Occasion: Holiday dinners, weeknight sides, potlucks, barbecues—this casserole fits right in. It’s fancy enough for Thanksgiving but humble enough for a Tuesday.
- Crowd-Pleaser: Kids love the sweet corn flavor. Adults love the creamy, cheesy texture. Even picky eaters go back for seconds. I’ve never seen this dish fail to get compliments.
- Unbelievably Delicious: The texture is what gets me every time. It’s soft and tender like a spoonbread, but with little pockets of melted cheddar and that subtle tang from the sour cream. It’s next-level comfort food.
What makes this recipe different from all the other corn casseroles out there? It’s the balance. The sour cream keeps it incredibly moist without making it heavy. The cheddar adds savory depth that cuts through the sweetness of the corn muffin mix. And the ratio? I’ve tested this more times than I care to admit. This version is the sweet spot—not too bready, not too wet, just perfectly scoopable.
What Ingredients You Will Need
This recipe uses simple, wholesome ingredients to deliver bold flavor and satisfying texture without the fuss. Most of these are probably already in your pantry or fridge.
- 1 box (8.5 oz) Jiffy Corn Muffin Mix – This is the star. I know some people make their own cornbread mix from scratch, but for this casserole, Jiffy is the way to go. It has that perfect sweetness and fine texture that makes the dish work. Don’t substitute with a larger box of regular cornbread mix—the ratios will be off.
- 1 can (15 oz) whole kernel corn, drained – Adds those lovely bursts of sweetness and texture. I prefer whole kernel over cream-style for this version because it gives the casserole more structure. If you only have frozen corn, thaw and drain it well first.
- 1 can (15 oz) cream-style corn – This is the secret to the moist, tender texture. Don’t skip it or try to substitute. The cream-style corn adds moisture and natural sweetness that you can’t replicate with anything else.
- 1 cup sour cream – Full-fat works best here for richness and texture. The tanginess of the sour cream balances the sweetness of the corn muffin mix beautifully. I’ve tried Greek yogurt in a pinch and it works, but the texture is slightly less creamy.
- 1 cup shredded cheddar cheese – Sharp cheddar gives the best flavor. Pre-shredded cheese works in a bind, but freshly shredded melts more smoothly. I recommend shredding your own from a block—it really does make a difference in texture.
- 1/4 cup unsalted butter, melted – Adds richness and helps create that golden, slightly crispy top. If you only have salted butter, just reduce any added salt in the recipe.
- 1 large egg, lightly beaten – Helps bind everything together and gives the casserole structure. Make sure your egg is at room temperature for the best incorporation.
- Optional: 2 tablespoons chopped fresh chives or green onions – For a pop of color and mild onion flavor. I love adding these right before serving, but they’re completely optional.
Equipment Needed
You don’t need any fancy gadgets for this recipe, which is part of its charm. Here’s what you’ll need:
- 8×8 inch baking dish or 2-quart casserole dish – This is the perfect size for this recipe. A 9×9 works too, but the casserole will be slightly thinner and may bake a few minutes faster. I’ve used a round 2-quart casserole dish and it works beautifully.
- Large mixing bowl – Any medium-to-large bowl will do. You just need enough room to stir everything together without splashing.
- Whisk or wooden spoon – A whisk works great for beating the egg and smoothing out the mixture. A wooden spoon is fine too. I’ve used both and honestly, whatever you grab first will work.
- Measuring cups and spoons – For the sour cream, melted butter, and cheese. Although honestly, I often eyeball the cheese these days.
- Can opener – For the corn and cream-style corn. A manual one works fine, but an electric one speeds things up.
- Oven mitts – The dish gets hot, and you don’t want to be that person using a dish towel (I’ve been there).
If you don’t have an 8×8 dish, you can use a 9-inch pie plate or even a cast iron skillet. Just keep an eye on the baking time—different materials conduct heat differently. My cast iron version baked about 5 minutes faster.
Preparation Method
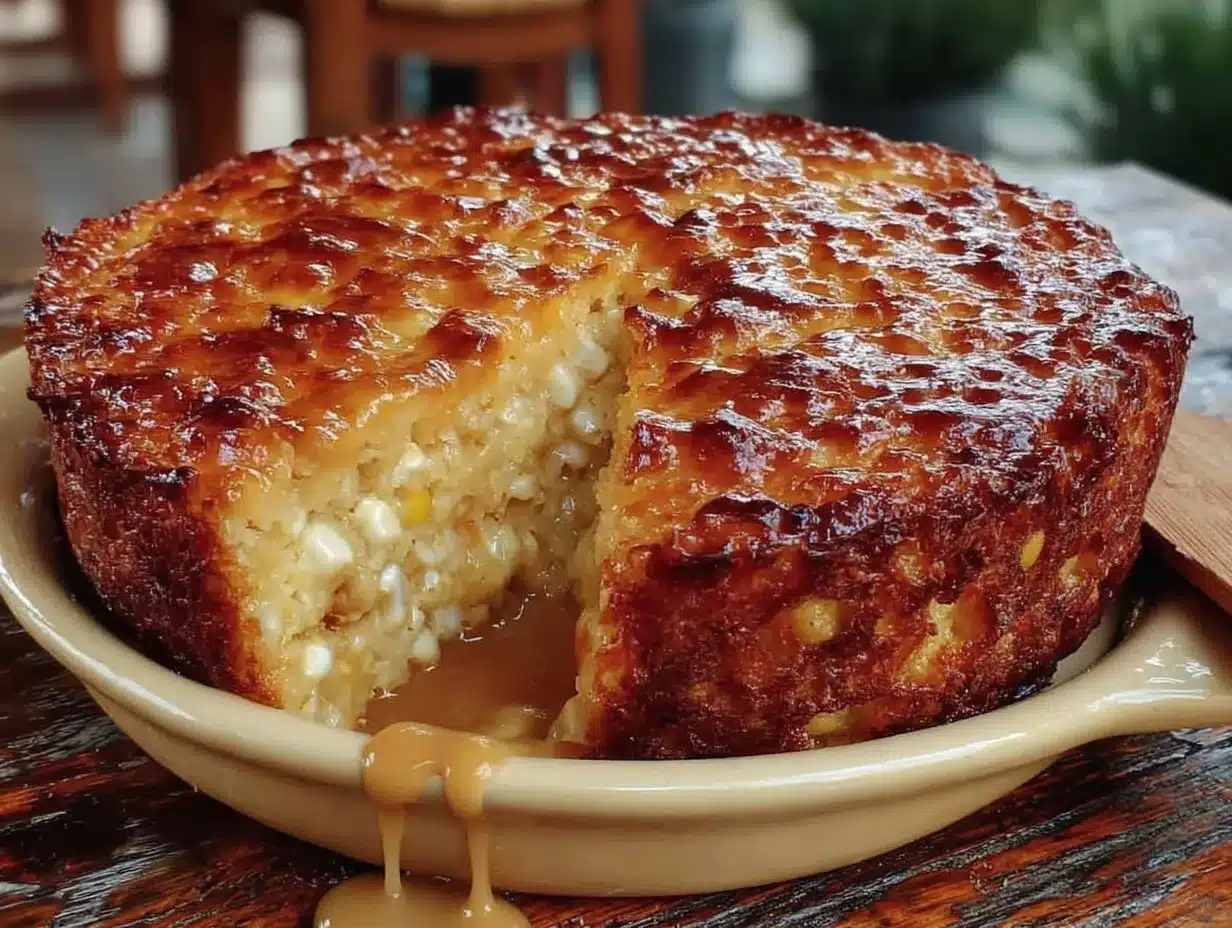
Let’s get to the good part. This is so simple, you’ll barely break a sweat.
- Preheat your oven to 350°F (175°C). While it’s heating up, lightly grease your 8×8 baking dish with butter or non-stick spray. I’ve forgotten to do this before and regretted it—the casserole will stick something fierce. Don’t skip this step.
- In your large mixing bowl, whisk the egg until it’s light and frothy. This takes about 30 seconds. You want it well-beaten so it incorporates evenly into the batter. I learned this the hard way after finding a streak of cooked egg in my casserole once.
- Add the melted butter and sour cream to the beaten egg. Stir until smooth. The mixture should look creamy and pale yellow. If your butter was too hot and the mixture looks a little separated, don’t panic—it will come together when you add the dry ingredients.
- Add the drained whole kernel corn and the cream-style corn. Stir until everything is evenly distributed. This is where you’ll start to smell that sweet corn aroma. It’s a good sign.
- Sprinkle in the Jiffy Corn Muffin Mix. Stir gently until just combined. A few small lumps are totally fine—overmixing will make the casserole tough. We want tender, not rubbery. Fold in the shredded cheddar cheese, reserving about 1/4 cup for the top.
- Pour the mixture into your prepared baking dish. Spread it evenly with a spatula. Sprinkle the reserved cheddar cheese on top. This creates that beautiful golden crust that everyone fights over.
- Bake for 35-40 minutes, or until the top is golden brown and the edges are pulling away from the dish slightly. The center should be set but still slightly jiggly—like a cheesecake. A toothpick inserted in the center should come out clean or with just a few moist crumbs. If it’s still wet, give it another 5 minutes.
- Let it cool for at least 10 minutes before serving. This is the hardest part, I know. But letting it rest allows the casserole to set properly. If you cut into it too soon, it will be soupy. Trust me on this one—I’ve made that mistake more than once.
Cooking Tips & Techniques
After making this casserole more times than I can count, I’ve picked up a few tricks that make a real difference. Here’s what I’ve learned:
Don’t overmix the batter. I know it’s tempting to keep stirring until everything is perfectly smooth, but that activates the gluten in the corn muffin mix and makes the casserole dense and tough. Stir just until the dry ingredients are moistened. A few lumps are your friends here.
Let your ingredients come to room temperature. Cold sour cream and cold egg can make the melted butter seize up, creating an uneven texture. Take them out of the fridge about 20 minutes before you start. I usually set everything on the counter while I preheat the oven.
Watch your baking time. Every oven runs a little differently. My old oven used to take the full 40 minutes, but my current one runs hot and I start checking at 30 minutes. The top should be golden brown and the edges should look slightly crispy. If the top is browning too fast but the center is still jiggly, tent the dish loosely with foil for the last 10 minutes.
Let it rest. I cannot stress this enough. The casserole needs time to set up after baking. If you serve it immediately, it will be loose and almost soupy. After 10 minutes, it firms up beautifully. After 20 minutes, it’s perfect for slicing into neat squares.
Use freshly shredded cheese. Pre-shredded cheese has anti-caking agents that prevent it from melting as smoothly. Freshly shredded cheddar melts into creamy pockets throughout the casserole. It takes an extra 30 seconds to shred your own, and it’s absolutely worth it.
Variations & Adaptations
This casserole is incredibly forgiving and adaptable. Here are some of my favorite variations:
- Spicy Jalapeño Cheddar: Add 1-2 diced jalapeños (seeds removed for less heat) and use pepper jack cheese instead of cheddar. The spicy kick pairs beautifully with the sweet corn. I made this for a game day party and it disappeared in minutes.
- Bacon and Chive: Cook 4-5 strips of bacon until crispy, crumble them, and fold into the batter along with 2 tablespoons of chopped fresh chives. The smoky, salty bacon takes this to a whole new level. Save a little bacon for the top, because presentation matters.
- Southwest Style: Add 1/2 cup of diced green chiles, 1/2 cup of black beans (drained and rinsed), and swap the cheddar for a Mexican cheese blend. Top with a dollop of sour cream and some fresh cilantro before serving.
- Gluten-Free Option: Use a gluten-free corn muffin mix in place of the Jiffy. I’ve tested this with a few different brands and they all work well. Just check the package for any adjustments in liquid ratios.
- Dairy-Free Adaptation: Use dairy-free sour cream (I like the one from Kite Hill) and a dairy-free cheddar shred. The texture will be slightly different, but the flavor is still fantastic. Use olive oil or vegan butter in place of regular butter.
My personal favorite variation? The bacon and chive version. I made it for a friend who was having a rough week, and she texted me later saying it was the best thing she’d eaten in months. That’s the power of a good casserole.
Serving & Storage Suggestions
This casserole is incredibly versatile when it comes to serving. Here’s how to make the most of it:
Serving Temperature: Serve warm, ideally about 10-15 minutes after it comes out of the oven. It’s also surprisingly good at room temperature—I’ve eaten leftovers cold straight from the fridge and enjoyed them just as much.
Presentation: For a casual dinner, just scoop it out with a spoon. For a more polished look, let it cool for 20 minutes and cut it into neat squares. Garnish with fresh chives, a sprinkle of paprika, or a little extra shredded cheese on top.
What to Serve With It: This casserole is a natural side dish for so many mains. It pairs beautifully with honey glazed ham, roasted chicken, grilled pork chops, or even a simple green salad with vinaigrette. For a cozy weeknight dinner, I love serving it alongside slow cooker chili for the ultimate comfort food combo.
Storage: Leftovers keep well in an airtight container in the refrigerator for up to 4 days. The texture softens slightly as it sits, but the flavor actually gets better. I sometimes make this a day ahead on purpose.
Reheating: The best way to reheat is in the oven at 350°F for about 10-15 minutes, or until warmed through. The microwave works in a pinch—just heat in 30-second intervals and cover with a damp paper towel to prevent drying out.
Freezing: This casserole freezes beautifully. Let it cool completely, wrap it tightly in plastic wrap and then foil, and freeze for up to 3 months. Thaw in the refrigerator overnight and reheat in the oven. I’ve done this for holiday prep and it works like a charm.
Nutritional Information & Benefits
While this is definitely a comfort food indulgence, it does have some redeeming qualities. Here’s a rough breakdown per serving (based on 9 servings):
- Calories: Approximately 290-320
- Protein: 8-10 grams
- Carbohydrates: 32-36 grams
- Fat: 15-18 grams
- Fiber: 2-3 grams
- Calcium: About 15% of daily value (thanks to the cheese and sour cream)
The corn provides some fiber and essential vitamins like B vitamins and vitamin C. The dairy adds calcium and protein. And honestly, sometimes we need food that just makes us feel good—both emotionally and physically. This casserole is hearty and satisfying, which means you’re less likely to reach for empty snacks an hour later.
Dietary Considerations: This recipe contains gluten, dairy, and eggs. For a gluten-free version, use a gluten-free corn muffin mix. For a dairy-free version, use dairy-free alternatives as mentioned in the variations section. It’s not low-carb by any stretch, but it is a wonderful treat in moderation.
Conclusion
This cozy Jiffy corn casserole with sour cream and cheddar is more than just a recipe—it’s a reminder that the best food doesn’t have to be complicated. It came together in a moment of panic and ended up being the star of the show. That potluck taught me something important: sometimes the simplest dishes are the ones that stick with us.
I hope you give this casserole a try. Make it for a holiday dinner. Bring it to a potluck. Or just make it on a random Tuesday because you need a little comfort. Customize it with your favorite add-ins, make it your own, and don’t be surprised when people ask for the recipe.
I’d love to hear how yours turns out! Drop a comment below and let me know if you tried any variations. Did you add bacon? Jalapeños? Did you make it for a special occasion? Share your story—I read every single comment and I love hearing about your kitchen adventures. Until next time, happy cooking!
Frequently Asked Questions
Can I make this Jiffy corn casserole ahead of time?
Absolutely! You can assemble the casserole up to 24 hours in advance, cover it tightly with plastic wrap, and refrigerate. When you’re ready to bake, let it sit at room temperature for about 20 minutes, then bake as directed. You may need to add 5-10 minutes to the baking time since it’s starting from cold.
Can I use frozen corn instead of canned?
Yes, you can substitute frozen corn for the whole kernel corn. Thaw it first and drain off any excess liquid. I wouldn’t recommend substituting the cream-style corn though—that’s a key ingredient for the texture and moisture of the casserole.
Why is my corn casserole runny?
This usually happens for one of two reasons: either it wasn’t baked long enough, or it wasn’t allowed to rest after baking. The casserole needs time to set as it cools. Make sure you’re baking until the center is just set and the edges are golden, and then let it rest for at least 10 minutes before serving.
Can I double this recipe?
Yes, this recipe doubles beautifully. Use a 9×13 baking dish and increase the baking time to about 45-50 minutes. Check for doneness with a toothpick in the center. The larger dish will need a bit more time to bake through evenly.
What’s the best way to reheat leftovers?
The oven method is best for maintaining texture. Reheat at 350°F for 10-15 minutes, covered with foil to prevent drying out. The microwave works in a pinch but can make the edges a bit rubbery. If using the microwave, cover with a damp paper towel and heat in 30-second intervals.
Pin This Recipe!

Best Easy Jiffy Corn Casserole with Sour Cream and Cheddar

This creamy, cheesy, and slightly sweet corn casserole comes together in under 45 minutes with simple pantry staples. Perfect for potlucks, holiday dinners, or a comforting weeknight side dish.
- Prep Time: 5 minutes
- Cook Time: 35-40 minutes
- Total Time: 40-45 minutes
- Yield: 9 servings 1x
- Category: Side Dish
- Cuisine: American
Ingredients
- 1 box (8.5 oz) Jiffy Corn Muffin Mix
- 1 can (15 oz) whole kernel corn, drained
- 1 can (15 oz) cream-style corn
- 1 cup sour cream
- 1 cup shredded cheddar cheese
- 1/4 cup unsalted butter, melted
- 1 large egg, lightly beaten
- Optional: 2 tablespoons chopped fresh chives or green onions
Instructions
- Preheat your oven to 350°F (175°C). Lightly grease an 8×8 inch baking dish with butter or non-stick spray.
- In a large mixing bowl, whisk the egg until light and frothy, about 30 seconds.
- Add the melted butter and sour cream to the beaten egg. Stir until smooth and creamy.
- Add the drained whole kernel corn and cream-style corn. Stir until evenly distributed.
- Sprinkle in the Jiffy Corn Muffin Mix. Stir gently until just combined; a few small lumps are fine. Fold in 3/4 cup of the shredded cheddar cheese, reserving 1/4 cup for the top.
- Pour the mixture into the prepared baking dish and spread evenly. Sprinkle the reserved cheddar cheese on top.
- Bake for 35-40 minutes, until the top is golden brown and the edges pull away from the dish. The center should be set but slightly jiggly. A toothpick inserted in the center should come out clean or with a few moist crumbs.
- Let cool for at least 10 minutes before serving to allow the casserole to set properly.
Notes
Don’t overmix the batter to avoid a dense texture. Let ingredients come to room temperature for best results. For a spicier version, add diced jalapeños and use pepper jack cheese. For a gluten-free option, use a gluten-free corn muffin mix. Leftovers keep in the refrigerator for up to 4 days and freeze well for up to 3 months.
Nutrition
- Serving Size: 1 square (1/9 of cas
- Calories: 305
- Sugar: 8
- Sodium: 520
- Fat: 16.5
- Saturated Fat: 9
- Carbohydrates: 34
- Fiber: 2.5
- Protein: 9
Keywords: corn casserole, Jiffy corn casserole, easy corn casserole, sour cream corn casserole, cheesy corn casserole, potluck side dish, Thanksgiving side dish


