I wasn’t expecting pumpkin seed wisdom from an exterminator. But there I was, standing in my own backyard last October, watching a guy named Dave in a crisp uniform spray around the foundation of my house. I was apologizing for the mess—three half-carved pumpkins sat on the porch, their guts spilling onto a tarp. Dave just laughed and said, “You’re gonna roast those seeds, right? But don’t do what my wife did last year. She made them savory. Kids wouldn’t touch ’em. I told her, ‘Honey, if you want ’em gone in five minutes, make ’em taste like a cinnamon roll.'”
He wasn’t trying to give me a recipe. He was just complaining about his kids being picky eaters. But that line—”make ’em taste like a cinnamon roll”—stuck in my head. I mean, honestly, why had I never thought of that? Pumpkin seeds always felt like a savory snack to me. Salty, roasty, a little bit of cayenne if you’re feeling spicy. But sweet? That felt almost wrong. And yet, the more I thought about it, the more I knew Dave was onto something.
So I went inside, tossed the seeds in a bowl, and started experimenting. Butter, brown sugar, cinnamon—the usual suspects for anything that wants to taste like a bakery treat. But I wanted it quick. No long, slow roasting. No babysitting the oven. I wanted that candy-like crunch in under 20 minutes, start to finish. And you know what? It worked. Better than I expected. The first batch came out so glossy and fragrant that my neighbor actually knocked on the door to ask what I was baking. I handed her a handful and she just stood there, chewing, looking at the pumpkin guts still on the tarp, and said, “Wait, these are from that?”
That’s the thing about this recipe. It takes something you’d normally throw away and turns it into the snack that disappears first at any gathering. Or, if you’re like me, the snack you hide in the back of the pantry so you don’t eat the whole batch in one sitting. Honestly, I’ve been making these every fall since Dave the exterminator dropped that wisdom on me. And every time I do, I think about how the best cooking advice comes from the most unexpected places.
Why You’ll Love This Recipe
Let me tell you why this particular version of cinnamon sugar pumpkin seeds is the one you’ll come back to year after year. I’ve tested this recipe at least a dozen times—tweaking the butter ratio, testing different sugars, even trying to make it work with coconut oil for a dairy-free friend. This version is the winner. It’s the one that gets the “can I have the recipe?” text every single time I post it on social media.
- Quick & Easy: From bowl to table in under 20 minutes. No soaking, no overnight drying, no complicated steps. You can make these while your pumpkin soup simmers or while you’re cleaning up the carving mess.
- Simple Ingredients: You probably have everything in your pantry right now. Pumpkin seeds (obviously), butter, brown sugar, cinnamon, and a pinch of salt. That’s it. No fancy extracts, no obscure spices.
- Perfect for Fall Snacking: These are great for Halloween parties, Thanksgiving appetizers, or just a cozy afternoon treat with a hot cup of apple cider. They also make an amazing topping for yogurt or oatmeal.
- Crowd-Pleaser: I’ve served these to kids, adults, even my aunt who “doesn’t like pumpkin seeds.” She ate half the bowl. The sweet coating makes them irresistible to pretty much everyone.
- Unbelievably Delicious: The texture is what gets me. The seeds get this shatteringly crisp coating of caramelized sugar and butter, while the inside stays nutty and satisfying. It’s like eating a tiny, crunchy cinnamon toast square.
What makes this recipe different from the dozens of other pumpkin seed recipes out there? It’s the technique. Most recipes tell you to boil the seeds first, or dry them overnight, or roast them at a low temperature for an hour. Not this one. We’re using a hot, fast roast with a butter-sugar glaze that caramelizes in minutes. No fuss, no waiting, no complicated steps. Just pure, candy-like crunch in record time.
This is the kind of recipe that makes you close your eyes after the first bite. It’s comfort food reimagined—faster, sweeter, and with the same soul-soothing satisfaction as a fresh-baked cinnamon roll. Perfect for impressing guests without stress, or turning a simple pumpkin carving session into something memorable.
What Ingredients You Will Need
This recipe uses simple, wholesome ingredients to deliver big flavor without the fuss. Everything listed here is a pantry staple for most home cooks, especially during the fall season. Here’s what you’ll need and why each ingredient matters.
- Pumpkin seeds (1 cup, raw and cleaned): Freshly scooped seeds are best, but you can also use store-bought raw pumpkin seeds (often labeled as pepitas). If you’re using seeds from a carving pumpkin, make sure to rinse off the pulp and pat them dry. The fresher the seeds, the better the texture.
- Unsalted butter (2 tablespoons, melted): Butter adds richness and helps the sugar mixture stick to the seeds. I prefer unsalted so I can control the salt level. If you only have salted butter, just skip the added salt in the recipe. For a dairy-free version, melted coconut oil works beautifully—just note that the flavor will be slightly different.
- Brown sugar (2 tablespoons, packed): Brown sugar is key here. It has molasses in it, which gives the seeds a deeper, almost caramel-like flavor. Light or dark brown sugar both work, but dark brown will give you a richer taste. Don’t substitute granulated sugar unless you absolutely have to—the texture won’t be quite the same.
- Ground cinnamon (1 teaspoon): This is the star of the show. Use a good-quality cinnamon for the best flavor. I personally prefer Ceylon cinnamon for its milder, sweeter profile, but Saigon cinnamon works great too if you like a stronger kick. Feel free to add a pinch of nutmeg or pumpkin pie spice if you’re feeling adventurous.
- Salt (¼ teaspoon): A small amount of salt balances the sweetness and enhances the overall flavor. Don’t skip it—it makes the cinnamon sugar pop. Flaky sea salt is nice if you have it, but regular table salt works just fine.
- Vanilla extract (½ teaspoon, optional): This is my little secret ingredient. It rounds out the sweetness and adds a warm, cozy note. It’s not strictly necessary, but I highly recommend it. Use pure vanilla extract if you can, not imitation.
Ingredient Selection Tips: When buying pumpkin seeds from the store, look for raw, unsalted seeds. Roasted or salted seeds will throw off the cooking time and flavor balance. If you’re using seeds from a fresh pumpkin, try to get them as dry as possible before adding the butter mixture. Wet seeds won’t crisp up properly.
Substitution Guidance: For a vegan version, use melted coconut oil or vegan butter instead of regular butter. For a lower-sugar option, you can reduce the brown sugar to 1 tablespoon, but the coating will be less crunchy. You can also try using coconut sugar for a more natural sweetener—it works, but the color will be darker.
Equipment Needed
You don’t need fancy kitchen tools for this recipe. That’s one of the things I love about it. Here’s what you’ll need:
- Baking sheet: A standard half-sheet pan works perfectly. Line it with parchment paper or a silicone baking mat for easy cleanup. Trust me, the sugar glaze can be sticky.
- Mixing bowl: Any medium-sized bowl will do. You just need enough room to toss the seeds with the butter mixture.
- Spatula or wooden spoon: For stirring and spreading the seeds on the baking sheet. A silicone spatula is great for scraping every last bit of the butter-sugar mixture.
- Measuring spoons: For accurate measurements. I know some people eyeball it, but for the best results, measure the brown sugar and cinnamon precisely.
- Paper towels or clean kitchen towel: For drying the seeds if you’re using fresh pumpkin seeds. Pat them as dry as possible.
Alternative Suggestions: If you don’t have a baking sheet, a cast-iron skillet works surprisingly well. Just keep an eye on the seeds because cast iron retains heat and they can burn faster. If you don’t have parchment paper, you can lightly grease the baking sheet with butter or cooking spray, but cleanup will be a bit more work.
Personal Experience: I’ve made these seeds in a toaster oven more times than I can count. It works great—just keep the temperature the same and check them a minute or two early since toaster ovens can run hot. Also, I’ve learned the hard way that a silicone mat is worth the investment. My first few batches left a sticky, caramelized mess on my baking sheet that took forever to scrub off.
Preparation Method
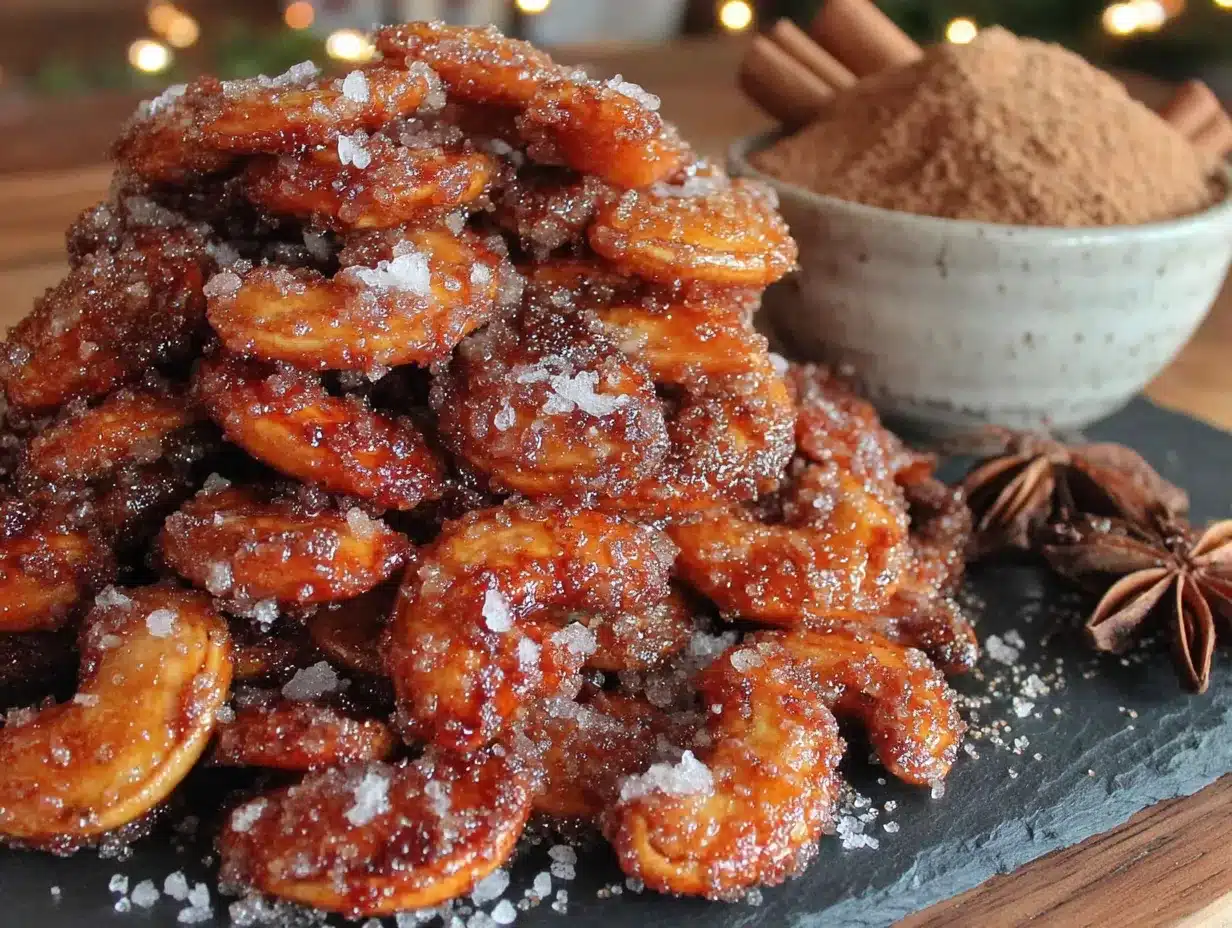
Let’s get cooking. This whole process takes about 15 minutes from start to finish, so preheat your oven first and then work through the steps.
- Preheat your oven to 375°F (190°C). Line a baking sheet with parchment paper or a silicone mat. Getting the oven hot before you start is important—the high heat is what creates that quick caramelization.
- Clean and dry your pumpkin seeds. If you’re using fresh seeds from a pumpkin, separate them from the pulp and rinse them in a colander under cold water. Pick out any large chunks of pumpkin flesh. Spread the seeds on a clean kitchen towel or paper towels and pat them very dry. This step is crucial—wet seeds won’t crisp up. Let them air dry for a few minutes while you prepare the glaze.
- Melt the butter. In a small microwave-safe bowl, melt the 2 tablespoons of unsalted butter. This takes about 20-30 seconds in the microwave. Alternatively, you can melt it in a small saucepan on the stovetop over low heat. Let it cool slightly so it doesn’t cook the sugar when you mix them together.
- Mix the cinnamon sugar coating. In a medium mixing bowl, combine the melted butter, 2 tablespoons of packed brown sugar, 1 teaspoon of ground cinnamon, ¼ teaspoon of salt, and ½ teaspoon of vanilla extract if using. Stir until the sugar is mostly dissolved and the mixture looks like a thick, grainy paste. It won’t be completely smooth—that’s fine.
- Toss the seeds in the coating. Add the dried pumpkin seeds to the bowl with the butter-sugar mixture. Use a spatula or spoon to stir until every seed is evenly coated. Make sure to scrape the bottom of the bowl—the sugar tends to settle there. The seeds should look glossy and slightly clumpy.
- Spread the seeds on the baking sheet. Pour the coated seeds onto the prepared baking sheet. Spread them into a single, even layer. Try not to let them overlap too much, or they’ll steam instead of roasting. If some seeds are clumped together, gently separate them with your fingers or the spatula.
- Roast for 8-10 minutes. Place the baking sheet in the preheated oven. Roast for 8 minutes, then check on them. They should be fragrant and the coating should be bubbling slightly. If they need more time, continue roasting in 1-minute increments. At 10 minutes, they should be golden brown and the sugar will have caramelized into a glossy coating. Watch them carefully—they can go from perfect to burnt in less than a minute.
- Cool completely before serving. Remove the baking sheet from the oven and let the seeds cool directly on the pan. They will crisp up as they cool. Don’t try to move them or eat them right away—they’ll be soft and the sugar will be dangerously hot. Let them sit for at least 10 minutes. Once cool, they should be crunchy and shatter when you bite into them.
Troubleshooting Tips: If your seeds are still soft after cooling, they probably had too much moisture. Pop them back in the oven at 300°F (150°C) for another 3-5 minutes. If the sugar burned before the seeds were done, your oven might run hot—try reducing the temperature to 350°F (175°C) next time. And if the coating seems uneven, make sure you’re stirring the seeds thoroughly in step 5.
Sensory Cues: At the 8-minute mark, your kitchen should smell like a cinnamon bakery. The seeds will look glossy and the sugar will be bubbling. When they’re done, the coating should be a deep amber color, not dark brown. If you see smoke or smell burning, pull them out immediately.
Cooking Tips & Techniques
Over the years, I’ve made plenty of mistakes with pumpkin seeds. Burnt batches, soggy batches, batches that tasted like nothing but sugar. Here’s what I’ve learned so you don’t have to repeat my failures.
The Drying Secret: The number one reason pumpkin seeds turn out chewy instead of crunchy is moisture. If you’re using fresh seeds, dry them thoroughly. I mean really dry. I like to spread them on a towel and let them sit for 30 minutes before coating them. Some people even dry them in a low oven (200°F) for 10 minutes before adding the coating. It’s an extra step, but it guarantees crunch.
Don’t Overcrowd the Pan: This is a mistake I made my first few times. I’d dump all the seeds onto the pan in a big pile, thinking they’d spread out on their own. They didn’t. The seeds on the bottom steamed while the ones on top burned. Spread them in a single layer with a little space between each seed. If you have a lot of seeds, use two baking sheets.
Watch the Oven Like a Hawk: The difference between perfect cinnamon sugar pumpkin seeds and a burnt mess is about 30 seconds. The sugar caramelizes quickly at 375°F. Set a timer for 8 minutes and don’t wander off. Check them at 8 minutes, then every minute after that. Your nose is a good guide—the moment you smell that toasty cinnamon scent, they’re probably done.
Cooling is Non-Negotiable: I know it’s tempting to eat them right out of the oven. Don’t. They’re soft and the sugar is molten hot. Let them cool completely on the baking sheet. As they cool, the sugar hardens into that crackly coating. If you try to move them too soon, they’ll stick together and lose their crunch.
Double Batch Strategy: If you’re making these for a party, double the recipe and use two baking sheets. Rotate the pans halfway through cooking (swap the top and bottom racks) so they cook evenly. And honestly, make extra. They disappear fast.
Variations & Adaptations
One of the best things about this recipe is how easy it is to change up. Here are some variations I’ve tried and loved.
Spiced Chai Pumpkin Seeds: Add ½ teaspoon of ground ginger, ¼ teaspoon of ground cardamom, and a pinch of ground cloves to the cinnamon sugar mixture. It gives the seeds a warm, chai-like flavor that’s perfect for fall. I made this version for a book club meeting and everyone asked for the recipe.
Maple Pecan Pumpkin Seeds: Substitute the brown sugar with 2 tablespoons of pure maple syrup. The texture will be slightly different—more of a glazed coating than a crunchy one—but the flavor is incredible. Add ¼ cup of chopped pecans to the baking sheet for the last 3 minutes of roasting. This version is amazing on top of vanilla ice cream.
Vegan Coconut Version: Use melted coconut oil instead of butter, and swap the brown sugar for coconut sugar. The coconut sugar gives a deeper, almost molasses-like flavor. You can also add 2 tablespoons of shredded coconut to the mix. Toast the coconut separately and add it after roasting, or it will burn.
Savory-Sweet Hybrid: This one’s for people who can’t decide. Reduce the brown sugar to 1 tablespoon and add ½ teaspoon of smoked paprika and a pinch of cayenne pepper. The heat from the cayenne balances the sweetness beautifully. I made this version for a football party and it was the first bowl to empty.
Dietary Adjustments: For a gluten-free version, you’re already good—pumpkin seeds are naturally gluten-free. Just double-check your cinnamon and vanilla extract to make sure they’re certified gluten-free if you’re sensitive. For a nut-free version, skip the pecan variation and stick to the basic recipe.
Serving & Storage Suggestions
These cinnamon sugar pumpkin seeds are versatile. Here’s how to serve them and keep them fresh.
Serving Temperature: Serve them at room temperature. They’re best within a few hours of making them, when the coating is at its crunchiest. If you’re serving them at a party, spread them in a bowl and let people grab handfuls. They’re also amazing sprinkled over a bowl of vanilla ice cream or yogurt.
Complementary Dishes: These seeds pair wonderfully with warm fall drinks like apple cider, hot chocolate, or a pumpkin spice latte. They also make a great topping for butternut squash soup or a simple green salad with apples and goat cheese. For a dessert board, arrange them alongside dark chocolate, dried figs, and sharp cheddar cheese.
Storage Instructions: Store the cooled seeds in an airtight container at room temperature. They’ll stay crunchy for up to 5 days. Do not refrigerate them—the moisture in the fridge will make them soft. If they do lose their crunch, you can re-crisp them in a 300°F (150°C) oven for 3-4 minutes.
Freezer Instructions: You can freeze these seeds for up to 3 months. Let them cool completely, then transfer them to a freezer-safe bag or container. Squeeze out as much air as possible. To serve, let them thaw at room temperature for about 15 minutes. They might lose a tiny bit of crunch, but they’ll still be delicious.
Flavor Development: Honestly, these seeds are best the day you make them. The coating is at its peak crunchiness. But they’re still pretty good on day two or three. Just don’t expect them to last that long—they have a way of disappearing.
Nutritional Information & Benefits
Let’s talk about the good stuff. Pumpkin seeds are actually a nutritional powerhouse, and this recipe keeps things relatively balanced despite the sugar coating.
Estimated Nutritional Values (per ¼ cup serving):
- Calories: 180
- Fat: 12g (mostly healthy unsaturated fats)
- Carbohydrates: 12g
- Fiber: 2g
- Sugar: 8g
- Protein: 7g
- Iron: 10% of the Daily Value
- Magnesium: 20% of the Daily Value
Health Benefits: Pumpkin seeds are rich in magnesium, which supports muscle function and sleep quality. They also contain zinc, which is great for immune health—perfect for cold and flu season. The fiber and protein make them a satisfying snack that won’t spike your blood sugar too much.
Dietary Considerations: This recipe is naturally gluten-free and can be made vegan with a simple swap. It’s also nut-free if you stick to the basic version. The main allergens to note are dairy (from the butter) and possibly tree nuts if you add the pecan variation.
Personal Wellness Perspective: I love that this recipe turns a nutrient-dense seed into something that feels like a treat. It’s a great way to get kids (or picky adults) to eat something that’s actually good for them. I don’t feel guilty eating a handful of these because I know I’m getting protein, fiber, and minerals along with that cinnamon sugar crunch.
FAQs
Can I use store-bought pumpkin seeds instead of fresh ones?
Absolutely. Look for raw, unsalted pumpkin seeds (often labeled as pepitas). Avoid roasted or salted seeds, as they’ll throw off the cooking time and flavor. If you only have roasted seeds, reduce the roasting time by about 3 minutes and skip the added salt.
Why did my pumpkin seeds turn out chewy instead of crunchy?
This usually happens for one of two reasons: the seeds weren’t dry enough before roasting, or they didn’t cook long enough. Make sure to pat the seeds very dry with a towel before adding the coating. If they’re still chewy after cooling, pop them back in the oven at 300°F for 3-5 minutes.
Can I make these in an air fryer?
Yes! Air fryers work great for this recipe. Preheat your air fryer to 350°F (175°C). Spread the coated seeds in the basket in a single layer. Cook for 6-8 minutes, shaking the basket halfway through. Keep a close eye on them—air fryers cook faster than ovens.
How do I prevent the sugar coating from burning?
The key is to watch the seeds closely in the last few minutes of cooking. Sugar caramelizes quickly at high temperatures. If your oven runs hot, reduce the temperature to 350°F. You can also line your baking sheet with parchment paper, which helps prevent the sugar from sticking and burning.
Can I double this recipe?
Definitely. Just make sure to use two baking sheets so the seeds are in a single layer. Rotate the pans halfway through cooking for even results. The cooking time might increase by 1-2 minutes, so keep an eye on them.
Conclusion
So there you have it—the best easy cinnamon sugar pumpkin seeds recipe, inspired by an exterminator who just wanted his kids to eat pumpkin seeds. Honestly, I think about Dave every time I make these. He had no idea he was handing me a recipe I’d use for years. But that’s the thing about good cooking advice. It comes when you least expect it, and it sticks with you.
These seeds are quick, they’re easy, and they turn something you’d normally toss in the compost into the most popular snack at your table. Whether you’re making them after a pumpkin carving session, packing them for a fall hike, or just craving something sweet and crunchy, this recipe delivers. And the best part? You can make it your own. Add more cinnamon, swap the sugar, throw in some pecans—it’s hard to mess this up.
I’d love to hear how yours turn out. Did you add a secret spice? Did your kids actually eat them? Did you hide the bowl in the pantry so you didn’t eat the whole batch? (No judgment here—I’ve done it.) Drop a comment below and let me know. And if you’re looking for another quick fall snack, you might enjoy my caramel apple dip or these salted maple roasted pecans. Happy snacking!
Pin This Recipe!
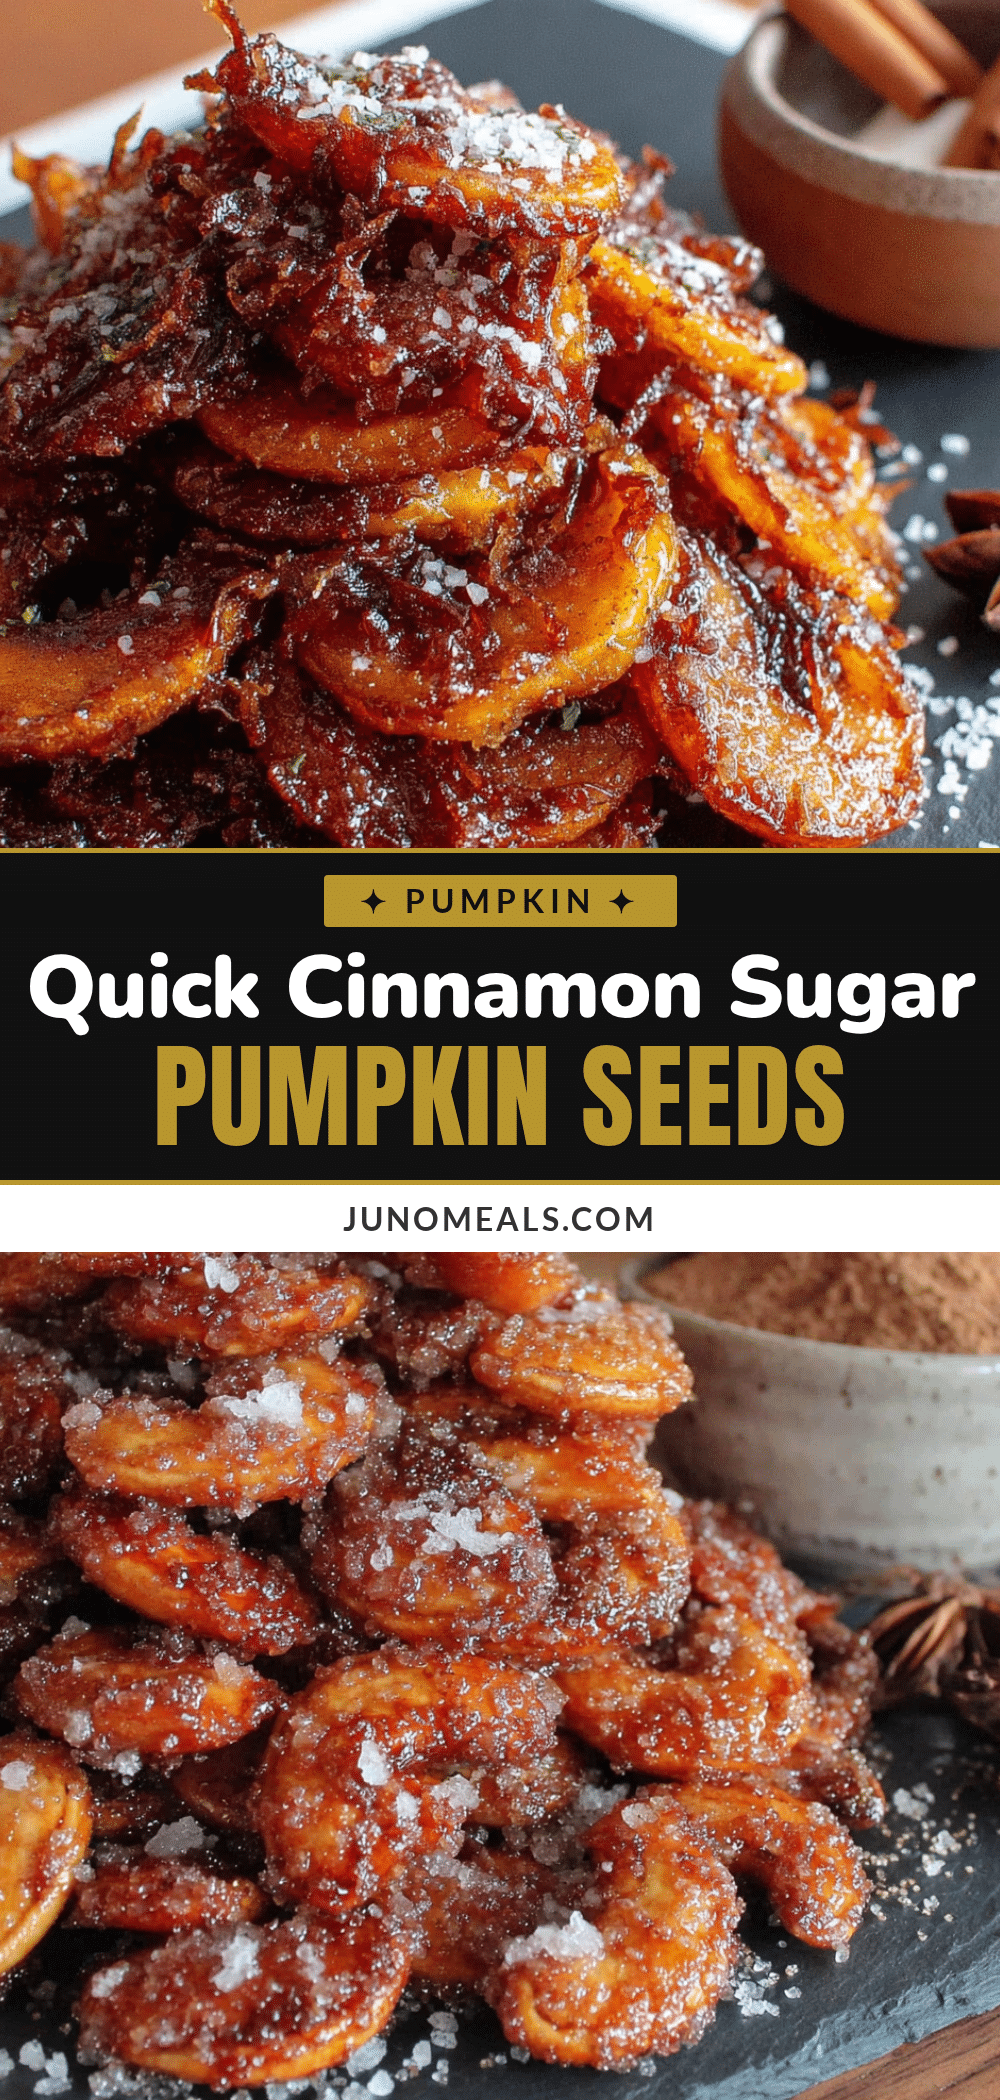
Best Easy Cinnamon Sugar Pumpkin Seeds Recipe
Quick and easy cinnamon sugar pumpkin seeds that taste like a cinnamon roll. Ready in under 20 minutes with simple pantry ingredients, these crunchy, candy-like seeds are the perfect fall snack.
- Prep Time: 5 minutes
- Cook Time: 10 minutes
- Total Time: 15 minutes
- Yield: 4 servings 1x
- Category: Snack
- Cuisine: American
Ingredients
- 1 cup raw pumpkin seeds, cleaned
- 2 tablespoons unsalted butter, melted
- 2 tablespoons brown sugar, packed
- 1 teaspoon ground cinnamon
- ¼ teaspoon salt
- ½ teaspoon vanilla extract (optional)
Instructions
- Preheat your oven to 375°F (190°C). Line a baking sheet with parchment paper or a silicone mat.
- Clean and dry your pumpkin seeds. If using fresh seeds, rinse off pulp and pat very dry with paper towels or a clean kitchen towel.
- Melt the butter in a small microwave-safe bowl (20-30 seconds) or on the stovetop. Let cool slightly.
- In a medium mixing bowl, combine melted butter, brown sugar, cinnamon, salt, and vanilla extract (if using). Stir until it forms a thick, grainy paste.
- Add the dried pumpkin seeds to the bowl and toss until every seed is evenly coated.
- Spread the coated seeds in a single, even layer on the prepared baking sheet. Gently separate any clumps.
- Roast for 8-10 minutes, checking at 8 minutes. The seeds should be fragrant and the coating bubbling. Watch carefully to prevent burning.
- Remove from oven and let cool completely on the baking sheet for at least 10 minutes. The seeds will crisp up as they cool.
Notes
For best crunch, dry seeds thoroughly before coating. Watch closely in the last few minutes to prevent burning. Cool completely before serving for maximum crispiness. Store in an airtight container at room temperature for up to 5 days.
Nutrition
- Serving Size: ¼ cup
- Calories: 180
- Sugar: 8
- Sodium: 150
- Fat: 12
- Saturated Fat: 4
- Carbohydrates: 12
- Fiber: 2
- Protein: 7
Keywords: cinnamon sugar pumpkin seeds, roasted pumpkin seeds, fall snack, Halloween snack, easy pumpkin seeds recipe


