I figured making meringue cookies was a precise, fussy science that required a pastry degree and a perfectly dry day. It took about one batch of these ghost-shaped mistakes for that assumption to fall apart completely. Honestly, I was just trying to use up leftover egg whites from a batch of homemade pasta, and I needed something, anything, to distract my toddler from the fact that it was raining on a Tuesday.
We were supposed to be making Halloween treats, but let’s face it, my first attempt looked less like a ghost and more like a sad, melted snowman. They were flat, they were sticky, and my kid called them “boo-blobs.” But the second batch? Something clicked. I stopped over-mixing, I got the timing right, and suddenly, these perfect little ghost meringue cookies with chocolate chip eyes were staring back at me. They were light, they were crisp, and they had that perfect, slightly chewy center that makes a good meringue so satisfying.
The best part? This recipe is almost ridiculously simple. You don’t need any special equipment beyond a mixer, and the ingredients are things you probably already have in your pantry. It’s the kind of project that feels like a win, even when you’re just doing it for the fun of it. And honestly, there’s something deeply satisfying about piping out a little ghost and seeing it come to life in the oven.
Why You’ll Love This Recipe
These ghost meringue cookies are more than just a pretty face. They are a perfect blend of fun and function, ideal for anyone who wants a show-stopping treat without spending hours in the kitchen.
- Incredibly Easy: With just a handful of ingredients and a few simple steps, these cookies come together in under 30 minutes of active time. The oven does most of the work.
- Naturally Gluten-Free & Low-Fat: Made primarily from egg whites and sugar, these cookies are a lighter alternative to butter-laden Halloween sweets. They are a great option for friends with dietary restrictions.
- Perfect for Any Spooky Occasion: From Halloween parties to a fun weekend baking project with kids, these ghosts are guaranteed to bring smiles. They also make a fantastic, unique addition to a dessert table alongside other treats.
- Endlessly Customizable: The base recipe is a blank canvas. You can change the eye colors, add a touch of flavoring, or even dip them in chocolate for a more decadent treat.
- Unbelievably Cute: Let’s be real—the main draw is the adorable factor. These little guys are just too cute to eat. (But you will, and you’ll love every bite.)
What makes this recipe different from the rest? It’s the foolproof technique. I’ve tested the ratios and the baking time to ensure you get that perfect, crisp exterior with a soft, marshmallowy interior every single time. No more sticky, weeping meringues. This is the kind of recipe that makes you feel like a pro, even if you are a total beginner.
What Ingredients You Will Need
This recipe relies on a few simple, pantry-staple ingredients to create something magical. The quality of your ingredients matters, especially with such a short list.
- Egg Whites (4 large, room temperature): The foundation of our meringue. Using room temperature egg whites is crucial—they whip up to a greater volume and create a more stable foam. (Pro-tip: Separate your eggs when they are cold, then let the whites sit on the counter for 30 minutes before whipping.)
- Granulated Sugar (1 cup / 200g): This is not just for sweetness. Sugar stabilizes the egg white foam and gives the meringue its structure and glossy sheen. I recommend using standard white granulated sugar. Do not use powdered sugar, as it contains cornstarch which can affect the texture.
- Cream of Tartar (1/2 teaspoon): This is the secret weapon for a stable meringue. It helps to strengthen the egg white proteins and prevents the sugar from crystallizing, ensuring a smooth, billowy texture. If you don’t have it, you can substitute with 1 teaspoon of lemon juice or white vinegar.
- Vanilla Extract (1 teaspoon): A touch of vanilla adds a lovely warmth and depth of flavor. For a more intense flavor, you can use vanilla bean paste or the seeds from half a vanilla bean.
- Mini Chocolate Chips (1/4 cup / 45g): These are for the ghost’s eyes. Standard mini chocolate chips work perfectly. You could also use dark chocolate chips, white chocolate chips, or even small candies like M&M’s Minis for a pop of color.
Ingredient Substitutions & Notes:
- For a different flavor: Swap the vanilla extract for peppermint extract for a cool, festive twist, or add a pinch of almond extract for a nutty undertone.
- For a colorful ghost: Add a few drops of gel food coloring to the meringue before piping. Gel colors are best because they don’t add extra liquid that can destabilize the meringue.
- For a vegan option: Unfortunately, traditional meringue is not vegan. However, you can make a similar treat using aquafaba (the liquid from a can of chickpeas). The process is the same, but the texture will be slightly different.
Equipment Needed
You don’t need a professional kitchen to make these adorable ghosts. Here is what you will need:
- Electric Mixer: A stand mixer with a whisk attachment is ideal, but a hand mixer will work just as well. You will be whipping for about 8-10 minutes, so your arm will thank you for using an electric mixer.
- Large Mixing Bowl: Make sure it is spotlessly clean and free of any grease. Any fat residue can prevent your egg whites from whipping properly. A glass or metal bowl is best.
- Piping Bag & Tip: A large piping bag fitted with a large round tip (like a Wilton 1A or 2A) is perfect for creating the ghost shape. If you don’t have a piping bag, you can use a sturdy zip-top bag with the corner snipped off.
- Baking Sheet & Parchment Paper: A standard baking sheet lined with parchment paper is essential. The parchment prevents the meringues from sticking.
- Rubber Spatula: For scraping down the bowl and folding in the chocolate chips.
Preparation Method
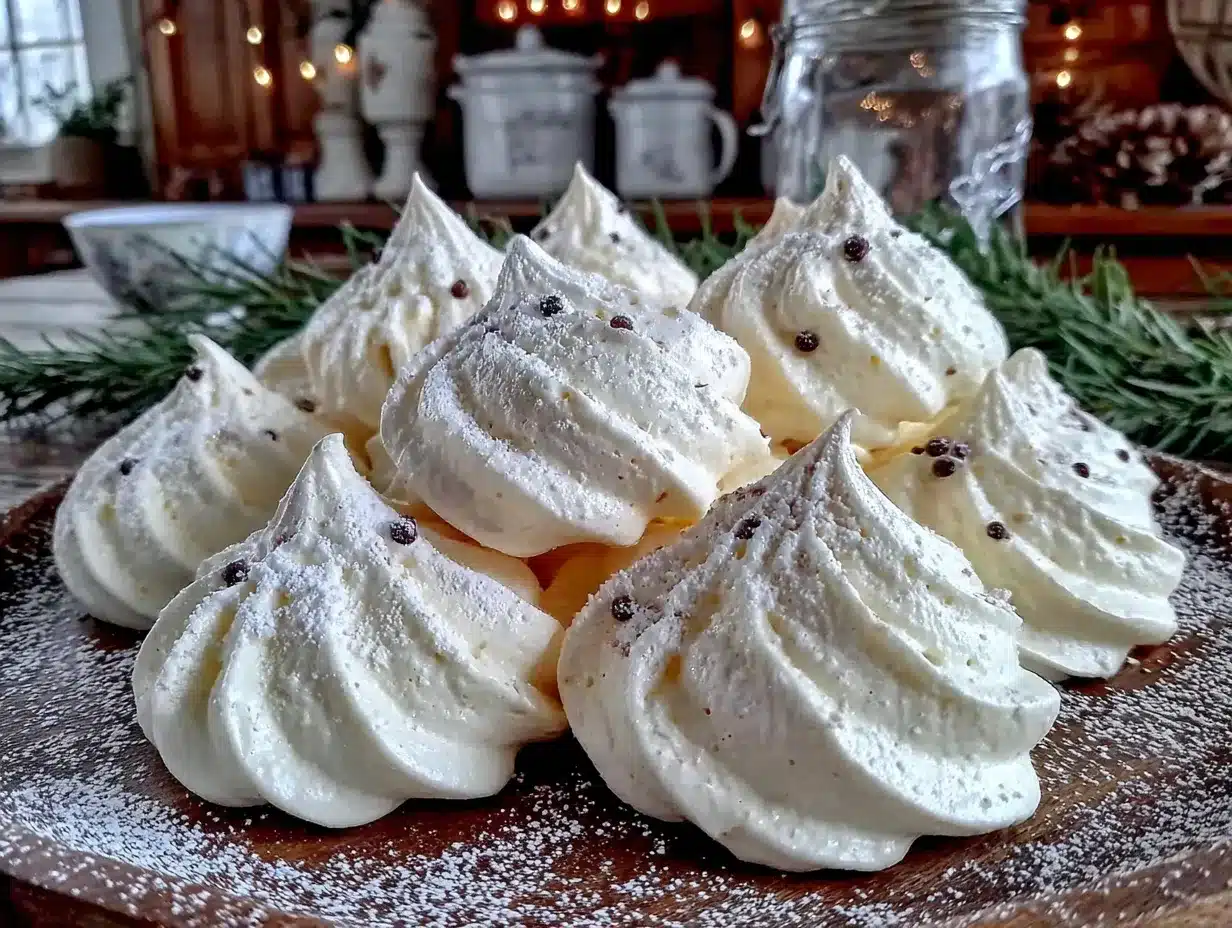
Follow these steps carefully, and you will have perfect ghost meringue cookies every time. The key is patience, especially when whipping the egg whites.
- Preheat & Prepare: Preheat your oven to 200°F (93°C). Line a large baking sheet with parchment paper. This low temperature is what dries out the meringues without browning them.
- Whip the Egg Whites: Place the room-temperature egg whites and cream of tartar in the clean, grease-free bowl of your stand mixer. Start mixing on medium speed until the mixture becomes frothy and foamy, about 2 minutes. It should look like a bubbly sea.
- Gradually Add Sugar: With the mixer running on medium-low speed, begin adding the granulated sugar, one tablespoon at a time. This is the most important step. Adding the sugar slowly allows it to dissolve completely, preventing a gritty texture. Take your time—this should take about 3-4 minutes.
- Whip to Stiff Peaks: Once all the sugar is added, increase the speed to high. Whip until the meringue is thick, glossy, and forms stiff, upright peaks. You know it’s ready when you can turn the bowl upside down and the meringue doesn’t move. This usually takes another 4-6 minutes. The mixture should feel smooth between your fingers, not grainy.
- Add Vanilla: Add the vanilla extract and whip for another 30 seconds until just combined.
- Pipe the Ghosts: Transfer the meringue to your prepared piping bag. Hold the bag vertically about 1/2 inch above the baking sheet. Pipe a tall, round blob, about 1.5 inches wide and 2 inches tall. As you finish piping, stop applying pressure and pull the bag straight up to create a little peak on the ghost’s head. This is what makes them look like classic ghosts. Leave about 1 inch of space between each ghost.
- Add the Eyes: Gently press two mini chocolate chips into the upper portion of each ghost to create the eyes. Don’t push them in too deep, or they will sink into the meringue.
- Bake Low & Slow: Place the baking sheet in the preheated oven and bake for 60 minutes. Do not open the oven door during this time! After 60 minutes, turn off the oven but leave the cookies inside to cool completely for at least 1 hour, or preferably overnight. This drying process is what gives them their crisp texture.
- Cool Completely: Once the oven is cool, remove the baking sheet. The meringues should lift easily off the parchment paper. If they stick, they need more time to dry. Let them cool on the baking sheet for another 30 minutes.
Cooking Tips & Techniques
I have made plenty of mistakes with meringue so you don’t have to. Here are my best tips for success:
- The Bowl Must Be Clean: This is non-negotiable. Any trace of fat from butter, oil, or even egg yolk will prevent your egg whites from whipping. Wash your bowl and whisk with hot, soapy water and dry them thoroughly before you start.
- Room Temperature Matters: Cold egg whites will not whip to the same volume as room-temperature ones. They will be dense and won’t hold their shape well. Set them out for 30 minutes before you start.
- Don’t Over-whip: You want stiff peaks, but if you whip too long, the meringue can become dry and grainy. Stop as soon as the peaks are stiff and glossy. A good test is to lift the whisk—the peak should stand straight up without flopping over.
- Humidity is the Enemy: Meringue loves a dry day. If you are baking on a humid or rainy day, your meringues might become sticky and soft. You can try adding an extra tablespoon of sugar to help stabilize them, but it’s not a guaranteed fix. A dry, cool day is truly best.
- Pipe with Confidence: Don’t overthink the piping. A slightly imperfect ghost is more charming than a perfectly uniform one. The little peaks and quirks are what give them personality.
Variations & Adaptations
Once you master the basic ghost, the possibilities are endless. Here are a few fun ways to change things up:
- Spooky Spider Webs: After piping the ghosts, use a toothpick to drag a little bit of melted dark chocolate in a spiral pattern on the baking sheet to create a spider web effect. Place the ghost on top!
- Chocolate-Dipped Ghosts: Once the meringues are cool, dip the bottoms in melted dark or white chocolate. Let them set on a piece of parchment paper. This adds a decadent crunch and a beautiful finish.
- Pumpkin Spice Ghosts: Add 1 teaspoon of pumpkin pie spice and a pinch of cinnamon to the sugar before you start whipping. This gives them a lovely fall flavor that is perfect for October.
- Colorful Spirits: Add a drop of purple, green, or orange gel food coloring to the meringue before piping. You can even create a ghost with a gradient effect by painting stripes of color inside your piping bag before filling it with meringue.
- Mini Meringue Kisses: If you don’t want to pipe ghosts, you can simply pipe small, round kisses. They bake in about 45 minutes and are perfect for snacking.
Serving & Storage Suggestions
These ghost meringue cookies are best enjoyed within a few days of baking, but they store surprisingly well if kept properly.
- Serving: Serve them at room temperature. They are perfect on a Halloween dessert table, in a goodie bag, or as a fun snack for a spooky movie night. They pair wonderfully with a cup of hot apple cider or a warm mug of hot chocolate.
- Storage: Store the completely cooled meringues in an airtight container at room temperature. Do not refrigerate them, as the humidity in the fridge will make them sticky. They will stay crisp for up to 2 weeks.
- Freezing: You can freeze baked meringues for up to 3 months. Place them in a single layer in a freezer-safe container, separating layers with parchment paper. Thaw them at room temperature for about 30 minutes before serving. They will lose a little bit of their initial crispness but will still be delicious.
- Flavor Development: Meringues are best within the first 3-4 days. The texture is at its peak right after they have cooled and dried. Over time, they can absorb a bit of moisture from the air, making them slightly chewy, which some people actually prefer.
Nutritional Information & Benefits
While these are a treat, they are a lighter option compared to many other cookies.
- Per Serving (1 ghost cookie): Approximately 45 calories, 1g fat, 9g carbohydrates, 1g protein.
- Low in Fat: Unlike butter-based cookies, these are virtually fat-free, making them a nice option for those watching their fat intake.
- Gluten-Free: This recipe is naturally gluten-free, so it is safe for guests with celiac disease or gluten sensitivity.
- Good Source of Protein: Egg whites are a complete protein, providing all the essential amino acids. While the amount per cookie is small, it’s a nice bonus.
- Potential Allergens: Contains eggs. The chocolate chips may contain dairy and soy, so check the label if you have allergies.
Conclusion
These adorable ghost meringue cookies with chocolate chip eyes are more than just a Halloween treat—they are a little piece of baking magic. They are proof that you don’t need complicated techniques or fancy ingredients to create something truly special. Whether you are making them for a party, a classroom treat, or just a fun afternoon with your family, they are guaranteed to bring a smile to everyone’s face.
I love this recipe because it is a perfect blend of simplicity and whimsy. It’s the kind of thing that makes you feel like a kid again, watching something so cute come to life in your own kitchen. So go ahead, pipe a little ghost, give him some chocolate chip eyes, and enjoy the process. And hey, if you make a batch, I would love to hear how they turned out! Drop a comment below and let me know if you tried any fun variations. Happy baking!
Frequently Asked Questions
Can I make these ghost meringues without a piping bag?
Absolutely! If you don’t have a piping bag, you can use a sturdy zip-top bag. Simply fill the bag with the meringue, snip off a small corner, and pipe away. It might not be as precise, but it will still work perfectly.
Why did my meringue cookies turn out sticky?
Sticky meringues are usually a sign of under-baking or high humidity. Make sure you bake them for the full 60 minutes and then let them cool completely in the turned-off oven. If the weather is humid, you might need to bake them for an extra 10-15 minutes.
Can I use liquid food coloring?
You can, but it is not recommended. Liquid food coloring adds extra moisture to the meringue, which can make it unstable and cause it to deflate. Gel or paste food coloring is a much better choice as it won’t affect the texture.
How do I know when the egg whites are whipped enough?
The best test is the “stiff peak” test. When you lift the whisk attachment, the meringue should form a peak that stands straight up without flopping over. The mixture should also be very glossy and smooth. If it looks dry or grainy, you have over-whipped it.
Can I freeze the unbaked meringue mixture?
No, you cannot freeze the unbaked meringue. The structure will break down as it thaws, and it will not whip up again properly. You must bake them immediately after whipping. However, you can freeze the baked cookies as described in the storage section.
Pin This Recipe!
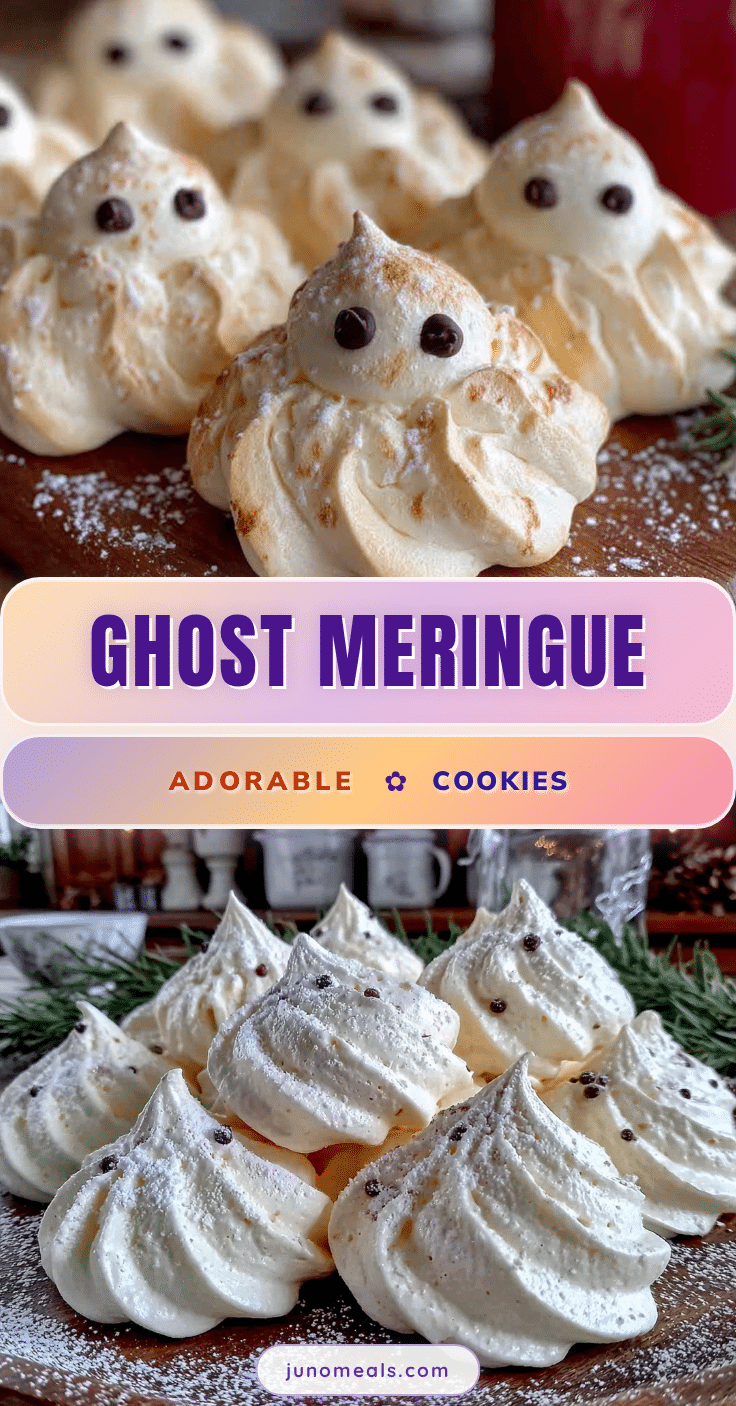
Adorable Ghost Meringue Cookies with Chocolate Chip Eyes
These light, crisp ghost meringue cookies with chocolate chip eyes are a fun and easy Halloween treat. Made with just a few simple ingredients, they are naturally gluten-free and low in fat.
- Prep Time: 20 minutes
- Cook Time: 60 minutes
- Total Time: 1 hour 20 minutes (plus cooling time)
- Yield: 24 servings 1x
- Category: Dessert
- Cuisine: American
Ingredients
- 4 large egg whites, room temperature
- 1 cup (200g) granulated sugar
- 1/2 teaspoon cream of tartar
- 1 teaspoon vanilla extract
- 1/4 cup (45g) mini chocolate chips
Instructions
- Preheat your oven to 200°F (93°C). Line a large baking sheet with parchment paper.
- Place the room-temperature egg whites and cream of tartar in a clean, grease-free bowl of a stand mixer. Start mixing on medium speed until frothy and foamy, about 2 minutes.
- With the mixer running on medium-low speed, gradually add the granulated sugar, one tablespoon at a time, taking about 3-4 minutes.
- Once all the sugar is added, increase the speed to high. Whip until the meringue is thick, glossy, and forms stiff, upright peaks, about 4-6 minutes. The mixture should feel smooth between your fingers, not grainy.
- Add the vanilla extract and whip for another 30 seconds until just combined.
- Transfer the meringue to a piping bag fitted with a large round tip (like Wilton 1A or 2A). Pipe tall, round blobs about 1.5 inches wide and 2 inches tall onto the prepared baking sheet, leaving about 1 inch of space between each. Pull the bag straight up to create a little peak on the ghost’s head.
- Gently press two mini chocolate chips into the upper portion of each ghost to create the eyes.
- Bake for 60 minutes. Do not open the oven door during this time.
- After 60 minutes, turn off the oven but leave the cookies inside to cool completely for at least 1 hour, or preferably overnight.
- Once the oven is cool, remove the baking sheet. The meringues should lift easily off the parchment paper. If they stick, let them cool on the baking sheet for another 30 minutes.
Notes
For best results, use room temperature egg whites and a clean, grease-free bowl. Avoid making meringues on humid days. If you don’t have cream of tartar, substitute with 1 teaspoon of lemon juice or white vinegar. For a vegan option, use aquafaba instead of egg whites.
Nutrition
- Serving Size: 1 ghost cookie
- Calories: 45
- Sugar: 9
- Sodium: 15
- Fat: 1
- Carbohydrates: 9
- Protein: 1
Keywords: ghost meringue cookies, Halloween cookies, meringue cookies, gluten-free cookies, low-fat cookies, chocolate chip eyes, spooky treats


