I told myself I was going to keep these ghost cupcakes simple. No piping bags, no fancy tips, just a spoon and a steady hand. It took about thirty seconds of staring at a bowl of vanilla buttercream for that plan to fall apart completely.
The thing is, I’ve made a lot of Halloween treats over the years. Some were ambitious (a haunted gingerbread house that collapsed at 2 a.m.), and some were just sad (store-bought cookies with melted candy eyes). These ghost cupcakes were supposed to be the easy win. And honestly? They were. But somewhere between the first swirl of buttercream and the third accidental ghost face that looked more like a surprised potato, I realized something. The “easy” version was fine, but the version with a little extra effort—a piping bag, a good tip, a tiny bit of patience—was the one worth sharing.
That’s the thing about baking. You can take the shortcut, or you can take the path that makes you stop and smile at what you’ve made. These ghost cupcakes are the second kind. They’re not complicated, but they look like you tried. And isn’t that the whole point of Halloween baking? To put a plate of something on the table that makes people say, “Wait, you made those?”
The vanilla buttercream is the star here. It’s not too sweet, not too stiff, and it pipes like a dream. The ghosts themselves are simple—just a round swirl with a couple of chocolate chip eyes—but each one ends up with its own little personality. Some look friendly. Some look confused. One of mine looked like it was judging my life choices. That’s the fun part.
So here’s the recipe. It’s for the baker who wants something cute, something that works, and something that tastes as good as it looks. No stress, no special skills—just a little buttercream and a whole lot of charm.
Why You’ll Love These Ghost Cupcakes
Let me tell you why these little guys have become my go-to for every Halloween party, potluck, and “I need to bring something cute” situation.
- Easy Enough for Beginners: If you can hold a piping bag and drop a chocolate chip, you can make these. No special decorating skills required. I promise.
- Simple Ingredients: Butter, sugar, flour, vanilla, and chocolate chips. You probably have everything already. No strange extracts or hard-to-find decorations.
- Perfect for Halloween Parties: These disappear fast. Kids love them, adults pretend they’re too cool for them, then eat three. They’re the life of the party.
- Customizable and Fun: Each ghost gets its own face. You can make them spooky, silly, or sweet. It’s like a tiny edible art project.
- Seriously Delicious: Forget the box mix. This vanilla cupcake is tender, buttery, and perfectly moist. The buttercream is silky and not cloying. It’s the kind of cupcake you’d be happy to eat even without the ghost face.
What makes this recipe different from the hundreds of other ghost cupcake recipes out there? It’s the buttercream. I use a specific technique—creaming the butter until it’s almost white, then adding the sugar slowly—that gives you a frosting that’s light, fluffy, and stable enough to hold its shape for hours. No melting ghosts here. Plus, the cupcake base is tested and true. I’ve made it a dozen times, and it never fails.
This recipe isn’t just good for a Halloween treat. It’s the kind of recipe that makes you feel proud to say, “I made those.” And honestly, that’s the best feeling in baking.
What Ingredients You Will Need
This recipe uses simple, wholesome ingredients to deliver a tender cupcake and a silky, pipe-able buttercream. Most of these are pantry staples, which makes this a last-minute Halloween win.
For the Vanilla Cupcakes
- 1 ½ cups (190g) all-purpose flour – Spoon and level for accuracy. Too much flour makes dense cupcakes.
- 1 ½ teaspoons baking powder – Fresh baking powder is key for a good rise.
- ¼ teaspoon salt – Balances the sweetness and enhances flavor.
- ½ cup (113g) unsalted butter, softened – I use Kerrygold for its rich flavor, but any good unsalted butter works.
- 1 cup (200g) granulated sugar – White sugar gives the lightest crumb.
- 2 large eggs, room temperature – Cold eggs can seize the batter. Let them sit out for 30 minutes.
- 2 teaspoons vanilla extract – Pure vanilla, not imitation. It makes a difference.
- ½ cup (120ml) whole milk, room temperature – Whole milk gives a richer crumb, but 2% works too.
For the Vanilla Buttercream Frosting
- 1 cup (226g) unsalted butter, softened – Must be soft but not melted. Leave it out for an hour.
- 3 ½ cups (420g) powdered sugar – Sift it if it’s lumpy. Nobody wants lumpy frosting.
- 2 teaspoons vanilla extract – Again, pure vanilla.
- 2-3 tablespoons heavy cream – Or whole milk. Heavy cream makes it extra silky.
- Pinch of salt – Trust me on this.
For the Ghost Decorations
- ½ cup mini chocolate chips – For the eyes. I prefer Ghirardelli, but any brand works.
- Optional: Black gel food coloring – For drawing mouths if you want more detail. I usually skip this and just use chips.
Ingredient Tips: For the best cupcakes, make sure your butter and eggs are truly at room temperature. Cold ingredients don’t emulsify properly, leading to a dense, tough crumb. If you’re in a rush, you can warm your eggs in a bowl of warm water for 5 minutes. For the buttercream, if it looks curdled or separated at any point, don’t panic. Just keep mixing and add a tablespoon of cream. It will come back together. I’ve saved many a batch this way.
Equipment Needed
You don’t need a professional bakery setup for these, but a few key tools make the process smoother.
- 12-count standard muffin pan – Non-stick is fine, but I prefer a light-colored metal pan for even baking.
- Paper cupcake liners – White or black liners look great for Halloween. Avoid the thin cheap ones; they stick.
- Electric hand mixer or stand mixer – You can do this by hand, but your arm will hate you by the time you’re done creaming the butter.
- Large piping bag – Disposable or reusable. I use a reusable silicone one.
- Large round piping tip (Wilton 1A or similar) – This gives the perfect ghost shape. A star tip also works for a different texture.
- Rubber spatula – For scraping the bowl. Don’t skip this.
- Cooling rack – Essential for cooling cupcakes evenly. If you leave them in the pan, they get soggy bottoms.
- Small offset spatula – Optional, but helpful for smoothing frosting if you mess up a ghost.
Budget Tip: If you don’t have a piping bag, you can use a sturdy zip-top bag with the corner snipped off. It won’t be as precise, but it works in a pinch. I’ve done it. It’s fine.
Preparation Method
Let’s make some ghosts. Follow these steps, and you’ll have a tray of adorable, delicious cupcakes in about an hour.
Step 1: Preheat and Prep
Preheat your oven to 350°F (175°C). Line your muffin pan with 12 paper liners. Set aside.
Step 2: Make the Cupcake Batter
In a medium bowl, whisk together the flour, baking powder, and salt. Set aside. In a large bowl (or the bowl of your stand mixer), beat the softened butter and granulated sugar together on medium-high speed until light and fluffy—about 3 to 4 minutes. It should look pale and almost doubled in volume. Scrape down the sides of the bowl.
Add the eggs one at a time, beating well after each addition. Add the vanilla extract and beat until combined. The mixture might look slightly curdled at this point—that’s okay, especially if your eggs were a little cold.
With the mixer on low speed, add the flour mixture in three additions, alternating with the milk. Start and end with the flour. (So: flour, milk, flour, milk, flour.) Mix just until combined after each addition. Overmixing will make your cupcakes tough. Stop as soon as you don’t see any more streaks of flour.
Step 3: Bake the Cupcakes
Divide the batter evenly among the 12 liners. Each should be about two-thirds full. Bake for 18 to 20 minutes, or until a toothpick inserted into the center of a cupcake comes out clean or with a few moist crumbs. The tops should be golden and spring back when lightly touched.
Let the cupcakes cool in the pan for 5 minutes, then transfer them to a wire rack to cool completely. Do not frost them while they’re warm—the buttercream will melt into a puddle. I learned this the hard way at a party once. Not cute.
Step 4: Make the Vanilla Buttercream
While the cupcakes cool, make the frosting. In a large bowl, beat the softened butter on medium speed until smooth and creamy—about 2 minutes. It should be pale and fluffy.
Add the powdered sugar, one cup at a time, beating on low speed until incorporated. Scrape the bowl after each addition. Once all the sugar is in, add the vanilla extract, a pinch of salt, and 2 tablespoons of heavy cream. Beat on medium-high speed for 3 to 4 minutes, until the frosting is light, fluffy, and spreadable. If it’s too thick, add the remaining tablespoon of cream. If it’s too thin, add a little more powdered sugar.
Sensory Cue: The finished buttercream should hold a peak when you lift the beater. It should feel silky, not greasy.
Step 5: Assemble the Ghosts
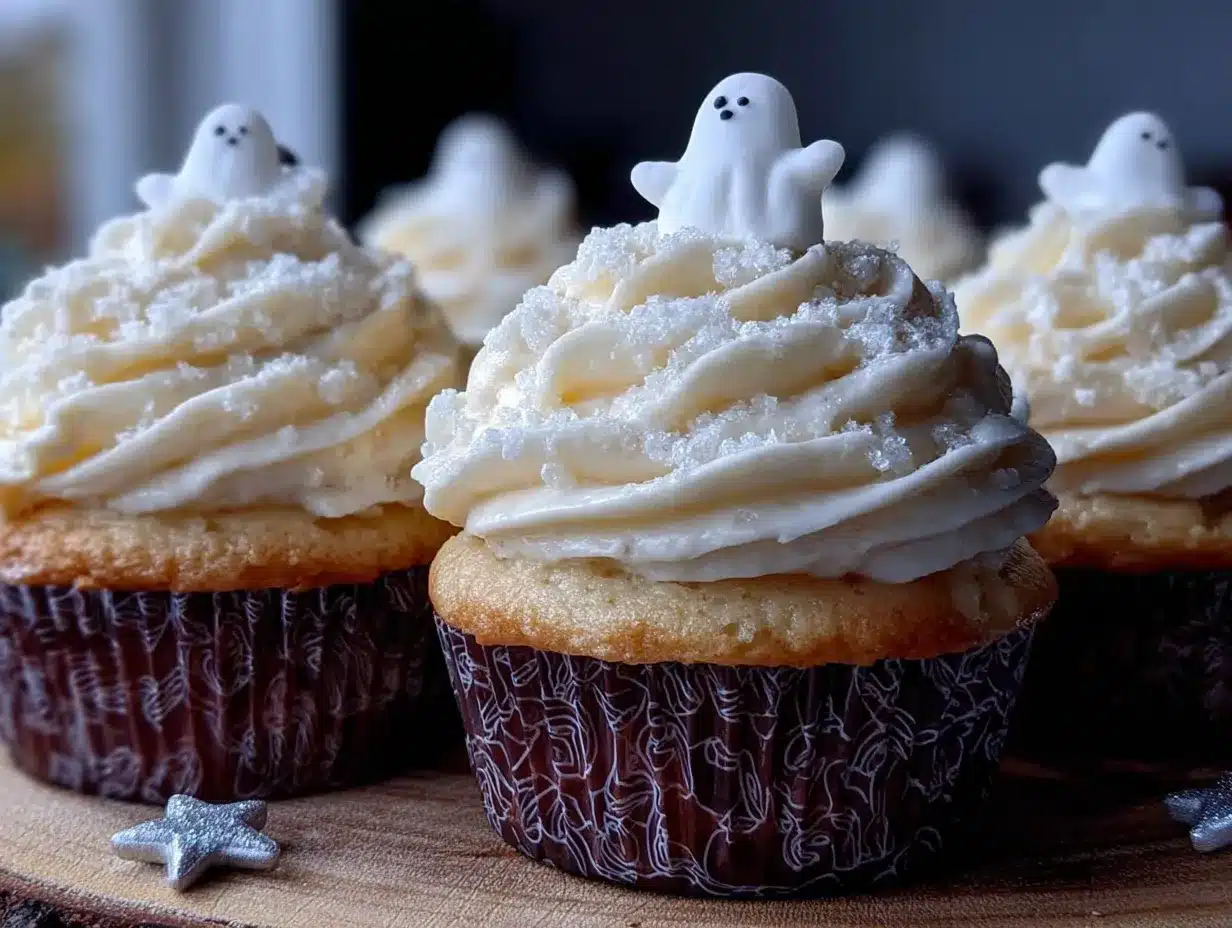
Fit your piping bag with the large round tip. Fill the bag with the buttercream. Hold the bag straight up and down, with the tip about ½ inch above the center of a cooled cupcake. Squeeze firmly and steadily, letting the frosting pile up into a tall, round mound. As you reach the top, slowly lift the bag while still squeezing, then stop squeezing and pull away. You want a nice rounded dome shape—that’s the ghost’s head.
Immediately press two mini chocolate chips into the frosting for eyes. Place them close together for a cute ghost, or far apart for a surprised one. If you want, you can also pipe a small mouth using black gel food coloring, but I honestly think the chip eyes are enough.
Repeat with the remaining cupcakes. You’ll get the hang of it after the first two.
Cooking Tips & Techniques
I’ve made these ghost cupcakes more times than I can count, and I’ve made every mistake in the book. Here’s what I’ve learned.
The Buttercream Consistency is Everything: If your buttercream is too stiff, the ghosts will look lumpy and weird. If it’s too soft, they’ll slump into sad blobs. The perfect texture is like a thick, spreadable cloud. If you’re unsure, err on the side of slightly stiffer. You can always let it warm up a bit in the bag.
Don’t Overfill the Cupcake Liners: I know it’s tempting to get a bigger cupcake, but overfilling leads to muffin tops that overflow and flatten. Stick to two-thirds full. You’ll get 12 perfect, domed cupcakes.
The Room Temperature Rule is Real: I used to think this was baking snobbery. Then I made a batch with cold eggs and cold butter, and the cupcakes came out dense and flat. Room temperature ingredients emulsify properly, which gives you that light, tender crumb. It matters.
Piping Practice: Your first ghost might look a little… abstract. That’s fine. The beauty of these is that each one is unique. If you mess up, scrape the frosting off, put it back in the bowl, and try again. No one will know.
Chill the Frosted Cupcakes: Once you’ve piped all the ghosts, pop the tray in the fridge for 15 minutes. This sets the buttercream and makes the cupcakes easier to transport. It also helps the chocolate chips stay put.
Variations & Adaptations
One of the best things about this recipe is how easy it is to adapt. Here are a few ways to make it your own.
Chocolate Ghosts: Swap ¼ cup of the all-purpose flour for ¼ cup of unsweetened cocoa powder. You’ll get a chocolate cupcake with the same vanilla buttercream ghost on top. The contrast is gorgeous.
Gluten-Free Option: Use a 1:1 gluten-free baking flour blend. I’ve tested this with Bob’s Red Mill, and it works perfectly. Just don’t overmix the batter.
Dairy-Free Ghosts: Use vegan butter (like Miyoko’s) and a dairy-free milk alternative in both the cupcakes and the buttercream. The texture will be slightly different, but still delicious. I’d recommend using a little extra powdered sugar in the frosting to help it stiffen up.
Spooky Spider Variation: Instead of ghosts, pipe the buttercream into flat swirls and add eight chocolate chip legs to make spiders. My kids love this version even more than the ghosts.
Flavor Twist: Add ½ teaspoon of almond extract to the buttercream. It gives a subtle, nutty flavor that pairs beautifully with the vanilla cupcake. I tried this on a whim one year, and now I can’t go back.
Serving & Storage Suggestions
These ghost cupcakes are best served at room temperature. The buttercream softens slightly, and the cupcake crumb is perfectly tender. If you’ve refrigerated them, let them sit out for 20 to 30 minutes before serving.
For Parties: Arrange them on a black or orange platter. Add a few candy pumpkins or sprinkles around the base for a festive touch. They’re the centerpiece of any Halloween dessert table.
Storage: Store leftover cupcakes in an airtight container at room temperature for up to 2 days, or in the refrigerator for up to 5 days. If refrigerating, let them come to room temperature before serving for the best texture.
Freezing: You can freeze the unfrosted cupcakes for up to 3 months. Wrap them tightly in plastic wrap and then foil. Thaw at room temperature, then frost and decorate. I do this every year in September so I’m ready for October parties.
Flavor Development: Honestly, these cupcakes are best the day they’re made. The buttercream is fluffiest, and the cupcake is freshest. That said, they’re still delicious the next day. The flavors meld together, and the buttercream firms up a little. Some people prefer them that way.
Nutritional Information & Benefits
Let’s be real—these are a treat. But here’s the approximate nutritional breakdown for one ghost cupcake (based on 12 servings):
- Calories: ~380
- Fat: 22g
- Carbohydrates: 45g
- Protein: 3g
- Sugar: 35g
Health Highlights: The butter in this recipe provides a good source of Vitamin A. The eggs add protein and choline, which is great for brain health. And honestly, a little indulgence is good for the soul. Baking is a form of self-care, and sharing these with loved ones is a form of connection.
Dietary Considerations: This recipe contains gluten, dairy, and eggs. For allergen-friendly options, see the Variations section above.
My Perspective: I don’t believe in “healthy” cupcakes. I believe in real ingredients, eaten in moderation, with joy. These ghost cupcakes are made with butter, sugar, and love. That’s a combination I can stand behind.
Conclusion
These ghost cupcakes are more than just a Halloween treat. They’re a little moment of creativity in the kitchen, a reason to gather friends and family, and a reminder that baking doesn’t have to be perfect to be wonderful. Each ghost has its own personality, and that’s the whole point.
I’ve made these for costume parties, classroom celebrations, and quiet nights at home. They never fail to make people smile. And honestly, that’s the best thing you can ask for from a recipe.
So go ahead. Make a batch. Give one a surprised face, one a grumpy face, and one a face that looks like it just saw a spider. See if anyone notices. They won’t care—they’ll be too busy eating them.
If you make these, I’d love to hear about it. Leave a comment below, tag me in your photos, or tell me about the weirdest ghost face you came up with. Happy Halloween, and happy baking!
Frequently Asked Questions
Can I use a boxed cake mix for these ghost cupcakes?
Absolutely. If you’re short on time, a good vanilla boxed cake mix works fine. Just follow the package instructions and let the cupcakes cool completely before frosting. The ghost decoration is the star anyway.
How do I get my buttercream to be perfectly white?
Use a high-quality unsalted butter that’s pale in color, and beat it until it’s very light and fluffy before adding the sugar. A tiny drop of purple food coloring can also help cancel out any yellow tint. But honestly, a slightly warm, creamy buttercream is beautiful as is.
Can I make these cupcakes ahead of time?
Yes. Bake the cupcakes up to 2 days in advance and store them in an airtight container at room temperature. Make the buttercream the day you plan to serve them, or make it a day ahead and store it in the fridge. Let it come to room temperature and re-whip before piping.
Why did my buttercream turn out greasy?
This usually happens when the butter is too warm. If your kitchen is hot, the butter can over-soften, causing the frosting to separate. Try chilling the bowl and the beater for 10 minutes, then re-whip. You can also add a tablespoon of cold cream to help bring it back together.
Can I freeze the decorated ghost cupcakes?
I don’t recommend it. The buttercream can absorb moisture from the freezer and lose its texture. If you need to freeze, freeze the unfrosted cupcakes and decorate them after thawing. The chocolate chips can also get a weird white bloom in the freezer.
Pin This Recipe!
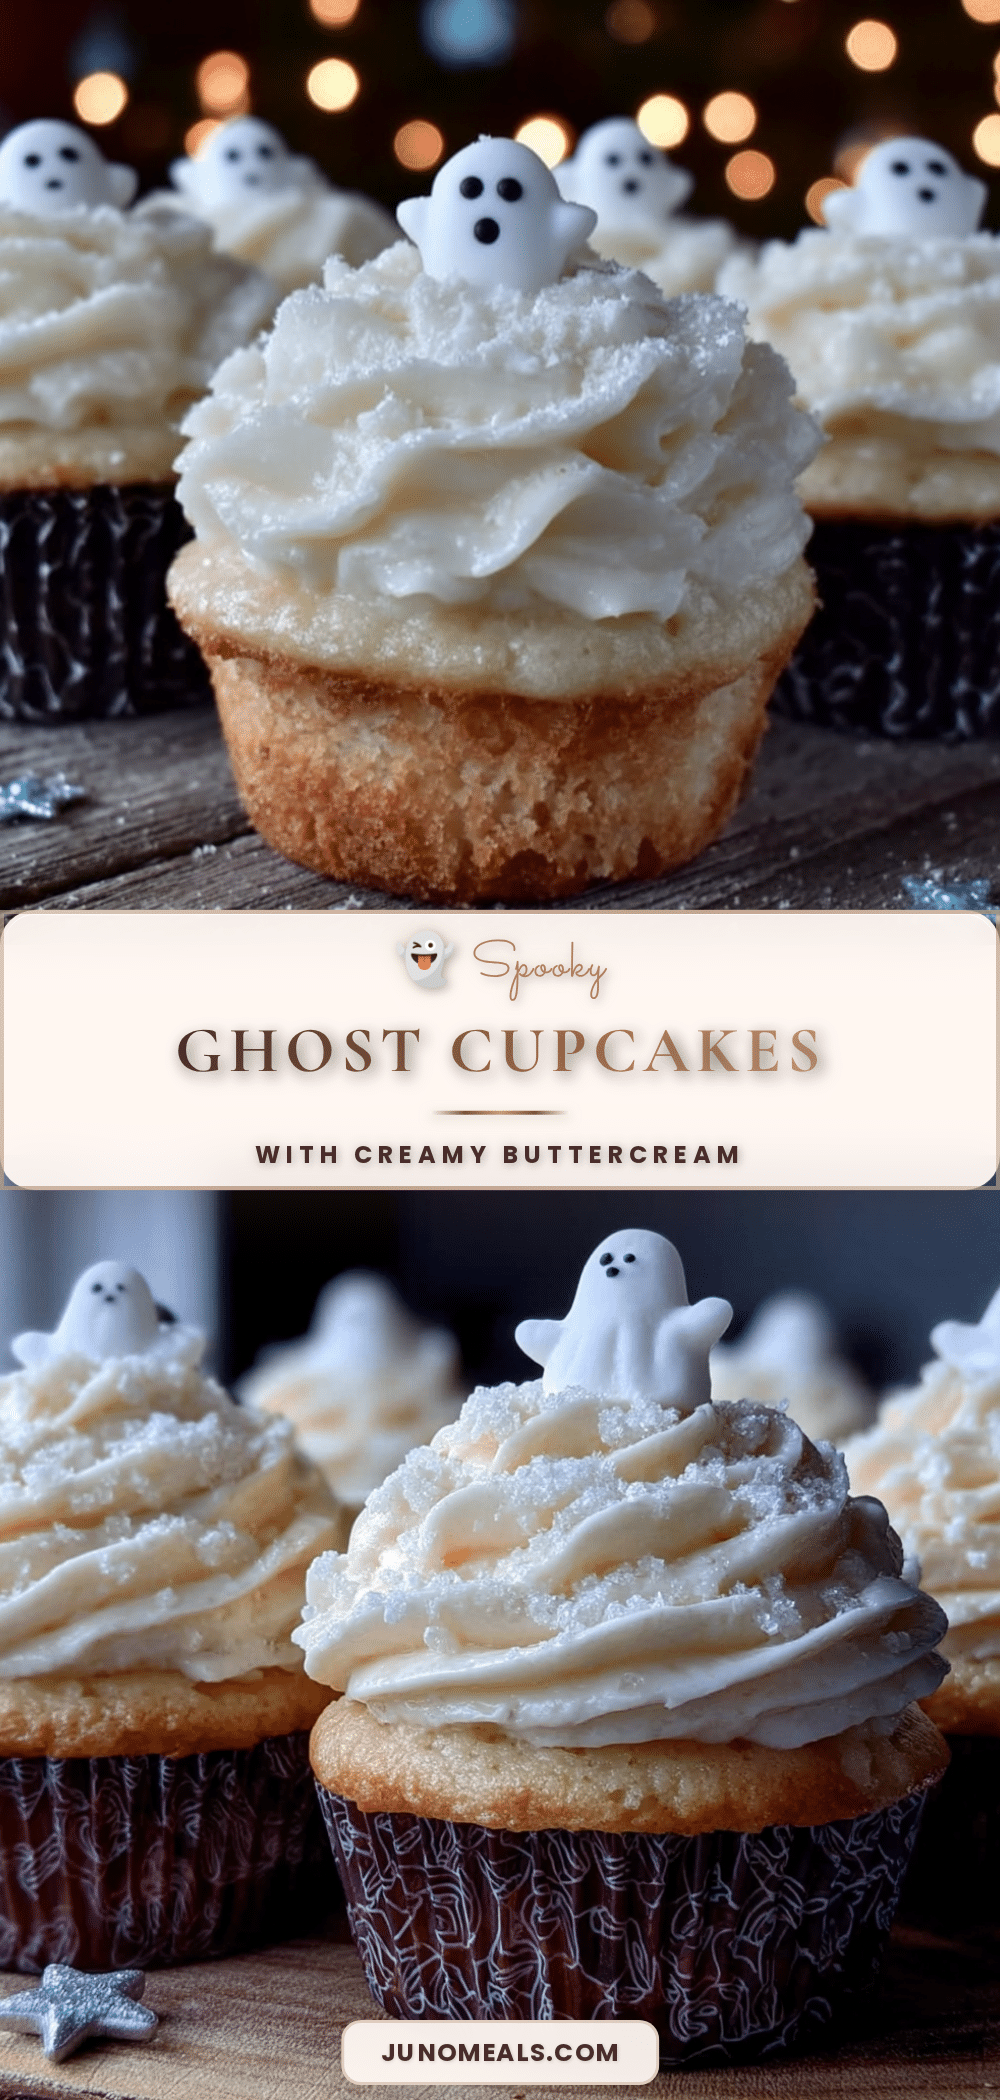
Adorable Ghost Cupcakes with Easy Vanilla Buttercream
These ghost cupcakes are a fun and easy Halloween treat featuring tender vanilla cupcakes topped with a silky vanilla buttercream and cute chocolate chip eyes. Each ghost has its own personality, making them perfect for parties and family baking.
- Prep Time: 20 minutes
- Cook Time: 20 minutes
- Total Time: 40 minutes
- Yield: 12 cupcakes 1x
- Category: Dessert
- Cuisine: American
Ingredients
- 1 ½ cups (190g) all-purpose flour
- 1 ½ teaspoons baking powder
- ¼ teaspoon salt
- ½ cup (113g) unsalted butter, softened
- 1 cup (200g) granulated sugar
- 2 large eggs, room temperature
- 2 teaspoons vanilla extract
- ½ cup (120ml) whole milk, room temperature
- 1 cup (226g) unsalted butter, softened (for frosting)
- 3 ½ cups (420g) powdered sugar
- 2 teaspoons vanilla extract (for frosting)
- 2–3 tablespoons heavy cream
- Pinch of salt
- ½ cup mini chocolate chips
- Optional: Black gel food coloring
Instructions
- Preheat oven to 350°F (175°C). Line a 12-count muffin pan with paper liners.
- In a medium bowl, whisk together flour, baking powder, and salt. Set aside.
- In a large bowl, beat softened butter and granulated sugar on medium-high speed until light and fluffy, about 3-4 minutes. Scrape down sides.
- Add eggs one at a time, beating well after each. Add vanilla extract and beat until combined.
- With mixer on low, add flour mixture in three additions, alternating with milk, starting and ending with flour. Mix just until combined.
- Divide batter evenly among liners, filling each about two-thirds full.
- Bake for 18-20 minutes, until a toothpick inserted in center comes out clean or with a few moist crumbs. Cool in pan 5 minutes, then transfer to wire rack to cool completely.
- For buttercream: In a large bowl, beat softened butter on medium speed until smooth and creamy, about 2 minutes.
- Add powdered sugar one cup at a time, beating on low until incorporated. Scrape bowl after each addition.
- Add vanilla extract, pinch of salt, and 2 tablespoons heavy cream. Beat on medium-high for 3-4 minutes until light and fluffy. Add remaining cream if needed for consistency.
- Fit a piping bag with a large round tip (Wilton 1A or similar). Fill with buttercream.
- Pipe a tall, rounded dome of frosting onto each cooled cupcake. Press two mini chocolate chips into each for eyes.
- Optional: Use black gel food coloring to pipe mouths. Refrigerate frosted cupcakes for 15 minutes to set.
Notes
For best results, ensure butter and eggs are at room temperature. If buttercream looks curdled, keep mixing and add a tablespoon of cream. Cupcakes are best served the day they are made. Store leftovers in an airtight container at room temperature for up to 2 days or refrigerate for up to 5 days. Unfrosted cupcakes can be frozen for up to 3 months.
Nutrition
- Serving Size: 1 cupcake
- Calories: 380
- Sugar: 35
- Sodium: 180
- Fat: 22
- Saturated Fat: 13
- Carbohydrates: 45
- Fiber: 1
- Protein: 3
Keywords: ghost cupcakes, Halloween cupcakes, vanilla cupcakes, vanilla buttercream, Halloween dessert, easy Halloween treats


