I figured making strawberry jam would be this intricate, all-day affair with bubbling pots and endless stirring. It took about ten minutes for that assumption to fall apart completely. Honestly, the idea of cooking down tons of sugar and fruit on the stove always sounded like a messy, time-consuming disaster waiting to happen. But then I stumbled on this easy fresh refrigerator strawberry jam recipe that skips the stove and still delivers that vibrant, sweet-tart punch you want from homemade jam.
The first time I made it, I was skeptical. No cooking? Just fruit, sugar, and lemon juice, all mixed and left to thicken in the fridge? It felt almost too simple to be true. But within a few hours, the jam had developed a beautiful texture — thick enough to spread but still bursting with fresh strawberry flavor. The berries retained their bright color and summer scent, making it way more inviting than any cooked jam I’d tried before.
What really stuck with me is how this recipe fits into my practical, “learn-by-doing” kitchen style. I didn’t need to babysit a boiling pot or guess when it reached “setting point.” Instead, I got to enjoy the process and results with minimal fuss. It’s the kind of jam you make when you want fresh fruit flavor fast, without the mess or the wait. And once you try it, you kind of trust that it’s going to work every single time.
So yeah, this easy fresh refrigerator strawberry jam recipe became my go-to for quick homemade spreads, especially when I want to bring a little homemade charm to breakfasts or desserts without the stress. It’s a quiet little win in the kitchen, and that’s why I keep coming back to it.
Why You’ll Love This Recipe
There’s a reason this easy fresh refrigerator strawberry jam recipe has found a permanent spot in my kitchen routine. It’s just… reliable and straightforward.
- Quick & Easy: Comes together in under 15 minutes plus chilling time, perfect for busy mornings or last-minute brunch plans.
- Simple Ingredients: No fancy pectin or preservatives — just fresh strawberries, sugar, and lemon juice. You probably already have everything on hand.
- Perfect for Breakfast & Baking: Whether you’re spreading it on toast, dolloping on yogurt, or swirling into crumbly scones, it hits the spot.
- Crowd-Pleaser: Kids love the fresh berry taste, and adults appreciate the natural sweetness without being overpowering.
- Unbelievably Fresh Flavor: Because it’s not cooked, the strawberries keep their bright, summery taste and a beautiful ruby-red color.
This isn’t just another jam recipe. I like to think of it as the freshest, quickest way to capture strawberry season in a jar — no special equipment or sugar magic required. Plus, since you don’t heat the fruit, it feels a little more like eating fresh strawberries with a hint of sweetness than a dense spread.
Honestly, it’s the kind of recipe that makes you want to experiment more with fruit preserves, maybe even try your hand at making small-batch jams for gifts or weekend breakfasts. And if you’re into pairing it with baked goods, you might appreciate the way it complements the tang of a lemon cheesecake — like in these mini lemon blueberry cheesecakes I recently tried. It’s a fresh, no-fuss way to add that homemade touch.
What Ingredients You Will Need
This recipe uses simple, wholesome ingredients to deliver bold flavor and satisfying texture without the fuss. Most are pantry staples or fresh fruit you can grab without a special trip to the store.
- Fresh Strawberries, hulled and chopped (about 4 cups or 600 grams) — ripe but firm berries work best to maintain texture.
- Granulated Sugar (1 cup or 200 grams) — balances the tartness and helps with preservation.
- Fresh Lemon Juice (2 tablespoons or 30 ml) — adds brightness and natural pectin, helping the jam set.
- Vanilla Extract (optional, 1 teaspoon) — for a subtle depth of flavor.
For the freshest flavor, I like to pick berries that are fully red and fragrant, avoiding any that are mushy or overly soft. If you can find local, in-season strawberries, that’s even better. I’ve found that organic berries often have a more intense flavor, but regular store-bought ones work just fine here.
You can swap out the granulated sugar for coconut sugar or honey if you want a different sweetness profile or are avoiding refined sugars — just keep in mind the texture might change slightly. For a vegan option, make sure your sugar is certified vegan.
Equipment Needed
- Mixing Bowl: A medium-sized bowl to combine the fruit and sugar comfortably.
- Measuring Cups and Spoons: For precise ingredient amounts — accuracy helps the jam set properly.
- Jar or Airtight Container: A clean glass jar or container to store the jam in the refrigerator. Mason jars work perfectly.
- Fork or Potato Masher: To gently crush the strawberries to your preferred consistency.
- Whisk or Spoon: For mixing the ingredients evenly.
If you don’t have a potato masher, a fork or even the back of a spoon can do the trick. I prefer glass jars because they’re easy to clean and don’t hold onto flavors. Keeping everything clean and dry before storing helps prevent any unwanted fermentation. For a budget-friendly approach, repurposed jam jars from the store work just fine.
Preparation Method
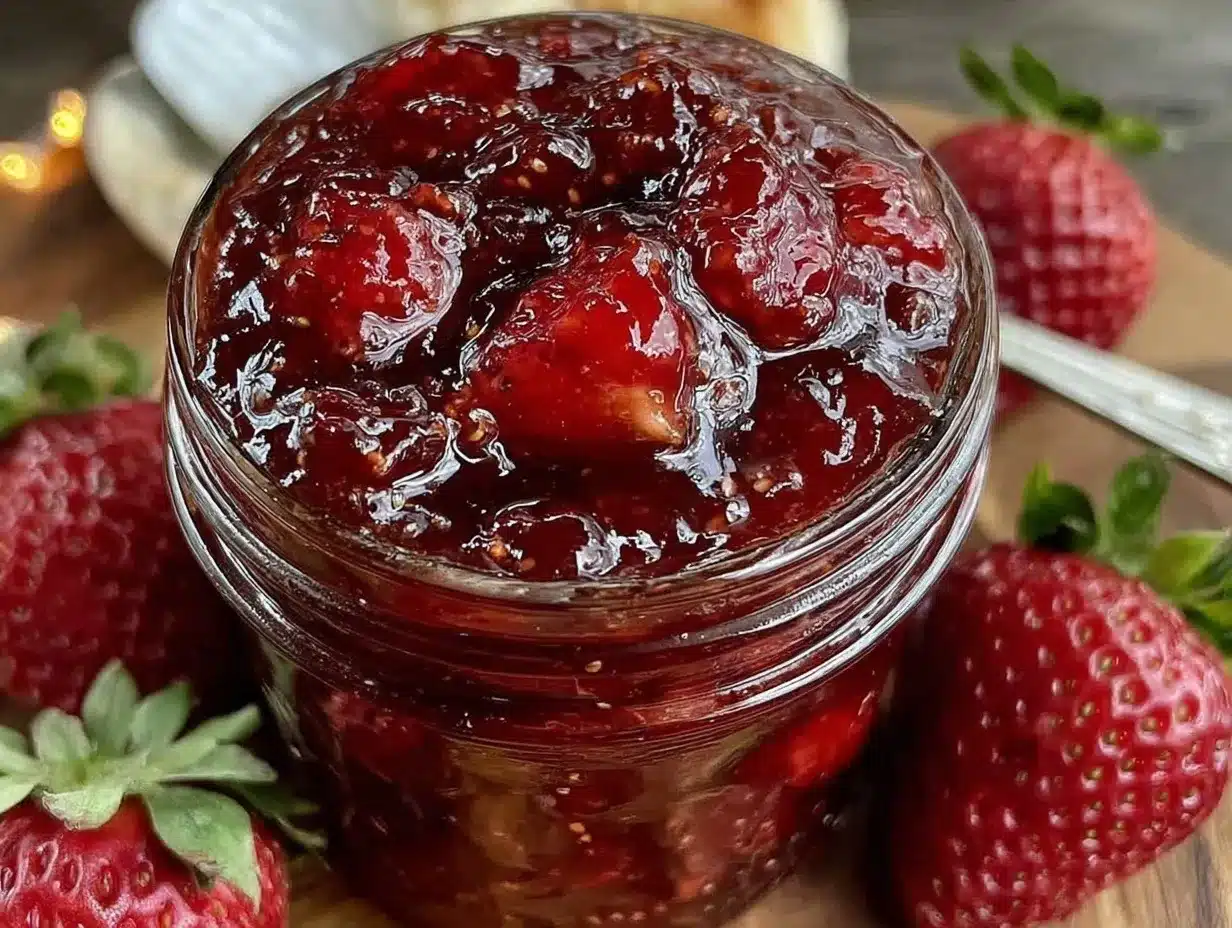
- Prepare Your Strawberries: Rinse about 4 cups (600 grams) of fresh strawberries under cold water. Hull and chop them into small pieces, roughly half-inch chunks. This helps them break down evenly without turning to mush. (10 minutes)
- Mix with Sugar: In a medium bowl, combine the chopped strawberries with 1 cup (200 grams) of granulated sugar. Stir gently but thoroughly to coat all the berries. You’ll notice the sugar starts to draw out the juices right away. (5 minutes)
- Add Lemon Juice and Optional Vanilla: Stir in 2 tablespoons (30 ml) of fresh lemon juice. This adds brightness and helps the jam thicken naturally. If you like, add 1 teaspoon of vanilla extract for a subtle flavor twist. (2 minutes)
- Crush the Berries: Use a potato masher or fork to gently crush the berries to your desired consistency. I like mine with a little texture, so I don’t mash them completely smooth. This step is key for that classic jam feel. (3 minutes)
- Transfer and Chill: Pour the mixture into a clean glass jar or airtight container. Cover tightly and refrigerate for at least 4 hours, preferably overnight. During this time, the jam will thicken naturally as the sugar absorbs the juices and the lemon does its magic. (4+ hours)
When you open the jar, the jam should have a spreadable, slightly chunky texture. If it’s too runny after chilling, you can leave it a bit longer, or gently stir and let it sit again. If you want a smoother version, mash the berries more thoroughly before chilling.
One time, I left it in the fridge for a full 24 hours, and the flavor deepened even more. It’s a bit like a fresh fruit preserve that keeps improving the longer it rests, so don’t be shy about making it a day ahead.
Cooking Tips & Techniques
Here’s the thing about this easy fresh refrigerator strawberry jam: it’s all about gentle handling and patience.
- Don’t Over-Mash: If you mash too vigorously, you’ll end up with a puree instead of a jam. I learned this the hard way when I was aiming for a smooth texture but lost all the berry chunks — it made the jam feel a bit one-note.
- Use Fresh, Firm Strawberries: Softer berries can turn mushy and watery, which affects the jam’s thickness. Always pick berries that are ripe but hold their shape.
- Be Patient with Setting: This jam doesn’t need heat, so it thickens slowly in the fridge. Don’t rush it by trying to freeze it or stir in pectin — just give it time.
- Stir Before Serving: Sometimes the sugar settles at the bottom or the juices separate slightly. A quick stir brings it back to that perfect spreadable state.
- Multitask While Waiting: While your jam chills, you can prep breakfast or bake something simple. For example, this jam pairs beautifully with homemade scones or even a quick batch of pancakes you might find on the recipe archive.
One small fail I had was not washing the jar well enough, leading to a slightly sour taste after a few days. Lesson learned: sterilize your containers and keep the jam refrigerated to avoid any funky fermentation.
Variations & Adaptations
Once you’re comfortable with this basic recipe, you can tweak it to suit your taste or dietary needs.
- Low-Sugar Version: Reduce the sugar by a quarter and add a splash of apple juice or a few drops of stevia to maintain sweetness while keeping it lighter.
- Mixed Berry Jam: Swap half the strawberries for fresh raspberries or blueberries for a more complex berry flavor. Just chop and mash like usual.
- Spiced Twist: Add a pinch of cinnamon or a splash of balsamic vinegar to the mix before chilling for a sophisticated flavor boost.
- Vegan & Allergy Friendly: This recipe is naturally vegan and gluten-free. For nut allergies, just avoid adding any nuts as toppings or mix-ins.
- Chunky or Smooth: Adjust the texture by varying how much you mash the fruit. For a smoother spread, use a blender for a few seconds before refrigerating.
I once tried a batch with a hint of fresh mint folded in after mixing — it added a surprising freshness that made the jam feel almost gourmet. Feel free to experiment and make it your own!
Serving & Storage Suggestions
This easy fresh refrigerator strawberry jam shines best when served chilled or at room temperature, spread thickly on toasted bread or warm biscuits. It’s also fantastic spooned over plain yogurt or layered into desserts like parfaits or cheesecakes.
For storage, keep it in a sealed glass jar in the refrigerator. It stays good for up to two weeks, but honestly, it rarely lasts that long at my house. If you want to keep it longer, you can freeze small portions in ice cube trays and thaw as needed.
Reheating isn’t necessary and can thin out the jam, so just let it come to room temp before spreading if you prefer it less chilled. Over time, the flavor deepens and the sweetness mellows, making it even more enjoyable a day or two after making.
Pair this jam with a crisp breakfast like a buttery croissant or alongside a rich soft cheese for a simple yet elegant snack. It’s also a lovely companion to a fresh fruit salad or a subtle addition to a lemon tart filling.
Nutritional Information & Benefits
This strawberry jam is relatively low in calories compared to cooked jams, thanks to the fresh fruit and moderate sugar content. Per 2-tablespoon serving, you’re looking at roughly 70 calories, mostly from natural sugars.
Strawberries are packed with vitamin C and antioxidants, supporting immune health and skin vitality. The lemon juice adds a little vitamin C punch and acts as a natural preservative.
Because this recipe contains no added preservatives or artificial ingredients, it’s a clean, wholesome way to enjoy a sweet spread. It’s naturally gluten-free and can be adapted for vegan or low-sugar diets with ease.
From my wellness perspective, having a fresh, homemade jam like this helps me avoid the processed stuff loaded with high fructose corn syrup. It’s a little treat that feels honest and nourishing, perfect for mindful eating.
Conclusion
This easy fresh refrigerator strawberry jam recipe is the kind of simple, no-fuss homemade goodness that fits right into any busy cook’s life. It’s quick, requires minimal ingredients, and delivers that true strawberry flavor you just can’t fake.
Feel free to make it your own by adjusting sugar levels, adding spices, or mixing in other berries. That’s the beauty of it — it’s flexible but dependable.
Personally, it’s become my secret weapon for quick breakfasts and last-minute desserts, and I love how it brings a little homemade warmth to everyday moments. If you’ve got fresh strawberries on hand, I really think you’ll appreciate how this recipe turns them into something special without a lot of hassle.
I’d love to hear how you tweak it or what you pair it with — drop a comment and share your jam stories!
FAQs About Easy Fresh Refrigerator Strawberry Jam
How long does refrigerator strawberry jam last?
It typically stays fresh in the fridge for up to two weeks if stored in a clean, airtight container.
Can I use frozen strawberries for this recipe?
Yes, but thaw and drain them well first to avoid excess water making the jam too runny.
Do I need to cook this jam at all?
Nope! This recipe is designed to be quick and fresh without any cooking, relying on sugar and lemon juice to thicken.
Can I reduce the sugar in the recipe?
Absolutely. You can reduce sugar by up to 25% but keep in mind the jam might be less thick and less sweet.
What’s the best way to serve this fresh strawberry jam?
Spread it on toast, swirl into yogurt or oatmeal, or use as a topping for desserts like cheesecakes or pancakes.
Pin This Recipe!
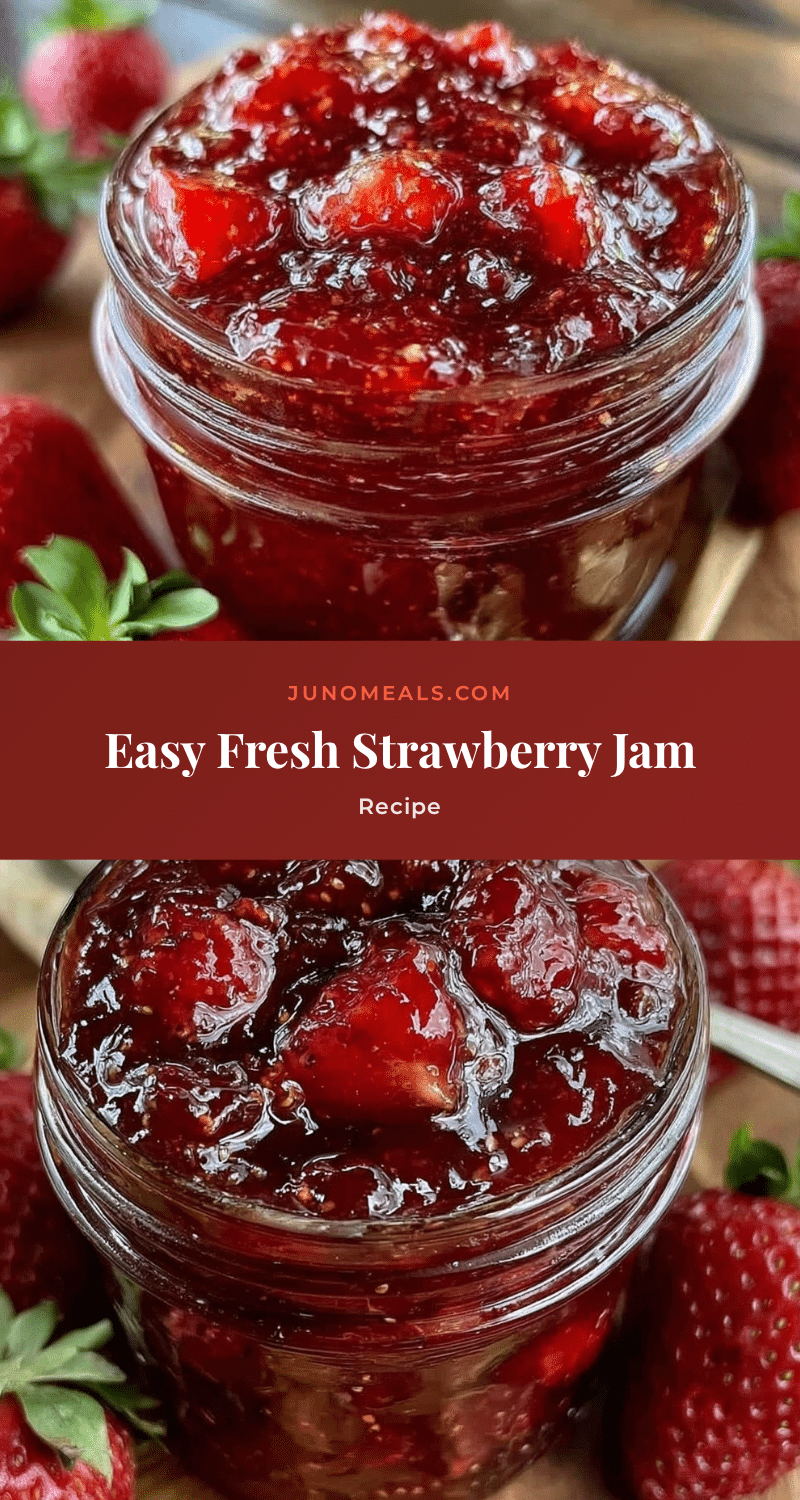
Easy Fresh Refrigerator Strawberry Jam
A quick and simple no-cook strawberry jam recipe that uses fresh strawberries, sugar, and lemon juice to create a vibrant, spreadable homemade jam perfect for breakfasts and desserts.
- Prep Time: 20 minutes
- Cook Time: 0 minutes
- Total Time: 4 hours 20 minutes
- Yield: About 2 cups (16 tablespoons) of jam 1x
- Category: Spread
- Cuisine: American
Ingredients
- 4 cups fresh strawberries, hulled and chopped (about 600 grams)
- 1 cup granulated sugar (200 grams)
- 2 tablespoons fresh lemon juice (30 ml)
- 1 teaspoon vanilla extract (optional)
Instructions
- Rinse 4 cups (600 grams) of fresh strawberries under cold water. Hull and chop into roughly half-inch chunks. (10 minutes)
- In a medium bowl, combine the chopped strawberries with 1 cup (200 grams) granulated sugar. Stir gently but thoroughly to coat all the berries. (5 minutes)
- Stir in 2 tablespoons (30 ml) fresh lemon juice. Add 1 teaspoon vanilla extract if using. (2 minutes)
- Use a potato masher or fork to gently crush the berries to your desired consistency, leaving some texture. (3 minutes)
- Pour the mixture into a clean glass jar or airtight container. Cover tightly and refrigerate for at least 4 hours, preferably overnight, to thicken naturally. (4+ hours)
Notes
Do not over-mash the berries to maintain texture. Use fresh, firm strawberries for best results. Allow jam to chill for at least 4 hours or overnight for optimal thickness. Stir before serving if juices separate. Sterilize jars to prevent fermentation. Can reduce sugar by 25% or substitute with coconut sugar or honey (texture may vary).
Nutrition
- Serving Size: 2 tablespoons
- Calories: 70
- Sugar: 16
- Carbohydrates: 18
- Fiber: 1
Keywords: strawberry jam, refrigerator jam, no-cook jam, homemade jam, fresh strawberry spread, easy jam recipe


