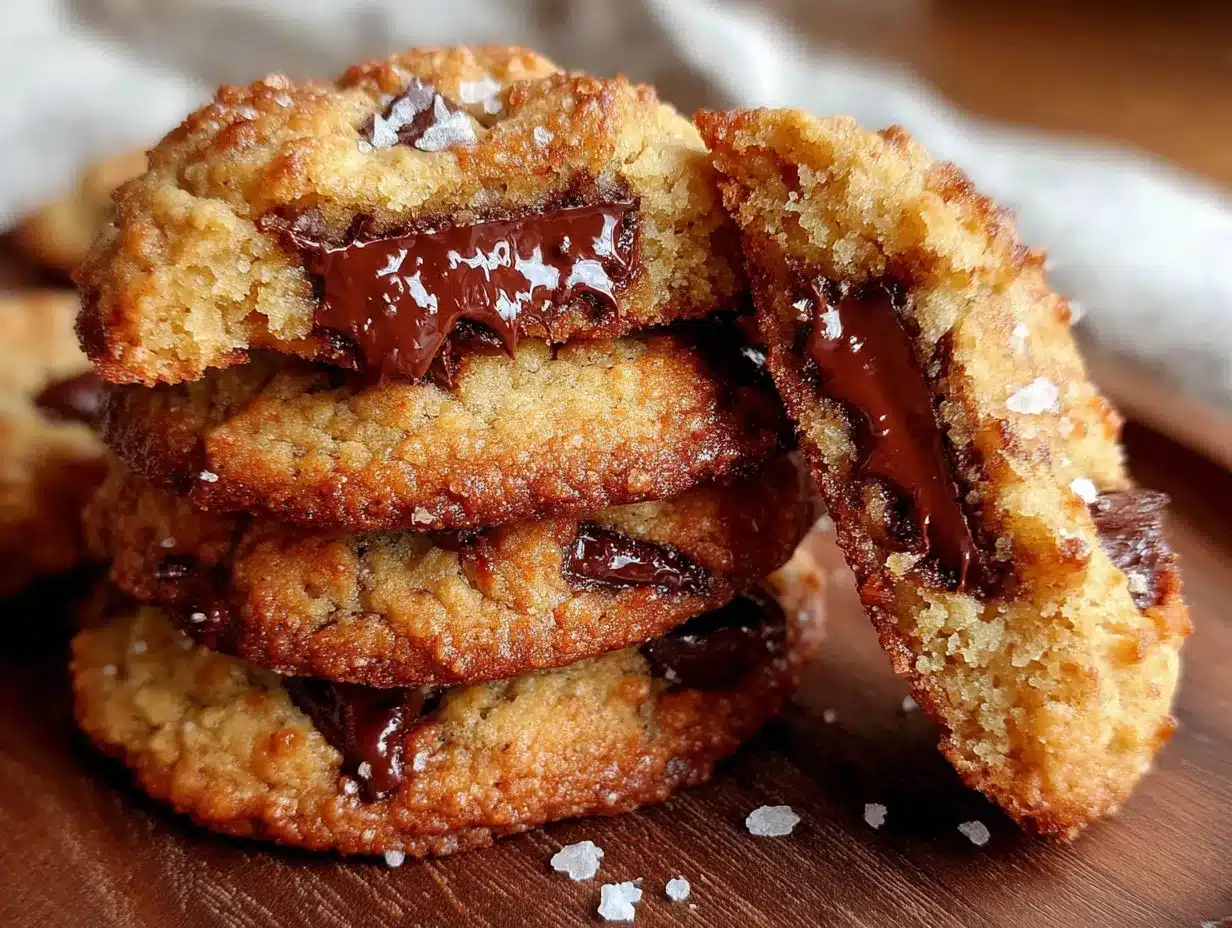
The edges are lacy and browned, almost caramelized, while the center gives just slightly under your fingertip. That thin, crackled top gives way to a soft, almost doughy middle that stretches when you pull the cookie apart. That specific texture — the one that makes you close your eyes without thinking — is what I was chasing when I started messing around with this small batch recipe.
Honestly, I’ve made more batches of chocolate chip cookies than I can count. The kind that spread into one giant, thin disc. The kind that puffed up like little biscuits. The kind that were hard by the next morning (which, let’s face it, is a tragedy). I was never looking for a complicated project. I just wanted a single, reliable recipe that gave me exactly six perfect cookies — not two dozen, not ten, just six — with that ideal chewy texture.
It took a few tries (and a few too many snacks of cookie dough) to get there. I learned that the temperature of the butter matters more than you’d think, and that resting the dough, even for a short time, changes everything about the final bite. This recipe is the result of those experiments. It’s the one I make on a Tuesday night when a craving hits hard and I don’t want leftovers tempting me from the counter for a week.
These cookies are for the moments when you want something warm, homemade, and genuinely satisfying, without the fuss of a full batch. They’re for you, on your own time, with your own craving. And honestly? They might just be the best six cookies you’ll ever bake.
Why You’ll Love This Recipe
This isn’t just another chocolate chip cookie recipe. It’s the one I’ve tested and tweaked until it was exactly right — a small batch that delivers big on flavor and texture without leaving you with a mountain of cookies you don’t need.
- Small Batch Perfection: Makes exactly 6 generous cookies. No more, no less. Perfect for when you want a treat without the temptation of a full batch.
- Pantry-Friendly Ingredients: You probably have everything you need already. No trips to a specialty store for obscure flours or fancy extracts.
- Ready in Under 30 Minutes: From the moment the craving hits to the first warm bite, you’re looking at about 25 minutes total. That includes a short chill time for the dough.
- That Perfect Chewy Texture: The edges are crisp and golden, the center is soft and almost gooey, and the whole cookie has that satisfying chew that keeps you coming back for more.
- No Leftover Guilt: Six cookies is the perfect amount. They’re gone before they have a chance to go stale, which means every single one is enjoyed at peak freshness.
I’ve made this recipe for myself on a quiet Sunday afternoon, for a friend who stopped by unexpectedly, and even as a quick dessert after a weeknight dinner. Every single time, it delivers. It’s the kind of cookie that makes you feel like you’ve done something special, even though it took almost no effort at all.
What Ingredients You Will Need
This recipe uses simple, everyday ingredients to create something genuinely special. Each one plays a specific role in building that chewy texture and rich flavor we’re after.
- Unsalted Butter (4 tablespoons, softened) — I use unsalted so I can control the salt level myself. Let it sit out for about 30 minutes before you start; it should be soft enough to leave a dent when you press it, but not melted.
- Granulated Sugar (3 tablespoons) — This adds sweetness and helps create those crispy, caramelized edges. It also contributes to the spread of the cookie.
- Light Brown Sugar (3 tablespoons, packed) — This is the secret to the chewy texture. Brown sugar contains molasses, which adds moisture and a deeper, almost toffee-like flavor. Pack it firmly into your measuring spoon.
- Large Egg Yolk (1) — Just the yolk, not the whole egg. The yolk adds richness and tenderness, while leaving out the white prevents the cookie from becoming cakey. Save the white for an omelet or scramble the next morning.
- Vanilla Extract (1/2 teaspoon) — Use pure vanilla extract if you have it. It adds a warm, aromatic depth that makes the chocolate taste even better.
- All-Purpose Flour (1/2 cup, plus 1 tablespoon) — Standard all-purpose flour works perfectly here. Spoon it into your measuring cup and level it off with a knife; don’t scoop directly from the bag or you’ll pack in too much flour.
- Baking Soda (1/4 teaspoon) — This helps the cookies spread slightly and gives them that nice, crackly top. Make sure it’s fresh — old baking soda won’t work as well.
- Salt (1/4 teaspoon) — A generous pinch of salt balances the sweetness and makes the chocolate flavor pop. I use fine sea salt for the dough and sometimes sprinkle a little flaky salt on top before baking.
- Semi-Sweet Chocolate Chips (1/3 cup) — I prefer Ghirardelli or Guittard semi-sweet chips for their balanced flavor and good melt. You can also chop a dark chocolate bar into chunks for a more rustic look and bigger pools of chocolate.
Equipment Needed
You don’t need a fancy kitchen setup for these cookies. Here’s what you’ll actually use:
- Medium Mixing Bowl — Any medium bowl will do. I use a ceramic one because it doesn’t slide around on the counter.
- Electric Hand Mixer (or a strong arm and a wooden spoon) — A hand mixer makes creaming the butter and sugars quick and easy. If you want a workout, a sturdy wooden spoon works too, but expect to put some elbow grease into it.
- Rubber Spatula — Essential for scraping down the sides of the bowl and folding in the chocolate chips without overmixing.
- Small Cookie Scoop (about 1.5 tablespoons) — A scoop gives you evenly sized cookies that bake at the same rate. If you don’t have one, just use two spoons to portion the dough.
- Baking Sheet — A standard half-sheet pan works perfectly. Line it with parchment paper or a silicone baking mat for easy cleanup and even baking.
- Cooling Rack — Letting the cookies cool on a rack prevents the bottoms from steaming and getting soggy. If you don’t have one, transfer them to a plate after a few minutes on the sheet.
I’ve made these cookies with a cheap baking sheet and a fork to mix the dough. They still turned out great. The tools help, but the technique matters more.
Preparation Method
Follow these steps carefully, and you’ll have perfect cookies every time. I’ve included sensory cues so you know exactly what to look for at each stage.
- Cream the butter and sugars. In your medium mixing bowl, combine the softened butter, granulated sugar, and packed brown sugar. Beat with an electric hand mixer on medium speed for about 2 minutes, until the mixture is light, fluffy, and pale in color. It should look like a thick paste and smell sweet and buttery. Scrape down the sides of the bowl with your spatula.
- Add the egg yolk and vanilla. Drop in the egg yolk and add the vanilla extract. Beat on low speed until just combined, about 15 seconds. The mixture will look a bit curdled at this point — that’s totally normal. Don’t overmix or you’ll incorporate too much air.
- Whisk the dry ingredients. In a small separate bowl, whisk together the flour, baking soda, and salt. This ensures the baking soda and salt are evenly distributed throughout the flour. If you skip this step, you might end up with a pocket of baking soda in one cookie.
- Combine wet and dry ingredients. Add the flour mixture to the butter mixture. Mix on low speed or fold with your spatula until just combined. Stop as soon as you no longer see streaks of flour. A few small floury spots are fine — they’ll disappear when you fold in the chips. Overmixing at this stage develops gluten, which makes cookies tough.
- Fold in the chocolate chips. Add the chocolate chips and fold them in gently with your spatula. Make sure they’re evenly distributed throughout the dough. The dough will be soft and slightly sticky.
- Chill the dough (optional but recommended). Cover the bowl with plastic wrap and refrigerate the dough for 15-20 minutes. This firms up the butter, which prevents the cookies from spreading too much and gives them a thicker, chewier texture. If you’re in a hurry, you can skip this step, but the cookies will spread a bit more.
- Preheat the oven. While the dough chills, preheat your oven to 350°F (175°C). Line your baking sheet with parchment paper or a silicone mat.
- Portion the dough. Use your cookie scoop or two spoons to portion the dough into 6 equal balls, each about 1.5 tablespoons in size. Place them on the prepared baking sheet, spacing them about 3 inches apart. They will spread, so give them room.
- Bake. Bake for 9-11 minutes, or until the edges are golden brown and the centers look slightly underdone and puffy. The tops should be crackled and light golden. Don’t wait for the centers to look fully set — they’ll continue to bake on the hot sheet after you take them out.
- Cool on the baking sheet. Let the cookies cool on the baking sheet for 5 minutes. This is critical — it allows them to set up properly without breaking apart. After 5 minutes, transfer them to a cooling rack to cool completely, or eat one warm (which I highly recommend).
Cooking Tips & Techniques
I’ve made every mistake in the book with these cookies, so you don’t have to. Here’s what I’ve learned:
- Don’t skip the brown sugar. I tried making these with all granulated sugar once, and they came out flat and crispy. The molasses in brown sugar is what gives you that soft, chewy center. It’s non-negotiable.
- Use room temperature butter. Cold butter won’t cream properly with the sugar, and melted butter will make the cookies spread too much. Softened butter (around 65-68°F) is the sweet spot. If you forget to take it out ahead of time, cut it into small cubes and let it sit for 10 minutes.
- Measure flour correctly. This is the most common mistake I see. Spoon the flour into your measuring cup, then level it off with the back of a knife. Scooping directly from the bag can add up to 25% more flour, which makes dry, dense cookies.
- Watch the bake time. Every oven runs a little differently. Start checking at 9 minutes. The cookies should look slightly underdone in the center — puffy and soft. They’ll continue to cook on the hot baking sheet. If you wait until they look fully done, they’ll be overbaked and hard.
- Let them rest. That 5-minute rest on the baking sheet is crucial. It allows the cookies to set up without overbaking. If you try to move them too soon, they’ll fall apart. Trust the process.
I once forgot to add the baking soda to a batch. The cookies came out dense and flat — edible, but not chewy. It was a sad day. Now I double-check my ingredients before I start mixing.
Variations & Adaptations
Once you’ve mastered the basic recipe, feel free to play around. Here are a few variations I’ve tried and loved:
- Double Chocolate Chip: Replace 1 tablespoon of flour with 1 tablespoon of unsweetened cocoa powder. Use dark chocolate chips instead of semi-sweet. The result is a rich, fudgy cookie that tastes like a brownie.
- Add Nuts: Fold in 1/4 cup of toasted, chopped walnuts or pecans along with the chocolate chips. Toast them in a dry pan for 3-4 minutes first to bring out their flavor.
- Sea Salt Finish: Sprinkle a few flakes of flaky sea salt (like Maldon) on top of each cookie right after they come out of the oven. The salt cuts through the sweetness and makes the chocolate taste even better.
- Gluten-Free Option: Substitute the all-purpose flour with a 1:1 gluten-free baking flour blend (I like Bob’s Red Mill). The texture will be slightly different — a bit more tender — but still delicious and chewy.
- M&M Cookies: Swap the chocolate chips for 1/3 cup of mini M&Ms. This is a fun variation for kids or when you want a pop of color. The candy shells stay slightly crunchy.
My personal favorite variation is the sea salt finish. It turns an already great cookie into something that feels a little bit fancy, like something you’d get from a bakery. I make it when I want to impress someone without much effort.
Serving & Storage Suggestions
These cookies are best enjoyed warm, straight from the oven, with a tall glass of cold milk. But they’re also delicious at room temperature a few hours later.
Serving: Let the cookies cool for at least 5 minutes on the baking sheet before serving. They’re delicate when hot. Serve them on a small plate or a pretty napkin. If you’re feeling fancy, pair them with a scoop of vanilla ice cream for an impromptu ice cream sandwich.
Storage: Store any leftover cookies (if there are any!) in an airtight container at room temperature for up to 3 days. Place a slice of bread in the container with the cookies — the bread will absorb excess moisture and keep the cookies soft and chewy. Replace the bread slice every day or two.
Reheating: To revive a day-old cookie, pop it in a 300°F (150°C) oven for 3-4 minutes. It will come out warm and soft, almost like it was just baked. You can also microwave a cookie for 10-15 seconds, but be careful — it can get too soft.
Freezing: You can freeze the unbaked dough balls on a baking sheet, then transfer them to a freezer bag. Bake from frozen, adding 1-2 minutes to the bake time. This is perfect for when you want a single cookie on a whim.
The flavor actually improves slightly after a day. The brown sugar and vanilla have time to meld, and the texture settles into a perfect, uniform chew. If you can resist eating them all on day one, day two is a treat.
Nutritional Information & Benefits
Per cookie (based on 6 cookies from this recipe):
- Calories: ~220
- Fat: 12g
- Saturated Fat: 7g
- Carbohydrates: 28g
- Sugar: 18g
- Protein: 2g
- Sodium: 180mg
These are a treat, not a health food, and that’s okay. The portion control of a small batch means you’re less likely to overindulge. The dark chocolate in semi-sweet chips contains antioxidants, and the butter provides a small amount of vitamin A. The brown sugar offers a touch of molasses, which contains trace minerals like calcium and iron.
This recipe is vegetarian and can be made gluten-free with the substitution mentioned above. It contains dairy (butter) and eggs, so it’s not suitable for a vegan or dairy-free diet without modifications. The small batch size makes it easy to enjoy a homemade treat without derailing your week.
Honestly, I don’t make these for the nutritional value. I make them because they make me happy. And sometimes, that’s the most important ingredient.
Conclusion
This small batch chewy chocolate chip cookie recipe is the one I turn to again and again. It’s simple, reliable, and delivers exactly what it promises: six perfect, chewy, chocolate-filled cookies with crispy edges and soft centers. No fuss, no leftovers, no disappointment.
I love that this recipe gives me permission to bake for myself, without the pressure of a full batch. It’s a small act of self-care that takes less than half an hour and fills the kitchen with the best possible smell. Whether you’re baking for one, for a quiet night in, or for a spontaneous guest, these cookies are the answer.
I encourage you to make them your own. Add the sea salt. Swap in dark chocolate chunks. Fold in some toasted walnuts. The base is perfect, but the variations are endless. And when you find your favorite version, I’d love to hear about it.
Have you tried this recipe? Did you add a twist? Drop a comment below and tell me about your perfect cookie. And if you loved it, share it with a friend who needs a little homemade happiness in their day. Happy baking!
Frequently Asked Questions
Can I double this recipe?
Absolutely. Simply double all the ingredients to make 12 cookies. The baking time and temperature remain the same. Just make sure your mixing bowl is large enough to accommodate the doubled dough.
Why did my cookies spread too much?
This usually happens for one of three reasons: the butter was too soft or melted, the dough wasn’t chilled, or there wasn’t enough flour. Make sure your butter is softened but not melted, and try chilling the dough for at least 15 minutes before baking.
Can I use margarine or plant-based butter?
You can, but the texture will be different. Margarine has a higher water content than butter, which can make cookies spread more and become less chewy. If you use a plant-based butter, make sure it’s a stick form with a high fat content for best results.
How do I know when the cookies are done?
The edges should be golden brown and the centers should look slightly underdone and puffy. The tops will be crackled and light golden. Don’t wait for the centers to look fully set — they’ll continue to bake on the hot baking sheet after you take them out of the oven.
Can I use a whole egg instead of just the yolk?
You can, but the cookies will be less chewy and more cakey in texture. The egg white adds moisture and structure, which creates a puffier, lighter cookie. If you prefer that texture, go ahead and use a whole egg. But for the classic chewy texture, stick with just the yolk.
Pin This Recipe!

The Best Small Batch Chewy Chocolate Chip Cookies
This small batch recipe makes exactly six perfect, chewy chocolate chip cookies with crispy edges and soft centers. Ready in under 30 minutes, it’s the ideal treat when you want something warm and homemade without leftovers.
- Prep Time: 10 minutes
- Cook Time: 10 minutes
- Total Time: 25 minutes
- Yield: 6 cookies 1x
- Category: Dessert
- Cuisine: American
Ingredients
- 4 tablespoons unsalted butter, softened
- 3 tablespoons granulated sugar
- 3 tablespoons light brown sugar, packed
- 1 large egg yolk
- 1/2 teaspoon vanilla extract
- 1/2 cup plus 1 tablespoon all-purpose flour
- 1/4 teaspoon baking soda
- 1/4 teaspoon salt
- 1/3 cup semi-sweet chocolate chips
Instructions
- Cream the butter and sugars: In a medium mixing bowl, combine the softened butter, granulated sugar, and packed brown sugar. Beat with an electric hand mixer on medium speed for about 2 minutes, until light, fluffy, and pale in color. Scrape down the sides of the bowl.
- Add the egg yolk and vanilla: Drop in the egg yolk and add the vanilla extract. Beat on low speed until just combined, about 15 seconds. The mixture may look slightly curdled.
- Whisk the dry ingredients: In a small separate bowl, whisk together the flour, baking soda, and salt.
- Combine wet and dry ingredients: Add the flour mixture to the butter mixture. Mix on low speed or fold with a spatula until just combined. Do not overmix.
- Fold in the chocolate chips: Add the chocolate chips and fold them in gently with a spatula until evenly distributed.
- Chill the dough (optional but recommended): Cover the bowl with plastic wrap and refrigerate for 15-20 minutes.
- Preheat the oven to 350°F (175°C). Line a baking sheet with parchment paper or a silicone mat.
- Portion the dough: Use a cookie scoop or two spoons to portion the dough into 6 equal balls, each about 1.5 tablespoons. Place them on the prepared baking sheet, spacing about 3 inches apart.
- Bake for 9-11 minutes, until the edges are golden brown and the centers look slightly underdone and puffy. The tops should be crackled and light golden.
- Cool on the baking sheet for 5 minutes, then transfer to a cooling rack to cool completely, or enjoy warm.
Notes
For best results, use room temperature butter and measure flour correctly by spooning it into the measuring cup and leveling off. Chilling the dough for 15-20 minutes helps prevent excessive spreading. The cookies continue to bake on the hot sheet after removal, so take them out when centers look slightly underdone. For a sea salt variation, sprinkle flaky sea salt on top right after baking.
Nutrition
- Serving Size: 1 cookie
- Calories: 220
- Sugar: 18
- Sodium: 180
- Fat: 12
- Saturated Fat: 7
- Carbohydrates: 28
- Fiber: 1
- Protein: 2
Keywords: small batch chocolate chip cookies, chewy chocolate chip cookies, easy cookie recipe, 6 cookies, homemade cookies


