I made these witch finger cookies three times before I realized the secret wasn’t in the dough—it was in the chilling. The first batch spread into something that looked more like sad, swollen thumbs than elegant witch fingers. The second batch cracked in all the wrong places, and my almond nails fell off like bad press-ons. But that third batch? My six-year-old nephew actually screamed and hid behind the couch. That’s when I knew I had finally nailed it.
These spooky witch finger cookies with almond nails are exactly what you want for Halloween. They’re creepy enough to get a reaction, but delicious enough that people keep eating them. Honestly, I wasn’t sure a cookie could look genuinely unsettling while still tasting like a buttery, tender shortbread. But here we are.
The dough comes together fast, the shaping takes a little patience, and the payoff is huge. Every time I bring these to a party, they start conversations. People pick them up carefully, inspect the almond nail, and then take a bite with this look of delighted confusion. That’s the whole point of Halloween baking, right? Something that looks scary but tastes like comfort.
Why You’ll Love This Recipe
Let me tell you why these cookies keep showing up at every Halloween gathering I host. First off, they look genuinely creepy without requiring any artistic talent. If you can roll a snake out of Play-Doh, you can make these. The almond nail gives it that extra unsettling detail that makes people do a double-take.
- Quick & Easy: The whole process takes about an hour, including chilling time. Most of that is hands-off while the dough rests in the fridge.
- Simple Ingredients: Butter, sugar, flour, almond extract, and whole almonds. You probably already have everything except the almonds.
- Perfect for Halloween: These steal the show at parties, classroom treats, or just a spooky movie night at home.
- Crowd-Pleaser: Kids love the gross factor, adults love the buttery shortbread flavor. Everyone wins.
- Unbelievably Delicious: The almond extract gives these a subtle marzipan-like flavor that pairs perfectly with the crunchy almond nail.
What makes this recipe different from all the other witch finger cookies out there? It’s the chilling method. Most recipes skip the second chill after shaping, and that’s why their cookies spread into blobs. I learned that the hard way. You need to shape the fingers, chill them again, and only then bake. That’s the difference between cookies that look like fingers and cookies that look like mistakes.
These cookies aren’t just Halloween decorations you eat. They’re the kind of treat that makes people smile, shiver, and reach for another one before they finish the first. That’s the magic of a recipe that looks scary but tastes like home.
What Ingredients You Will Need
This recipe uses simple, pantry-friendly ingredients to create cookies that look complicated but aren’t. The almond extract is the star here—it gives the cookies that authentic marzipan flavor that makes them taste as good as they look scary.
- Unsalted butter, 1 cup (226g), softened to room temperature — I use Kerrygold for the rich flavor, but any good unsalted butter works. Softening is important; cold butter won’t cream properly.
- Powdered sugar, 1 cup (120g) — This gives the cookies a tender, melt-in-your-mouth texture that granulated sugar just can’t match.
- Large egg, 1, at room temperature — The egg binds everything together. If you forget to take it out of the fridge, place it in warm water for 5 minutes.
- Almond extract, 1 teaspoon — Pure almond extract is worth the splurge here. Imitation works fine, but pure has a deeper, more authentic flavor.
- Vanilla extract, 1/2 teaspoon — Adds warmth and rounds out the almond flavor.
- All-purpose flour, 2 1/2 cups (312g), plus more for dusting — Spoon and level your flour. Scooping directly from the bag packs it down and gives you dry, crumbly dough.
- Salt, 1/2 teaspoon — Balances the sweetness and enhances the buttery flavor.
- Whole almonds, about 30-35, skin on — The skin gives the nails a more realistic, slightly dirty look. If you only have blanched almonds, toast them lightly for color.
- Red food coloring, a few drops (optional) — For that “bloody” cuticle effect at the base of the nail. I use gel food coloring for better control.
For the red coloring, I personally prefer Wilton gel food coloring because a tiny drop goes a long way. Liquid food coloring can make the dough too sticky, so use it sparingly if that’s all you have.
Equipment Needed
You don’t need fancy equipment for these cookies. Most of what you need is probably already in your kitchen drawers.
- Electric hand mixer or stand mixer — Creaming the butter and sugar by hand is possible but your arm will hate you. I use my KitchenAid fitted with the paddle attachment.
- Large mixing bowl — Glass or stainless steel works best. Plastic bowls can hold onto grease and affect the dough.
- Baking sheet, 2 — Light-colored baking sheets give the most even browning. Dark sheets can burn the bottoms.
- Parchment paper or silicone baking mat — Silicone mats are my preference because the cookies slide right off and clean up is effortless.
- Sharp knife or paring knife — For scoring the knuckle lines. A dull knife will drag and tear the dough.
- Small bowl for red food coloring — For painting the “blood” on the cuticles.
- Pastry brush or small paintbrush — A clean, unused paintbrush from a craft store works perfectly for applying the red coloring.
If you don’t have a stand mixer, a hand mixer works just as well. I actually prefer my hand mixer for small batches because it’s easier to scrape down the sides.
Preparation Method
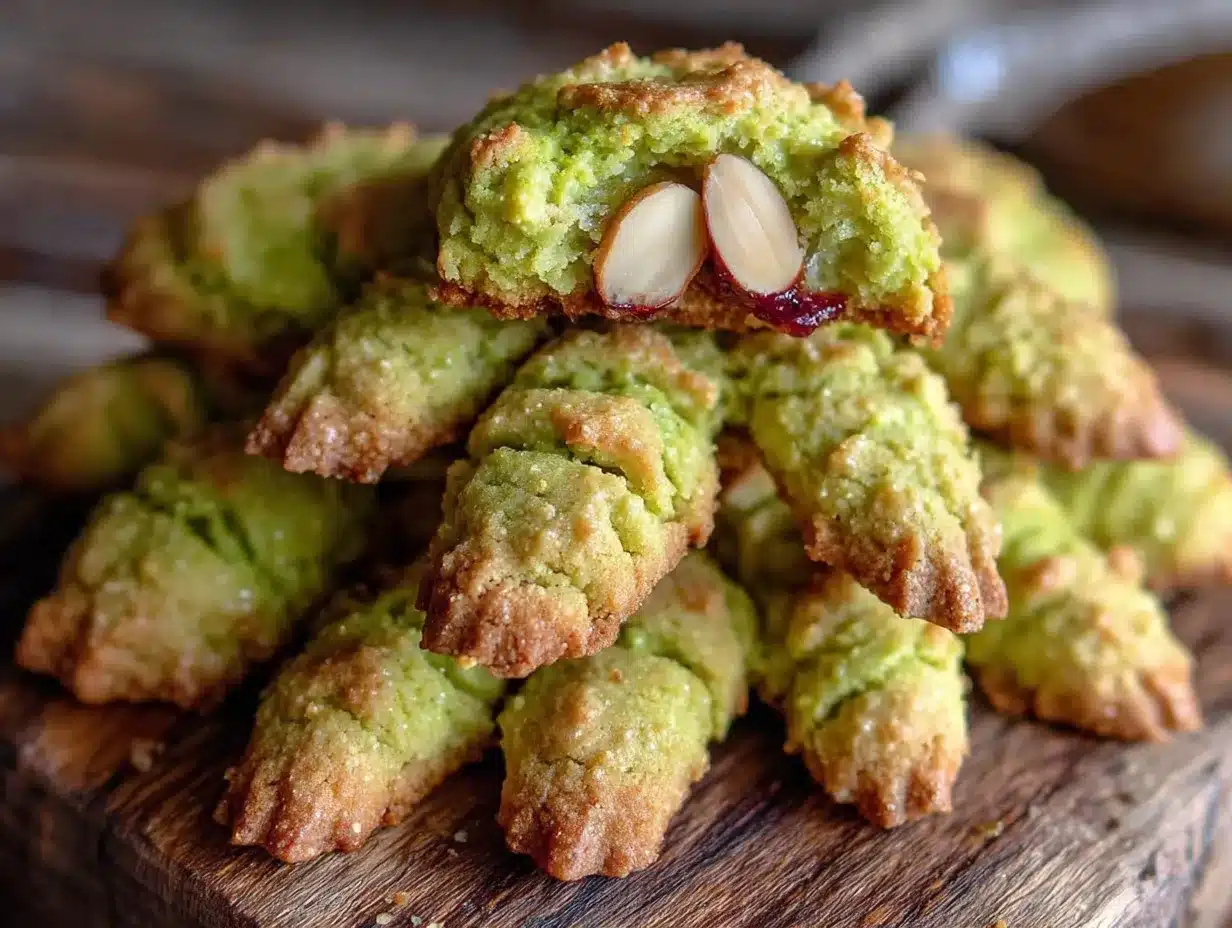
Here’s the step-by-step process that finally worked for me after those first two failed batches. Follow this exactly and you’ll get creepy, perfect fingers every time.
- Cream the butter and sugar. In a large mixing bowl, beat the softened butter and powdered sugar together on medium speed until light and fluffy, about 2-3 minutes. Scrape down the sides of the bowl halfway through. You want the mixture to look pale and airy.
- Add the wet ingredients. Beat in the egg, almond extract, and vanilla extract until fully combined. The mixture might look slightly curdled at this point—that’s normal. Don’t panic.
- Add the dry ingredients. In a separate bowl, whisk together the flour and salt. Gradually add this to the wet mixture, mixing on low speed until a soft dough forms. The dough should come together cleanly and not stick to your fingers. If it’s too sticky, add flour one tablespoon at a time.
- Chill the dough. Divide the dough in half, flatten each half into a disk, wrap tightly in plastic wrap, and refrigerate for at least 30 minutes. This step is non-negotiable. Chilled dough is much easier to shape and holds its form during baking. I’ve made the mistake of skipping this and ended up with puddles instead of fingers.
- Shape the fingers. Preheat your oven to 325°F (165°C). Line your baking sheets with parchment paper or silicone mats. Working with one disk at a time, pinch off a tablespoon-sized piece of dough. Roll it between your palms into a thin log, about 3-4 inches long. The log should be slightly thicker at one end (the base) and tapered at the other (the fingertip). Place on the prepared baking sheet.
- Add the almond nail. Press one whole almond firmly onto the tapered tip of each finger. The almond should sit flat against the dough, with the pointed end facing outward. Press gently to make sure it adheres.
- Create the knuckles. Using a sharp knife, gently score 2-3 lines across each finger to create knuckle creases. Don’t cut too deep—just enough to leave an indent. Angle the cuts slightly for a more natural look.
- Second chill. Place the shaped cookies back in the refrigerator for 15-20 minutes. This is the step that saved my recipe. Chilling the shaped cookies prevents them from spreading and losing their finger shape in the oven.
- Bake. Bake for 12-15 minutes, or until the edges are just barely golden. The cookies should still look pale on top. They continue to set as they cool, so don’t overbake them. I pull mine out at the 13-minute mark.
- Add the “blood”. While the cookies are still warm, use a small paintbrush to dab a tiny amount of red food coloring at the base of the almond nail. This creates the “bloody cuticle” effect. A little goes a long way—you want it to look unsettling, not gory.
- Cool completely. Let the cookies cool on the baking sheet for 5 minutes, then transfer to a wire rack to cool completely. The cookies firm up as they cool, so don’t try to move them too soon.
Cooking Tips & Techniques
I’ve made these cookies probably a dozen times now, and here are the things I wish someone had told me before my first attempt.
Don’t skip the second chill. This is the number one mistake people make. The first chill firms up the dough so you can shape it. The second chill firms up the shaped fingers so they hold their form during baking. If you skip it, the butter melts too fast and your fingers turn into blobs. I learned this the hard way when my first batch came out looking like deformed potatoes.
Use your palm, not your fingers. When rolling the dough into finger shapes, use the heel of your palm on a flat surface instead of rolling between your fingers. This gives you more even pressure and a more uniform shape. Your fingers should be slightly irregular anyway—real fingers aren’t perfectly straight.
Make the knuckle cuts at an angle. Straight-across cuts look fake. Angle your knife slightly and make the cuts deeper on one side than the other. This creates a more realistic joint appearance. Also, space the cuts unevenly—knuckles aren’t evenly spaced on real fingers.
Watch the bake time carefully. These cookies go from perfect to overdone in about 60 seconds. The edges should be just barely golden. The tops should still look pale. If you wait until the tops are golden, the cookies will be too hard and crunchy. They should be tender and slightly soft in the center.
Work in batches. Keep the unused dough in the refrigerator while you shape one batch. Warm dough is sticky dough, and sticky dough doesn’t hold its shape. I keep my second disk in the fridge until I’m ready to use it.
Variations & Adaptations
These cookies are surprisingly adaptable. Here are some variations I’ve tried and loved.
Gluten-Free Version: Substitute the all-purpose flour with a 1:1 gluten-free baking flour blend. I’ve had good results with Bob’s Red Mill gluten-free flour. Add 1/2 teaspoon of xanthan gum if your blend doesn’t include it. The texture will be slightly more crumbly, but the creepy factor remains intact.
Vegan Version: Replace the butter with vegan butter (I like Earth Balance), and use a flax egg (1 tablespoon ground flaxseed mixed with 3 tablespoons water, let sit for 5 minutes). The cookies won’t be quite as tender, but they’ll still hold their shape and taste delicious.
Different “Nails”: Not an almond fan? Use pecan halves, walnut pieces, or even candy corn for a sweeter version. I tried pistachios once and the green color actually looked more like a zombie finger—a happy accident that I now intentionally recreate.
Color Variations: Add a drop of green food coloring to the dough for a witchier look. Or leave them pale and use purple food coloring at the cuticle for a more magical, less gory vibe. My niece prefers the green version because she says they look like “ogre fingers.”
Savory Version: Reduce the sugar to 1/2 cup, omit the almond extract, and add 1 teaspoon of garlic powder and 1 teaspoon of dried rosemary. Use pecan halves for the nails. These are surprisingly good with cheese boards or as a Halloween party snack that’s more savory than sweet.
Serving & Storage Suggestions
These cookies are best served at room temperature, arranged on a platter in a way that maximizes the creepy factor. I like to scatter them on a black platter with a few fake spider webs or plastic spiders scattered around. The contrast between the pale cookies and the dark background makes the almond nails really pop.
For presentation, arrange the fingers in a way that looks like a hand reaching up from the platter. Or just pile them up casually—they look creepy no matter how you arrange them.
Storage: Store these cookies in an airtight container at room temperature for up to 5 days. They actually get slightly softer and more tender after a day or two, so don’t worry if you make them ahead of time. Just keep them away from humidity, which can make the almond nails lose their crunch.
Freezing: You can freeze the shaped, unbaked cookies for up to 3 months. Place them on a baking sheet in the freezer until solid, then transfer to a freezer bag. Bake directly from frozen, adding 2-3 minutes to the baking time. This is perfect for Halloween parties when you want fresh cookies without the last-minute rush.
Reheating: These cookies don’t really need reheating, but if you want that just-baked warmth, pop them in a 300°F (150°C) oven for 3-4 minutes. Don’t microwave them—the almond nails will get chewy and weird.
These cookies also make fantastic gifts. Pack them in a clear cellophane bag tied with orange ribbon, and watch people’s faces when they realize what they’re holding. I gave a bag to my neighbor last Halloween and she texted me a photo of her kids screaming with laughter.
Nutritional Information & Benefits
Let’s be real—these are cookies. They’re a treat, not a health food. But here’s the breakdown if you’re curious.
| Nutrient | Per Cookie (approx.) |
|---|---|
| Calories | 145 |
| Total Fat | 9g |
| Saturated Fat | 5g |
| Carbohydrates | 15g |
| Sugar | 7g |
| Protein | 2g |
The almonds actually add a small amount of protein and healthy fats, along with vitamin E and magnesium. So there’s that. But honestly, these cookies are about fun and flavor, not nutrition. They’re a once-a-year Halloween treat that brings joy and a little bit of controlled terror to your celebration.
If you need a dairy-free option, the vegan variation above works well. For nut allergies, skip the almond extract and use vanilla instead, and replace the almond nails with a small piece of dried apricot or a chocolate chip pressed into the tip.
Conclusion
These spooky witch finger cookies with almond nails have become my signature Halloween treat. Every year, people ask me to bring them. Every year, someone takes a photo and posts it online. And every year, I watch kids and adults alike pick one up, examine it carefully, and then take a bite with this expression of delighted surprise.
That’s the magic of a recipe that looks scary but tastes like butter and almonds. It’s Halloween in cookie form—a little bit spooky, a lot delicious, and completely unforgettable. Whether you’re hosting a Halloween party, sending treats to school, or just want to make something fun for your family, these cookies deliver.
I’d love to see your version. Tag me in your photos, leave a comment below with how yours turned out, or tell me about the best reaction you got. Did anyone scream? Did anyone refuse to eat one? Did anyone try to put one on their hand and take a selfie? Because that happened at my house and I still laugh about it.
Happy Halloween, and happy baking. May your fingers be creepy, your almond nails stay on, and your cookies disappear before you get a chance to eat one yourself.
Frequently Asked Questions
Can I make these cookies ahead of time?
Absolutely. You can make the dough up to 3 days ahead and keep it refrigerated. You can also shape the cookies and freeze them unbaked for up to 3 months. Bake directly from frozen, adding a few extra minutes to the bake time.
Why did my cookies spread and lose their shape?
This usually happens for one of two reasons: the dough wasn’t chilled long enough before shaping, or you skipped the second chill after shaping. The butter needs to be cold when it hits the oven, otherwise it melts too fast and the cookies spread. Always chill the shaped cookies for at least 15 minutes before baking.
Can I use a different nut for the nails?
Yes! Pecan halves, walnut pieces, or even candy corn work great. Keep in mind that different nuts have different moisture levels, so they might not stick as well. Press them firmly into the dough and they should hold. If they fall off during baking, just press them back on while the cookies are still warm.
How do I make the red “blood” look realistic?
Use gel food coloring for the most control. Dip a clean paintbrush into the coloring and dab a tiny amount at the base of the almond nail. Less is more—you want it to look like a small amount of blood, not a horror movie. You can also mix a drop of red with a tiny bit of corn syrup for a thicker, glossier effect.
Can I make these cookies gluten-free?
Yes. Substitute the all-purpose flour with a 1:1 gluten-free baking flour blend. Add 1/2 teaspoon of xanthan gum if your blend doesn’t include it. The texture will be slightly more crumbly, but the cookies will still look and taste great. Just handle them gently when moving them from the baking sheet.
Pin This Recipe!
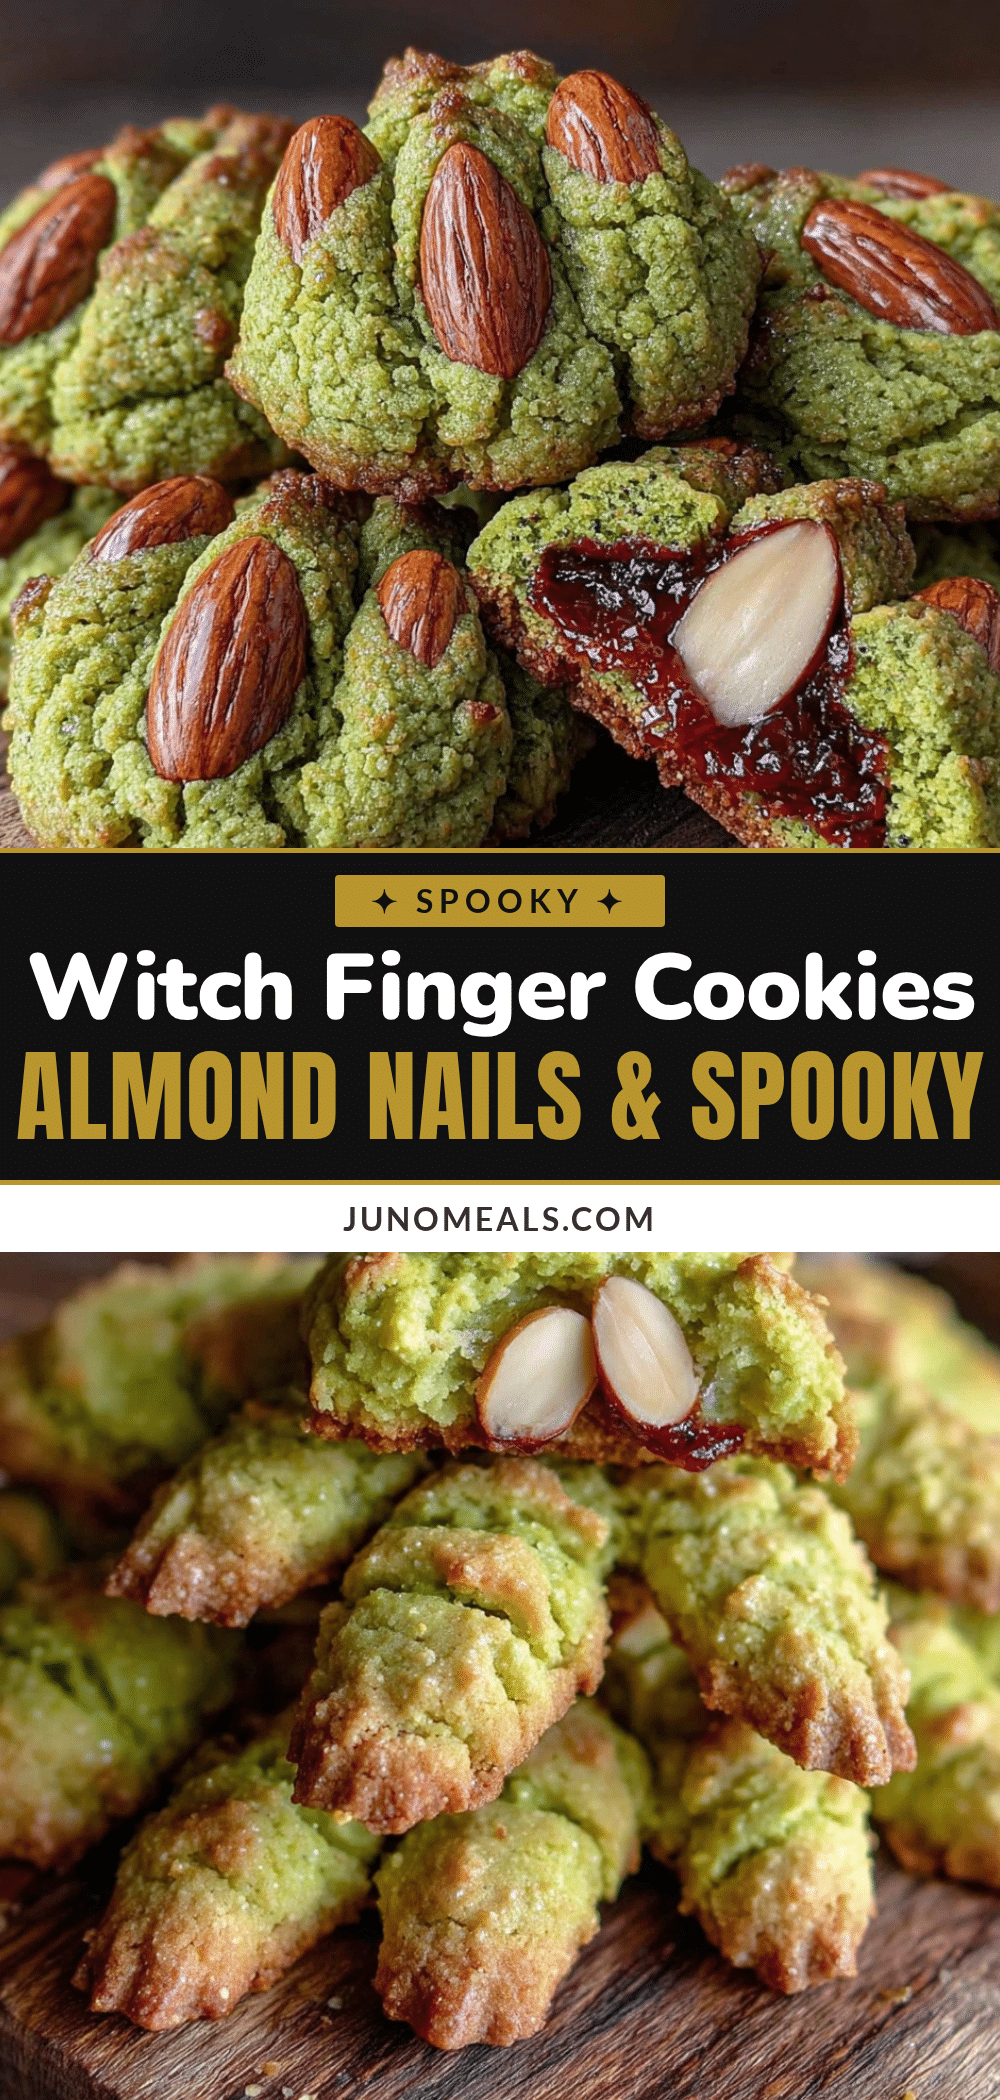
Spooky Witch Finger Cookies with Almond Nails: Easy Halloween Treat
These spooky witch finger cookies with almond nails are exactly what you want for Halloween. They’re creepy enough to get a reaction, but delicious enough that people keep eating them.
- Prep Time: 30 minutes
- Cook Time: 13 minutes
- Total Time: 1 hour 5 minutes
- Yield: 30 cookies 1x
- Category: Dessert
- Cuisine: American
Ingredients
- 1 cup (226g) unsalted butter, softened to room temperature
- 1 cup (120g) powdered sugar
- 1 large egg, at room temperature
- 1 teaspoon almond extract
- 1/2 teaspoon vanilla extract
- 2 1/2 cups (312g) all-purpose flour, plus more for dusting
- 1/2 teaspoon salt
- 30–35 whole almonds, skin on
- A few drops red food coloring (optional)
Instructions
- Cream the butter and sugar. In a large mixing bowl, beat the softened butter and powdered sugar together on medium speed until light and fluffy, about 2-3 minutes. Scrape down the sides of the bowl halfway through.
- Add the wet ingredients. Beat in the egg, almond extract, and vanilla extract until fully combined. The mixture might look slightly curdled at this point—that’s normal.
- Add the dry ingredients. In a separate bowl, whisk together the flour and salt. Gradually add this to the wet mixture, mixing on low speed until a soft dough forms. The dough should come together cleanly and not stick to your fingers. If it’s too sticky, add flour one tablespoon at a time.
- Chill the dough. Divide the dough in half, flatten each half into a disk, wrap tightly in plastic wrap, and refrigerate for at least 30 minutes.
- Shape the fingers. Preheat your oven to 325°F (165°C). Line your baking sheets with parchment paper or silicone mats. Working with one disk at a time, pinch off a tablespoon-sized piece of dough. Roll it between your palms into a thin log, about 3-4 inches long. The log should be slightly thicker at one end (the base) and tapered at the other (the fingertip). Place on the prepared baking sheet.
- Add the almond nail. Press one whole almond firmly onto the tapered tip of each finger. The almond should sit flat against the dough, with the pointed end facing outward. Press gently to make sure it adheres.
- Create the knuckles. Using a sharp knife, gently score 2-3 lines across each finger to create knuckle creases. Don’t cut too deep—just enough to leave an indent. Angle the cuts slightly for a more natural look.
- Second chill. Place the shaped cookies back in the refrigerator for 15-20 minutes.
- Bake. Bake for 12-15 minutes, or until the edges are just barely golden. The cookies should still look pale on top. They continue to set as they cool, so don’t overbake them.
- Add the ‘blood’. While the cookies are still warm, use a small paintbrush to dab a tiny amount of red food coloring at the base of the almond nail. This creates the ‘bloody cuticle’ effect.
- Cool completely. Let the cookies cool on the baking sheet for 5 minutes, then transfer to a wire rack to cool completely.
Notes
Don’t skip the second chill. This is the number one mistake people make. The first chill firms up the dough so you can shape it. The second chill firms up the shaped fingers so they hold their form during baking. Use your palm, not your fingers when rolling the dough. Make the knuckle cuts at an angle. Watch the bake time carefully. Work in batches, keeping unused dough in the refrigerator.
Nutrition
- Serving Size: 1 cookie
- Calories: 145
- Sugar: 7
- Sodium: 50
- Fat: 9
- Saturated Fat: 5
- Carbohydrates: 15
- Protein: 2
Keywords: witch finger cookies, Halloween cookies, almond cookies, shortbread cookies, spooky treats, Halloween baking, creepy cookies


