Spooky Witch Finger Cookies with Almond Nails: Easy Halloween Treat
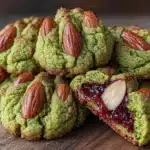
These spooky witch finger cookies with almond nails are exactly what you want for Halloween. They’re creepy enough to get a reaction, but delicious enough that people keep eating them.
- Prep Time: 30 minutes
- Cook Time: 13 minutes
- Total Time: 1 hour 5 minutes
- Yield: 30 cookies 1x
- Category: Dessert
- Cuisine: American
Ingredients
Scale
- 1 cup (226g) unsalted butter, softened to room temperature
- 1 cup (120g) powdered sugar
- 1 large egg, at room temperature
- 1 teaspoon almond extract
- 1/2 teaspoon vanilla extract
- 2 1/2 cups (312g) all-purpose flour, plus more for dusting
- 1/2 teaspoon salt
- 30–35 whole almonds, skin on
- A few drops red food coloring (optional)
Instructions
- Cream the butter and sugar. In a large mixing bowl, beat the softened butter and powdered sugar together on medium speed until light and fluffy, about 2-3 minutes. Scrape down the sides of the bowl halfway through.
- Add the wet ingredients. Beat in the egg, almond extract, and vanilla extract until fully combined. The mixture might look slightly curdled at this point—that’s normal.
- Add the dry ingredients. In a separate bowl, whisk together the flour and salt. Gradually add this to the wet mixture, mixing on low speed until a soft dough forms. The dough should come together cleanly and not stick to your fingers. If it’s too sticky, add flour one tablespoon at a time.
- Chill the dough. Divide the dough in half, flatten each half into a disk, wrap tightly in plastic wrap, and refrigerate for at least 30 minutes.
- Shape the fingers. Preheat your oven to 325°F (165°C). Line your baking sheets with parchment paper or silicone mats. Working with one disk at a time, pinch off a tablespoon-sized piece of dough. Roll it between your palms into a thin log, about 3-4 inches long. The log should be slightly thicker at one end (the base) and tapered at the other (the fingertip). Place on the prepared baking sheet.
- Add the almond nail. Press one whole almond firmly onto the tapered tip of each finger. The almond should sit flat against the dough, with the pointed end facing outward. Press gently to make sure it adheres.
- Create the knuckles. Using a sharp knife, gently score 2-3 lines across each finger to create knuckle creases. Don’t cut too deep—just enough to leave an indent. Angle the cuts slightly for a more natural look.
- Second chill. Place the shaped cookies back in the refrigerator for 15-20 minutes.
- Bake. Bake for 12-15 minutes, or until the edges are just barely golden. The cookies should still look pale on top. They continue to set as they cool, so don’t overbake them.
- Add the ‘blood’. While the cookies are still warm, use a small paintbrush to dab a tiny amount of red food coloring at the base of the almond nail. This creates the ‘bloody cuticle’ effect.
- Cool completely. Let the cookies cool on the baking sheet for 5 minutes, then transfer to a wire rack to cool completely.
Notes
Don’t skip the second chill. This is the number one mistake people make. The first chill firms up the dough so you can shape it. The second chill firms up the shaped fingers so they hold their form during baking. Use your palm, not your fingers when rolling the dough. Make the knuckle cuts at an angle. Watch the bake time carefully. Work in batches, keeping unused dough in the refrigerator.
Nutrition
- Serving Size: 1 cookie
- Calories: 145
- Sugar: 7
- Sodium: 50
- Fat: 9
- Saturated Fat: 5
- Carbohydrates: 15
- Protein: 2
Keywords: witch finger cookies, Halloween cookies, almond cookies, shortbread cookies, spooky treats, Halloween baking, creepy cookies