My dad claimed he hated sourdough for thirty-seven years. Not “didn’t prefer it,” but hated it—the tang, the chew, the whole “fermented bread” concept. He’d make a face whenever my mom brought home a loaf from the farmers’ market. “Tastes like a science experiment,” he’d say. Then last spring, I decided to finally tackle making a starter from scratch. I didn’t tell anyone what I was doing. I just mixed flour and water in a jar on my counter and waited. Day three, my dad walked into the kitchen, sniffed the air, and asked, “What’s that smell? It smells… good.” Day seven, he asked to see the jar. Day ten, I baked my first loaf. I didn’t tell him what it was. I just sliced it warm, slathered it with butter, and handed him a piece. He took a bite. Then another. Then he looked at me and said, “This is the best bread I’ve ever had.” I told him it was sourdough. He didn’t believe me. He made me show him the jar. Honestly, I think that moment meant more to me than the perfect crumb. It proved that sometimes, you just haven’t had the right version yet. Maybe you’ve been there—thinking something is too fussy, too time-consuming, or just not for you. Let me tell you, this simple sourdough starter from scratch with a day-by-day schedule is about to change your mind.
Why You’ll Love This Simple Sourdough Starter
I’ve tested this method about a dozen times now, tweaking ratios and water temperatures until I found a rhythm that works every single time. This isn’t just another sourdough starter guide—it’s the one I wish I had when I started. Here’s why it works:
- Incredibly Simple: Only two ingredients—flour and water. No fancy equipment, no special flour blends. You probably have everything you need right now.
- Day-by-Day Schedule: No guesswork. I’ll tell you exactly what to do each day, what to look for, and what it means when things go wrong (because they will, and that’s okay).
- Perfect for Beginners: This recipe assumes you’ve never made a starter before. I explain the science in plain English, not chemistry terms.
- Works with Any Schedule: Whether you work from home or have a crazy commute, I’ll show you how to fit feedings into your life without stress.
- Unbelievably Rewarding: There’s something magical about watching flour and water transform into bubbling, living culture. It never gets old.
What makes this starter different? I use a higher hydration ratio (100%) which creates a more active fermentation and a milder, less tangy flavor—perfect for people who think they don’t like sourdough. Plus, I include a troubleshooting section based on my own failures. I’ve forgotten feedings, used water that was too hot, and let my starter get moldy. I learned from all of it so you don’t have to.
This isn’t just a recipe—it’s a project that connects you to generations of bakers. It’s the kind of thing that makes you feel capable and patient. And honestly, the first time you see those bubbles, you’ll probably get a little emotional. I did.
What Ingredients You Will Need
This simple sourdough starter from scratch with a day-by-day schedule uses just two ingredients. That’s it. But the quality matters more than you might think.
- Unbleached All-Purpose Flour: This is your best bet for starting. I use King Arthur Flour because it has a consistent protein content (11.7%) that produces reliable results. Bleached flour has chemicals that can inhibit fermentation, so stick with unbleached. (If you’re in a pinch, bread flour works too, but it creates a stiffer starter that takes longer to get bubbly.)
- Whole Wheat Flour (for Day 1 only): Whole wheat flour has more natural yeasts and bacteria living on the grain, which gives your starter a head start. I use Bob’s Red Mill whole wheat flour for this initial feeding. After Day 1, you’ll switch to all-purpose.
- Filtered Water: Tap water often contains chlorine or chloramine, which can kill the beneficial bacteria in your starter. I use filtered water from my Brita pitcher. If you don’t have a filter, let tap water sit out overnight to allow chlorine to evaporate (though this won’t work for chloramine). Bottled spring water is also fine. The water should be lukewarm—about 75°F to 80°F. Too hot will kill your starter; too cold will slow it down.
- A Clean Glass Jar: I use a 32-ounce wide-mouth mason jar. You want something you can see through so you can monitor bubbles and activity. The wide mouth makes it easy to stir and scrape down the sides. Avoid metal bowls—they can react with the acidic starter and affect the flavor.
- A Kitchen Scale (Highly Recommended): Sourdough is about ratios, not volume. Measuring flour by weight is significantly more accurate than using cups. A digital scale costs about $15 and will save you from inconsistent results. I use my Escali scale for everything now.
- A Rubber Spatula or Spoon: For stirring and scraping down the sides of the jar. I prefer a small silicone spatula because it reaches the corners of the jar easily.
- A Clean Cloth or Coffee Filter: To cover the jar loosely. You want air to flow in and out, but you don’t want fruit flies or dust getting in. I use a paper coffee filter secured with a rubber band. Cheesecloth works too, just make sure it’s a few layers thick.
- A Marker or Tape: For marking the level of your starter on the jar. This helps you see how much it rises between feedings, which is a key indicator of activity.
Equipment Needed
You don’t need much for this simple sourdough starter from scratch with a day-by-day schedule. Here’s what I use and what you can substitute:
- Glass Jar: A 32-ounce mason jar is perfect. You can also use a large pickle jar or any glass container with a wide mouth. Just make sure it’s clean and dry before you start.
- Kitchen Scale: I can’t stress this enough—a scale makes everything easier. If you don’t have one, you can use measuring cups, but expect less consistent results. (I started with cups and my first starter was a disaster. The scale changed everything.)
- Spatula or Spoon: A small silicone spatula is ideal. A wooden spoon works too, but it’s harder to scrape the sides clean.
- Covering: A coffee filter, paper towel, or clean kitchen towel secured with a rubber band. Avoid airtight lids—your starter needs to breathe.
- Marker: For tracking the height of your starter. I use a dry-erase marker on the glass. It wipes off easily.
If you’re on a budget, you can absolutely start with a repurposed pasta sauce jar and a coffee filter. I did that for my first month, and it worked fine. The key is cleanliness—make sure everything is washed in hot, soapy water and dried thoroughly before use.
Preparation Method: Day-by-Day Schedule
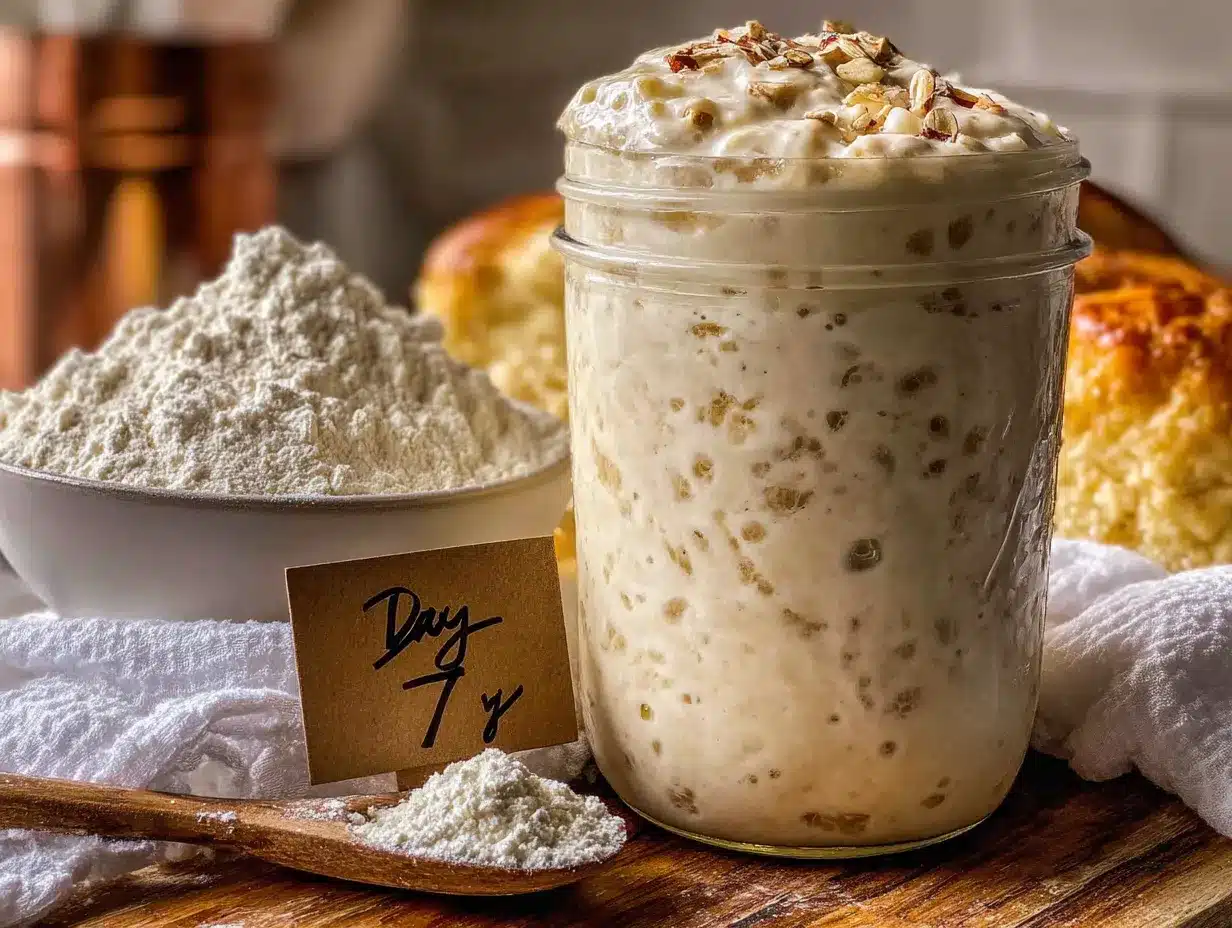
This simple sourdough starter from scratch with a day-by-day schedule takes about 7 to 10 days to become active and ready for baking. Here’s exactly what to do each day.
Day 1: The Beginning
- Weigh out 60 grams of whole wheat flour and 60 grams of lukewarm filtered water (about 75°F) in your clean jar.
- Stir vigorously with your spatula until no dry flour remains. The mixture should look like thick pancake batter. Scrape down the sides of the jar.
- Cover loosely with your coffee filter or cloth and secure with a rubber band. Mark the level of the mixture on the jar with your marker.
- Place the jar in a warm spot in your kitchen (about 70°F to 75°F is ideal). Avoid drafty windows or cold countertops. I keep mine on top of the refrigerator where it’s slightly warmer.
- Leave it alone for 24 hours. You might see some small bubbles by the end of the day, but don’t worry if you don’t. The yeasts and bacteria are just waking up.
Day 2: First Signs of Life
- Check your starter. You should see some small bubbles on the surface and maybe a liquid layer on top (called “hooch”—that’s normal). It might smell a little funky, like ripe cheese or feet. That’s good—it means the bacteria are working.
- Discard half of the starter (about 60 grams). Don’t skip this step—discarding keeps the ratio balanced and prevents your starter from becoming too acidic.
- Add 60 grams of unbleached all-purpose flour and 60 grams of lukewarm filtered water to the remaining starter.
- Stir until combined, scrape down the sides, cover, and mark the level. Return to the warm spot.
Day 3: The Activity Picks Up
- Your starter should look more active now—more bubbles, maybe some rise. It might smell more sour or even like acetone (nail polish remover). That’s normal as the yeast population grows.
- Repeat the feeding: discard half (about 60 grams), then add 60 grams all-purpose flour and 60 grams water.
- Stir, scrape, cover, mark, and return to the warm spot.
- Note: If you see any pink or orange spots, or if it smells rotten or like vomit, that’s mold. Discard everything, wash your jar thoroughly, and start over. This happened to me once when I used a dirty jar. Learn from my mistake.
Day 4: Patience Required
- Your starter might look less active today. Don’t panic—this is called the “dead phase” or “stall.” The bacteria and yeasts are still competing for dominance. Keep feeding.
- Discard half, add 60 grams flour and 60 grams water. Stir, scrape, cover, mark, return to the warm spot.
- If your starter seems sluggish, try using slightly warmer water (80°F) for the feeding. Just don’t exceed 85°F or you’ll kill the yeast.
Day 5: The Comeback
- By now, your starter should be showing more consistent activity. You should see bubbles throughout the mixture, not just on top. It might double in size within 8 to 12 hours of feeding.
- Feed as usual: discard half, add 60 grams flour and 60 grams water.
- If your starter is doubling within 12 hours, you can start feeding twice a day (morning and evening). If not, stick with once a day for now.
Day 6: Consistency Builds
- Your starter should be reliably doubling in size within 6 to 8 hours of feeding. It should smell pleasantly sour—like yogurt or fresh bread. The texture should be bubbly and spongy.
- Feed as usual. If you’re feeding twice a day, your starter will become stronger and more predictable.
- At this point, you can switch to a 1:1:1 ratio (equal parts starter, flour, and water by weight). So discard until you have 30 grams of starter left, then add 30 grams flour and 30 grams water. This smaller feeding will make your starter more active and save on flour.
Day 7 to 10: Ready to Bake
- Your starter is ready when it reliably doubles in size within 4 to 6 hours of feeding, has a dome-shaped top (not flat), and passes the “float test”—a small spoonful of starter floats in a bowl of water.
- For the float test: Drop a teaspoon of your starter into a bowl of room-temperature water. If it floats, it’s full of gas bubbles and ready to bake. If it sinks, give it another day or two of feedings.
- Once ready, you can use your starter immediately or store it in the refrigerator for weekly baking. Feed it once a week if refrigerated, or daily if kept at room temperature.
Cooking Tips & Techniques
After burning through about 20 pounds of flour in my first month of sourdough experimentation, I’ve learned a few things the hard way. Here are my best tips for this simple sourdough starter from scratch with a day-by-day schedule:
Temperature is everything. Your starter is a living thing, and it likes consistency. If your kitchen is cold (below 68°F), your starter will take longer to ferment. I keep mine in the microwave with the door cracked open—it stays a steady 72°F in there. In winter, I use the oven with just the light on (not the heat). Just remember to put a sticky note on the oven so nobody preheats it with your starter inside. Yes, I’ve done that. No, the starter didn’t survive.
Don’t overthink the discard. I know it feels wasteful to throw away half your starter every day, but it’s essential for maintaining the right balance of yeast and bacteria. You can save your discard in a separate jar in the fridge and use it for pancakes, waffles, crackers, or even pizza dough. I have a whole collection of discard recipes now—my favorite is sourdough discard crackers with rosemary and sea salt.
Watch for the signs, not the clock. Your starter doesn’t care what time it is. Instead of feeding at exactly 8 AM every day, look for signs of peak activity: a domed top, lots of bubbles, and a pleasant sour smell. Feed it when it’s at its peak, not when it’s fallen. This took me weeks to figure out. I was feeding my starter on a strict schedule even when it was clearly still hungry or already past its peak. Once I started watching the starter instead of the clock, everything clicked.
If your starter smells like acetone (nail polish remover), it’s hungry. This means you’re not feeding it often enough. Increase to twice-daily feedings or reduce the amount of starter you’re keeping. I had this problem when I tried to maintain a large starter—it was eating through its food too quickly. Once I scaled back to a smaller amount (30 grams), the smell went away.
Patience is not optional. Some starters are ready in 5 days. Some take 14. My first starter took 11 days to pass the float test. My second took only 7. The difference? Temperature and flour quality. Don’t compare your starter to someone else’s. Trust the process.
Variations & Adaptations
Once you’ve mastered this simple sourdough starter from scratch with a day-by-day schedule, you can experiment with different flours and techniques. Here are some variations I’ve tried:
Rye Flour Starter: Rye flour ferments faster than wheat because it has more natural yeasts and enzymes. I made a rye starter once and it was ready in 5 days. The flavor is darker and more complex—perfect for hearty German-style breads. Use 100% rye flour for the initial feedings, then switch to a 50/50 blend of rye and all-purpose for maintenance.
Gluten-Free Starter: You can make a gluten-free starter using brown rice flour or sorghum flour. The process is the same, but the starter will be thinner and less bubbly. It won’t pass the float test the same way, so instead, look for a 50% increase in volume within 8 hours. I’ve had good results with Bob’s Red Mill brown rice flour.
Whole Wheat Starter: If you want a more robust, nutty flavor, use 100% whole wheat flour for your starter. It will be more active and sour than an all-purpose starter. Just be aware that whole wheat starters can become acidic faster, so you might need to feed them twice a day once they’re established.
Stiff Starter (Lower Hydration): Some bakers prefer a stiff starter (60% hydration, meaning 60 grams water to 100 grams flour). It’s less liquid and more dough-like. Stiff starters produce a milder sourness and are easier to maintain because they ferment slower. I tried this method for a while, but I prefer the bubbly, active nature of a 100% hydration starter.
Serving & Storage Suggestions
Once your simple sourdough starter from scratch with a day-by-day schedule is active and healthy, you have two options for storage:
Room Temperature Storage: If you bake every day or every other day, keep your starter on the counter. Feed it once or twice daily at the same time. I feed mine every morning before coffee—it’s become a calming ritual. Use the discard for pancakes or crackers. Your starter will stay perpetually ready to bake.
Refrigerator Storage: If you bake once a week (like most of us), store your starter in the fridge. Feed it, let it sit at room temperature for an hour to start fermenting, then cover and refrigerate. Feed it once a week by taking it out, discarding half, feeding it, and putting it back. I’ve kept my starter in the fridge for up to three weeks without feeding when I was traveling. It just needed two or three feedings at room temperature to wake back up.
Reheating and Using: When you’re ready to bake, take your starter out of the fridge the night before. Feed it and let it sit at room temperature overnight. By morning, it should be bubbly and active. Use it in your favorite sourdough recipe. The flavor of refrigerated starter is usually milder than countertop starter, which I actually prefer for sandwich bread.
How Flavors Develop: Your starter’s flavor will change over time. A young starter (under 2 weeks) is mild and slightly sweet. An older starter (a month or more) develops more complexity—sour, tangy, with hints of fruitiness. My starter is now six months old, and it has a distinct apple-like aroma that I absolutely love. The flavor deepens the longer you maintain it.
Nutritional Information & Benefits
While your simple sourdough starter from scratch with a day-by-day schedule is mostly flour and water, the fermentation process adds some nutritional benefits:
- Estimated Values per 1 tablespoon of active starter: Calories: 15, Carbohydrates: 3g, Protein: 0.5g, Fat: 0g, Fiber: 0.1g
- Probiotics: The fermentation process creates beneficial bacteria that can support gut health. However, most of these bacteria are killed during baking, so the main benefit comes from the fermented flour itself.
- Reduced Phytic Acid: Fermentation breaks down phytic acid, an antinutrient that can interfere with mineral absorption. This means the minerals in sourdough bread are more bioavailable than in regular bread.
- Lower Glycemic Index: Sourdough bread has a lower glycemic index than regular bread because the fermentation process partially breaks down the starches. This means it causes a slower, steadier rise in blood sugar.
- Dietary Considerations: This starter is vegan and dairy-free. For a gluten-free version, use brown rice flour. Always check your flour labels for potential cross-contamination if you have celiac disease.
Conclusion
This simple sourdough starter from scratch with a day-by-day schedule is more than just a recipe—it’s a project that connects you to thousands of years of baking tradition. I’ve been maintaining my starter for six months now, and I still get a little thrill every time I see those bubbles after a feeding. It’s a living thing that depends on you, and there’s something deeply satisfying about that.
I encourage you to make this starter your own. Name it (mine is called “Bubbles”). Experiment with different flours. Use the discard in creative ways. And most importantly, don’t give up if things go wrong. My first starter died because I forgot to feed it for a week. My second one got moldy. My third one finally worked, and it was worth every failed attempt.
When you bake your first loaf of bread with your homemade starter, tag me in your photos. I want to see your bubbly, beautiful starter and the bread it creates. Leave a comment below with your questions or your own tips—I read every single one. And if you found this guide helpful, share it with a friend who’s been intimidated by sourdough. Trust me, they’ll thank you later.
Happy baking, friends. Your starter is waiting.
Frequently Asked Questions
Why does my starter smell like nail polish remover?
That acetone smell means your starter is hungry. It’s eating through its food too quickly, which produces acetone as a byproduct. Increase your feedings to twice a day or reduce the amount of starter you’re keeping. I had this exact problem when I tried to maintain a 200-gram starter—it was just too much for my feeding schedule.
Can I use tap water for my starter?
You can, but it’s risky. Most tap water contains chlorine or chloramine, which can kill the beneficial bacteria in your starter. If you must use tap water, let it sit out uncovered for 24 hours to allow chlorine to evaporate. This won’t work for chloramine, which is more stable. I recommend filtered or bottled water for the best results.
How do I know when my starter is ready to bake with?
Your starter is ready when it reliably doubles in size within 4 to 6 hours of feeding, has a dome-shaped top, and passes the float test (a spoonful floats in water). It should smell pleasantly sour—like yogurt or fresh bread. If it smells like feet or vomit, it’s not ready yet. Keep feeding.
What should I do with the discard?
Don’t throw it away! Store your discard in a separate jar in the refrigerator and use it for pancakes, waffles, crackers, or even pizza dough. My favorite discard recipe is sourdough crackers with rosemary and sea salt—they’re incredibly easy and taste better than anything you can buy at the store.
Can I speed up the process?
You can speed things up by using whole wheat or rye flour for the first few days (they have more natural yeasts), keeping your starter in a warmer spot (75°F to 80°F is ideal), and feeding twice a day once it shows activity. But honestly, patience is the secret ingredient. Rushing your starter usually leads to disappointment. Let it take the time it needs.
Pin This Recipe!
Simple Sourdough Starter: Day-by-Day Schedule for Beginners
Learn how to make a simple sourdough starter from scratch with a day-by-day schedule. This beginner-friendly guide uses just flour and water, with tips for troubleshooting and success.
- Prep Time: 10 minutes
- Cook Time: 0 minutes
- Total Time: 7 to 10 days
- Yield: 1 active sourdough starter 1x
- Category: Starter
- Cuisine: American
Ingredients
- 60 grams whole wheat flour (Day 1 only)
- Unbleached all-purpose flour (for feedings from Day 2 onward)
- Filtered water (lukewarm, about 75°F to 80°F)
Instructions
- Day 1: Weigh out 60 grams of whole wheat flour and 60 grams of lukewarm filtered water in a clean jar. Stir vigorously until no dry flour remains. Scrape down sides, cover loosely with a coffee filter or cloth, and mark the level. Place in a warm spot (70°F to 75°F) for 24 hours.
- Day 2: Check for small bubbles and possible hooch. Discard half (about 60 grams). Add 60 grams unbleached all-purpose flour and 60 grams lukewarm filtered water. Stir, scrape, cover, mark level, and return to warm spot.
- Day 3: Repeat feeding: discard half, add 60 grams all-purpose flour and 60 grams water. Stir, scrape, cover, mark, and return to warm spot. If you see pink or orange spots, discard everything and start over.
- Day 4: Starter may seem less active (dead phase). Continue feeding: discard half, add 60 grams flour and 60 grams water. Use slightly warmer water (80°F) if sluggish.
- Day 5: Starter should show more activity and may double in size within 8 to 12 hours. Feed as usual. If doubling within 12 hours, start feeding twice a day.
- Day 6: Starter should reliably double in 6 to 8 hours. Feed as usual. Switch to a 1:1:1 ratio (30 grams starter, 30 grams flour, 30 grams water) for smaller feedings.
- Day 7 to 10: Starter is ready when it doubles in 4 to 6 hours, has a dome-shaped top, and passes the float test. Use immediately or refrigerate for weekly baking.
Notes
Temperature is crucial; keep starter in a warm, consistent spot (70°F to 75°F). Discard is essential for balance but can be saved for other recipes. Watch for signs of activity rather than feeding on a strict schedule. If starter smells like acetone, it’s hungry—increase feedings. Patience is key; some starters take up to 14 days.
Nutrition
- Serving Size: 1 tablespoon
- Calories: 15
- Carbohydrates: 3
- Fiber: 0.1
- Protein: 0.5
Keywords: sourdough starter, beginner sourdough, day-by-day sourdough, simple sourdough, homemade starter, fermented bread