Homemade Fire Cider Immune Boost Shots: Best Easy Recipe
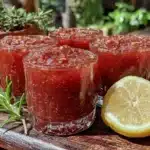
This Homemade Fire Cider Immune Boost Shots recipe is a spicy, tangy, potent tonic that actually makes a difference when cold season hits. It is simple, affordable, and fully customizable, using common kitchen ingredients to create a daily immune-boosting shot.
- Prep Time: 15 minutes
- Cook Time: 0 minutes
- Total Time: 28 days (4 weeks steeping)
- Yield: Approximately 2 cups (32 servings of 1 tablespoon each) 1x
- Category: Beverage / Wellness Tonic
- Cuisine: American
Ingredients
- 2 cups raw apple cider vinegar (unfiltered, with the mother)
- 8–10 cloves fresh garlic (peeled and lightly crushed)
- 1/4 cup fresh horseradish root (peeled and chopped into small cubes)
- 2 inches fresh ginger root (peeled and sliced into thin rounds)
- 1 inch fresh turmeric root (peeled and sliced)
- 1/2 medium yellow onion (chopped roughly)
- 1 fresh jalapeño or habanero (sliced; remove seeds for less heat)
- 1 whole lemon (washed and sliced into rounds)
- 1 sprig fresh rosemary (or 1 teaspoon dried)
- 2–3 sprigs fresh thyme (or 1/2 teaspoon dried)
- 1 teaspoon ground black pepper
- 2–4 tablespoons raw honey (add after steeping)
Instructions
- Prepare your aromatics: Peel and roughly chop the garlic, horseradish, ginger, turmeric, and onion. Slice the lemon and jalapeño into thin rounds. Bruise the rosemary and thyme sprigs slightly by rolling them between your palms or pressing them with the flat side of your knife.
- Layer everything in the jar: Start with the harder ingredients—horseradish, ginger, turmeric—at the bottom. Add the garlic, onion, and pepper next. Tuck the herb sprigs and lemon slices along the sides of the jar.
- Add the spices: Sprinkle the black pepper over the layered ingredients.
- Pour the vinegar: Slowly pour the apple cider vinegar over the ingredients until they are completely submerged. Leave about 1/2 inch of headspace at the top of the jar. Tap the jar gently on the counter to release any air bubbles.
- Seal and shake: Close the lid tightly and give the jar a good shake. If any ingredients are floating above the vinegar line, use a clean utensil to push them down.
- Label and store: Write the date on a piece of masking tape and stick it to the jar. Place the jar in a cool, dark cupboard (not the refrigerator) at a consistent temperature between 60-70°F.
- Shake daily: For the next four weeks, shake the jar once a day.
- Test at week three: Around day 21, start tasting your fire cider. If you want it stronger, let it steep another week. I prefer a full four-week steep for maximum potency.
- Strain and bottle: When the flavor is where you want it, set a fine-mesh strainer over a large bowl or measuring cup. Line the strainer with cheesecloth for a clearer final product. Pour the contents of the jar through the strainer. Gather the edges of the cheesecloth and squeeze firmly to extract every drop of liquid from the solids.
- Sweeten to taste: Whisk the raw honey into the strained liquid until fully dissolved. Start with 2 tablespoons and add more if needed.
- Store properly: Transfer the finished fire cider to dark glass bottles using a funnel. Seal tightly and store in the refrigerator for up to six months.
Notes
Bruising the aromatics (gently crushing garlic, rolling herbs) releases volatile oils for better flavor and potency. Use raw apple cider vinegar with the mother for best results. Avoid metal utensils or lids that contact the vinegar. Store in a cool, dark place during steeping (60-70°F). For a quick version, simmer ingredients in vinegar for 15 minutes, then cool and strain (less potent).
Nutrition
- Serving Size: 1 tablespoon
- Calories: 15
- Sugar: 2
- Carbohydrates: 3
Keywords: fire cider, immune boost, homemade fire cider, wellness shots, apple cider vinegar tonic, immune support, natural remedy, cold season remedy