Introduction
“You know what would be perfect right now?” my friend texted me one chilly evening, “Something warm, something sweet, something that feels like a hug.” Honestly, I was already halfway through a kitchen mess, but the idea stuck. I rummaged through the fridge and pantry, found some apples that were just begging to be used, and grabbed my trusty cast iron skillet. That’s how this Cozy Cast Iron Apple Crisp with Irresistible Oat Topping came to life—not from a grand plan but a simple craving and a pinch of kitchen spontaneity.
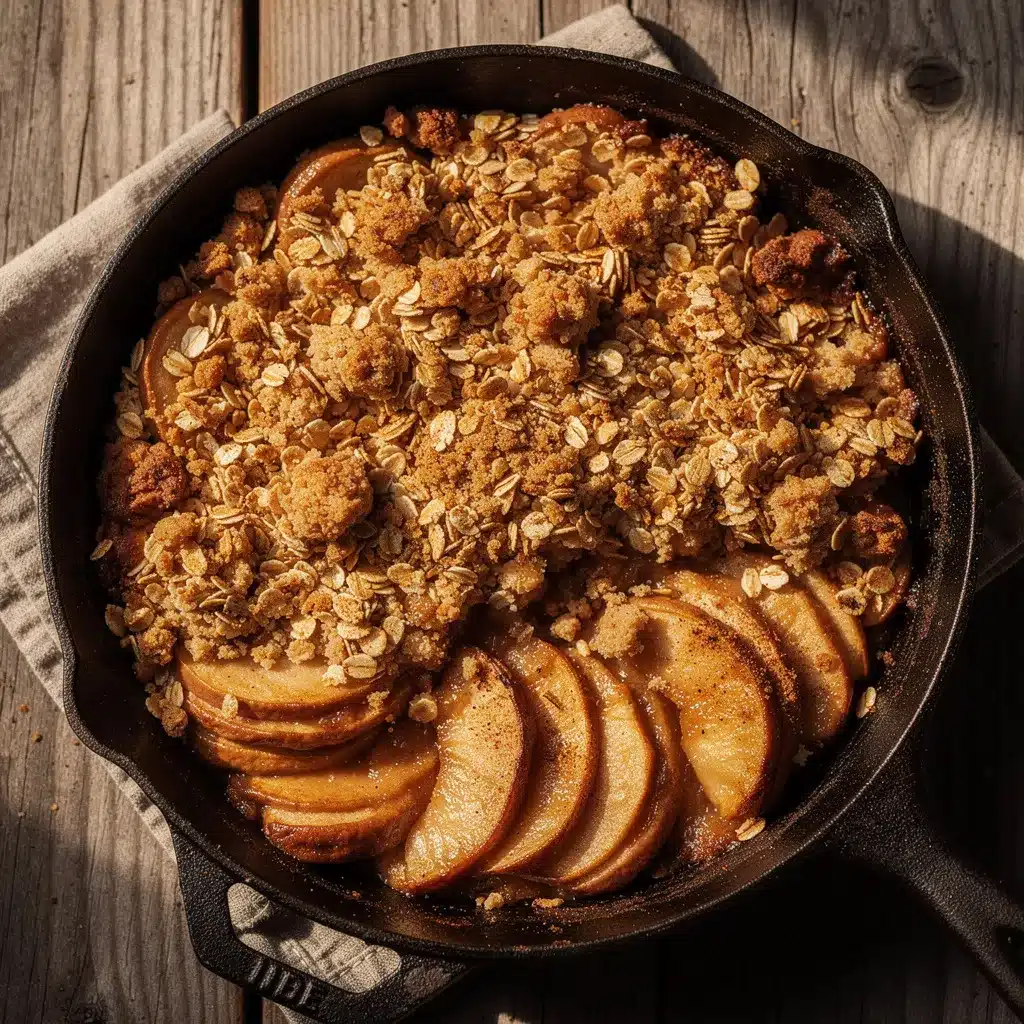
The smell of cinnamon and baked apples filling the air while the oat topping bubbled golden brown was enough to calm the chaos of the day. Each spoonful felt like a quiet moment of comfort, the kind that sneaks up on you in the best way. It’s not fancy, but that’s the charm—just the right mix of crisp and cozy. This recipe stayed with me because it’s the kind of apple crisp that’s as easy as it is satisfying, and honestly, it’s the one I reach for when I want to impress with zero stress.
There’s something about cooking in a cast iron skillet that makes the whole experience feel grounded. The caramelized edges, the crunchy oat topping—it all comes together so effortlessly. It’s a dessert that’s both nostalgic and fresh, and once you make it a couple of times, you’ll see why it’s become a quiet favorite in my kitchen.
Why You’ll Love This Recipe
Having made this Cozy Cast Iron Apple Crisp more times than I can count, I can tell you it’s truly a recipe that delivers in every way.
- Quick & Easy: Ready in under 45 minutes, this crisp fits perfectly into busy evenings or unexpected guests.
- Simple Ingredients: No need for specialty stores—just pantry staples and fresh apples you probably already have.
- Perfect for Cozy Nights: Whether you’re winding down solo or sharing with friends, it’s a warm, inviting treat.
- Crowd-Pleaser: Kids and adults alike rave about the balance of tart apples and sweet, crunchy topping.
- Unbelievably Delicious: The oat topping gets irresistibly crisp without drying out, thanks to a little brown sugar and butter magic.
This isn’t just any apple crisp. The cast iron skillet gives the apples a caramelized edge that’s hard to replicate, and the oat topping is perfectly textured—not too crumbly, not too soft. Plus, I often swap in a dash of nutmeg or a splash of vanilla extract to keep things interesting without complicating the recipe. It’s comfort food, but not the kind that leaves you feeling weighed down.
It’s the kind of dessert where you close your eyes after the first bite and just savor the moment—that’s why it keeps finding its way back to my table. If you’re looking for something that brings warmth, ease, and a bit of nostalgic charm, this Cozy Cast Iron Apple Crisp is your go-to.
What Ingredients You Will Need
This recipe uses simple, wholesome ingredients to deliver bold flavor and a satisfying texture without fuss. Most of these are pantry staples, and the fresh apples bring that seasonal brightness that makes this dish shine.
- For the Apple Filling:
- 6 cups tart apples, peeled, cored, and sliced (Granny Smith work great for balance)
- 2 tablespoons granulated sugar
- 1/4 cup brown sugar, packed (adds a deeper caramel flavor)
- 1 teaspoon ground cinnamon
- 1/4 teaspoon ground nutmeg (optional, but I love the warmth it adds)
- 1 tablespoon fresh lemon juice (prevents browning and adds brightness)
- 1 teaspoon vanilla extract (for a subtle aromatic lift)
- 2 tablespoons all-purpose flour (helps thicken the filling)
- For the Oat Topping:
- 1 cup old-fashioned rolled oats (not instant; gives the best texture)
- 1/2 cup all-purpose flour
- 1/2 cup packed brown sugar
- 1/2 teaspoon ground cinnamon
- 1/4 teaspoon salt
- 6 tablespoons unsalted butter, melted (I prefer Plugrá for a richer flavor)
- 1/2 cup chopped pecans or walnuts (optional, for crunch)
Feel free to swap in almond flour for a gluten-free version or use coconut sugar if you want a lower-glycemic option. If you’re after a dairy-free crisp, swap the butter for coconut oil—it still crisps up nicely. In summer, I’ve even added fresh peaches or berries alongside the apples for a seasonal twist.
Equipment Needed
- Cast Iron Skillet: A 10-inch skillet is ideal here. It helps develop that signature crispy edge and distributes heat evenly.
- Mixing Bowls: One medium for apples, another for the oat topping.
- Measuring Cups and Spoons: Precision helps, but this recipe is forgiving if you’re a little off.
- Sharp Knife and Peeler: For prepping your apples quickly and safely.
- Spoon or Spatula: To mix and spread the topping evenly.
If you don’t have a cast iron skillet, a glass or ceramic baking dish around 9×9 inches works too, but the texture will differ slightly. I’ve found that a well-seasoned skillet adds a subtle depth you just don’t get elsewhere. Cleaning it promptly and drying it well keeps it in great shape, which honestly makes a difference in how the crisp cooks.
Preparation Method
- Preheat your oven to 350°F (175°C). This gives the skillet time to warm evenly.
- Prepare the apples: Peel, core, and slice about 6 cups of tart apples into roughly 1/4-inch thick slices. Toss them in a medium bowl with 2 tablespoons granulated sugar, 1/4 cup packed brown sugar, 1 teaspoon cinnamon, 1/4 teaspoon nutmeg, 1 tablespoon lemon juice, 1 teaspoon vanilla extract, and 2 tablespoons flour. Mix gently so every slice is coated. You’ll notice the apples start to soften slightly and smell fragrant—that’s your cue.
- Spread the apple mixture evenly in your cast iron skillet. Use a spatula to level it out so every bite has fruit.
- Make the oat topping: In a separate bowl, combine 1 cup rolled oats, 1/2 cup all-purpose flour, 1/2 cup packed brown sugar, 1/2 teaspoon cinnamon, and 1/4 teaspoon salt. Stir in 6 tablespoons melted butter until the mixture clumps together. Fold in 1/2 cup chopped nuts if using. The topping should be moist but crumbly—think sandy texture that sticks slightly when pressed.
- Sprinkle the oat topping evenly over the apples. Don’t press down; you want it loose enough to crisp up.
- Bake uncovered for 40 to 45 minutes. The crisp should bubble at the edges, and the topping will be golden brown when done. If the topping browns too fast, loosely tent with foil after 30 minutes.
- Remove from oven and let cool for at least 15 minutes. This resting time thickens the juices and makes serving easier.
Pro tip: If your apples seem too juicy, adding an extra tablespoon of flour to the filling helps prevent a soggy bottom. Also, if you want an extra crunch, I sometimes broil the crisp for 2 minutes at the end—but watch closely to avoid burning!
Cooking Tips & Techniques
Getting the perfect apple crisp is part art, part science. Here’s what I’ve picked up from many batches:
- Choose the right apples: Tart and firm varieties like Granny Smith or Honeycrisp hold their shape well and balance sweetness.
- Don’t overmix the topping: You want clumps of oats and butter, not a smooth batter—this creates that signature crumbly texture.
- Use room temperature butter: It melts evenly into the oat mixture, helping the topping crisp up beautifully.
- Let it rest before serving: The filling thickens and flavors meld, giving you a better texture.
- Watch your oven temperature: I learned the hard way that too hot means burnt topping and undercooked fruit.
Multitasking tip: While the crisp bakes, I usually start prepping a simple whipped cream or scoop out vanilla ice cream to have ready. It’s these little touches that round out the meal with minimal fuss.
Variations & Adaptations
This apple crisp recipe is a great canvas for your own twists:
- Dietary swaps: Use gluten-free oats and almond flour to make it gluten-free. Swap butter for coconut oil for dairy-free.
- Seasonal fruits: Mix in pears, peaches, or even frozen berries for a different flavor profile.
- Flavor twists: Add a splash of bourbon or maple syrup to the apples for a deeper, richer taste.
- Nut-free option: Simply leave out nuts or substitute with seeds like pumpkin or sunflower.
- Cooking method: If you don’t have a cast iron skillet, a ceramic baking dish works fine, just expect a slightly different texture.
Once, I tried adding shredded coconut to the topping for a tropical twist—it was surprisingly good, especially paired with a scoop of coconut ice cream.
Serving & Storage Suggestions
Serve this apple crisp warm, ideally with a dollop of whipped cream or vanilla ice cream melting on top. The contrast of hot and cold is pure magic. For a little extra flair, sprinkle a pinch of cinnamon or toasted nuts before serving.
Leftovers store well covered in the refrigerator for up to 3 days. Reheat gently in a 300°F (150°C) oven for 10-15 minutes to bring back the crisp topping texture. While microwaving is faster, it tends to soften the oats.
Interestingly, the flavors deepen after a day, so sometimes it’s even better the next day. I often make this a day ahead when hosting, freeing me up to focus on other dishes. Speaking of which, pairing this with a simple salad or even alongside a cozy main dish from my recipe collection can make for a full meal.
Nutritional Information & Benefits
This Cozy Cast Iron Apple Crisp offers a balanced treat with fiber-rich oats and vitamins from fresh apples. One serving (about 1/6 of the crisp) contains roughly 320 calories, 5 grams of fiber, and moderate sugar from natural sources and brown sugar.
Apples provide antioxidants and vitamin C, while oats contribute to heart-healthy beta-glucans. Using less refined sugar or swapping for natural sweeteners can make it even friendlier for blood sugar.
Be mindful of nuts if you have allergies, but leaving them out won’t compromise the overall deliciousness. This recipe fits nicely into a balanced diet when enjoyed as an occasional cozy indulgence.
Conclusion
This Cozy Cast Iron Apple Crisp with Irresistible Oat Topping is one of those dishes that fits perfectly into simple, comforting home cooking. It’s easy to put together, uses straightforward ingredients, and rewards you with a warm, satisfying dessert that feels like it took more effort than it did.
Feel free to tweak the spices, swap ingredients, or add your own twist—the core of this recipe is about making something that feels like home. For me, this crisp reminds me to slow down and enjoy small moments, whether it’s a quiet night in or a casual gathering.
Try it out and see how it becomes a quietly requested favorite on your table, just like it did on mine. And if you’re curious about other crowd-pleasers with similarly friendly ingredients and fuss-free prep, you might appreciate the mini lemon blueberry cheesecakes from my collection—they’re perfect for when you want to switch up dessert mode while keeping things simple and delicious.
FAQs
Can I use frozen apples for this recipe?
Yes, but be sure to thaw and drain them well first to avoid excess moisture, which can make the crisp soggy.
What’s the best way to store leftovers?
Cover and refrigerate for up to 3 days. Reheat in the oven to keep the topping crisp.
Can I make this apple crisp ahead of time?
Absolutely! Prepare it up to the baking step, cover, and refrigerate overnight. Bake fresh when you’re ready to serve.
Is it possible to make this vegan?
Yes, swap butter for melted coconut oil and use a plant-based sugar alternative if preferred.
What if I don’t have a cast iron skillet?
A 9×9-inch glass or ceramic baking dish works fine, though you may miss out on that crunchy skillet edge crispness.
Pin This Recipe!
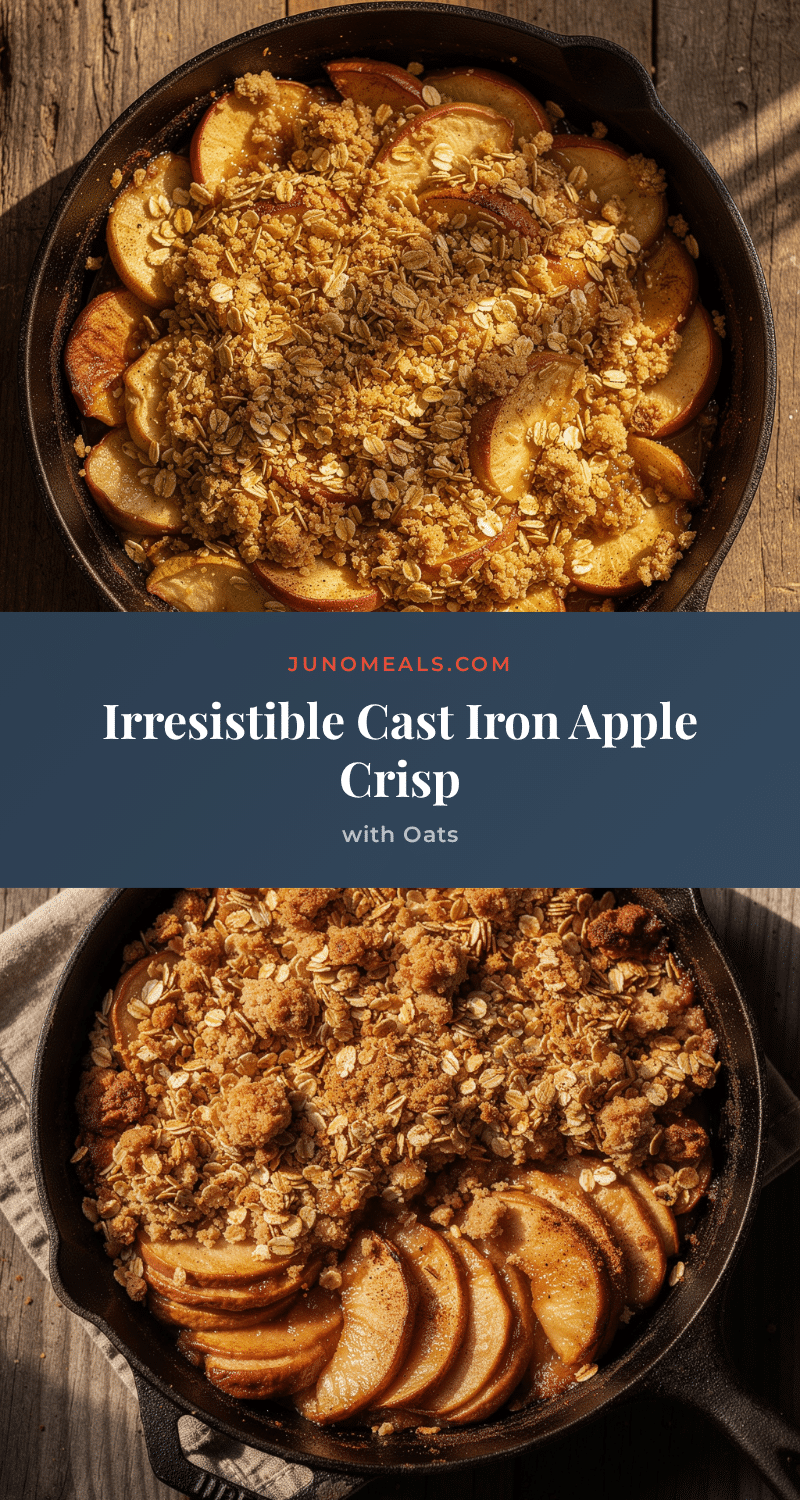
Cozy Cast Iron Apple Crisp Recipe with Easy Irresistible Oat Topping

A warm, comforting apple crisp baked in a cast iron skillet with a crunchy oat topping, perfect for cozy nights and easy entertaining.
- Prep Time: 15 minutes
- Cook Time: 45 minutes
- Total Time: 1 hour
- Yield: 6 servings 1x
- Category: Dessert
- Cuisine: American
Ingredients
- 6 cups tart apples, peeled, cored, and sliced (Granny Smith recommended)
- 2 tablespoons granulated sugar
- 1/4 cup brown sugar, packed
- 1 teaspoon ground cinnamon
- 1/4 teaspoon ground nutmeg (optional)
- 1 tablespoon fresh lemon juice
- 1 teaspoon vanilla extract
- 2 tablespoons all-purpose flour
- 1 cup old-fashioned rolled oats
- 1/2 cup all-purpose flour
- 1/2 cup packed brown sugar
- 1/2 teaspoon ground cinnamon
- 1/4 teaspoon salt
- 6 tablespoons unsalted butter, melted
- 1/2 cup chopped pecans or walnuts (optional)
Instructions
- Preheat your oven to 350°F (175°C).
- Peel, core, and slice about 6 cups of tart apples into roughly 1/4-inch thick slices. Toss them in a medium bowl with 2 tablespoons granulated sugar, 1/4 cup packed brown sugar, 1 teaspoon cinnamon, 1/4 teaspoon nutmeg, 1 tablespoon lemon juice, 1 teaspoon vanilla extract, and 2 tablespoons flour. Mix gently to coat evenly.
- Spread the apple mixture evenly in your cast iron skillet.
- In a separate bowl, combine 1 cup rolled oats, 1/2 cup all-purpose flour, 1/2 cup packed brown sugar, 1/2 teaspoon cinnamon, and 1/4 teaspoon salt. Stir in 6 tablespoons melted butter until the mixture clumps together. Fold in 1/2 cup chopped nuts if using.
- Sprinkle the oat topping evenly over the apples without pressing down.
- Bake uncovered for 40 to 45 minutes until the crisp bubbles at the edges and the topping is golden brown. If the topping browns too fast, tent loosely with foil after 30 minutes.
- Remove from oven and let cool for at least 15 minutes before serving.
Notes
If apples seem too juicy, add an extra tablespoon of flour to the filling to prevent soggy bottom. For extra crunch, broil for 2 minutes at the end but watch closely to avoid burning. Use almond flour and gluten-free oats for gluten-free version. Swap butter for coconut oil for dairy-free or vegan option. Leftovers store well refrigerated for up to 3 days and reheat in oven to maintain crispness.
Nutrition
- Serving Size: About 1/6 of the cri
- Calories: 320
- Sugar: 28
- Sodium: 150
- Fat: 12
- Saturated Fat: 7
- Carbohydrates: 50
- Fiber: 5
- Protein: 3
Keywords: apple crisp, cast iron skillet dessert, oat topping, easy apple dessert, cozy dessert, fall dessert, baked apples